
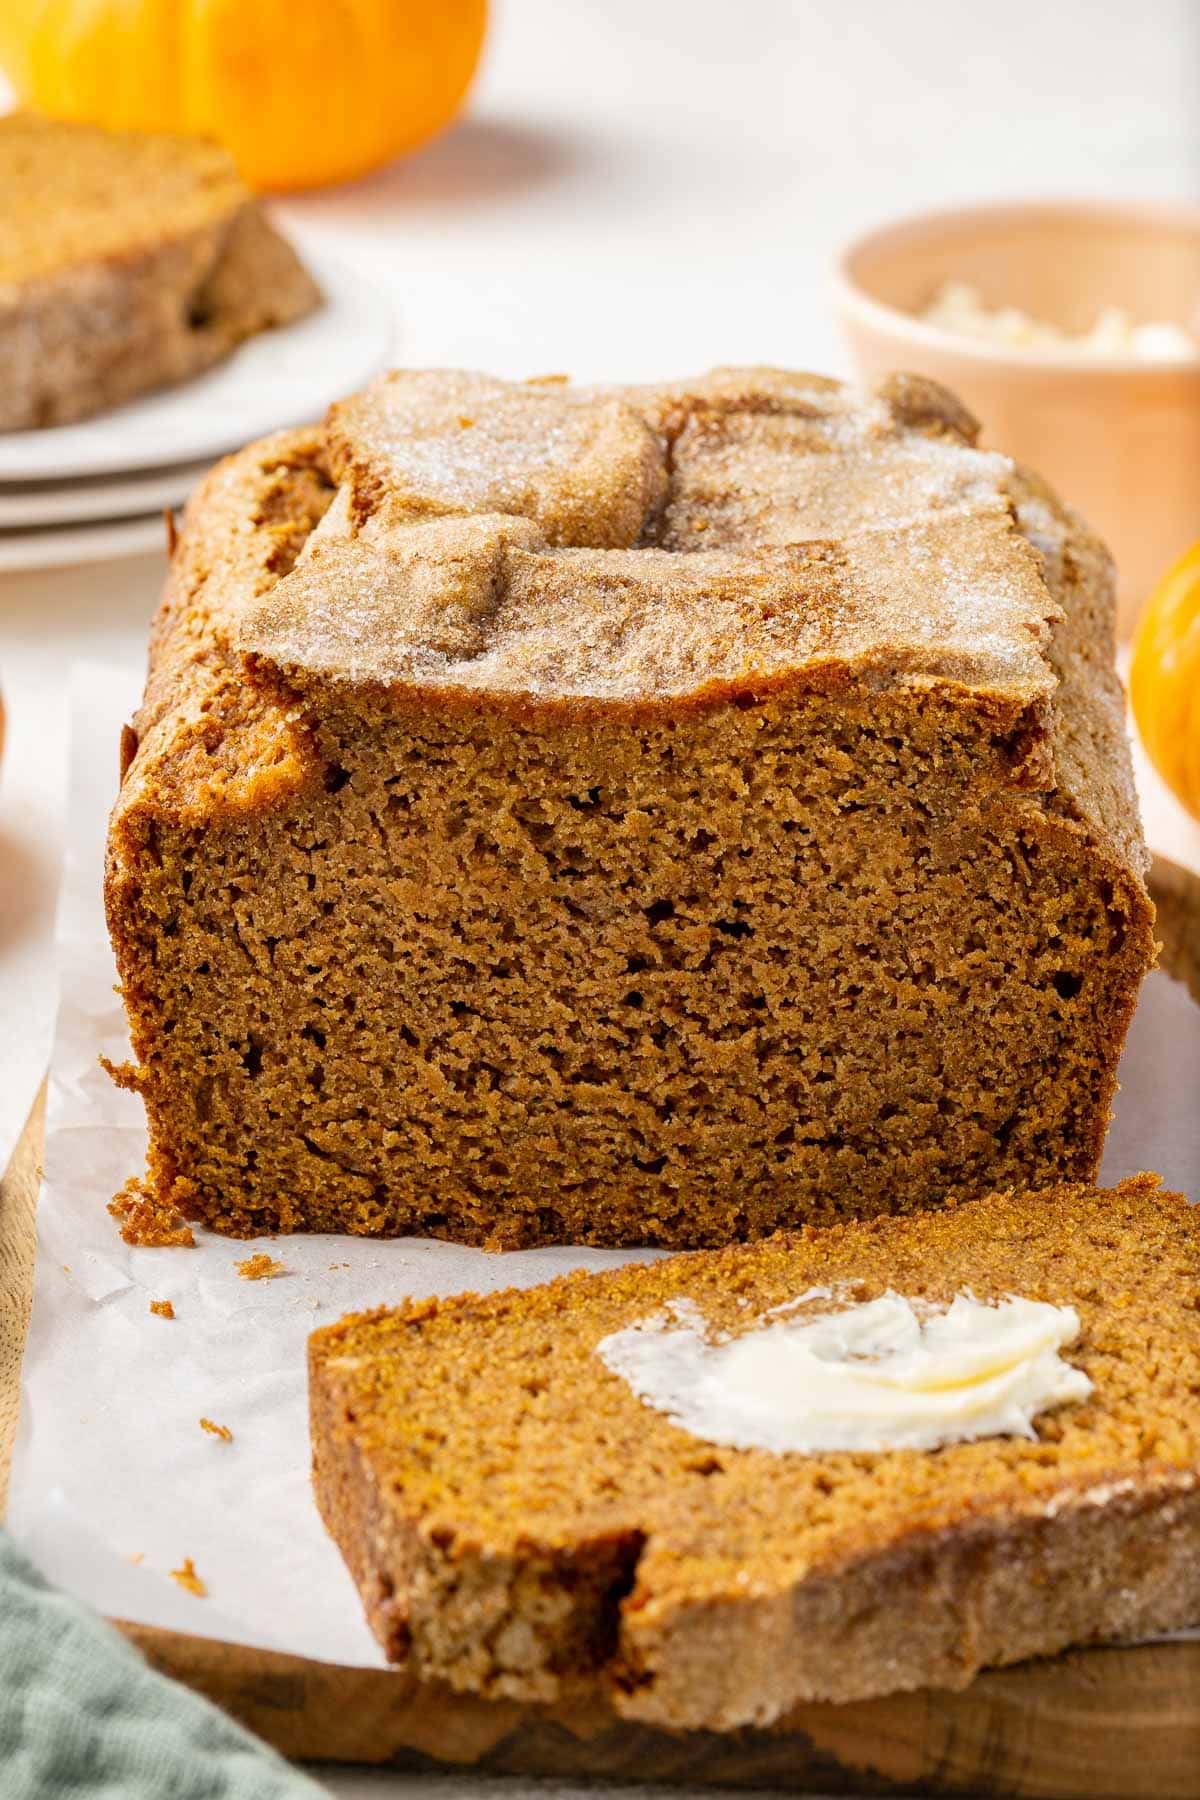
Gluten-Free Pumpkin Bread
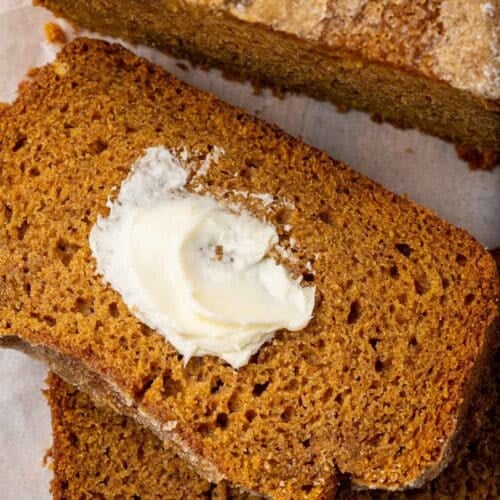
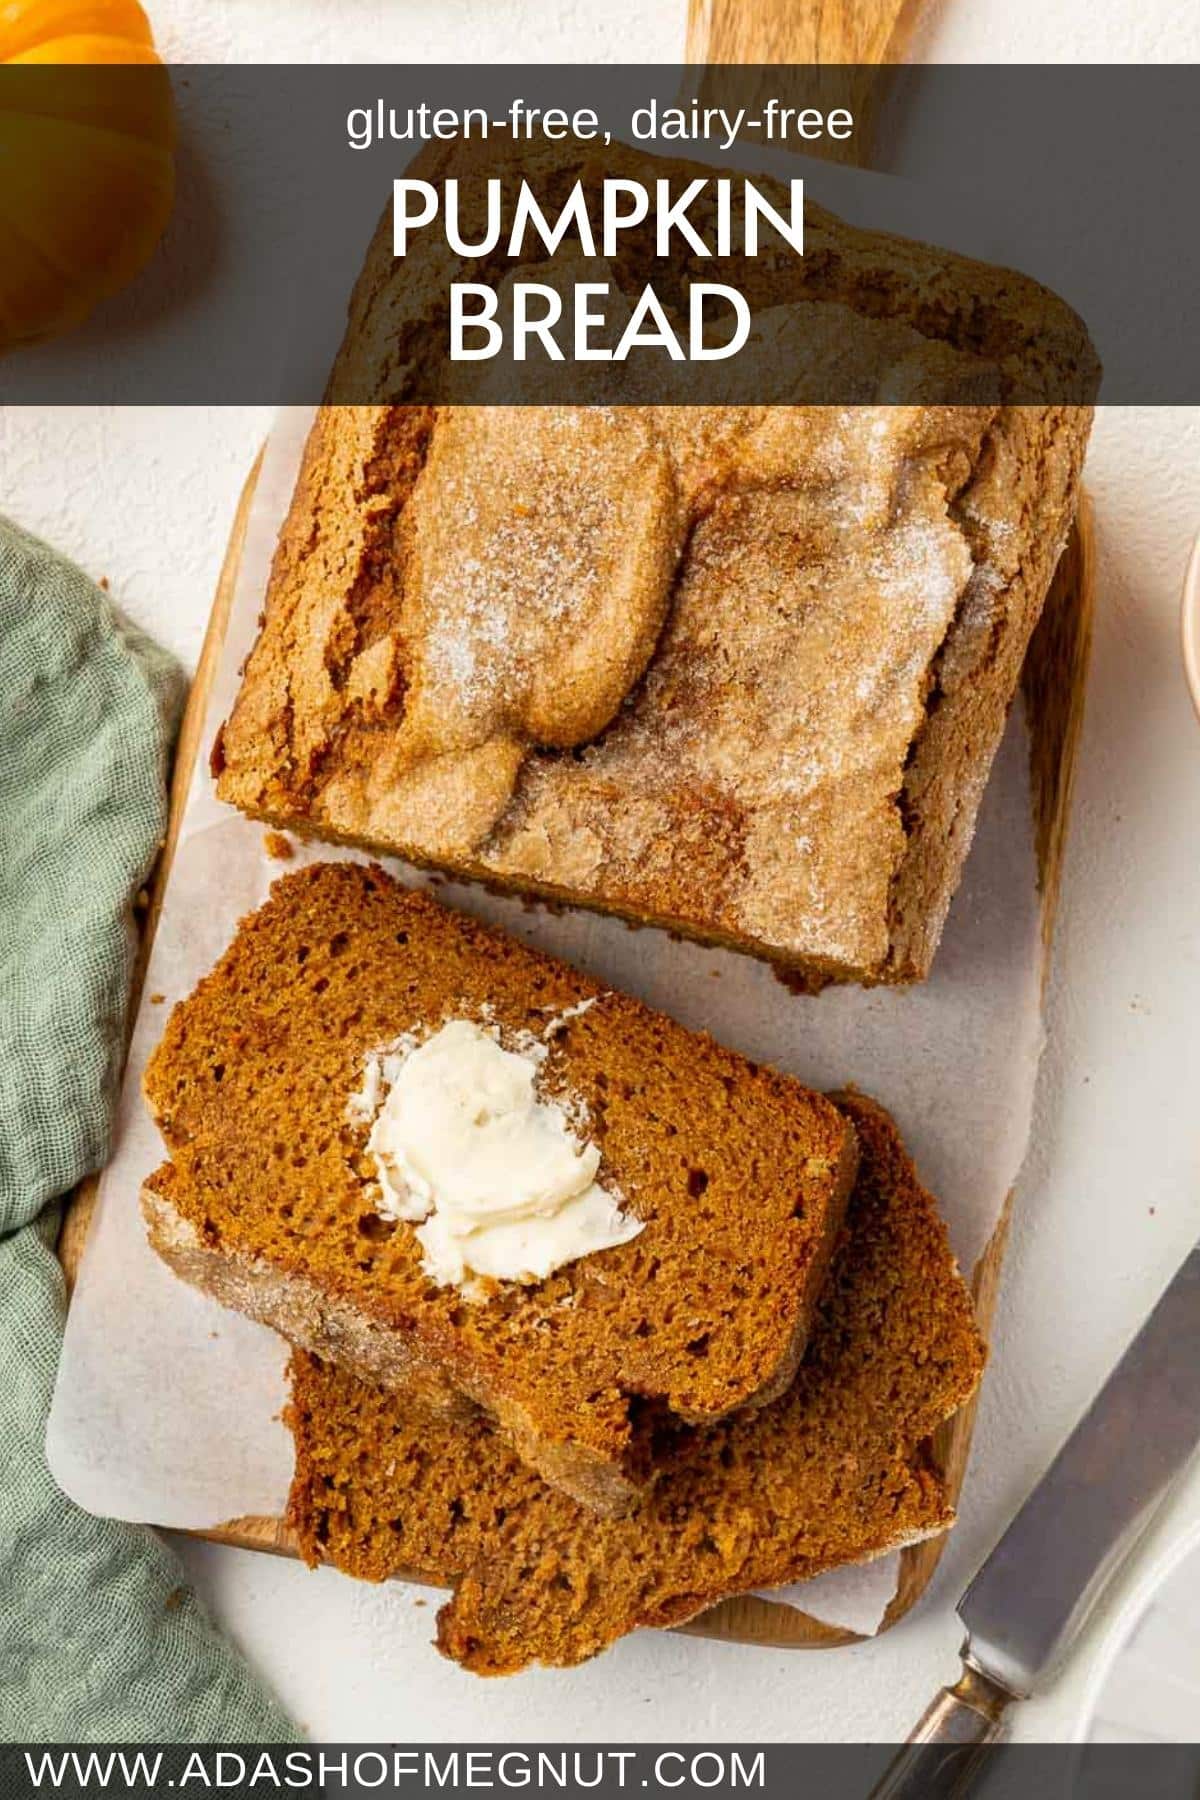
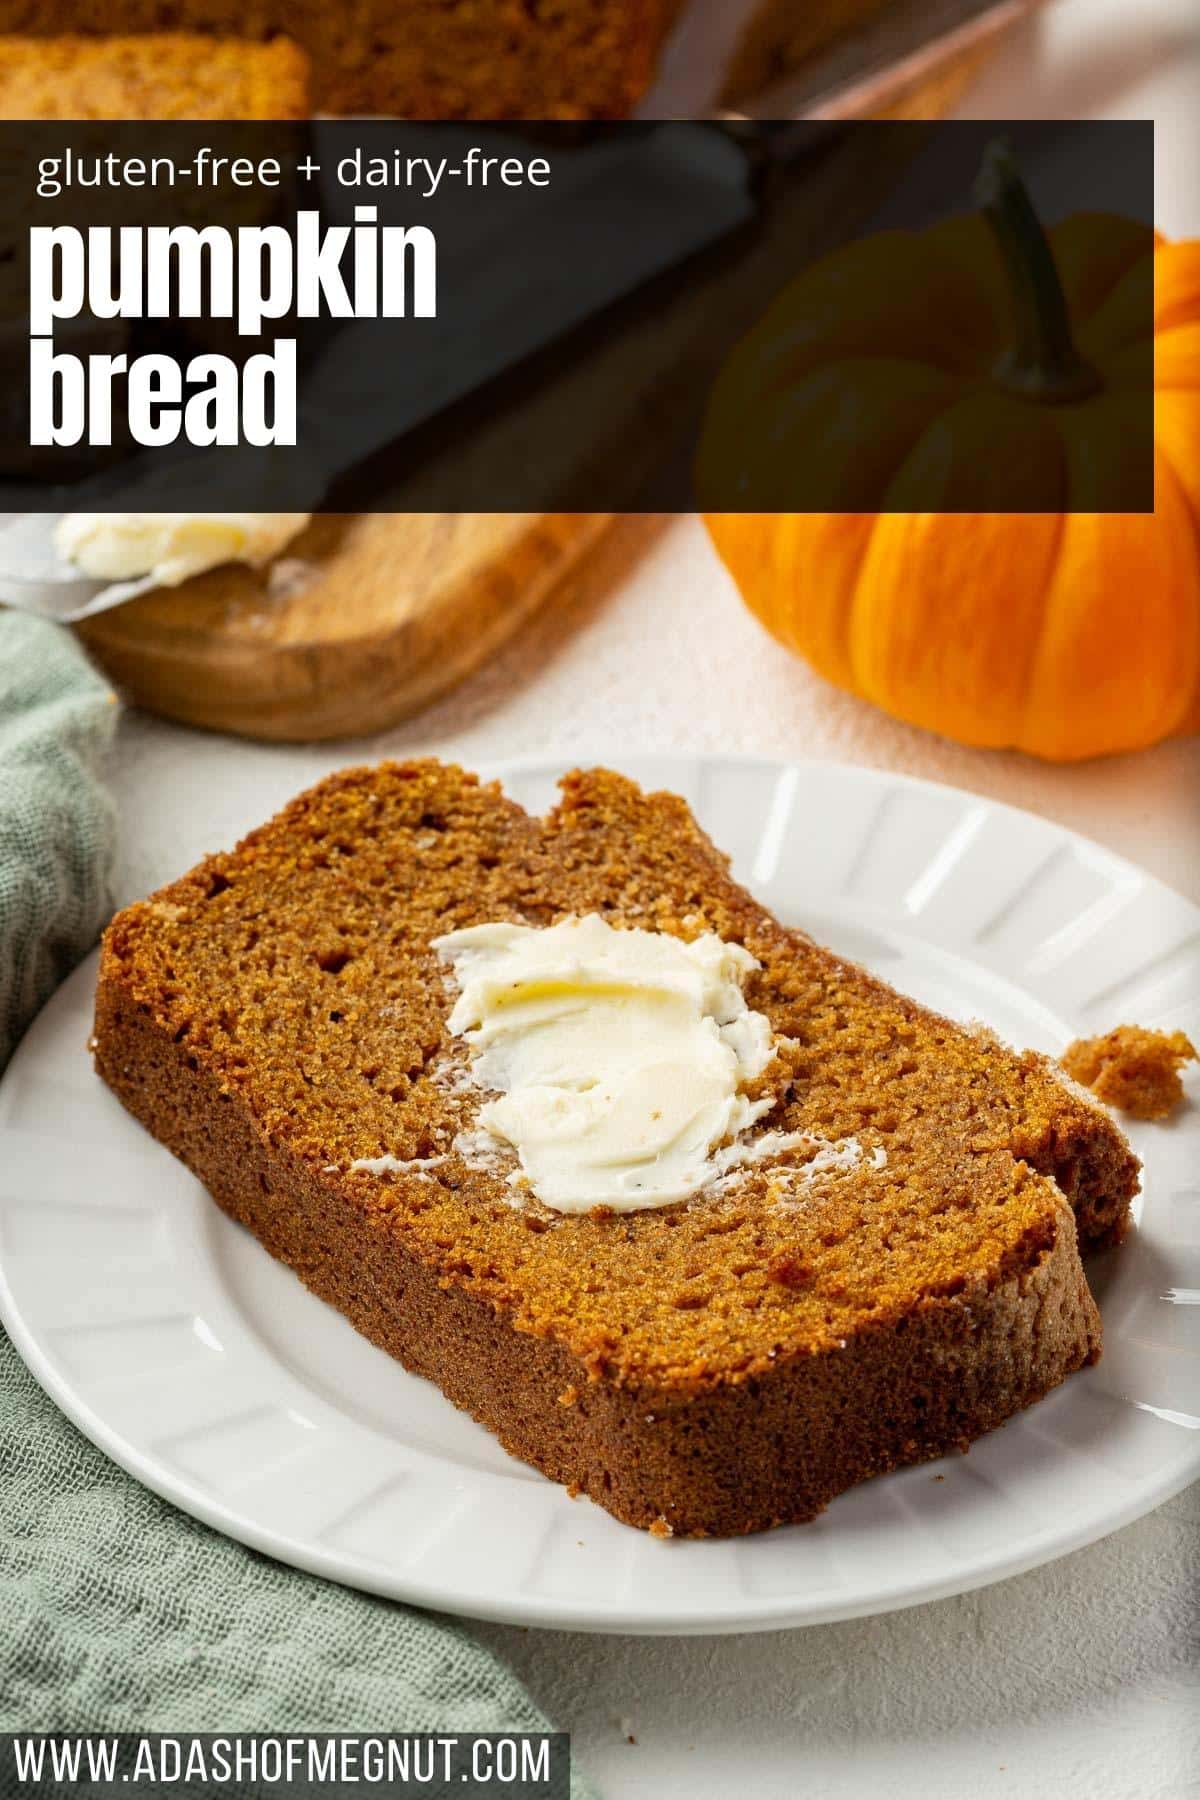
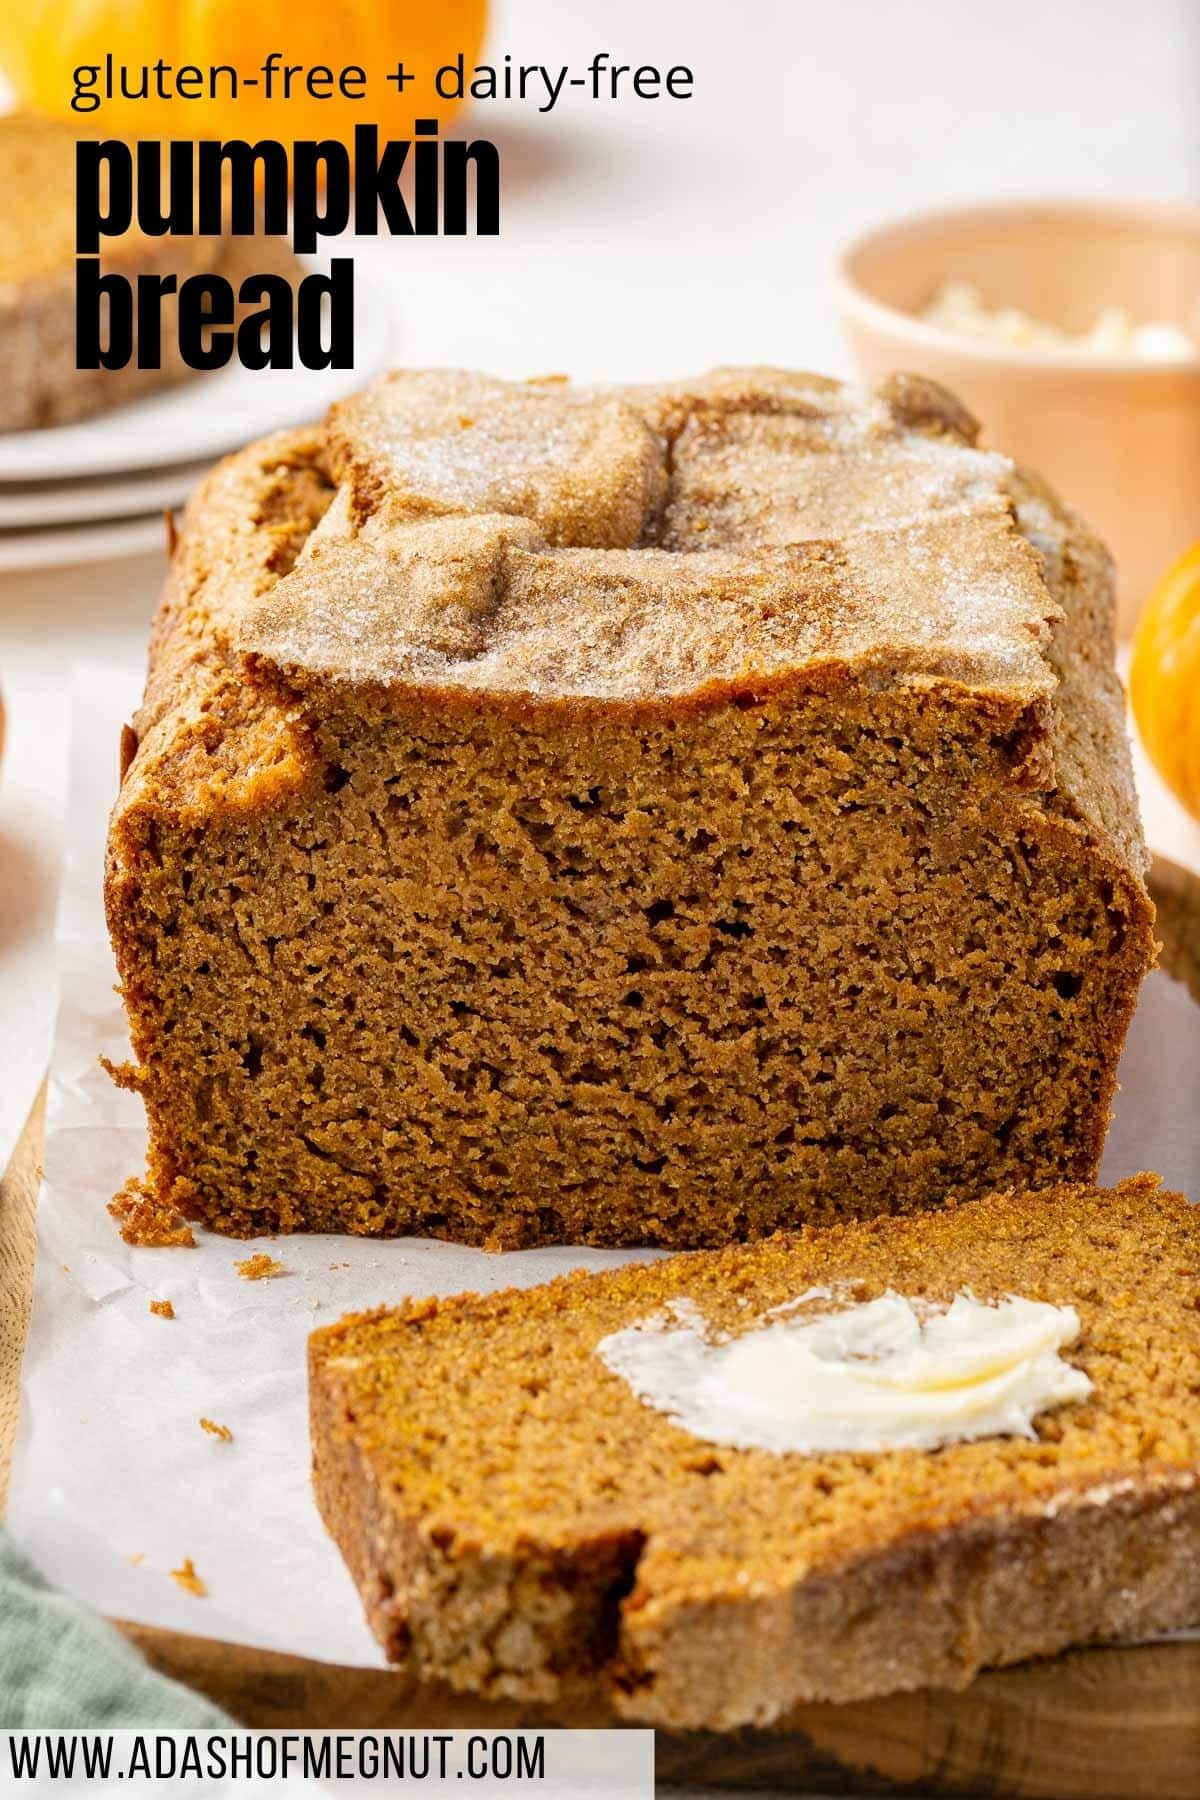
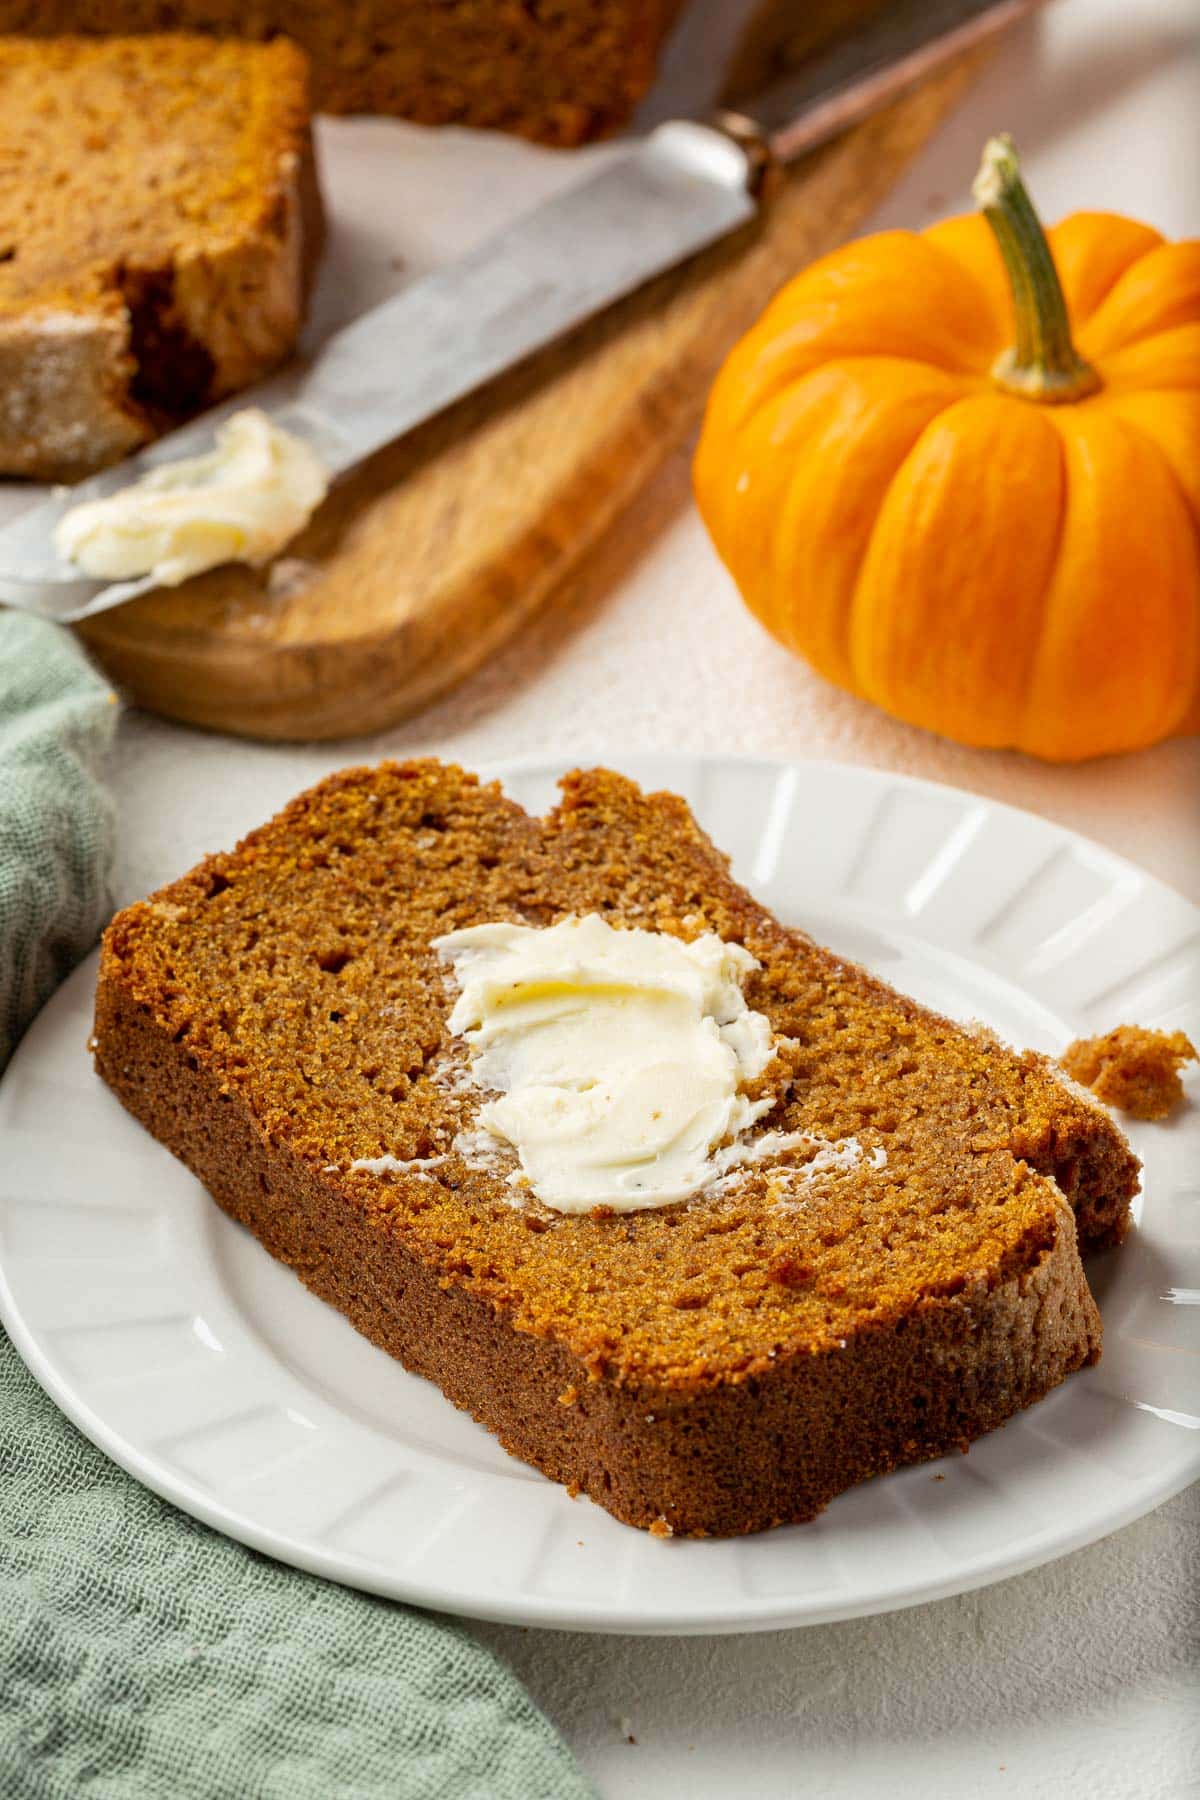
Table of Contents
Why this recipe works
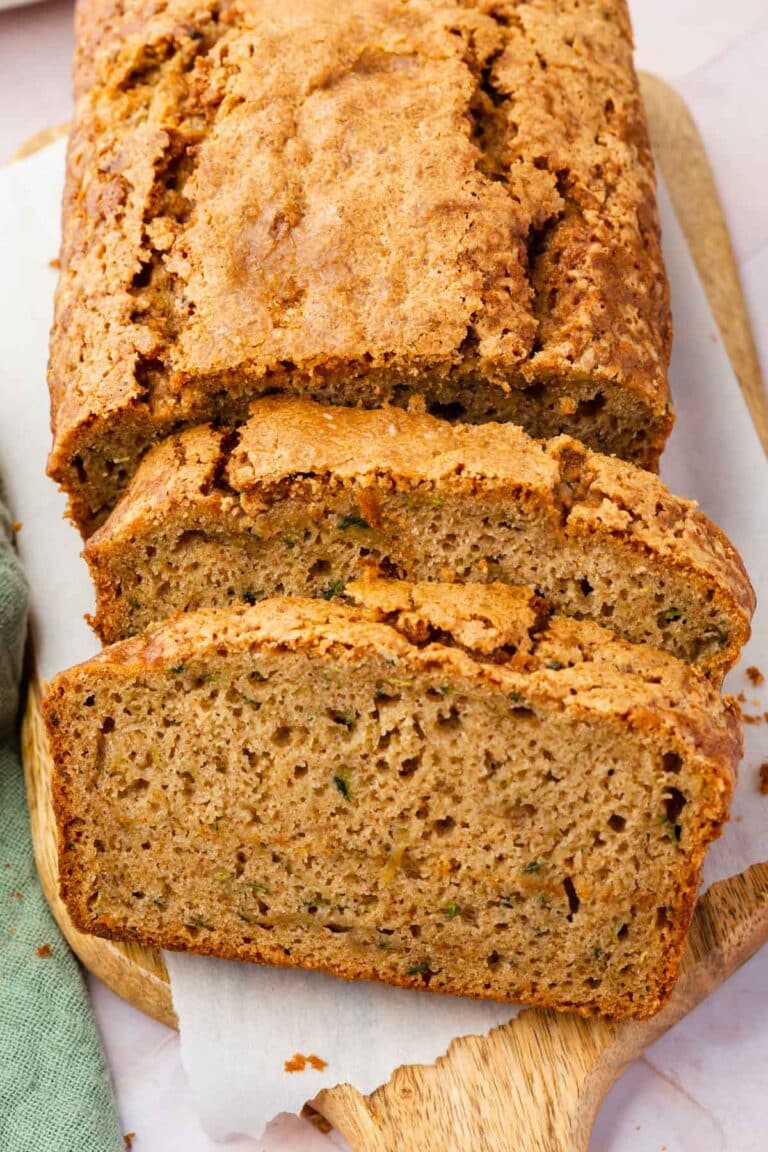
This gluten-free pumpkin bread has become a Fall staple in my household. With its comforting warmth, it’s the epitome of what this season feels like – cozy, inviting, and full of delightful spices.
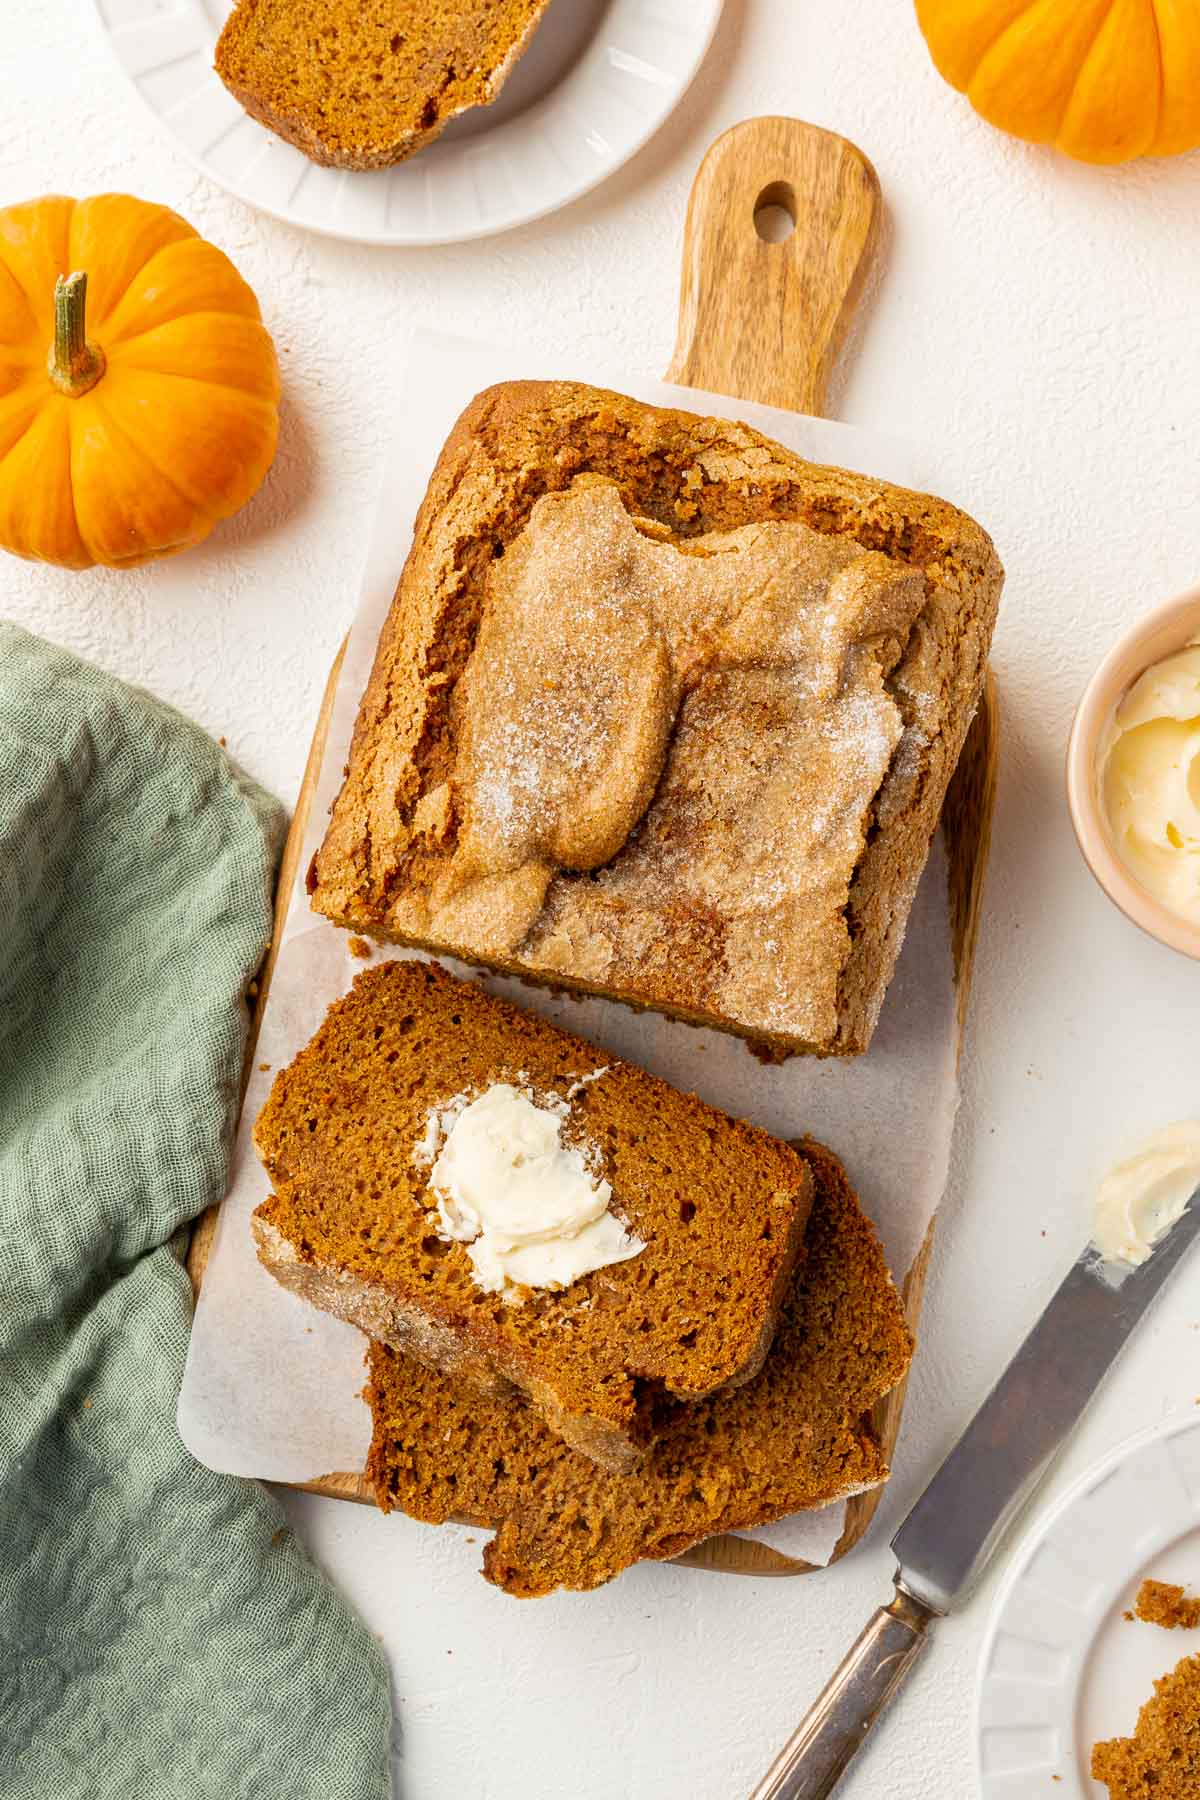
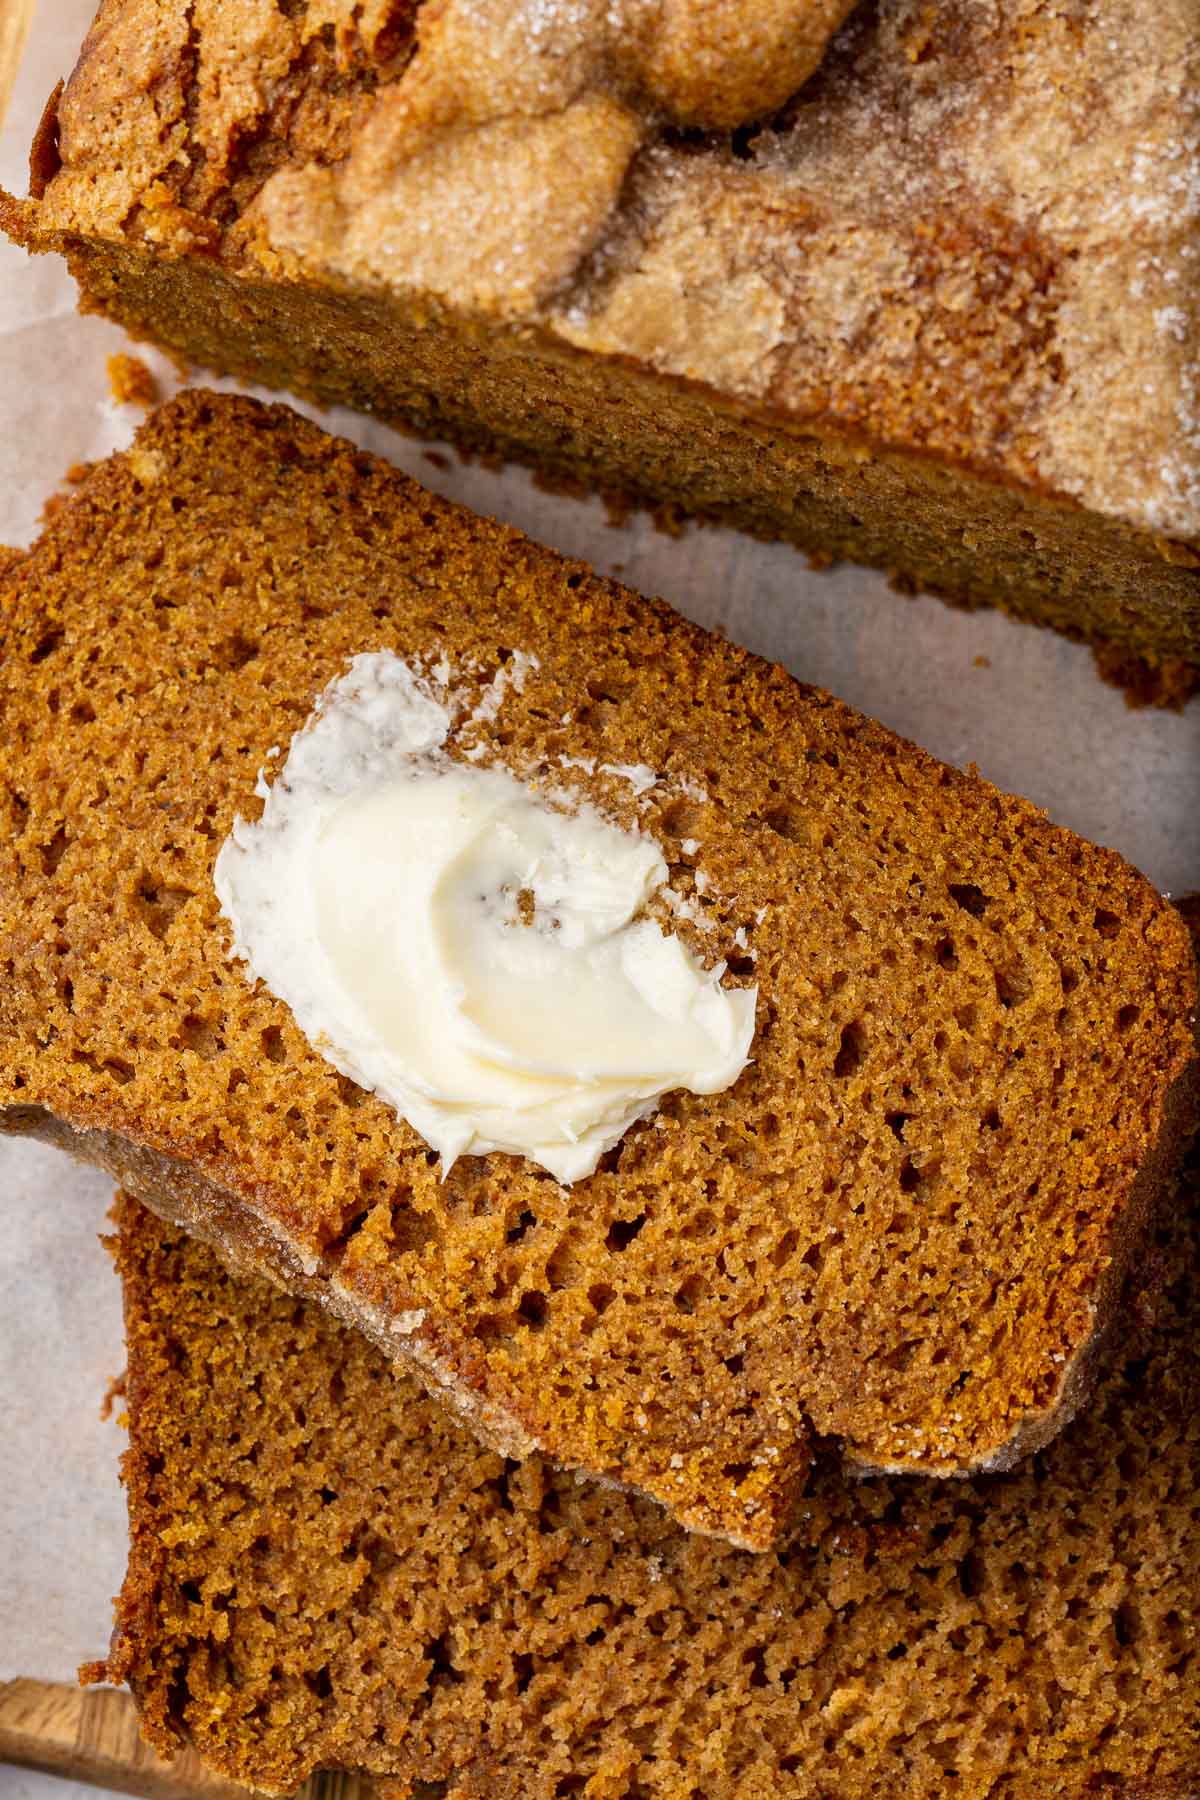
It’s tender, moist and full of rich, pumpkiny flavor. Your kitchen will smell just like Fall while you wait for this gluten-free bread to bake in the oven
Whether you’re hosting a brunch, entertaining friends, or simply enjoying a quiet morning with a cup of coffee, this pumpkin bread always fits the occasion and never fails to impress!
You’ll love this recipe because:
Ingredients
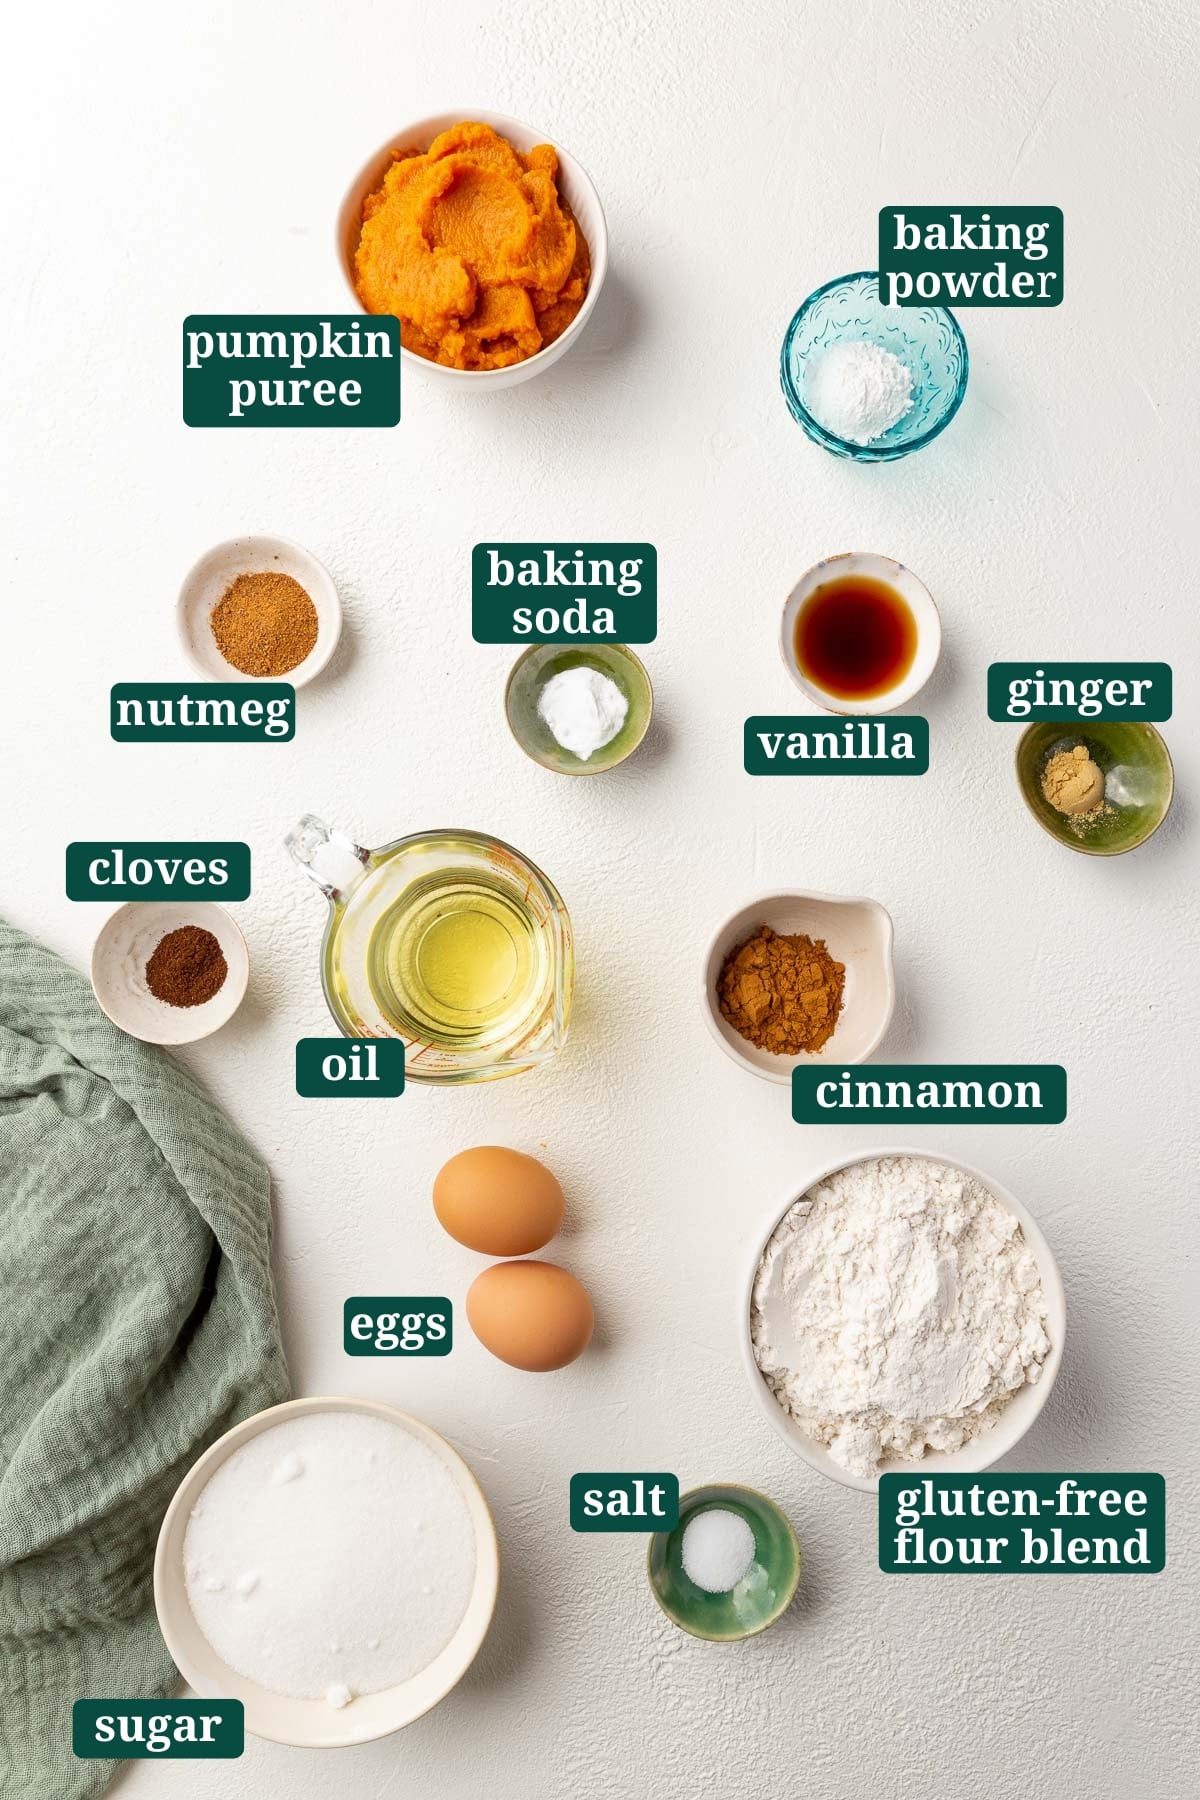
Ingredient Notes
- Gluten-free flour blend – This recipe was tested with Bob’s Red Mill 1-to-1 Gluten-Free Baking Flour (in the blue bag), which already contains xanthan gum. You will not need to add additional xanthan gum to the recipe. I cannot verify that other brands of gluten-free flour will work in this recipe, as I have not tested them myself.
- Baking powder & baking soda – Using a combination of baking powder and baking soda give this bread the proper rise. Ensure they are fresh for optimal rising. If not, the bread might not rise properly and turn out flat. In general, gluten-free baked goods need a little extra leavening agents since they don’t rise as tall as their gluten-filled counterparts.
- Spices (cinnamon, nutmeg, ginger, cloves) – Using fresh spices is key. Ground spices can lose flavor over time, so it’s ideal to replace them every year. If you would prefer to use a pumpkin pie spice instead, use 2 tablespoons of pre-mixed pumpkin pie spice.
- Granulated sugar – I used granulated sugar in this recipe because I didn’t want to overpower the pumpkin flavor in this bread.
- Pumpkin puree – Ensure you’re using pure pumpkin puree and not pumpkin pie filling, which has added spices and sugar.
- Eggs – Use large eggs for this recipe that are 50g each.
- Vegetable oil – I like to use oil in this gluten-free quickbread because it keeps it really moist without lending any additional flavor. Using butter would compete with the pumpkin flavor in my opinion.

When baking gluten-free, precise measurements are crucial to achieving the right texture and rise. Using a food scale ensures accurate gluten-free flour amounts, as scooping can compact the flour and lead to over-measurement. A food scale is relatively inexpensive and saves on washing many measuring cups. I’ve provided the metric measurements in the recipe card for your convenience.
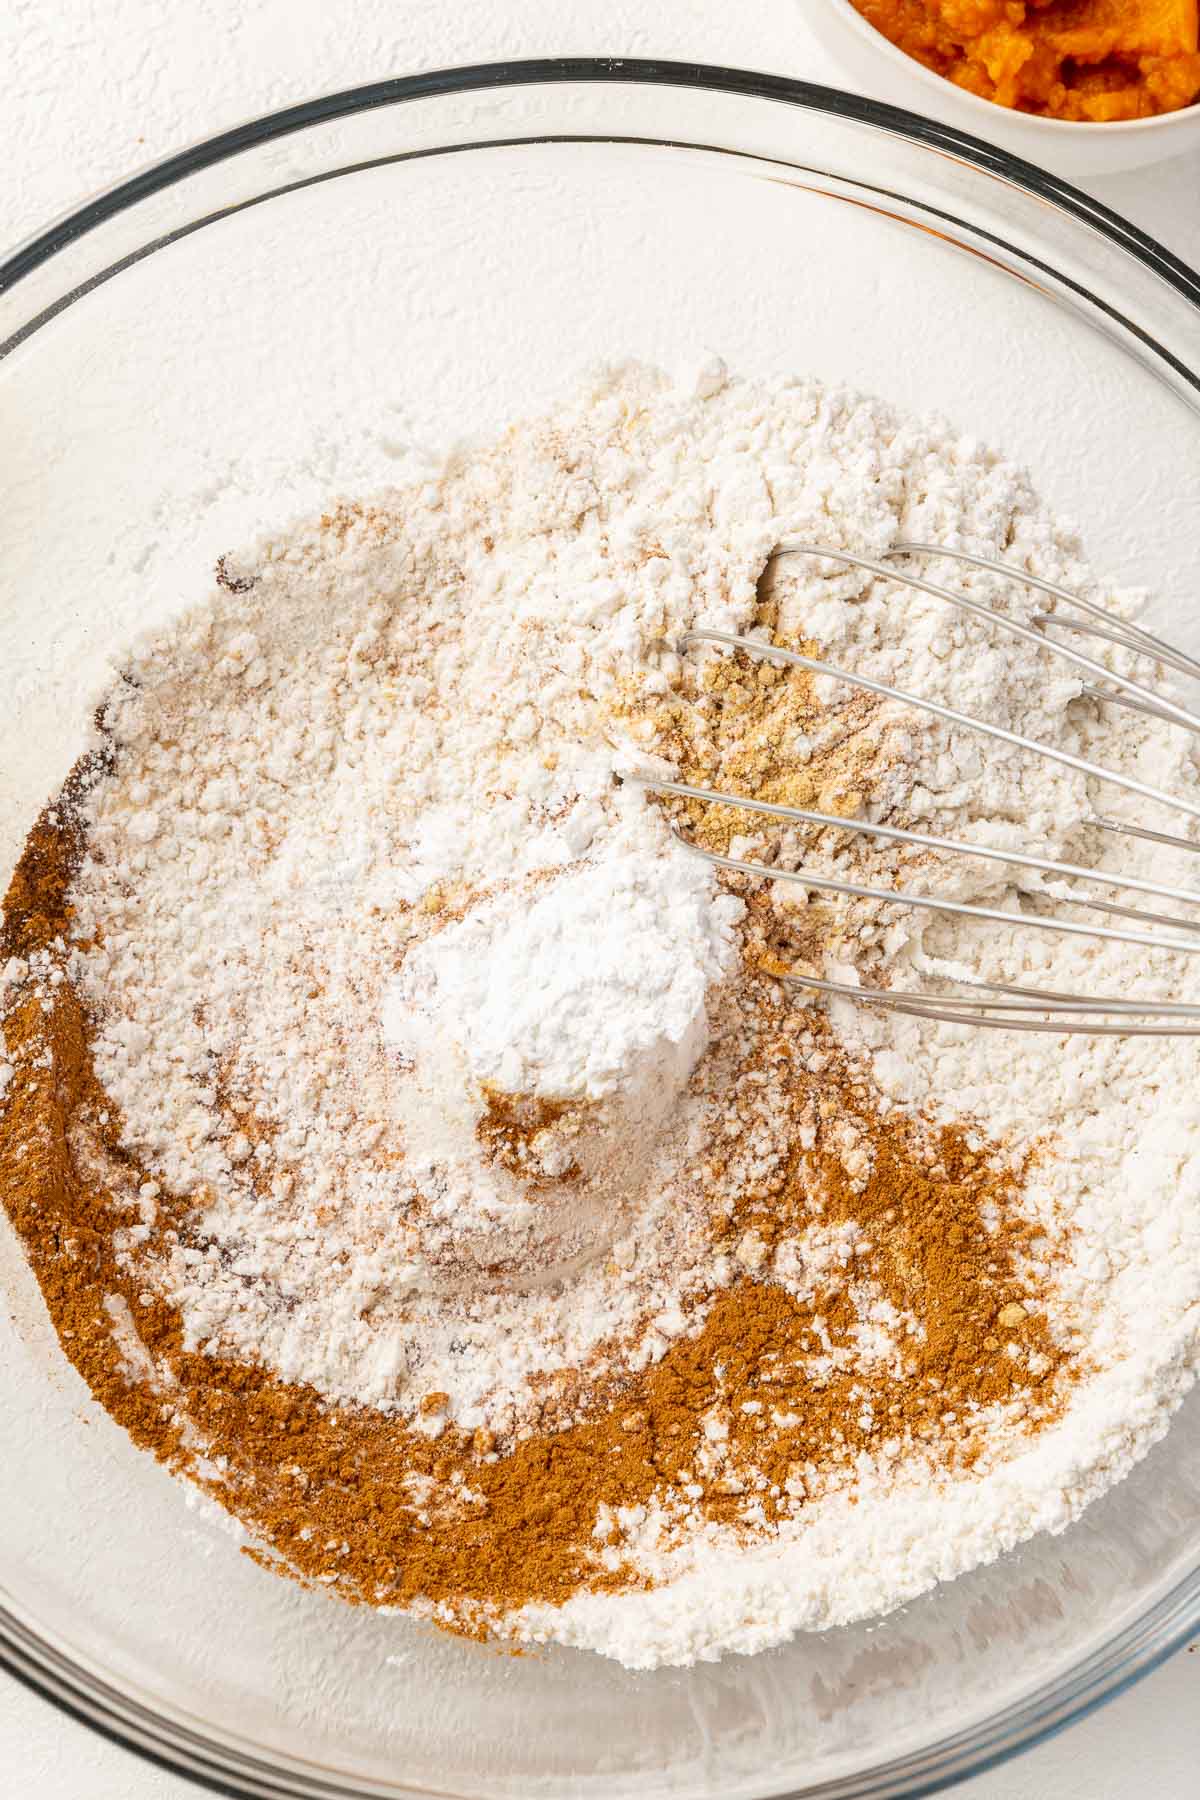
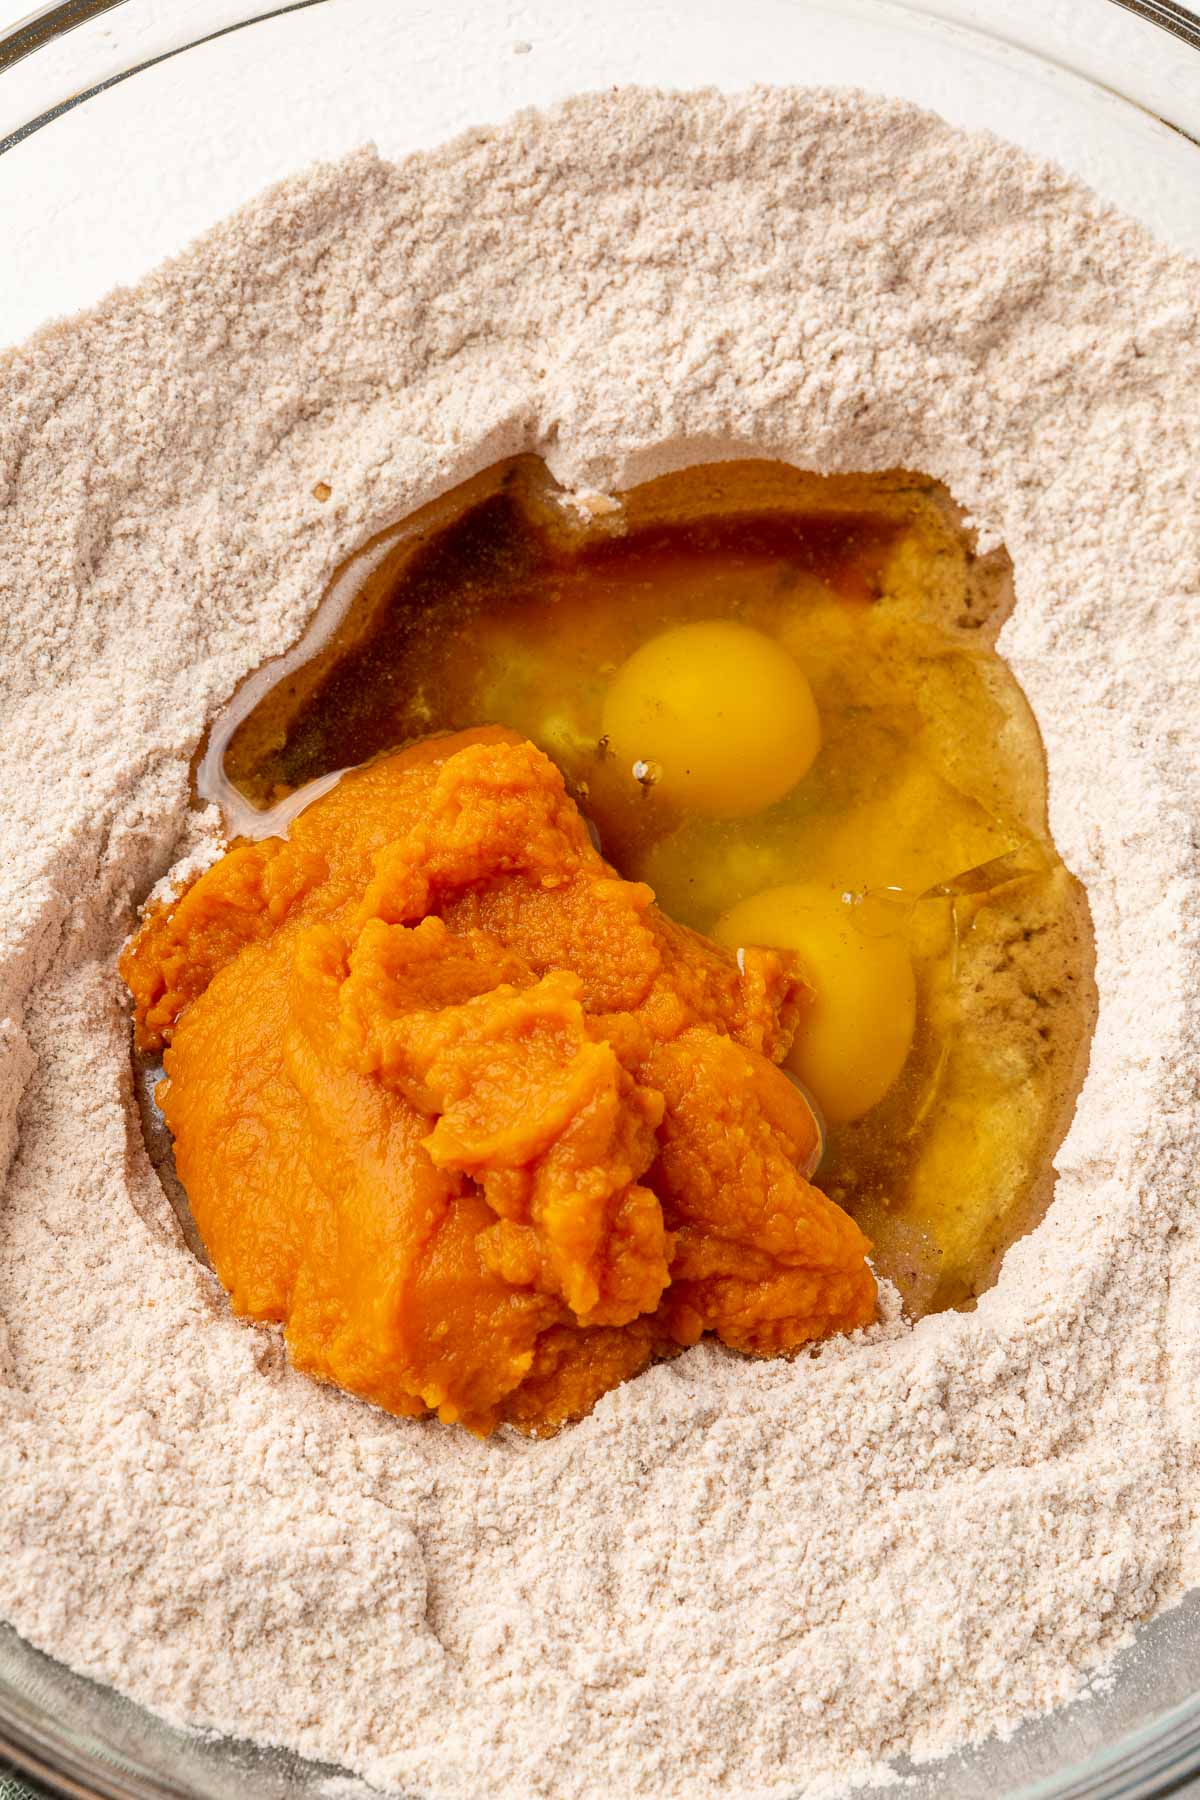
Step-by-Step instructions
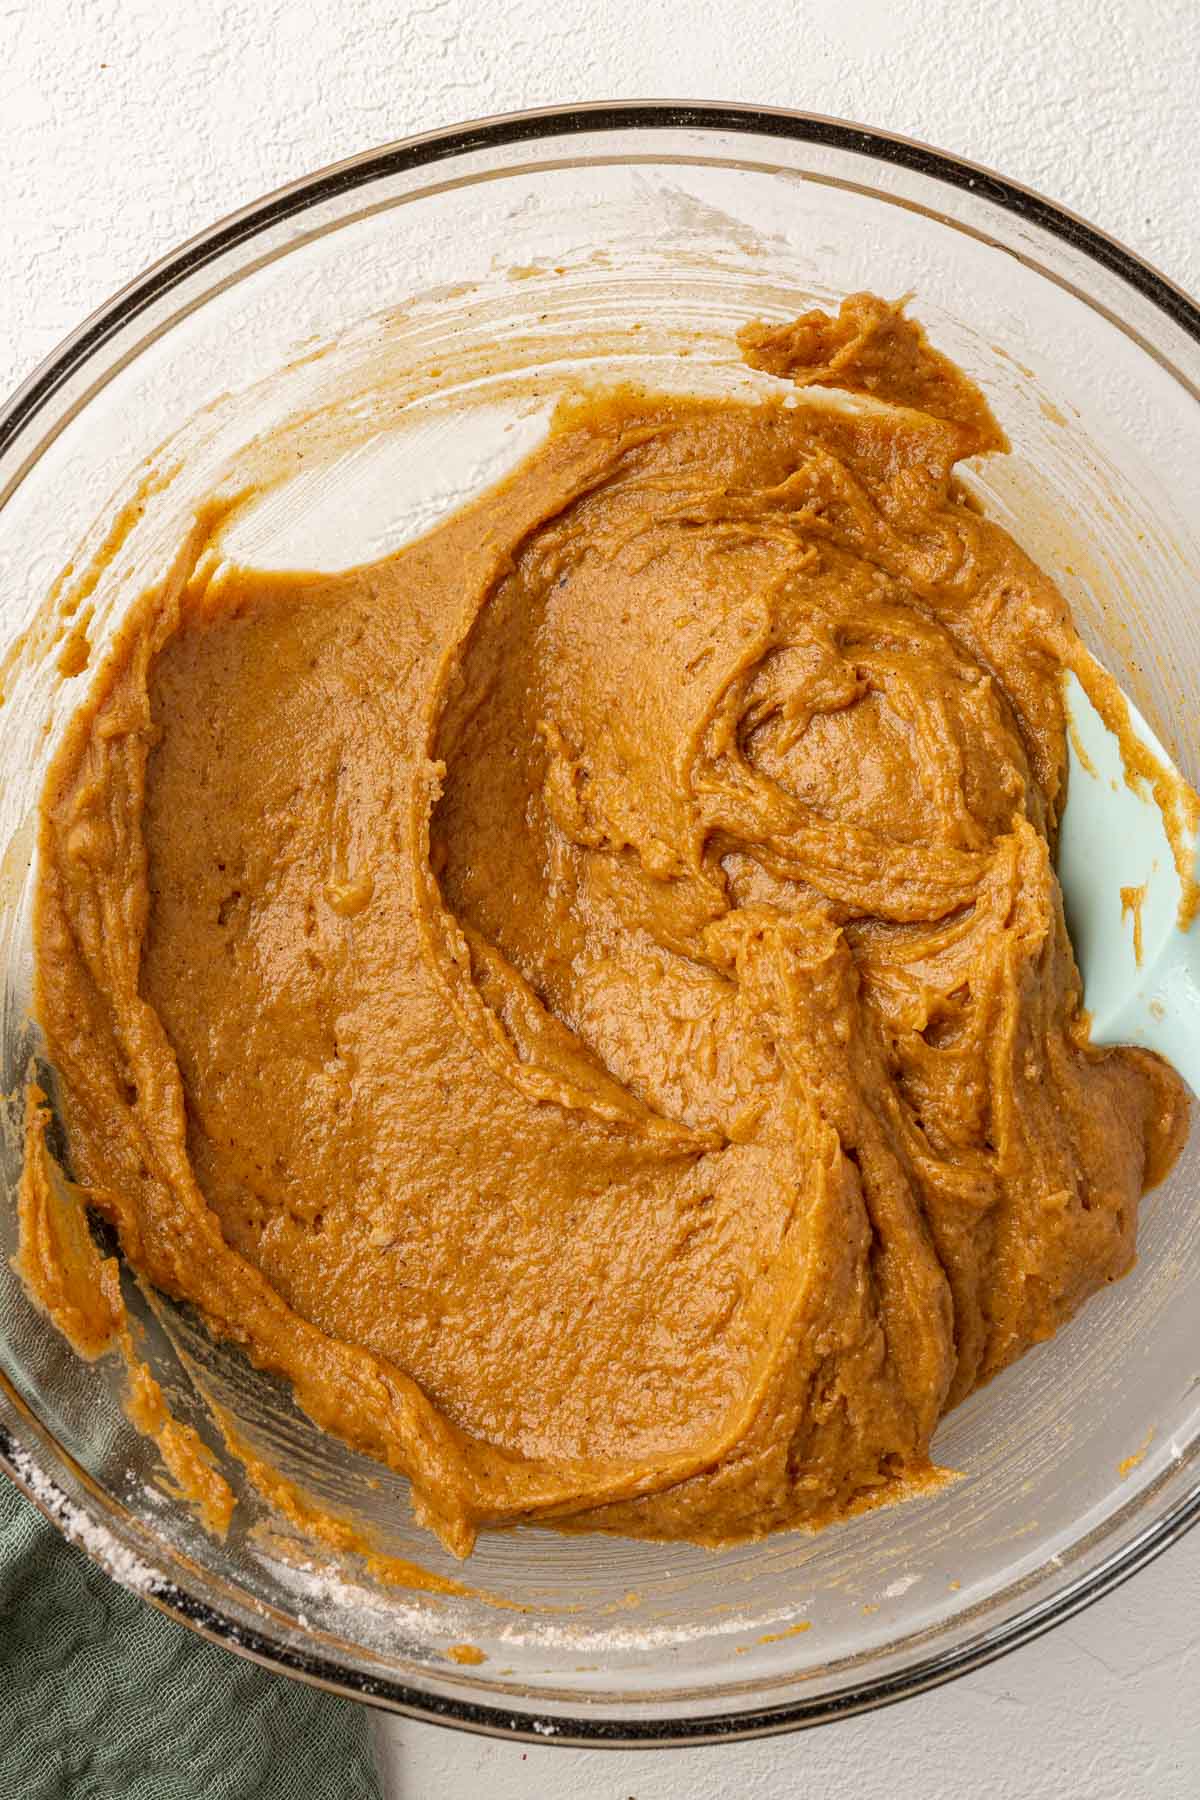
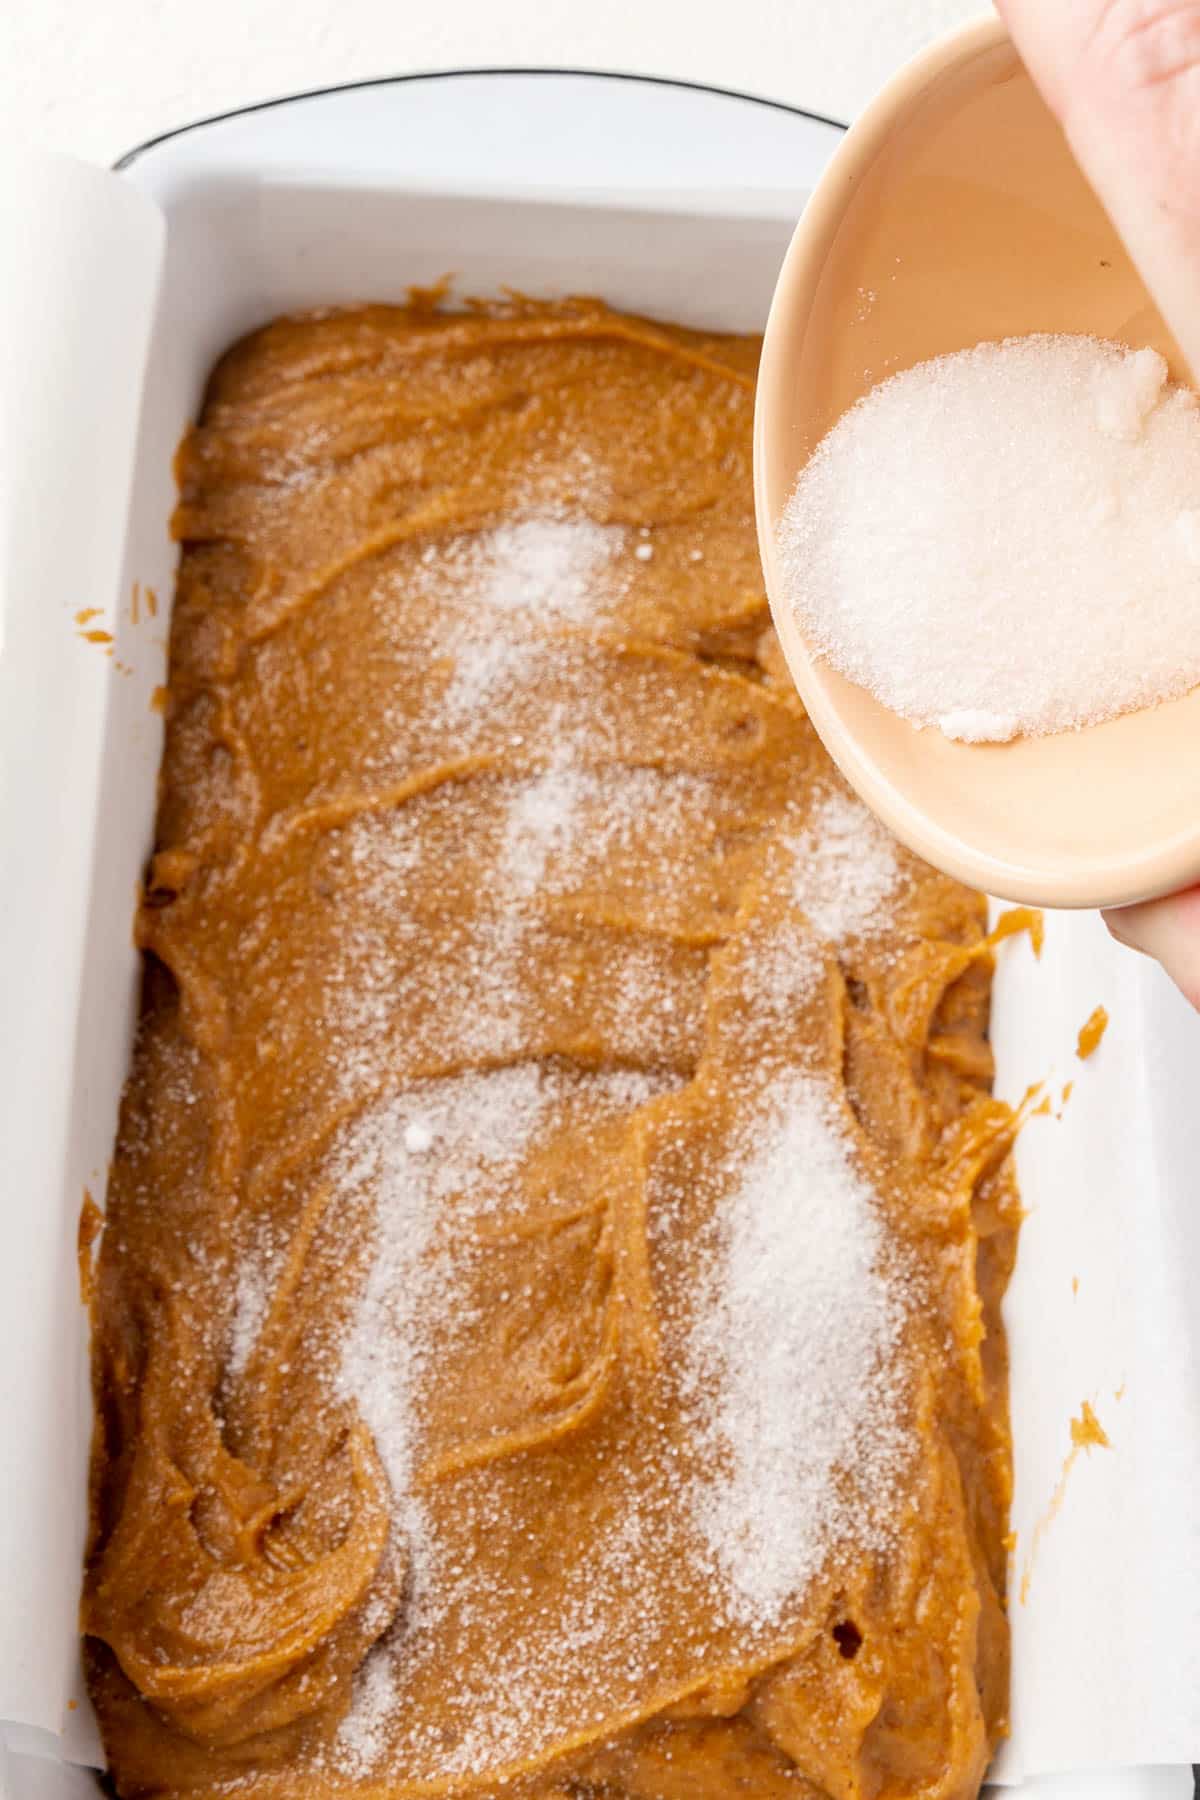
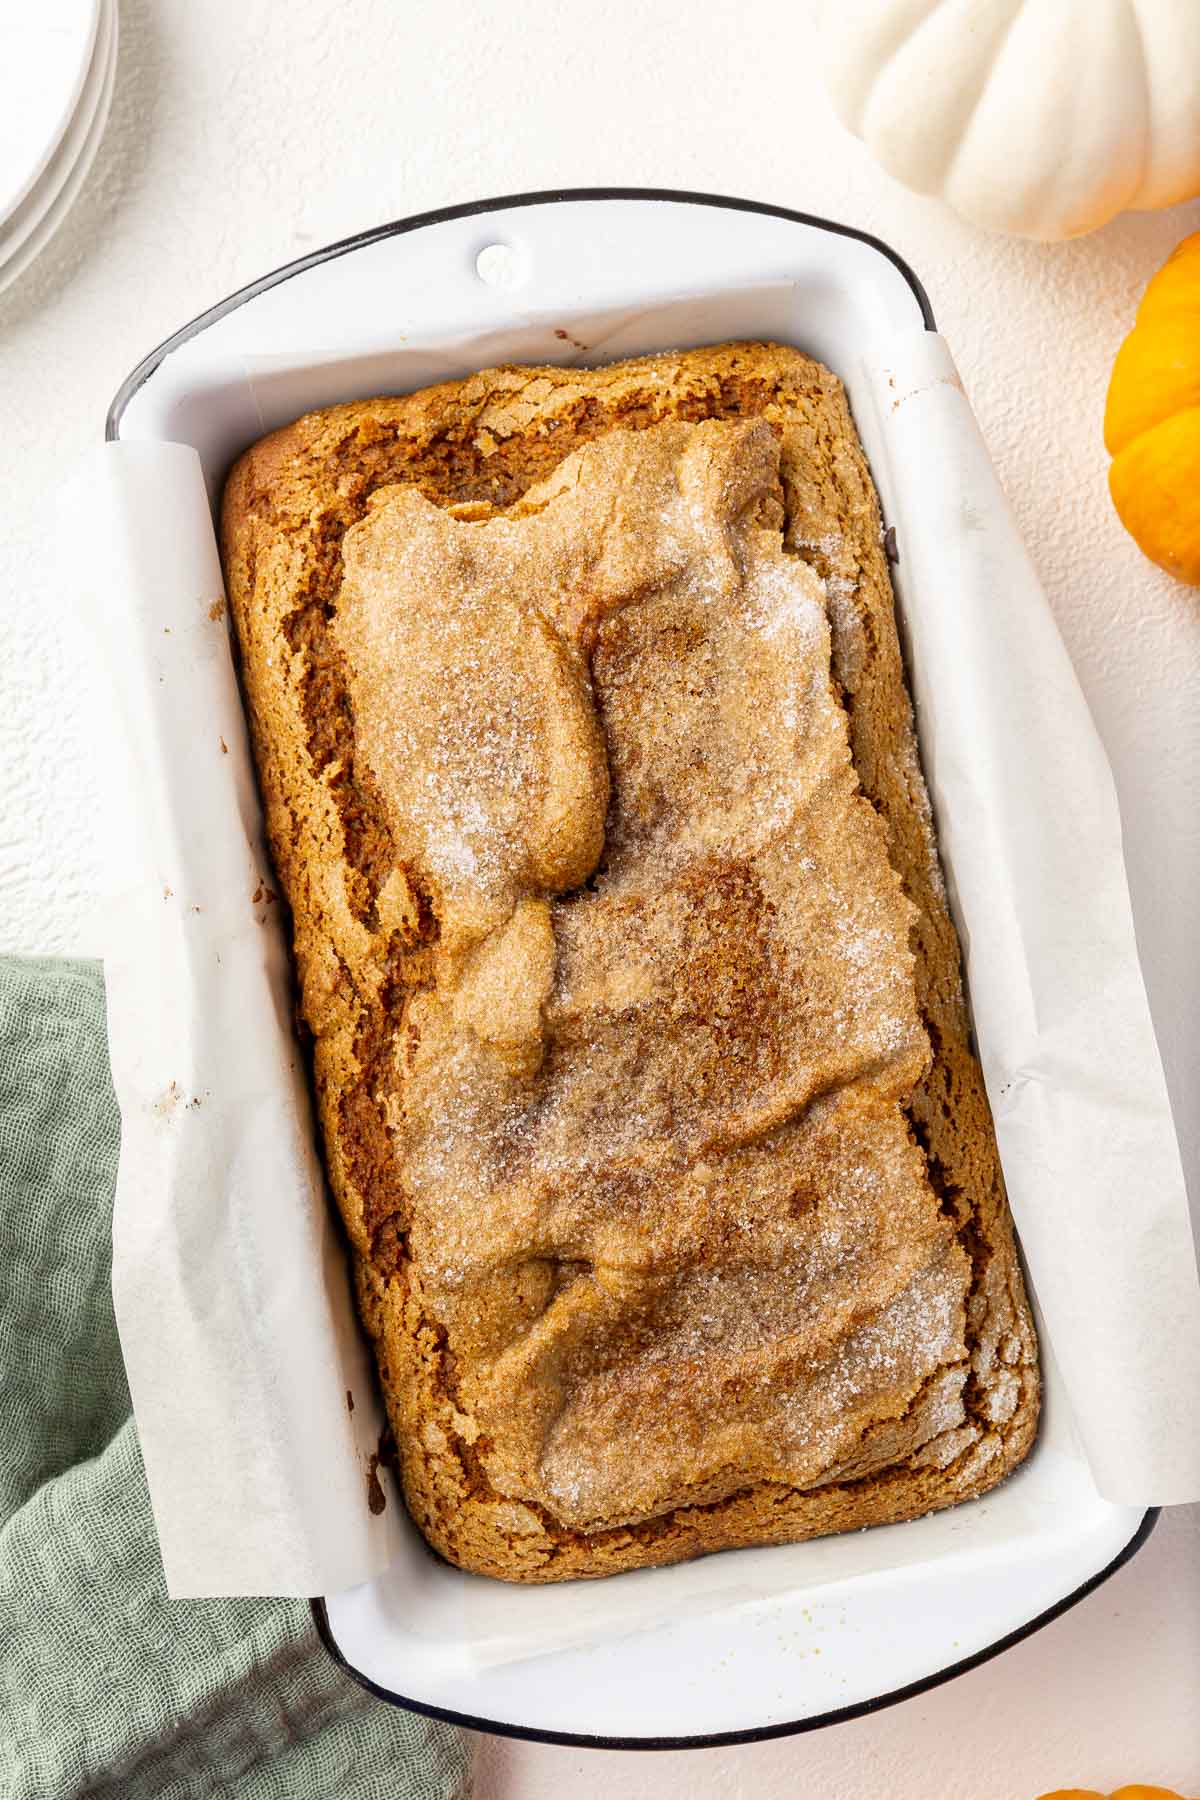
This gluten-free pumpkin bread is such an easy one bowl recipe for Fall. The below photos with matching steps are meant to help you see the recipe being made at various stages and not the complete recipe.
For the ingredient list with measurements, full instructions, printable recipe, and additional notes, please scroll down to the recipe card.


Recipe FAQs
I tested this recipe with Bob’s Red Mill 1-to-1 Gluten-Free Baking Flour (in the blue bag). This blend is designed for direct substitution for all-purpose flour in recipes, making it ideal for a variety of baked goods. It already contains xanthan gum, which helps provide the structure and texture that gluten normally would in traditional baked goods. When using this blend in the recipe, there’s no need to add any additional xanthan gum or make other adjustments. Just measure and use as directed, and you’ll achieve great results.
Yes! If you have some sugar pumpkins and are looking to make your own puree, try my homemade pumpkin puree recipe. It works great in this pumpkin bread!
This pumpkin bread recipe is actually already dairy-free since it uses oil instead of butter for the fat. If you do end up adding in chocolate chips, just be sure they are dairy-free.
expert tips
Storage instructions
- Storage: Store leftover pumpkin bread at room temperature for 2-3 days, wrapped in plastic wrap or in an airtight container. It’s best not to slice it until you’re ready to eat so that the bread stays as moist as possible.
- Freezer Option: For longer storage, you can freeze a whole loaf of pumpkin bread or individual slices. Wrap the bread in plastic wrap or in a freezer-safe bag container. I prefer to freeze individual slices of bread so I can grab just what I want to thaw.
- Reheat: Thaw frozen pumpkin bread at room temperature before serving. For individual slices, they will take about an hour to thaw at room temperature. For an entire loaf, you’ll need to thaw it overnight.
Serving suggestions
There are so many ways you can top this gluten-free pumpkin bread. So many that I’ve been dreaming up all the ways and had to share them with you.
Serve this gluten-free pumpkin bread with…
- greek yogurt and pumpkin seeds
- butter and honey
- cream cheese mixed with honey
- pure maple syrup
- fresh whipped cream and pomegranate seeds
- cream cheese frosting
Pumpkin Recipes You’ll Love for Fall
If you love breakfast but are always on the go then try these Gluten-Free Pumpkin Breakfast Cookies. Filled with pure pumpkin, gluten-free oats, and crunchy pepitas, there’s pumpkin flavor in every bite.
If you haven’t tried a savory pumpkin recipe, then Pumpkin Apple Cider Turkey Chili is the perfect recipe to start with. Can’t forget these fluffy Baked Pumpkin Donuts that are both gluten-free AND vegan. They take just about 20 minutes to get on the table.
A gluten-free vegan pumpkin cupcake is always a winner for Fall parties, don’t you think? Cream cheese and pumpkin are such a delicious flavor pairing! If you want another quick dessert recipe, try this gluten-free pumpkin mug cake. It only takes about 4 minutes to make!
Pumpkin isn’t just for desserts, you’ll absolutely love it in this Pumpkin Cheese Ball recipe that makes a great appetizer for fall parties! Don’t forget the pie! This Vegan Pumpkin Pie is also paleo, grain-free and gluten-free so everyone can enjoy this creamy dessert! Not vegan? Try this Gluten-Free Pumpkin Pie!
Love quick breads? Try these gluten-free recipes!
- Hash Brown Egg Cups
- Gluten Free Giant Strawberry Pop Tart
- Gluten-Free Vegan Baked Chocolate Sprinkle Donuts
- Gluten-Free Chocolate Peanut Butter Banana Muffins
More gluten-free baking recipes to try
Did you make this recipe?
I’d love to know! Please rate it and leave a comment below. You can also share your pictures and tag @adashofmegnut on Instagram.
Gluten-Free Pumpkin Bread
Ingredients
- 2 cups gluten-free flour blend (288g)
- 1 1/4 cups granulated sugar (250g)
- 2 teaspoons baking powder
- 1 teaspoon baking soda
- 1 tablespoon ground cinnamon
- 1/2 tablespoon ground nutmeg
- 1/2 teaspoon ground ginger
- 1/2 teaspoon cloves
- 1/2 teaspoon salt
- 2 large eggs (100g)
- 1 cup pumpkin puree (240g)
- 1/2 cup vegetable oil (113g)
- 1 teaspoon vanilla extract
- 2 teaspoons granulated sugar or turbinado sugar (for topping)
Instructions
- Preheat oven to 350F. Spray a 9×5-inch loaf pan with cooking spray and line with parchment paper. Set aside.
- In a bowl, whisk together gluten-free flour blend, granulated sugar, baking powder, baking soda, cinnamon, nutmeg, ginger, cloves and salt.
- Then add in the eggs, pumpkin puree, vegetable oil and vanilla extract.
- Mix until combined. Pour the batter into the prepared loaf pan.
- Sprinkle the top of the pumpkin bread batter with 2 teaspoons of granulated sugar.
- Bake at 350F for 45-55 minutes, until bread is fully cooked through. Check by inserting a wooden skewer into the center of the bread. If it comes out clean, the bread is ready.
- Allow to cool completely before slicing.
Notes
- If you have celiac disease or are on a gluten-free diet, always be sure to double check that all of your ingredients are gluten-free as manufacturing practices can change from time to time.
- I tested this pumpkin bread with Bob’s Red Mill 1-to-1 Gluten-Free Baking Flour (in the blue bag). This blend already contains xanthan gum, so you will not need to add it to the recipe. I cannot verify that other brands of gluten-free flour will work as I have not tested them myself.
- Check the bread about 10-20 minutes before the baking time stated. If it looks like the top is browning too fast, cover it with aluminum oil.
- Check the doneness of the loaf by inserting a wooden skewer or knife into the center of the bread. If it comes out clean, it’s done! If not, leave it in longer. The time stated is a guideline as all ovens are slightly different.
- Allow pumpkin bread to completely cool before slicing. In fact, I’ve found this pumpkin bread slices easier and tastes even better the second day.
Nutrition

I’m Megan
A gluten-free food blogger from Chicago and lover of all things food, showing you gluten-free can be easy and delicious, too. Let’s make gluten-free stress free together! Read more…


Loved this recipe! I used Cup 4 Cup wholesome blend flour and it came out perfect. I reduced the granulated sugar to 1/2 c and added 1/4 c of brown sugar and was happy with the sweetness level for my taste. I did add the topping sugar— that’s a great addition. I’ll be using this recipe a lot this season, thanks!