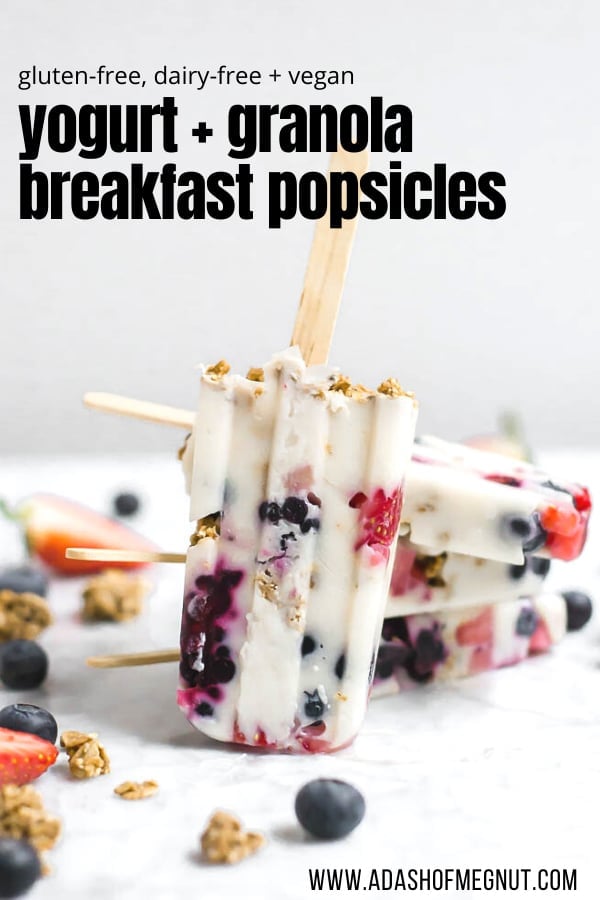
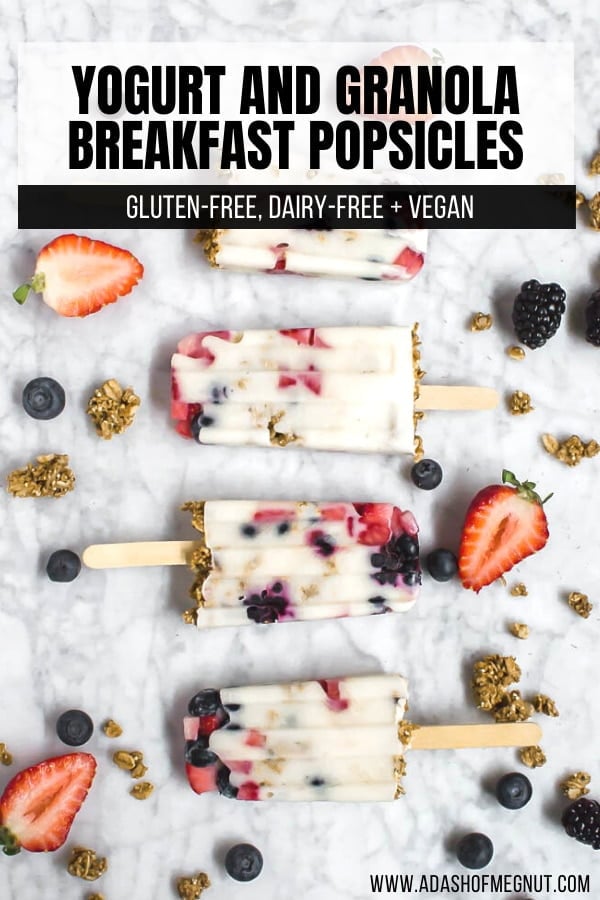
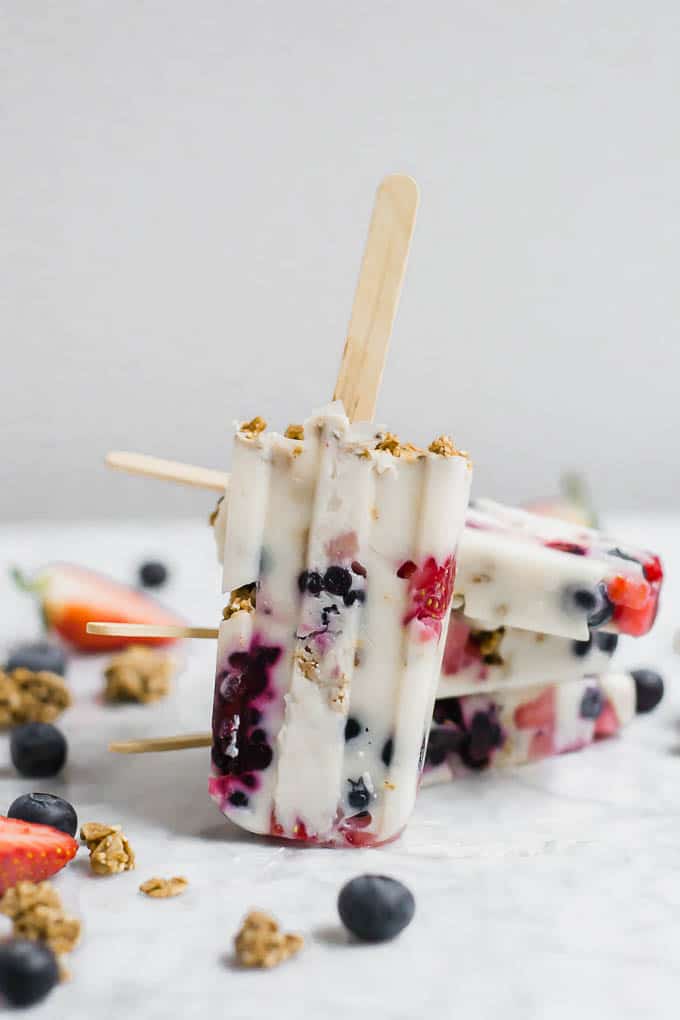
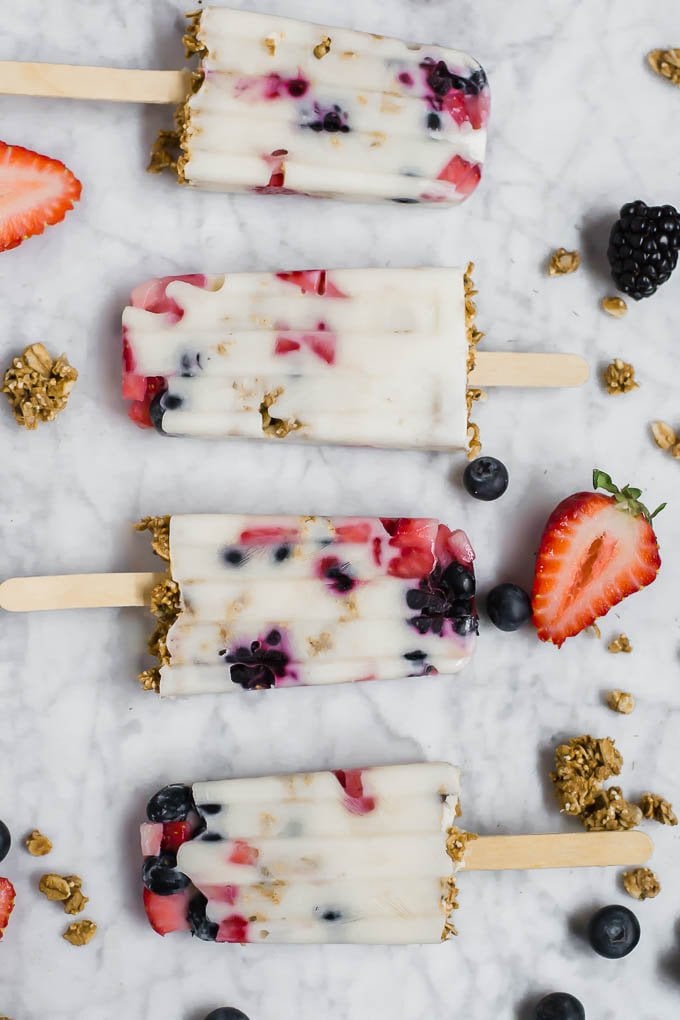
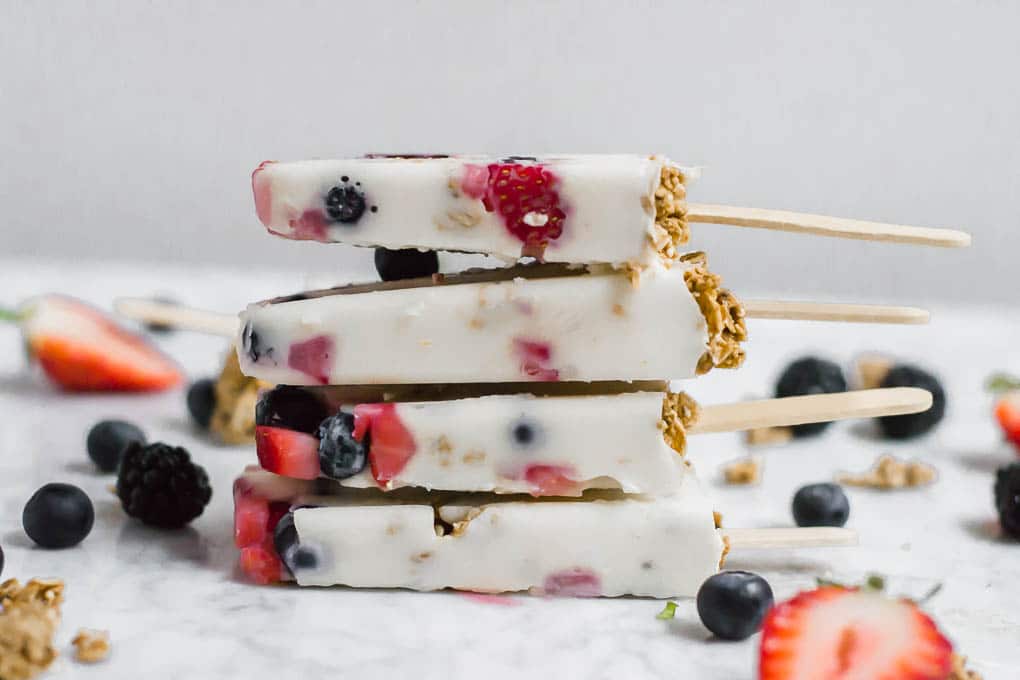
These Greek yogurt popsicles are my summer answer to the weekday breakfast rut. They’re cool, creamy, and layered like a parfait, but frozen on a stick.
Made with thick Greek yogurt, fresh berries, and a sprinkle of granola for crunch, they look like dessert but are secretly breakfast material.
You can prep them ahead and pull one out of the freezer on busy mornings or serve them for brunch on a stick. I’ve also tested them with dairy-free yogurt, so if you’re hosting someone with dietary needs, that option works too.
Why You’ll Love this Recipe
TIP
Use thick yogurt. Regular yogurt tends to freeze icy. Greek yogurt (or a thick dairy-free option) gives you that creamy, satisfying texture that holds up to freezing.
Ingredient Notes
- Greek Yogurt – Use full-fat or 2% plain Greek yogurt for the creamiest texture and best freeze-thaw results. Vanilla works too, just know it’ll sweeten the pops slightly. Dairy-free option: I’ve tested this with thick coconut yogurt and it works great! Choose one with a similar consistency to Greek yogurt, nothing too thin or watery.
- Fresh Berries – I like strawberries, blueberries, and raspberries for color and texture. Chop any larger berries so they distribute evenly in the molds. I cut blackberries and strawberries into small pieces and then find the smaller blueberries in each container. The first time I tested this recipe, I had the biggest blackberry in there and it created a huge hole in my popsicle! Don’t make my mistake!
- Granola – Use your favorite crunchy granola—store-bought or homemade. Make sure it’s gluten-free if needed. Avoid soft or chewy granola, which can get soggy when frozen.
- Sweetener (optional) – Add honey or maple syrup if your yogurt is unsweetened and you want a bit of extra sweetness. You can also swirl in a little fruit jam for visual flair and flavor.
For the ingredient list with measurements, full instructions, printable recipe, and additional notes, please scroll down to the recipe card.
Recipe FAQs
You can, but the texture will be icier. Greek yogurt is thicker and holds its shape better when frozen. If using regular yogurt, try straining it first or mix in a little cream cheese to help it freeze creamier.
Use a thick, unsweetened coconut or almond-based yogurt, anything with a similar consistency to Greek yogurt. Avoid thin or runny styles, which tend to freeze icy and separate.
They typically need at least 6 hours, or overnight for best results. If your pops feel stuck, run warm water over the outside of the mold for 15–20 seconds to release them cleanly.
Absolutely. You can skip the granola entirely or swap it for chopped nuts, crushed gluten-free cookies, or just add extra fruit for a smoother-textured version.
Expert Tips
Storage instructions
Freezer:
Store popsicles in the molds or transfer them to a freezer-safe bag or container once fully frozen. If stacking, separate with parchment to prevent sticking.
Best quality window:
Enjoy within 1–2 weeks for the best texture and flavor. After that, they may develop ice crystals and the fruit can become a bit icy.
Serving tip:
Let the pops sit at room temperature for 1–2 minutes before eating to soften slightly—they’ll be creamier and easier to bite into.
More gluten-free frozen treats to try

Did you make this recipe?
I’d love to know! Please rate it and leave a comment below. You can also share your pictures and tag @adashofmegnut on Instagram.
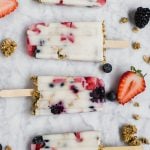
Breakfast Yogurt Popsicles
Ingredients
- 1 ½ cups full-fat greek yogurt - or dairy-free greek-style yogurt, like Kite Hill Greek Style plain yogurt
- 3 tablespoons pure maple syrup - or honey
- ⅓ cup strawberries - diced small
- ⅓ cup blueberries
- ⅓ cup blackberries - diced small
- ¾ cup gluten-free granola - or your favorite granola
**Use the toggle button above to turn the instruction photos on and off!
Instructions
- Mix the Yogurt: In a bowl, whisk together 1 ½ cups full-fat greek yogurt and 3 tablespoons pure maple syrup until smooth. Set aside.
- Combine Berries: In a separate bowl, combine ⅓ cup strawberries, ⅓ cup blueberries, and ⅓ cup blackberries. Add 1/4 cup of sweetened yogurt to berries and stir gently to coat.
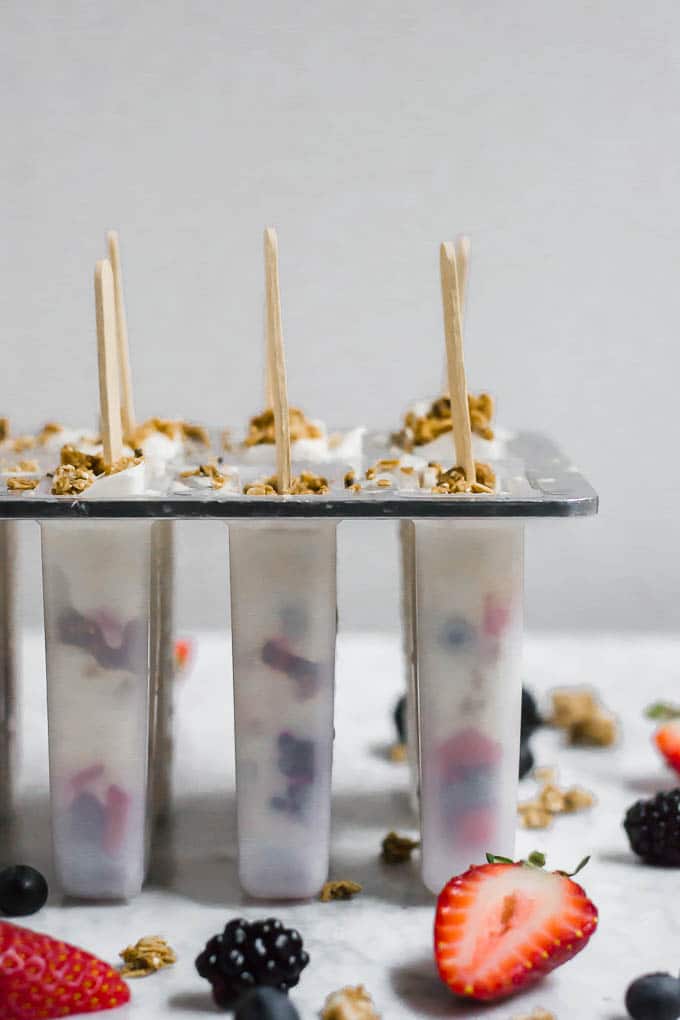
- Layer the Popsicles: Working with one mold at a time, add layers in this order: berry mixture, maple sweetened yogurt, granola, berry mixture, plain yogurt, granola. Fill each popsicle to the top. Insert popsicle stick in center of each mold. Note: You'll use about 1 tablespoon of the ¾ cup gluten-free granola in each popsicle.
- Freeze: Freeze for 4-6 hours or until completely firm.
- Remove from Molds: Run popsicle molds under warm water for 15-20 seconds, keeping water away from the top opening. Popsicles should release easily. If stuck, continue running under warm water.
Notes
- Gluten-free note: I have celiac disease and personally use a certified gluten-free granola in this recipe. If you’re cooking for someone with celiac or gluten sensitivity, double-check labels. Some granolas contain wheat or are processed with gluten. Also note – some people with celiac cannot process oats.
- Dairy-free option: Thick coconut yogurt works well here, just choose one with a consistency similar to Greek yogurt. Avoid runny styles, which can freeze icy.
- Make-ahead friendly: These popsicles keep best for 1–2 weeks in the freezer. After that, the texture may change slightly.
Nutrition
These look simple and delicious!
Thanks so much Jules!
Slurp!! Hope it’s OK, I wanted to include this goodness in a round up I am doing of health popsicles!!
OF COURSE! Thanks Tessa! 🙂