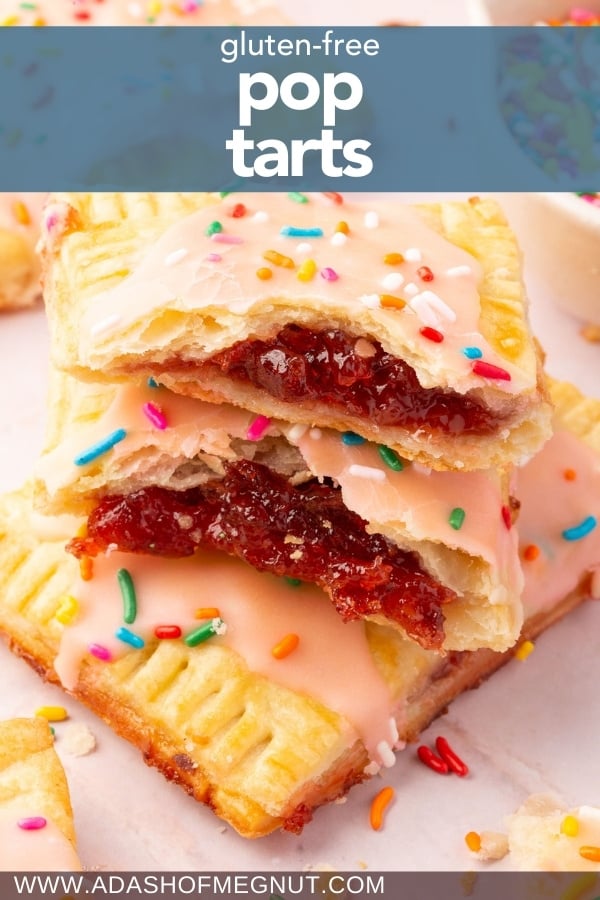
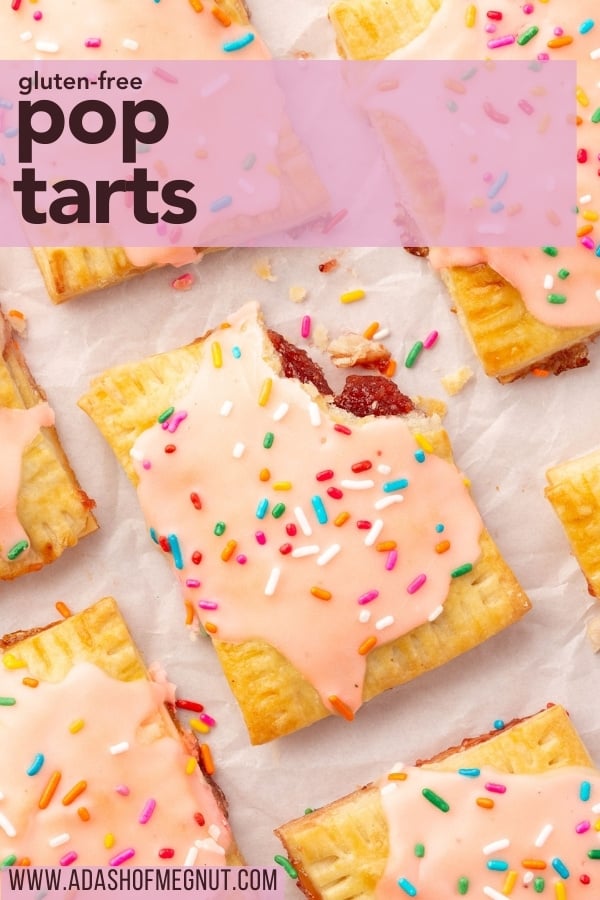
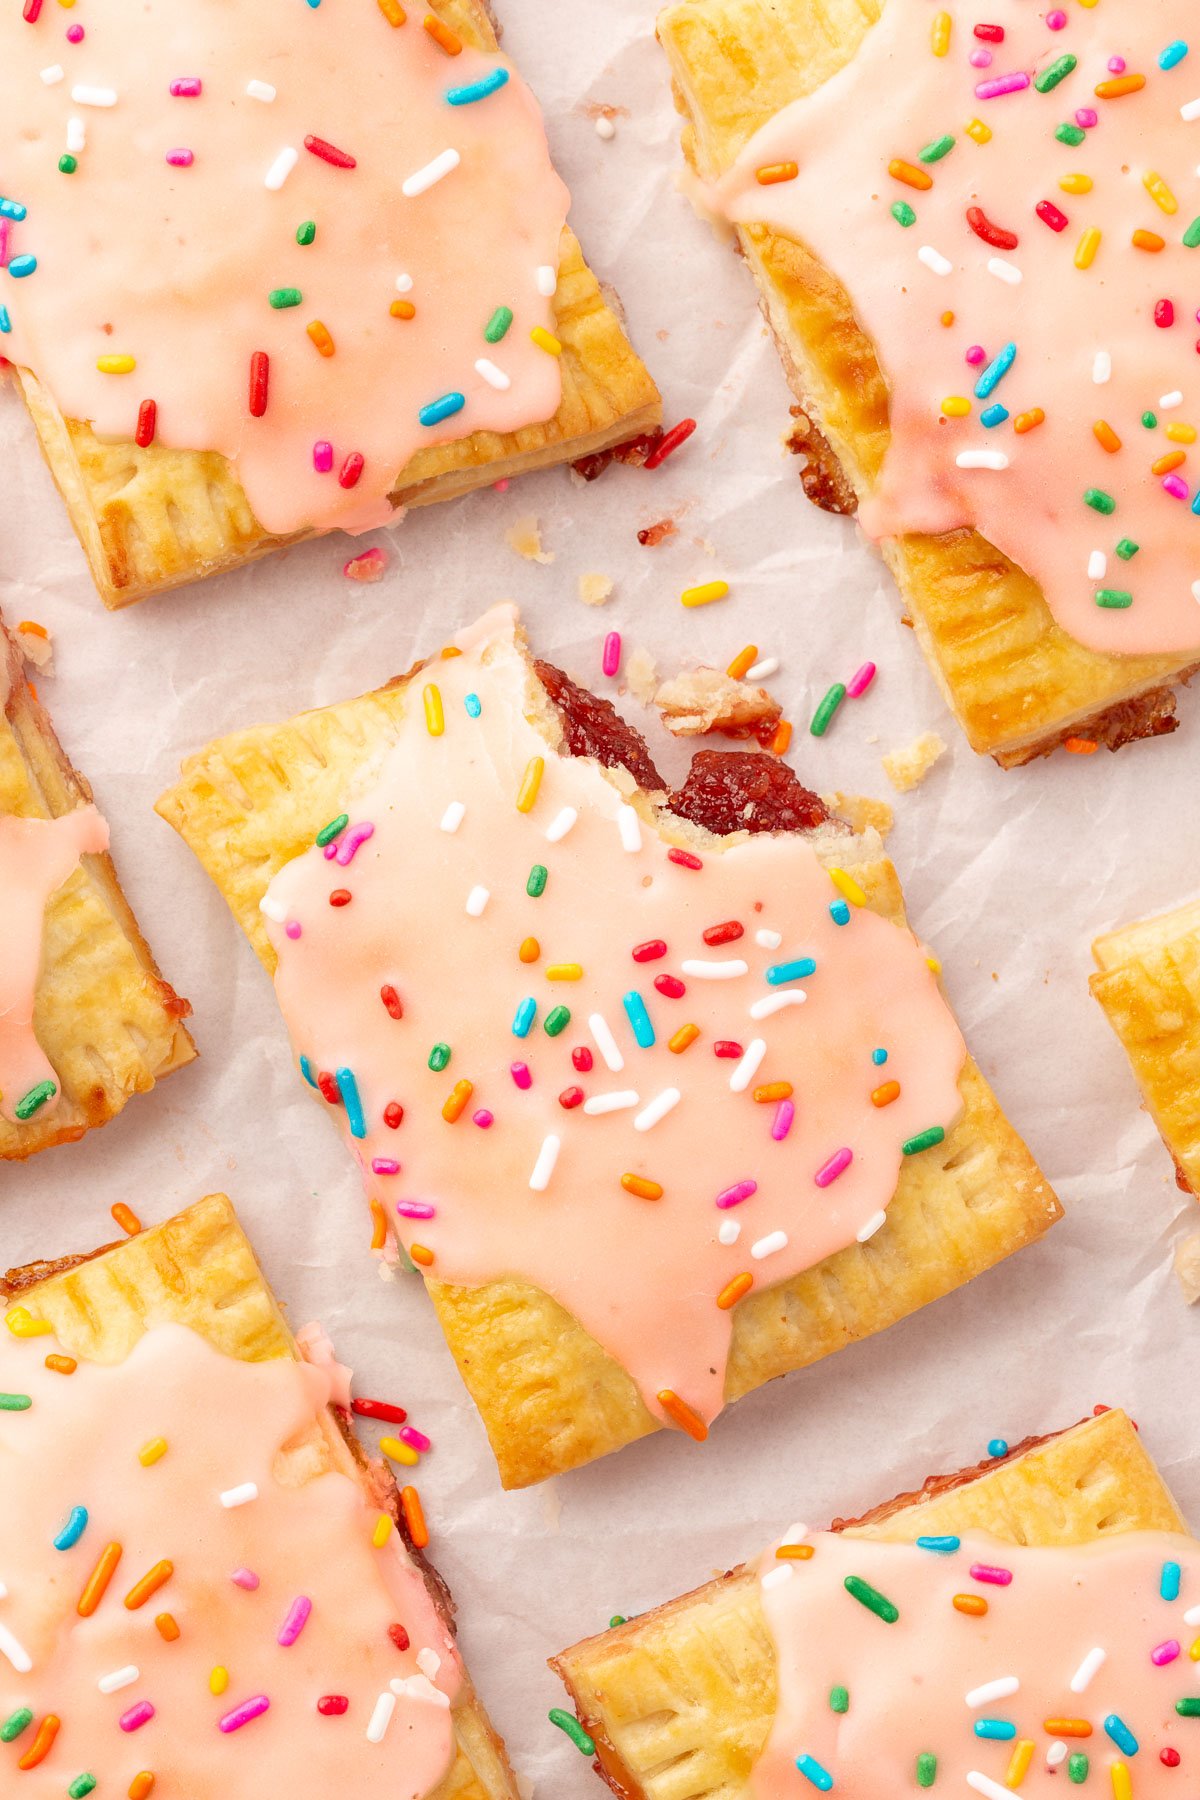
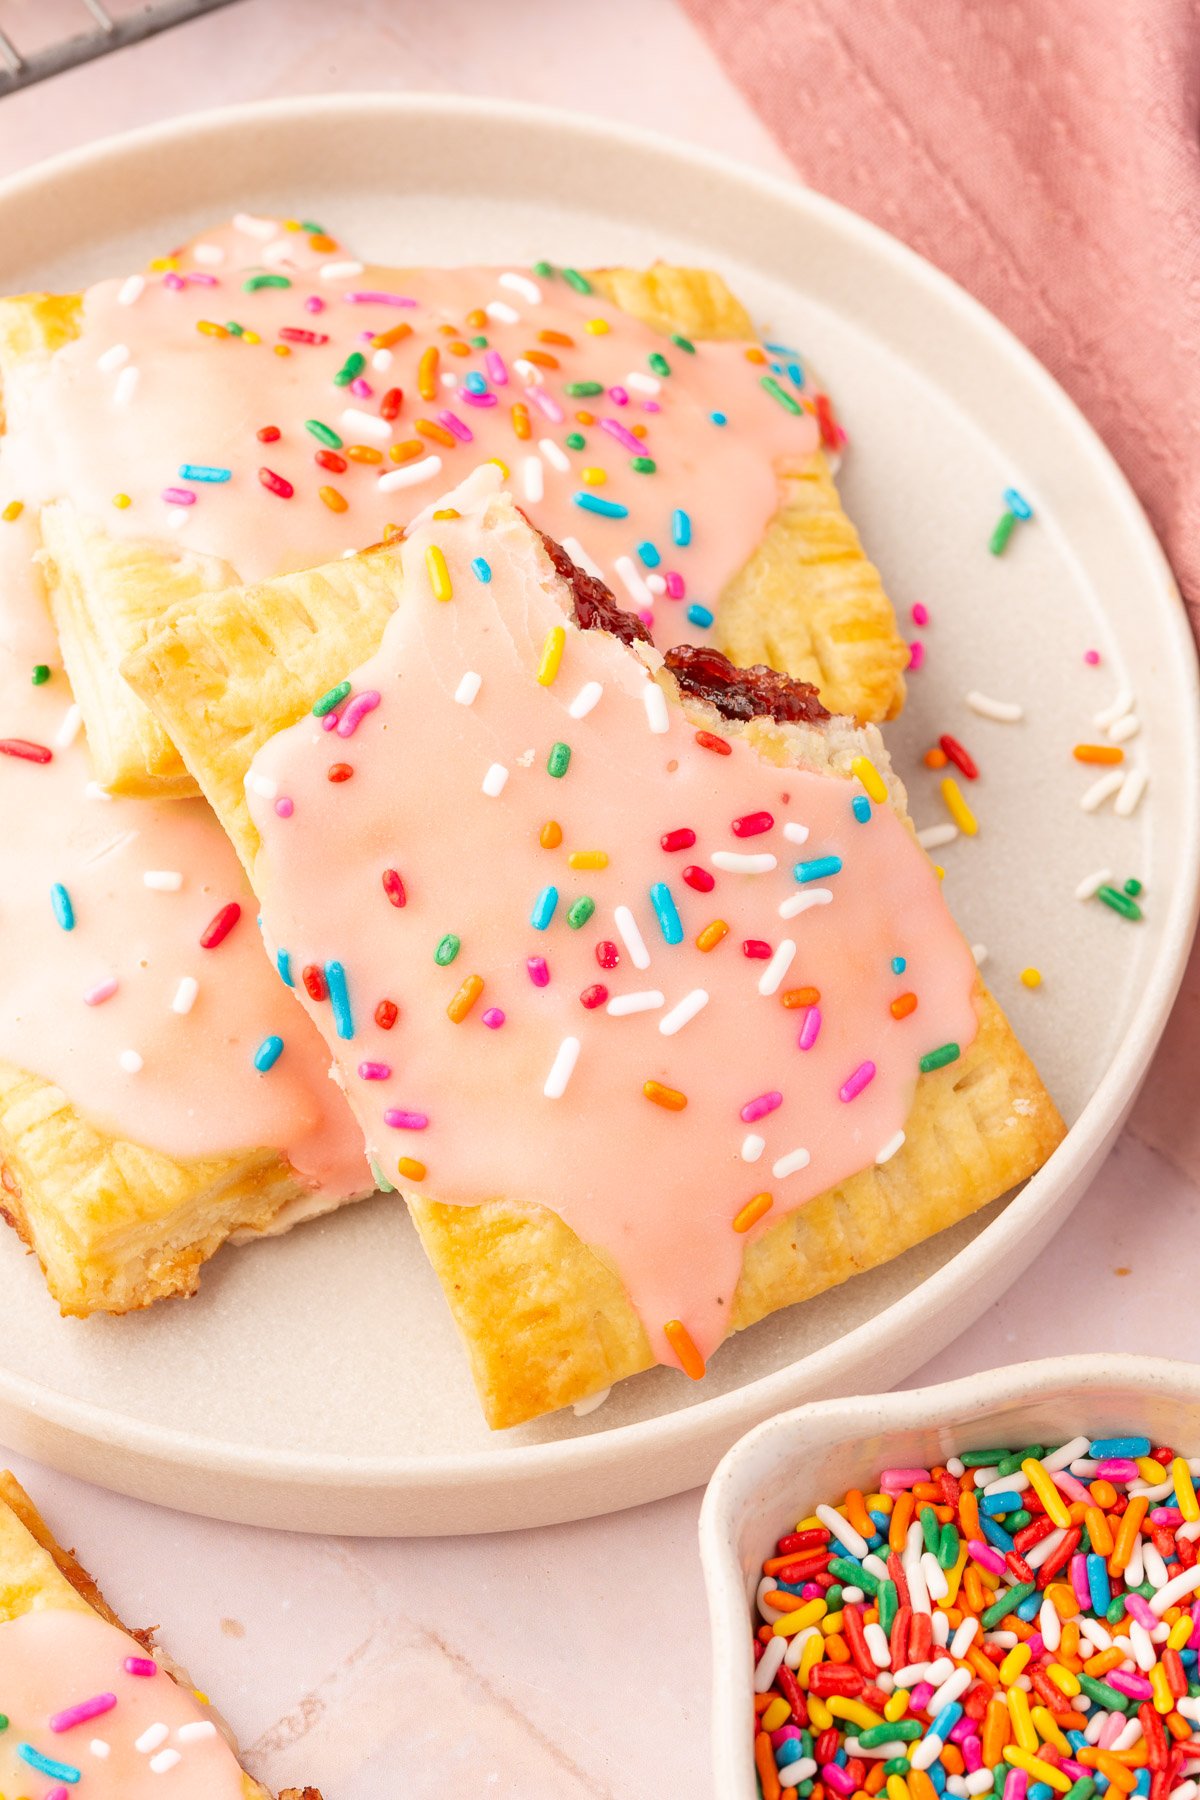
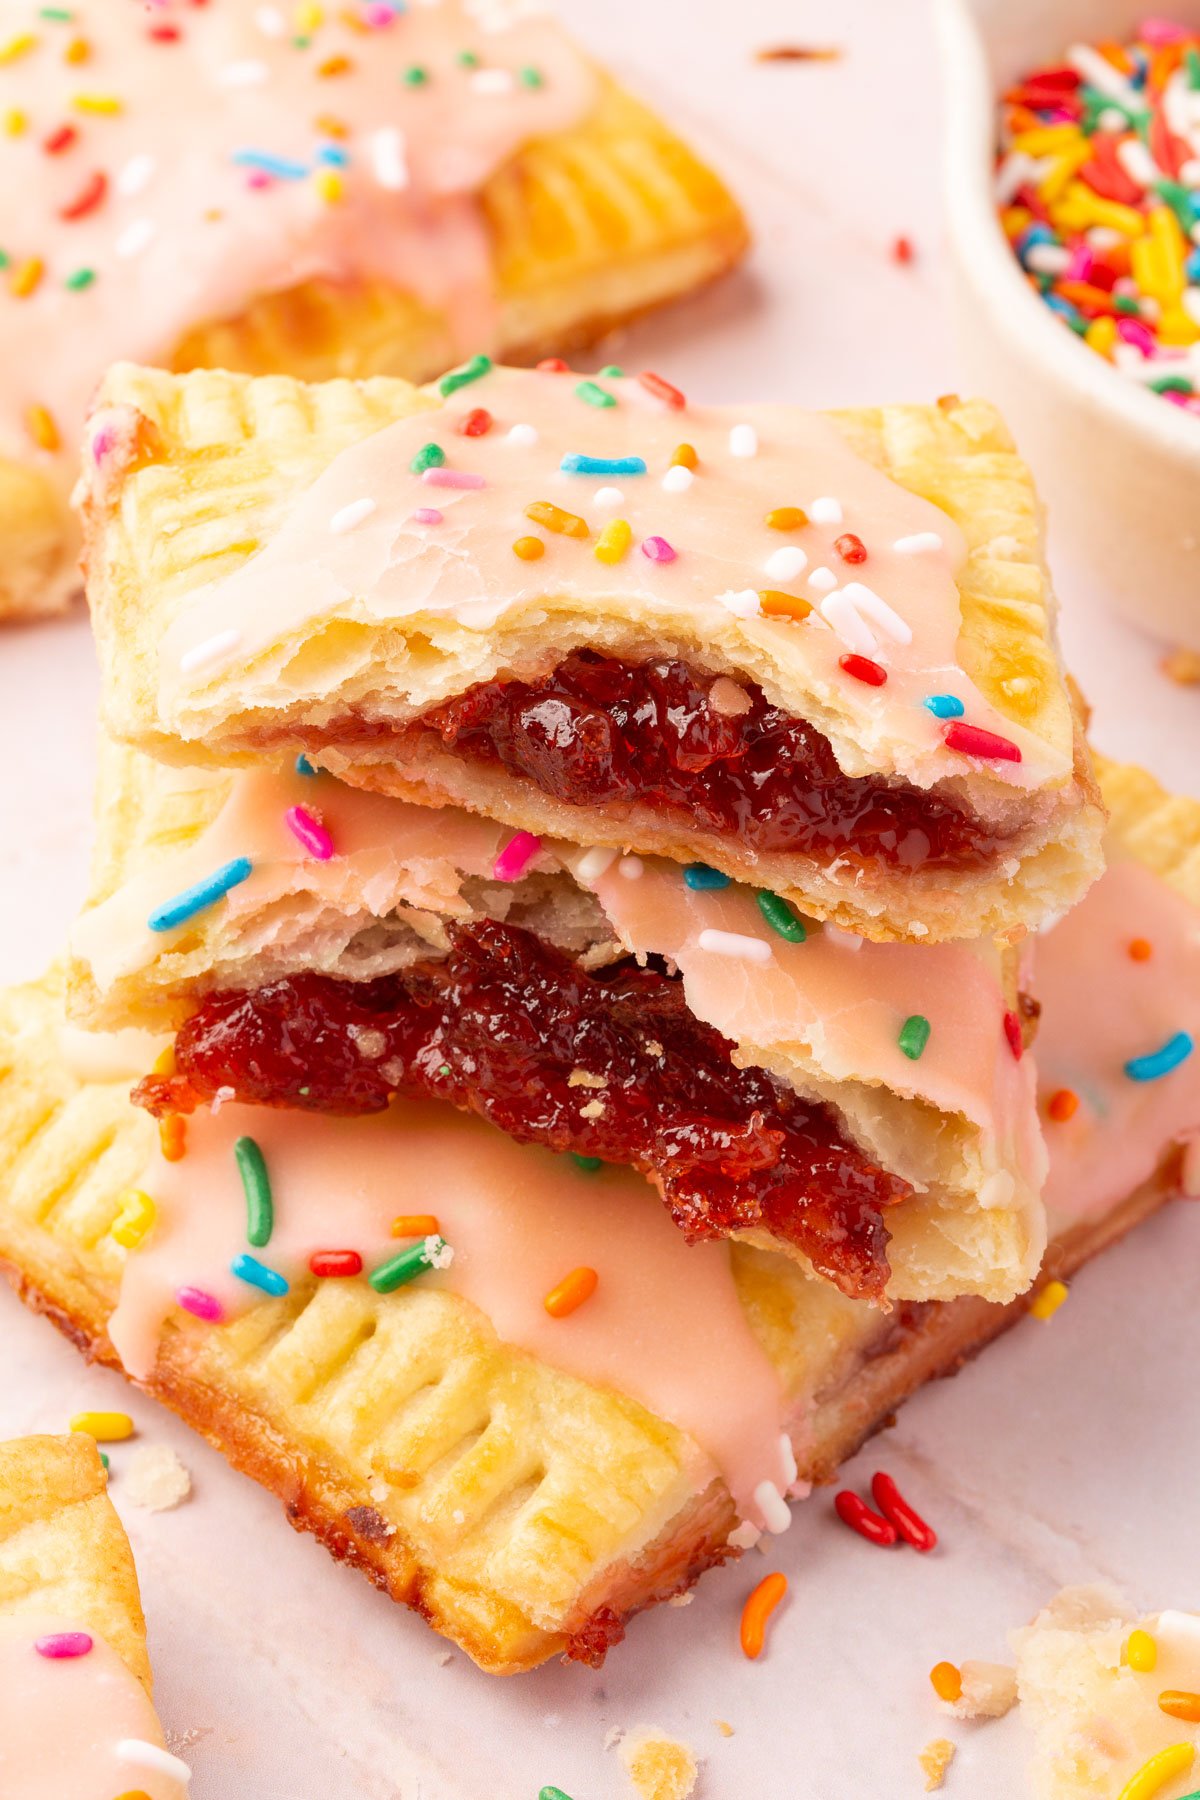
These homemade gluten-free pop tarts use a laminated pastry dough that creates real flaky layers, not just a repurposed pie crust. Fill them with strawberry preserves, bake at 350°F for about 25 minutes, and finish with a smooth vanilla glaze and sprinkles. They come out golden, buttery, and better than anything from a box.
The dough takes some time (about two and a half hours start to finish, including chilling), but the lamination is what makes these worth it. This recipe makes 9 pop tarts, and they freeze well both baked and unbaked.
Why You’ll Love This Recipe
Searching for more gluten-free recipes using my gluten-free pie crust? Try these! gluten-free strawberry cream cheese pie / gluten-free purple sweet potato pie / gluten-free chicken pot pie / gluten-free blueberry pie / gluten-free peach mango pie
Ingredients

Ingredient Notes
- Gluten-Free Flour Blend – I recommend Cup4Cup for the most tender, flaky pastry. My second choice is Bob’s Red Mill 1-to-1 Gluten-Free Baking Flour (blue bag), which already includes xanthan gum. I haven’t tested other blends for this recipe, so I can’t recommend them here.
- Sour Cream – Instead of adding water to my gluten-free pastry dough, I like to use sour cream instead. It adds moisture and richness that keeps the layers tender without making the dough too wet. Use it cold, straight from the fridge.
- Strawberry Preserves – Use preserves or jam, not jelly. Jelly is too thin and won’t hold up as a filling. I used strawberry, but raspberry, blueberry, apricot, or any thick jam works. For a cinnamon-sugar filling instead, try the filling from my giant brown sugar pop tart recipe.
- Cornstarch – Mixing a tablespoon into the preserves thickens the filling so it doesn’t leak while baking. Arrowroot starch or tapioca starch work as a substitute in the same amount.
- Corn Syrup – Helps create a glossy, smooth glaze. You can omit if you want, but the glaze won’t be as glossy.
- Sprinkles (optional) – Make sure to use gluten-free sprinkles, as some brands contain wheat-based ingredients.
Why Laminating the Dough Matters
Most homemade pop tart recipes use a standard pie crust. This one goes a step further. Rolling and folding the dough multiple times layers butter between sheets of pastry, which is what creates those flaky, buttery layers when it bakes. The hands-on work is just a few extra minutes of rolling and folding.
Recipe FAQs
The edges should be golden brown, about 23 to 25 minutes. The center may still look pale, and that’s fine. They firm up as they cool.
It’s probably too cold. Let it sit at room temperature for 10 to 15 minutes before rolling again. Gluten-free dough cracks more than regular dough, but the lamination process actually smooths it out with each fold.
No. The pop tarts are good without it. You can also dust them with powdered sugar for a simpler finish.
Expert Tips
Make Ahead Tips
- Pastry Dough: Prepare the dough up to 2 days in advance and store it wrapped tightly in plastic wrap in the fridge. Let it sit at room temperature for 10–15 minutes before rolling if too firm.
- Fully Assembled (Unbaked) Pop Tarts: Assemble the pop tarts, place them on a parchment-lined baking sheet, and refrigerate for up to 24 hours before baking. For longer storage, freeze them (see freezing instructions below).
- Glaze: Mix the glaze up to 2 days ahead and store it in an airtight container in the fridge. Stir well before using, adding a little extra milk if it thickens too much.
Storage Instructions
At Room Temperature: Store fully cooled pop tarts in an airtight container for up to 2 days.
In the Fridge: Keep in an airtight container for up to 1 week. Reheat in a toaster oven or oven at 300°F for 5 minutes to crisp them up.
Freezing Instructions:
Unbaked Pop Tarts: Place assembled pop tarts on a baking sheet and freeze until firm. Transfer to a freezer bag and store for up to 3 months. Bake straight from frozen, adding a few extra minutes to the baking time.
Baked Pop Tarts: Freeze in a single layer on a baking sheet, then transfer to an airtight container for up to 3 months. Reheat in a toaster oven or regular oven at 300°F for 5–8 minutes.

Serving Suggestions
If you’re making these for a weekend brunch, my gluten-free quiche lorraine is the perfect savory counterpart. It uses the same gluten-free pie crust as the base, so you’re already familiar with the dough. While the pop tart dough chills, you have plenty of time to get the quiche in the oven. For a bigger spread, my gluten-free breakfast casserole is easy to prep the night before and bake the next morning while you assemble and bake the pop tarts.
Gluten-Free Pop Tarts
Ingredients
For the Pastry Dough:
- 2½ cups (350 g) gluten-free flour blend - I recommend using Cup4Cup Gluten-Free Flour
- 1 tablespoon (12 g) granulated sugar
- ½ teaspoon salt
- ½ teaspoon baking powder
- 1 cup (227 g) unsalted butter - cold and cubed
- ⅔ cup (160 g) sour cream - cold
For the Strawberry Filling:
- 1 cup (250 g) strawberry preserves
- 1 tablespoon (8 g) cornstarch
For the Egg Wash:
- 1 (50 g) large egg
- 1 tablespoon (15 g) water
For the Glaze:
- 1½ cups (180 g) powdered sugar - sifted
- 2 tablespoons (30 g) whole milk
- 1 tablespoon (22 g) corn syrup
- 1 tablespoon (16 g) strawberry preserves or jam
- ½ teaspoon vanilla extract
- sprinkles - optional
**Use the toggle button above to turn the instruction photos on and off!
Instructions
For the Pastry Dough:
- In a large mixing bowl, whisk together 2½ cups (350 g) gluten-free flour blend, 1 tablespoon (12 g) granulated sugar, ½ teaspoon salt, and ½ teaspoon baking powder until well combined.

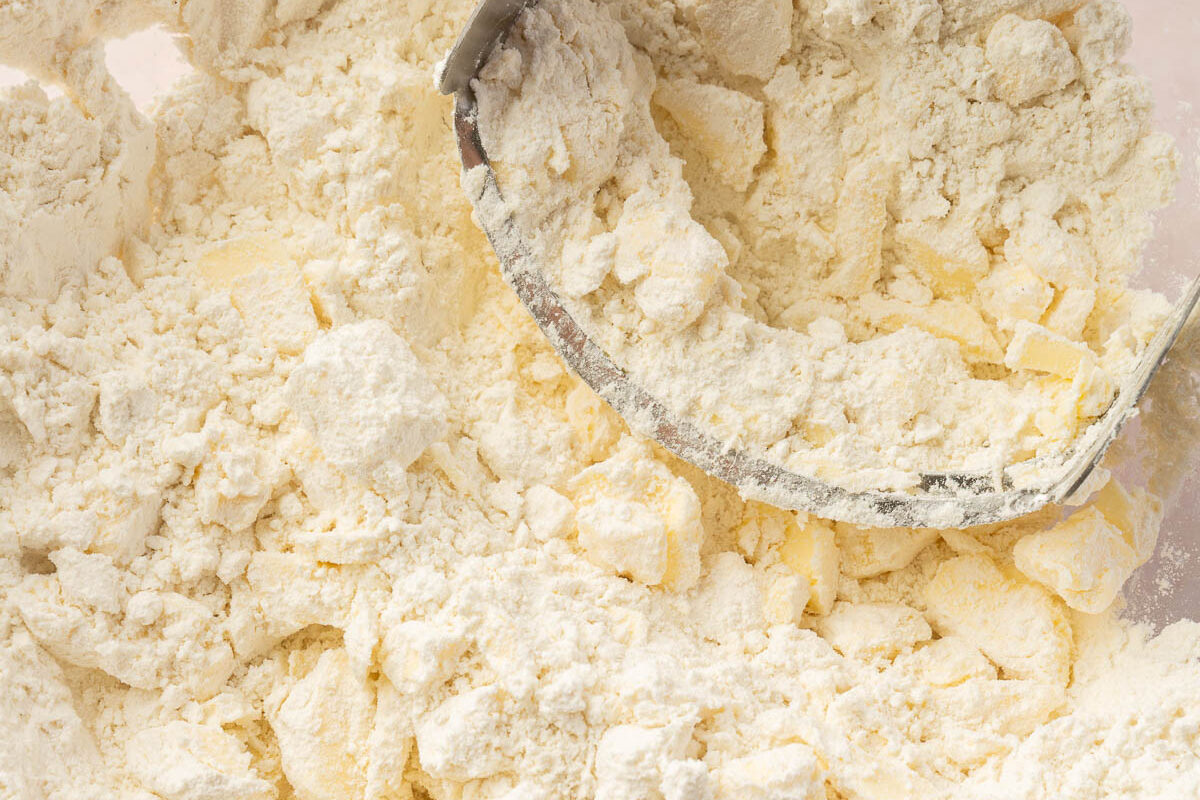
- Add 1 cup (227 g) unsalted butter (cold and cubed) to the dry ingredients. Use a pastry cutter or your fingers to work the butter into the flour until the mixture resembles coarse crumbs with some larger butter pieces about the size of an almond.

- Add ⅔ cup (160 g) sour cream to the dough and stir until it starts to come together. The dough will be shaggy at first.
- Knead the dough in the bowl or on a lightly floured surface until it forms a ball. Shape it into a rectangular block, wrap tightly in plastic wrap, and refrigerate for at least 30 minutes.

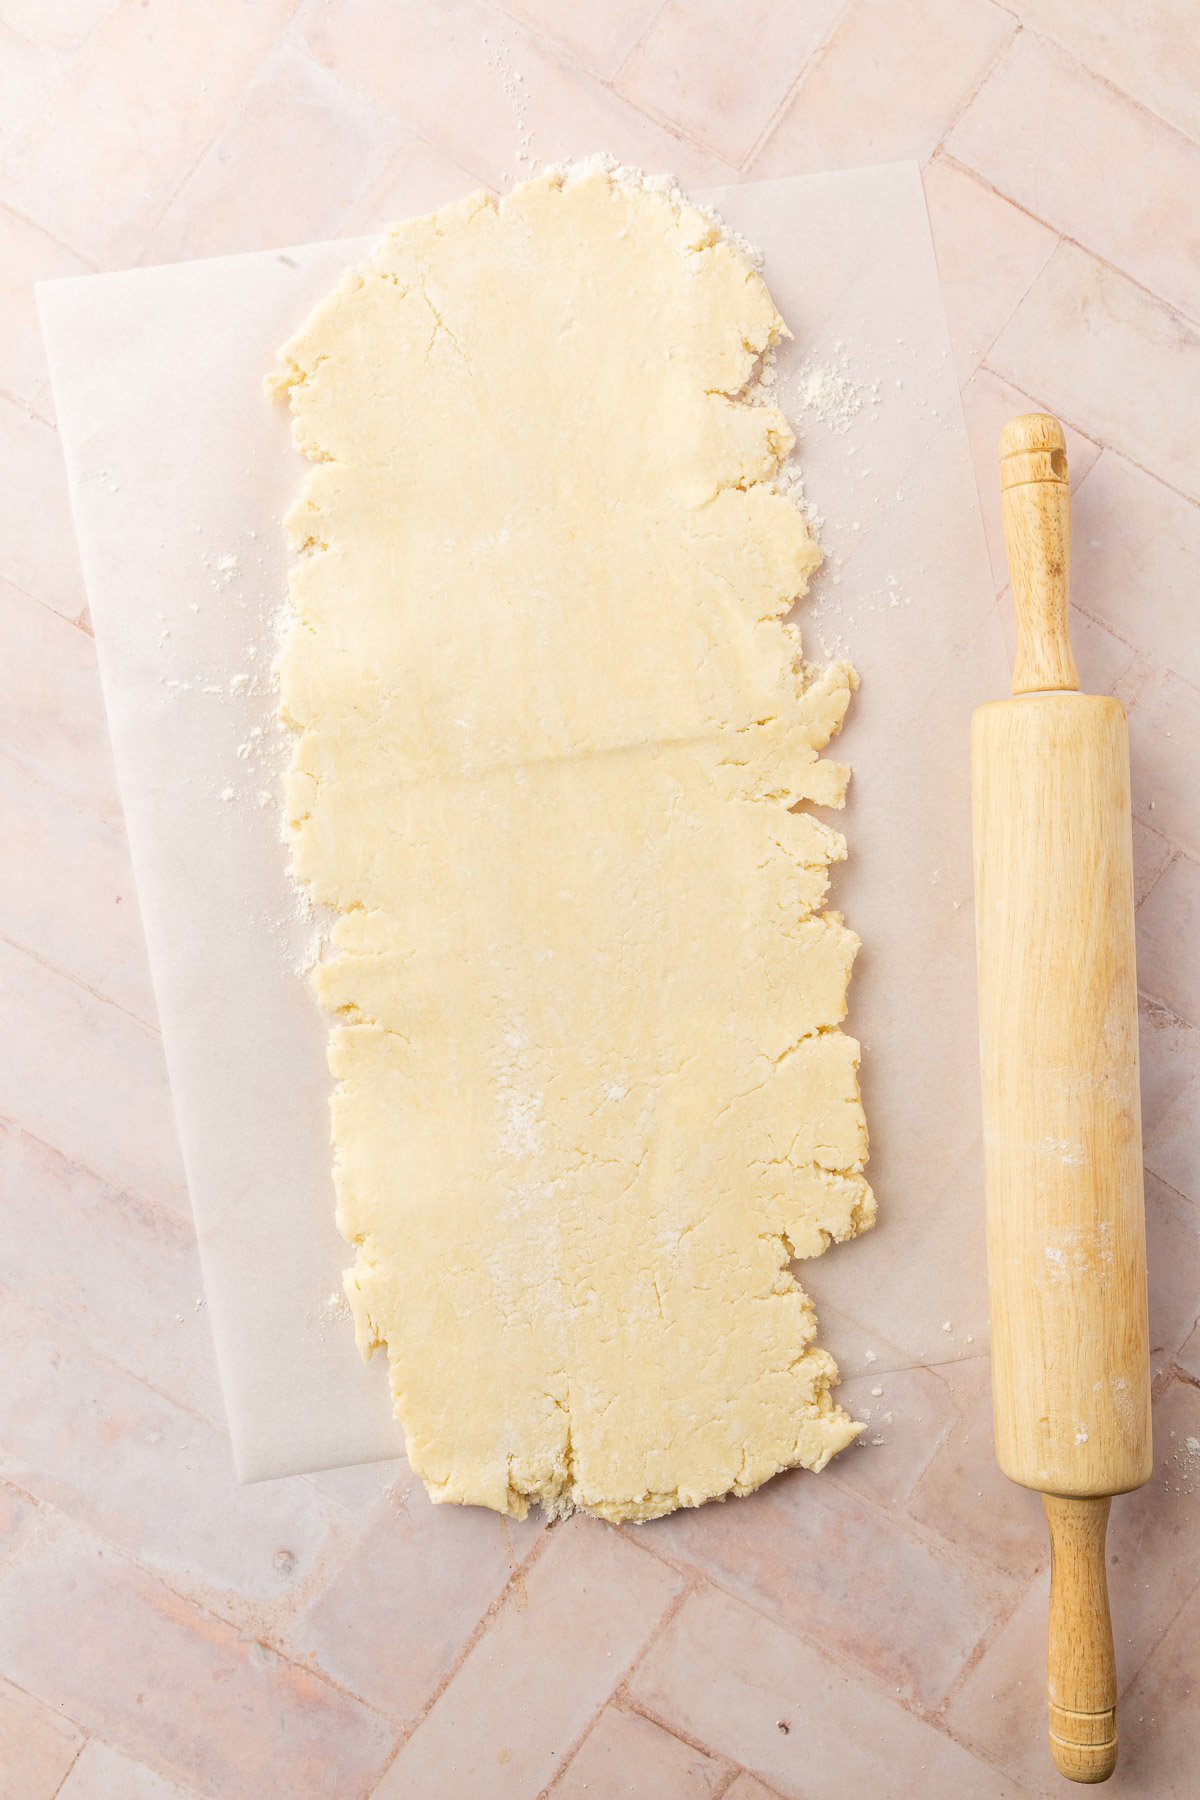
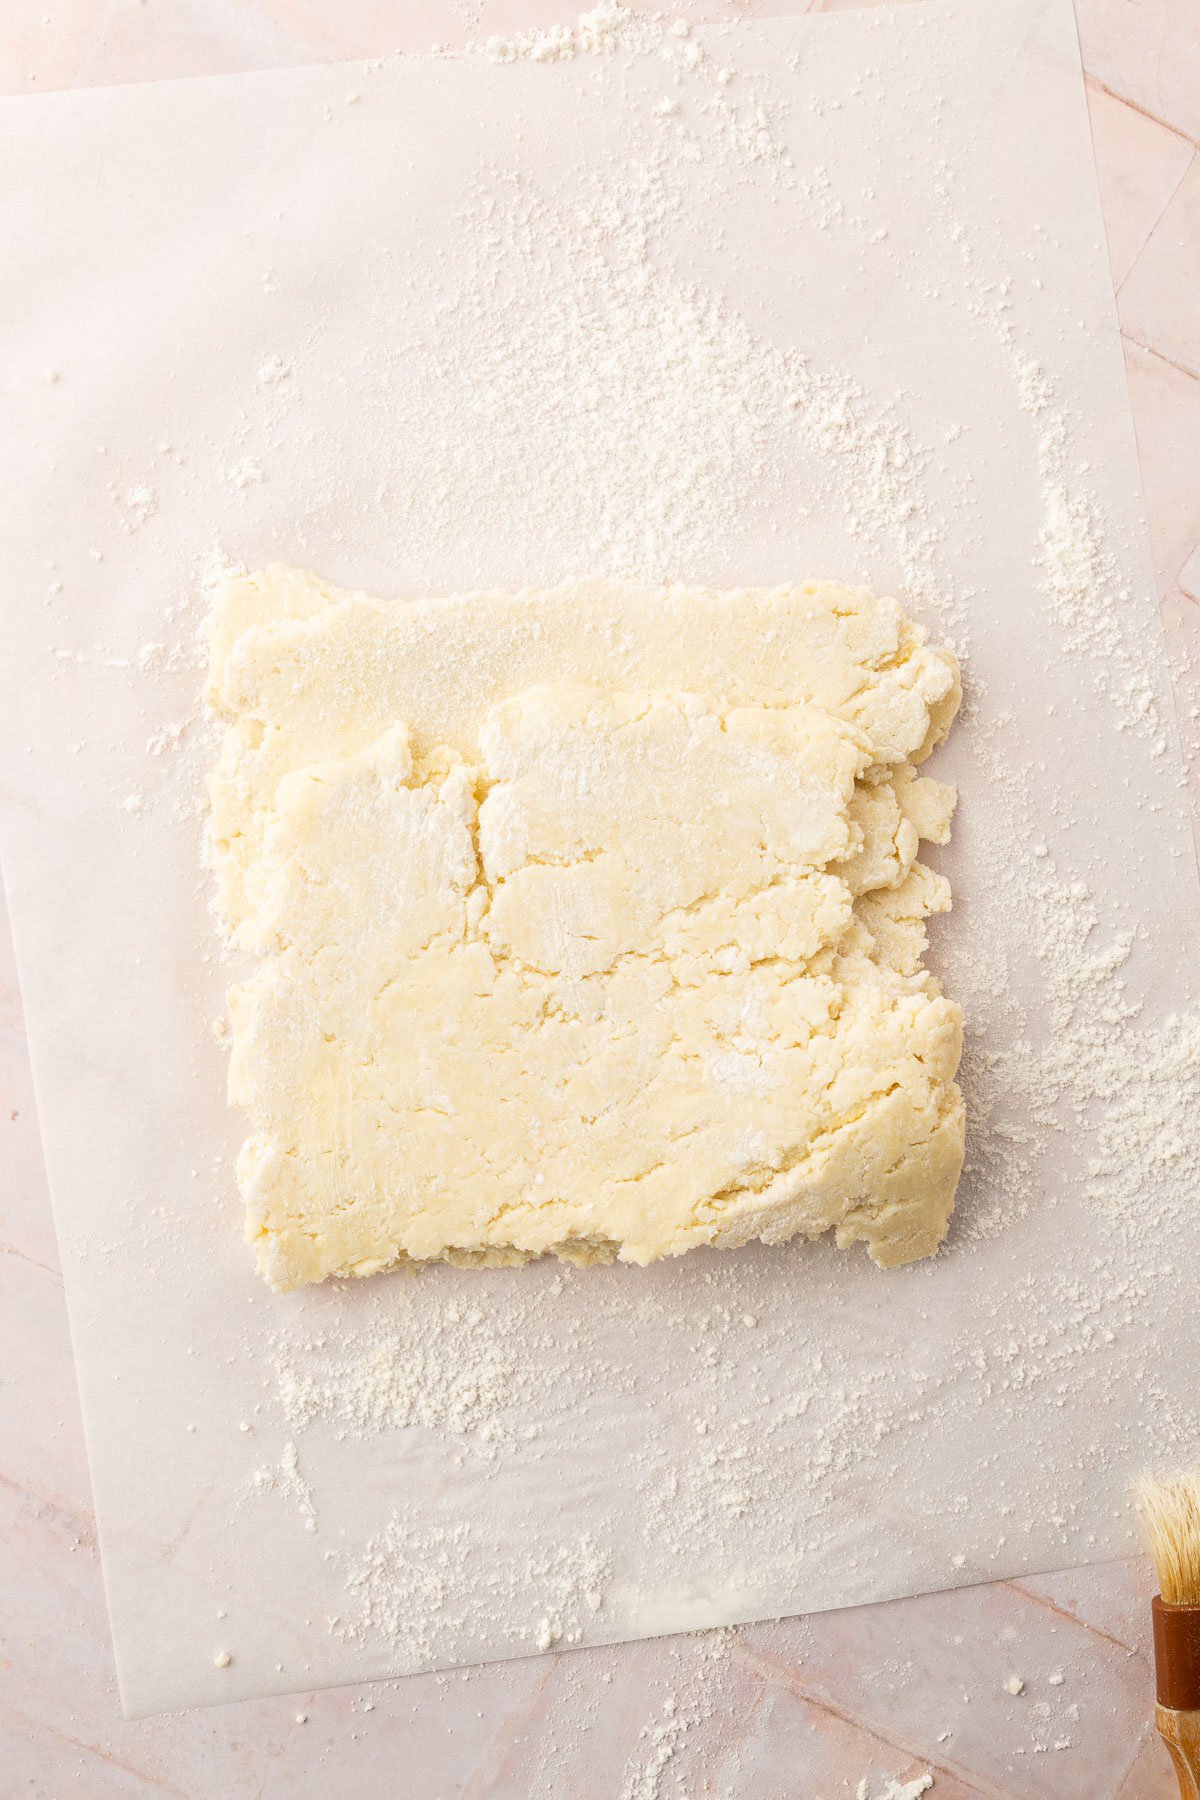
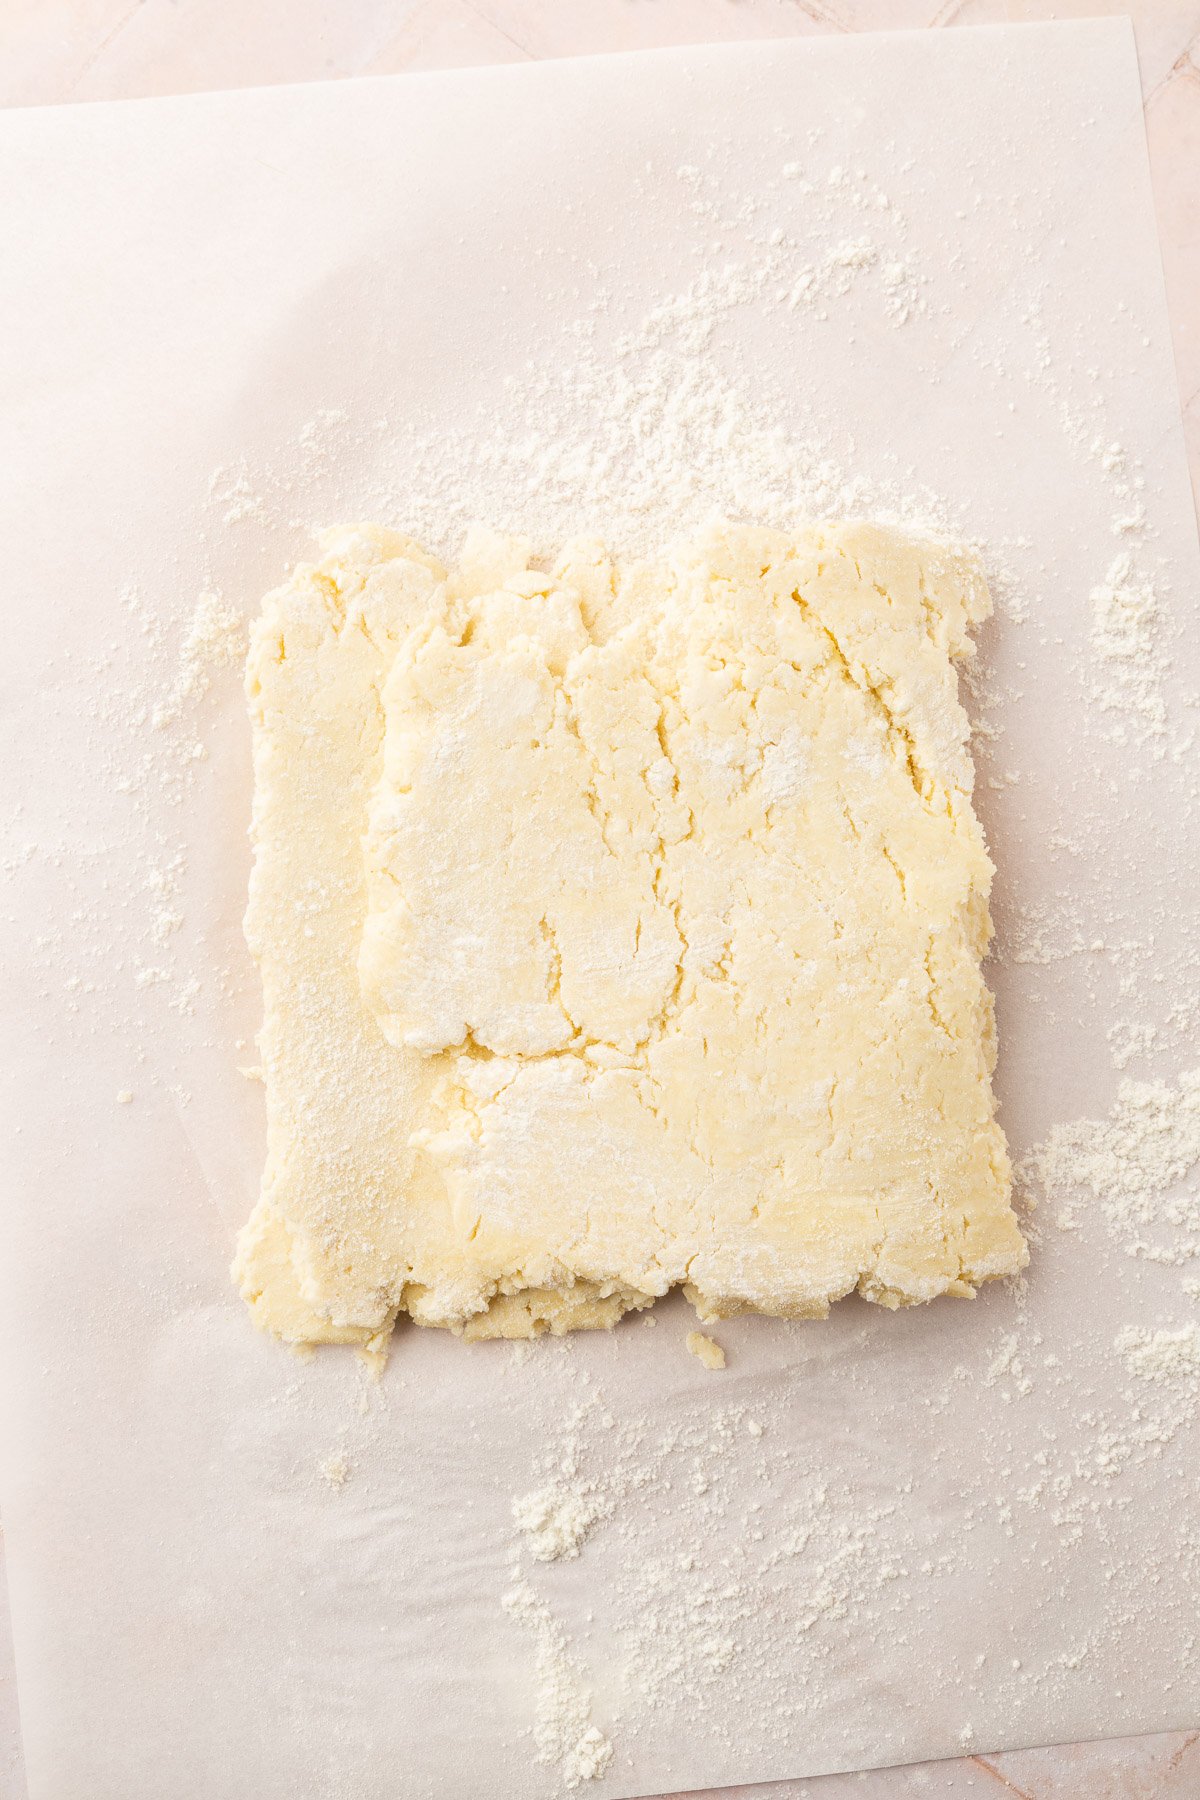
- Place the chilled dough on a lightly floured surface. Roll it out into a large rectangle about ¼ inch thick.

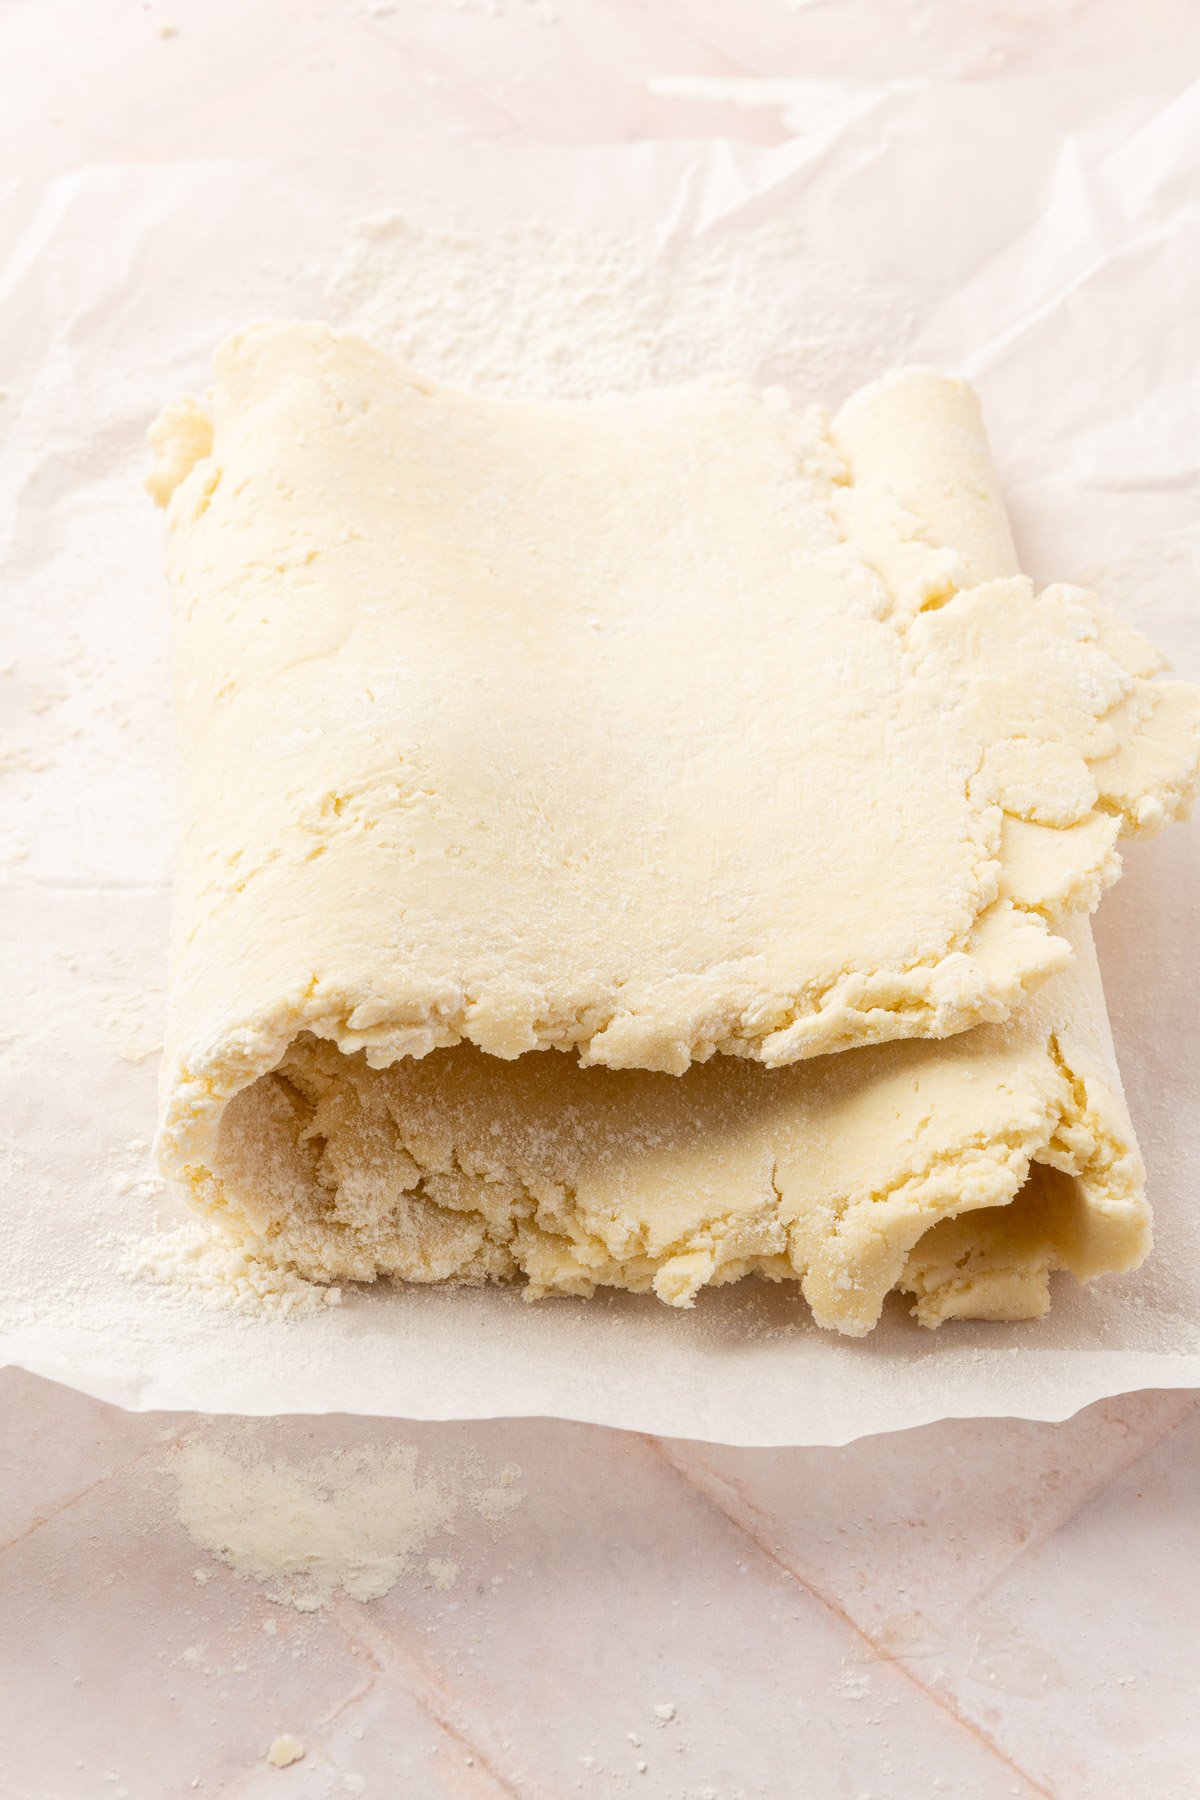
- Fold the top third of the dough toward the center.
- Fold the bottom third over the top, like a letter.
- Rotate the dough 90 degrees and repeat the rolling and folding process four more times.
- You'll notice as the dough continues to get folded that it will become much smoother and break less as it gets folded.
- Wrap in plastic wrap and refrigerate for at least 1 hour. If chilled longer, let it sit at room temperature for 10 to 15 minutes before rolling.


For the Filling:
- Stir together 1 cup (250 g) strawberry preserves and 1 tablespoon (8 g) cornstarch in a small bowl until smooth. Set aside.

For Assembling the Pop-Tarts:
- Preheat the oven to 350°F. Line a baking sheet with parchment paper.
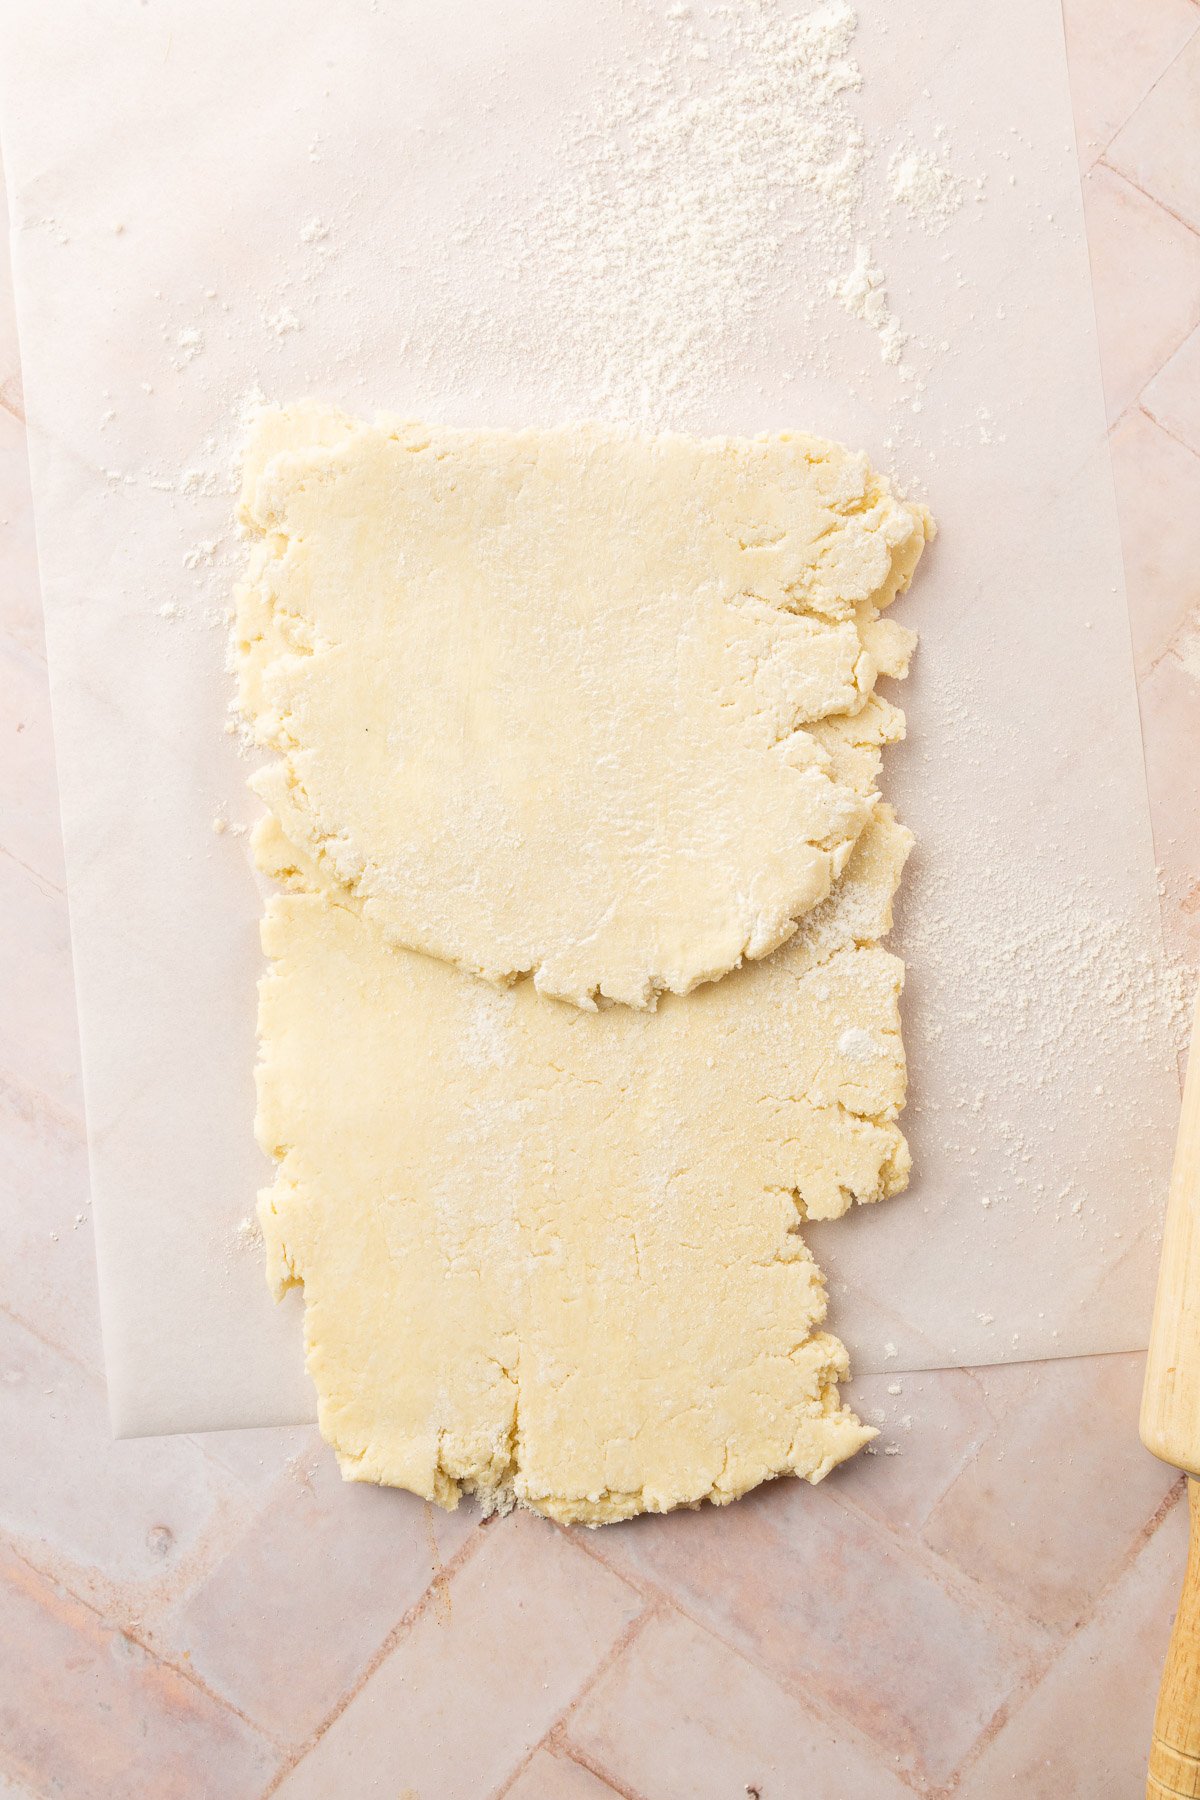
- Divide the chilled dough into three portions for easier rolling. Lightly dust a piece of parchment paper and a rolling pin with gluten-free flour.
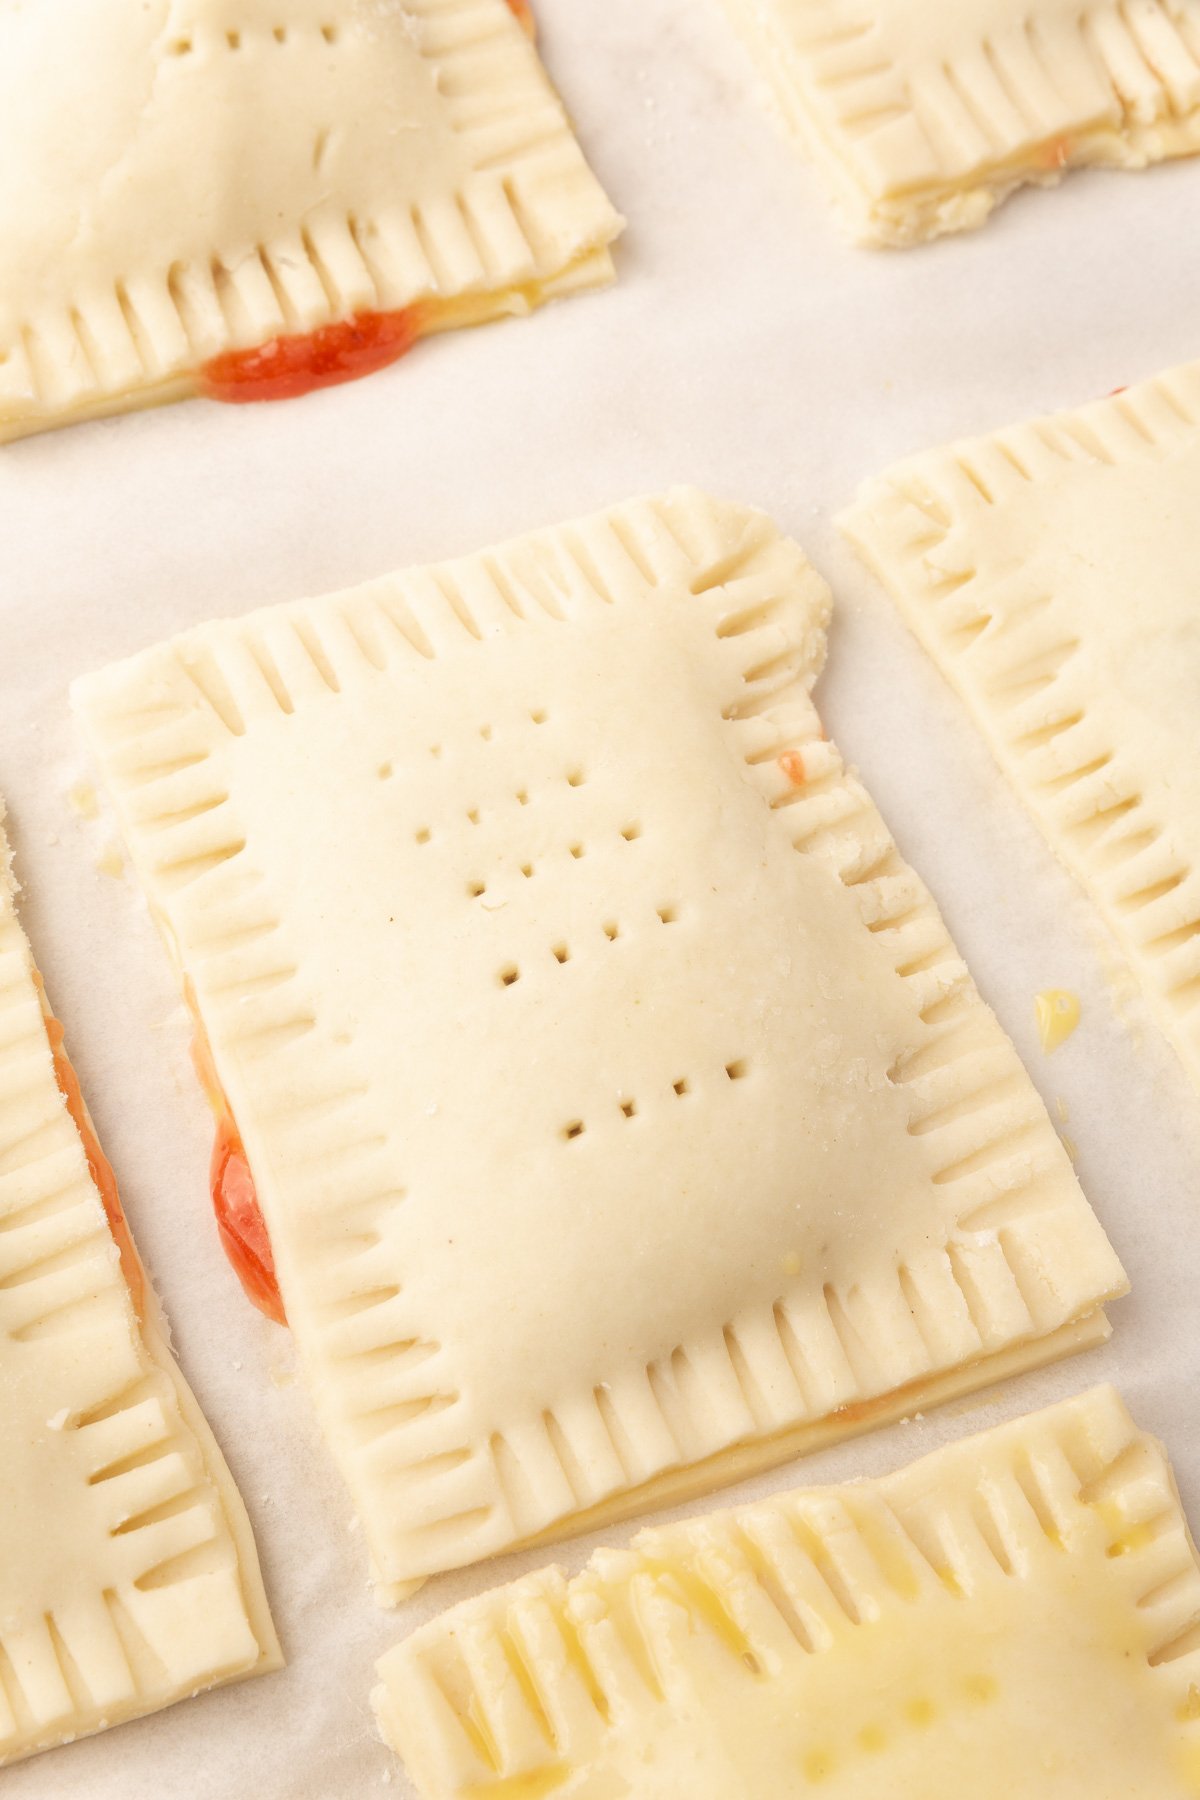
- Roll out each portion into a rectangle about 8×9 inches and ¼ inch thick. Cut into smaller rectangles, about 3×4 inches each. You should have 18 rectangles total.
- Place 9 rectangles on the prepared baking sheet. Spoon about 2 tablespoons of strawberry filling onto each, spreading it evenly but leaving a ½-inch border around the edges.
- Place the remaining 9 rectangles over the filling.
- Press the edges together with your fingers, then crimp all around with a fork to seal. Poke a few holes in the top of each pastry to allow steam to escape.
- Whisk together 1 (50 g) large egg and 1 tablespoon (15 g) water. Brush the tops of the assembled pop tarts lightly with the egg wash.
- Bake at 350℉ for 23–25 minutes, or until the edges are golden brown. Remove from the oven and let the pop-tarts cool completely before glazing.


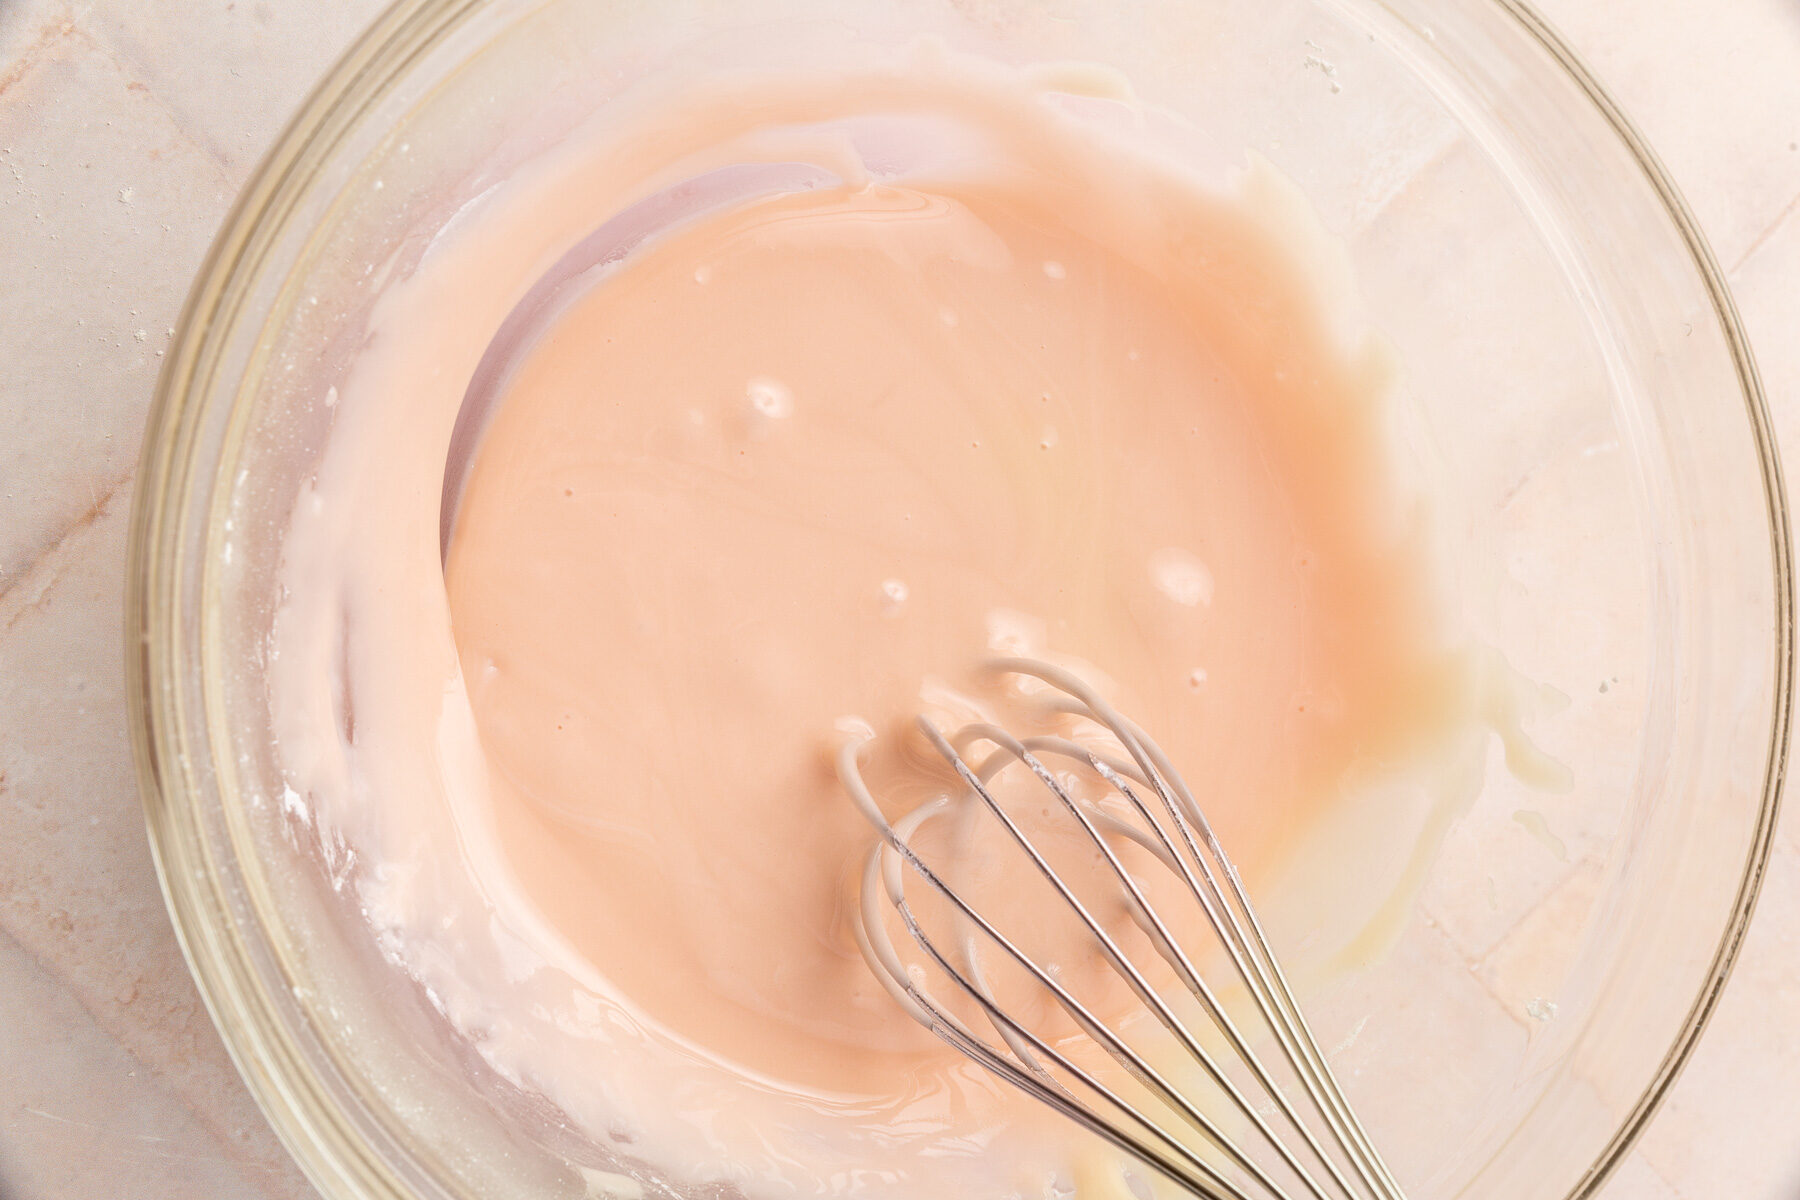
For the Glaze:
- Whisk together 1½ cups (180 g) powdered sugar, 2 tablespoons (30 g) whole milk, 1 tablespoon (22 g) corn syrup, 1 tablespoon (16 g) strawberry preserves or jam, and ½ teaspoon vanilla extract until smooth. The glaze should be thick but spreadable. Add more powdered sugar if too thin or more milk if too thick.
- Spoon the glaze over the cooled pop tarts. Add sprinkles while the glaze is still wet. Let the glaze set before serving.

Notes
- Flour blend: I recommend Cup4Cup for the most tender, flaky result. My second choice is Bob’s Red Mill 1-to-1 Gluten-Free Baking Flour (blue bag). I haven’t tested other blends for this recipe.
- Don’t skip lamination. Rolling and folding the dough multiple times is what creates the flaky layers. It takes extra time but makes a big difference.
- Filling swaps: Raspberry, blueberry, or apricot preserves all work in place of strawberry. For a cinnamon-sugar version, use the filling from my giant brown sugar pop tart recipe.