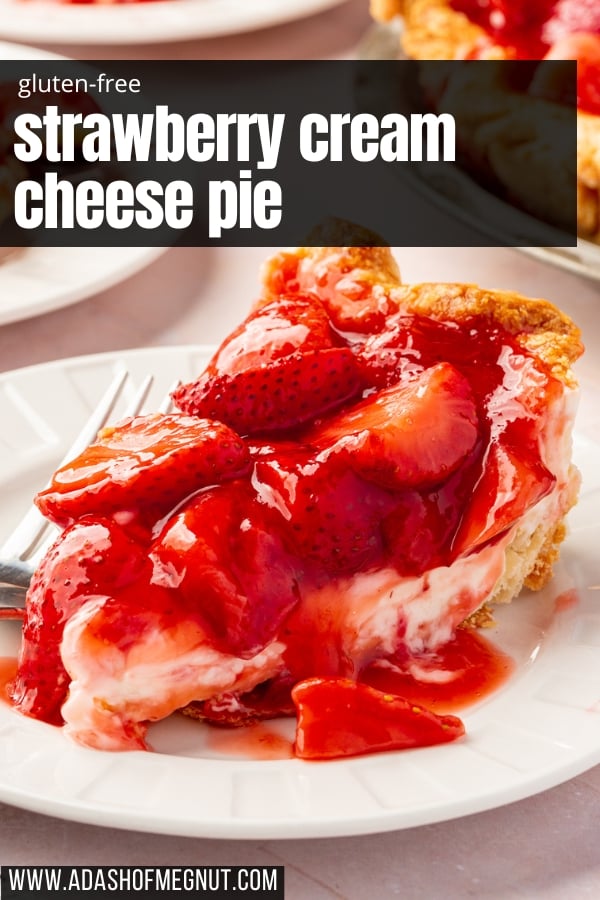
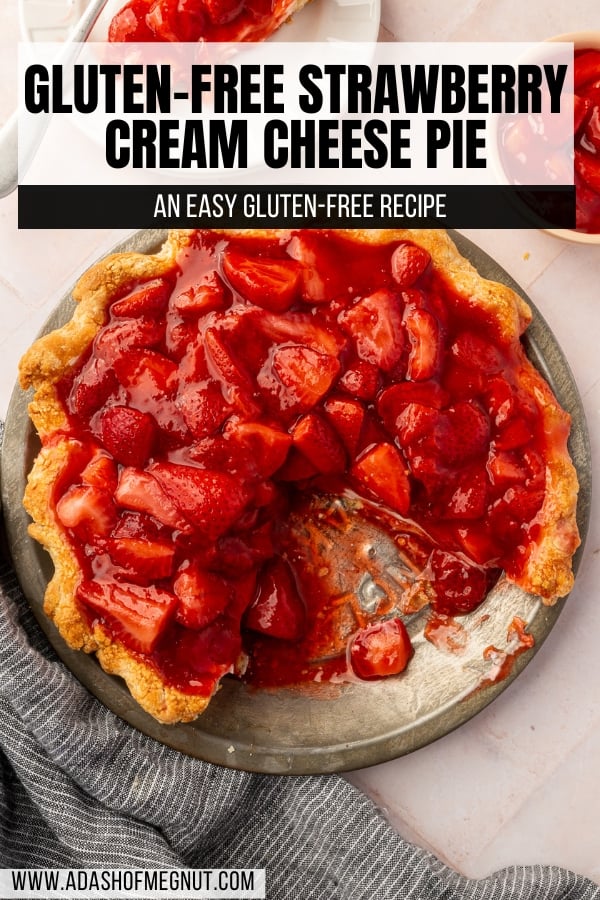
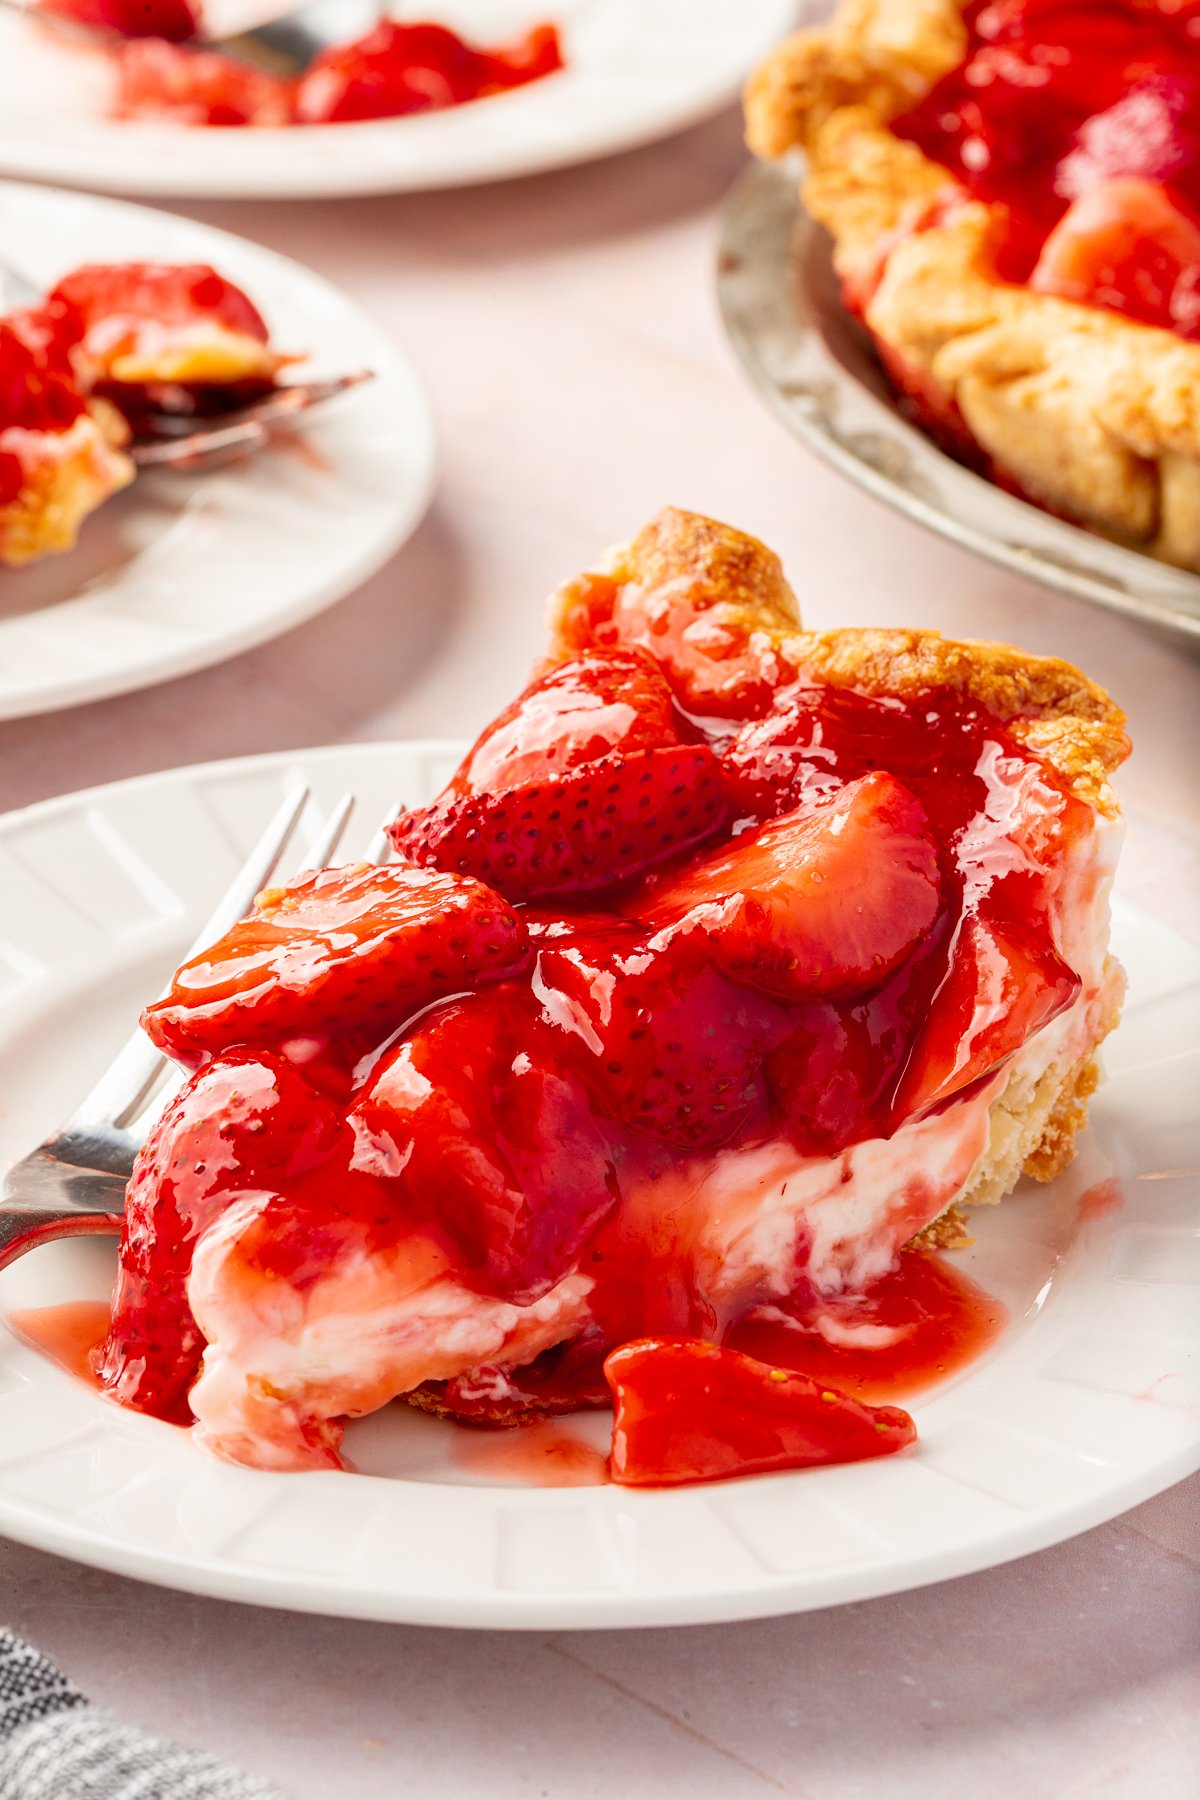
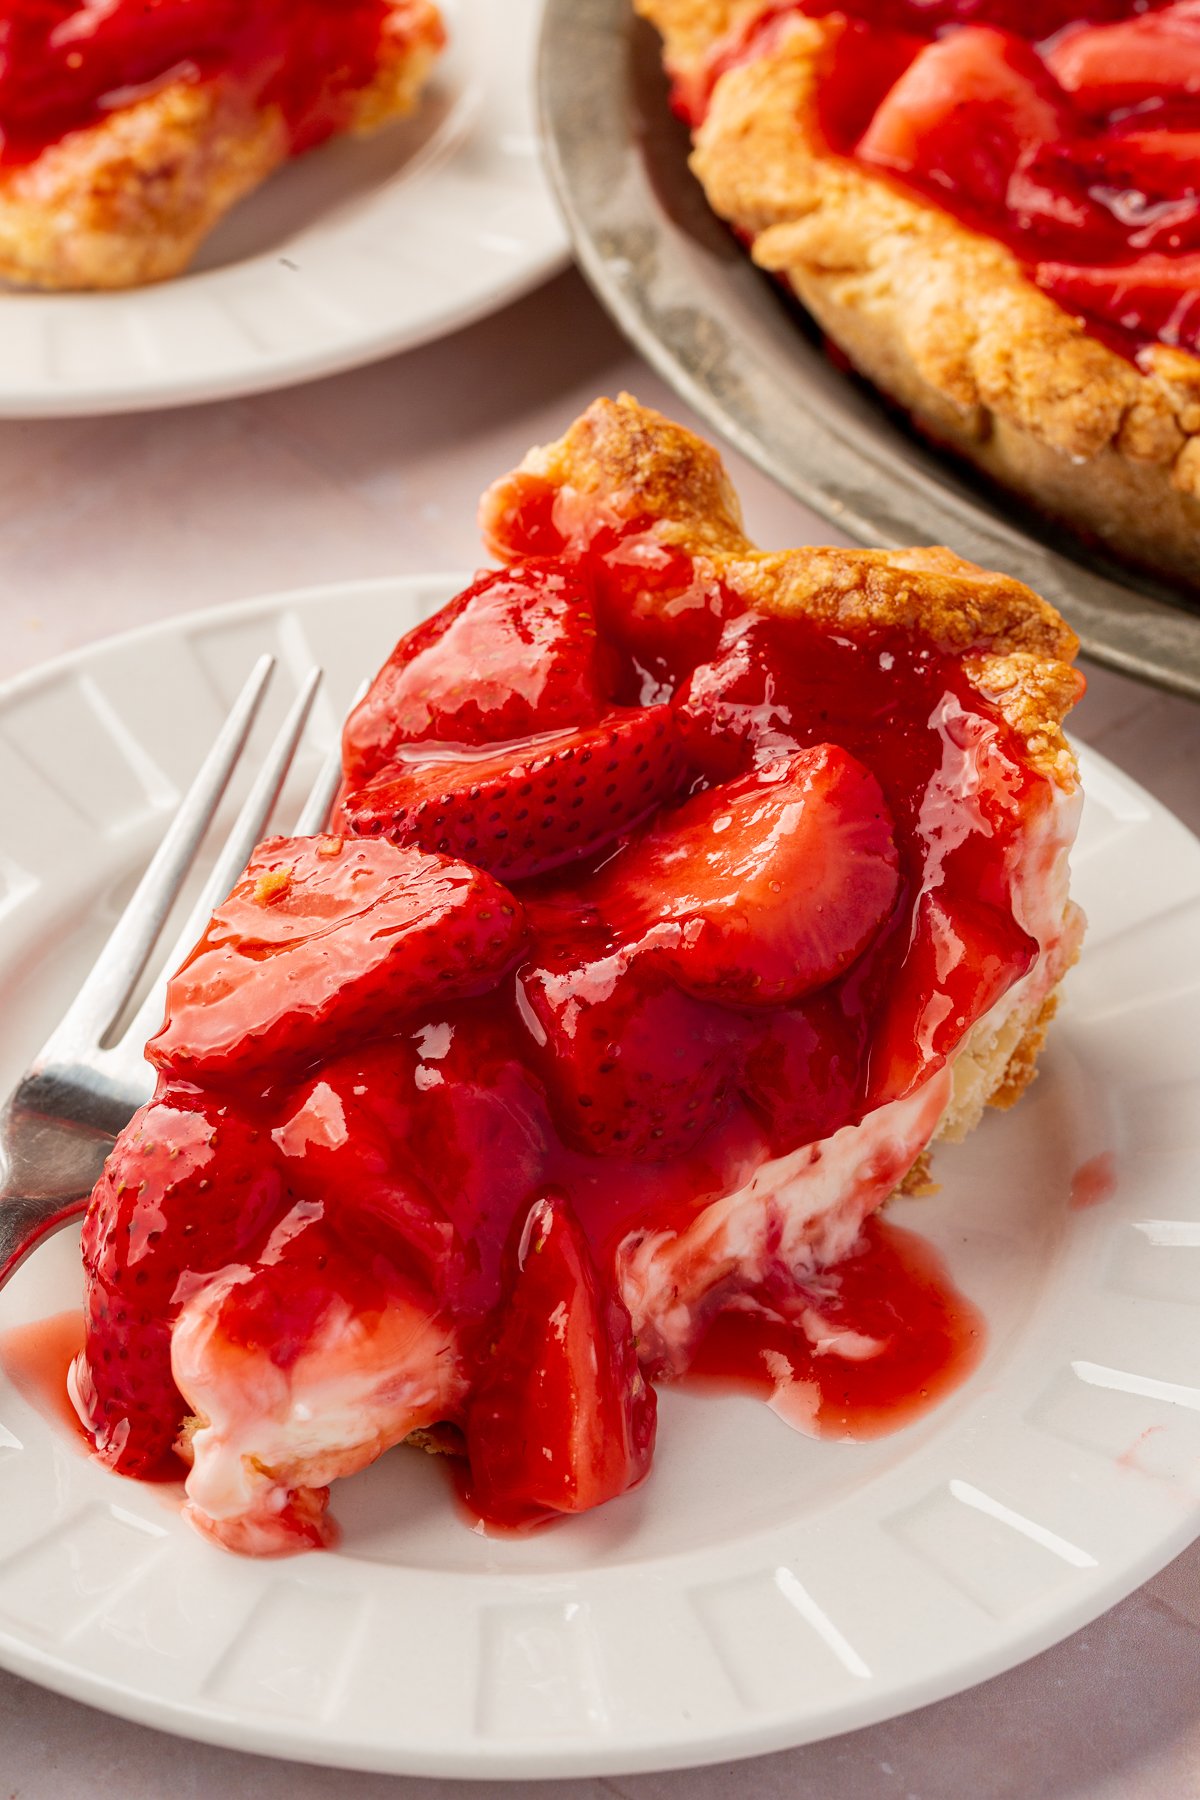
I love this gluten-free strawberry cream cheese pie recipe because it combines my favorite dessert elements: a flaky, buttery gluten-free crust, a creamy cheesecake-like filling, and sweet, juicy strawberries.
It’s a crowd-pleaser that’s perfect for any occasion, and the balance of textures makes each bite irresistible. Plus, it’s easy to prepare ahead of time, making it perfect for entertaining.
You’ll love this recipe because:
It’s make-ahead friendly. This recipe is easy to make in advance, allowing you to blind bake the crust and prep the filling in advance. It’s a perfect dessert for parties or special occasions when you want to impress but don’t want to be in the kitchen at the last minute.
It’s beautiful. This pie is as stunning as it is delicious! The vibrant strawberries paired with the creamy filling make for an impressive dessert that looks beautiful on the table and is sure to wow guests.
It’s gluten-free! This pie is perfect for those following a gluten-free diet, but you’ll never notice it’s gluten-free! The crust is flaky, the filling is rich, and the strawberries add the perfect sweet-tart balance.
Ingredients

Ingredient Notes
- Cream Cheese – Use full-fat cream cheese for the creamiest texture. Make sure it’s softened before mixing for a smooth filling.
- Strawberries – Fresh, ripe strawberries are ideal for this recipe. If they are not very sweet, you can increase the sugar in the recipe by up to 1 cup. Frozen strawberries can be used, but they should be thawed and drained before using..
- Cornstarch – This thickens the strawberry filling. Make sure to whisk it with water to create a slurry before adding it to the strawberries to avoid lumps.
- Powdered Sugar – Use powdered sugar for the cream cheese layer to ensure a smooth, creamy texture. Granulated sugar is not a good substitute here, as it won’t dissolve as easily and leaves a little gritty texture in the cream cheese layer.

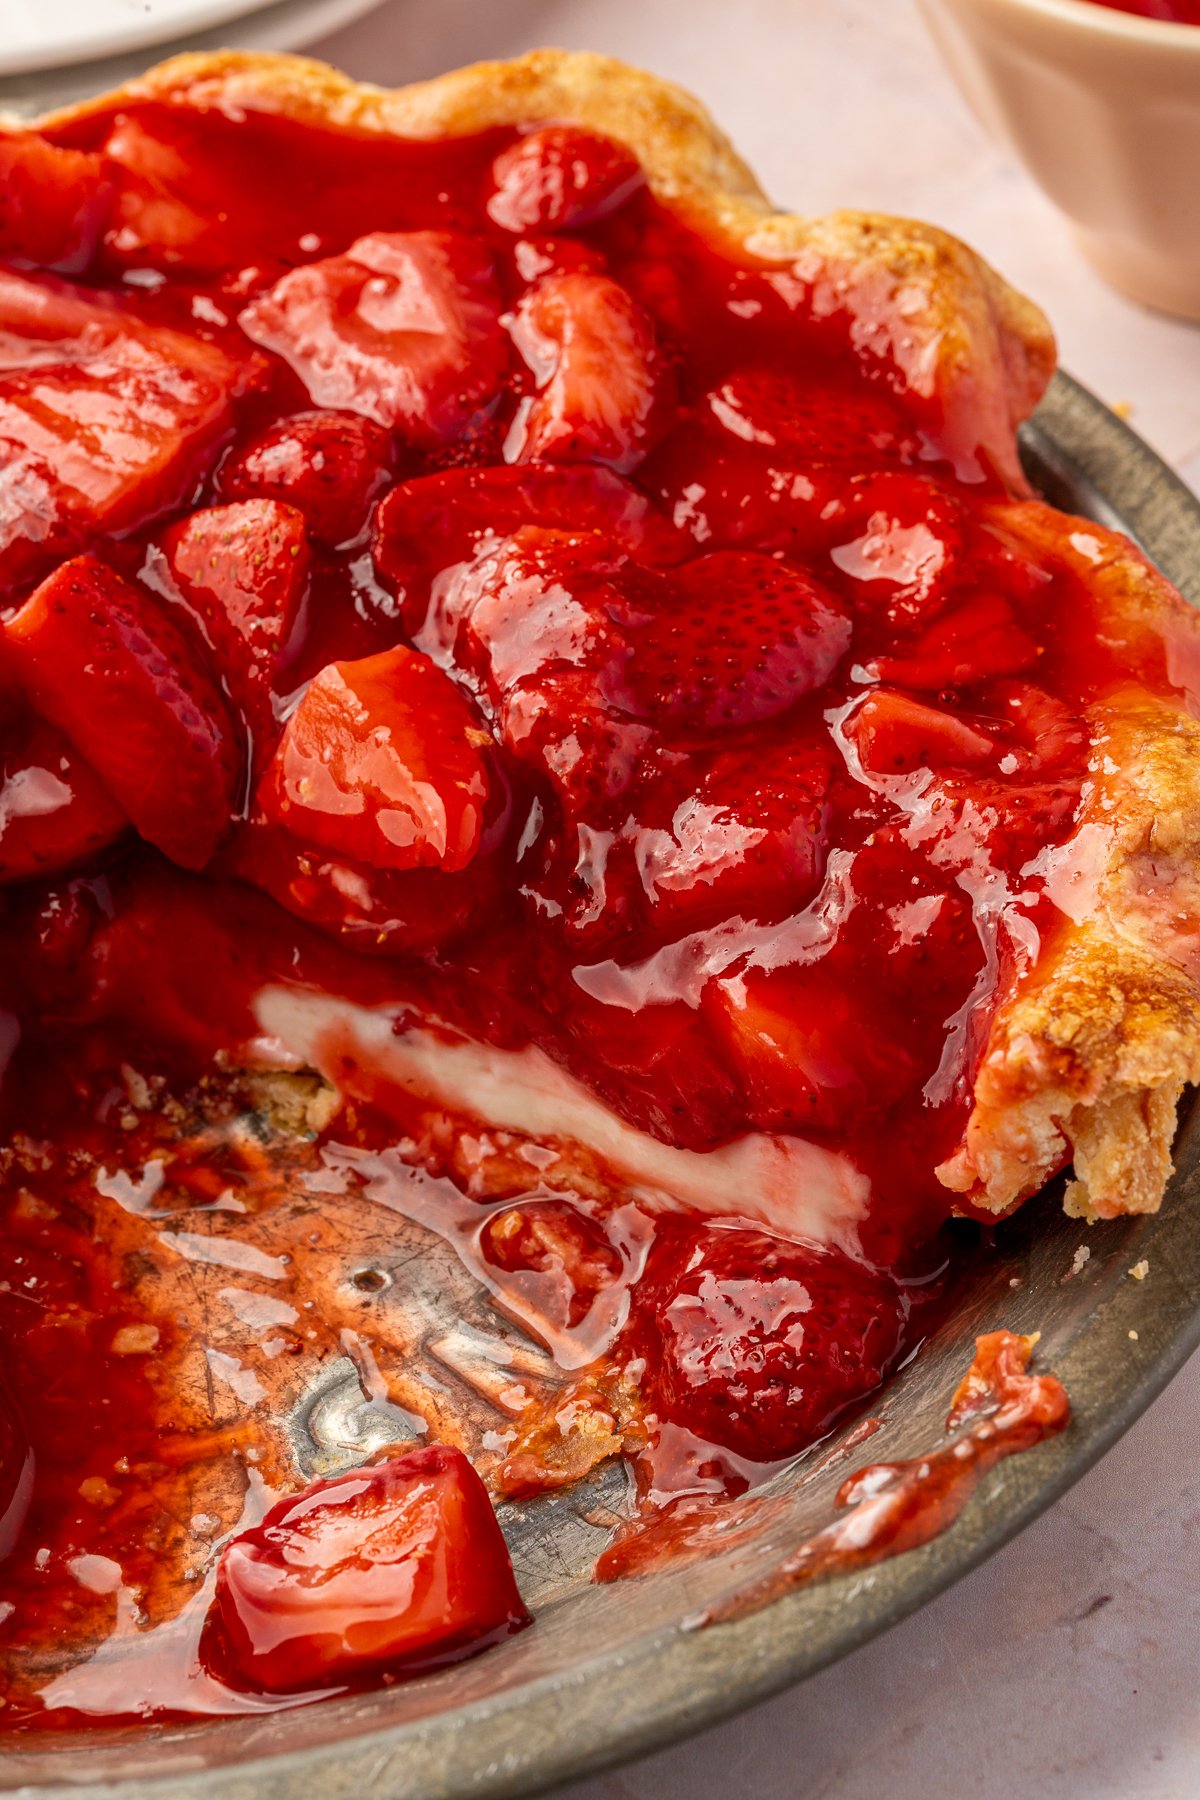
I only cook half of the strawberries to create a thick, jam-like base, while the remaining strawberries are added fresh after cooking. This method keeps some strawberries juicy and firm, giving the pie a delicious contrast between the cooked, syrupy filling and the fresh, vibrant fruit on top.
Step-by-Step instructions
For the ingredient list with measurements, full instructions, printable recipe, and additional notes, please scroll down to the recipe card.


Make Ahead Instructions
- Pie Crust: You can make the gluten-free pie crust ahead of time. Prepare the dough, shape it into a disk, and wrap it tightly in plastic wrap. Store it in the refrigerator for up to 3 days or freeze it for up to 3 months. If frozen, thaw it overnight in the refrigerator before rolling out and blind baking. You can also blind bake the gluten-free pie crust 1 day in advance. Wrap it tightly in plastic wrap and store at room temperature.
- Cream Cheese Layer: The cream cheese filling can be made up to 2 days in advance. Store it in an airtight container in the refrigerator until ready to use. Give it a stir before spreading it on the cooled crust to make it easier to spread.
- Strawberry Layer: You can prepare the strawberry filling up to 1 day ahead. Let it cool completely, then store it in an airtight container in the refrigerator. Bring it to room temperature before assembling the pie to spread easily.
- Fully Assembled Pie: For best results, you can assemble the entire pie a day before serving, up to 2 days. If I’m serving the gluten-free strawberry pie guests, I prefer to make it the day before the party or event. After a day, the strawberry filling starts to break down a bit which makes it not as pretty.
Recipe FAQs
Yes, you can use frozen strawberries, but make sure to thaw and drain them first to remove excess liquid. The filling may be slightly softer than if using fresh strawberries.
Absolutely! You can prepare the pie crust dough in advance and either refrigerate it for up to 2 days or freeze it for up to 3 months. Just thaw in the fridge before rolling it out.
Yes, a store-bought gluten-free pie crust will work fine if you’re short on time. Just follow the blind baking instructions as directed.
Leftover pie will stay fresh for up to 3 days when stored in an airtight container in the refrigerator. The strawberry topping will start to get liquidy after a day, so for the best presentation I prefer to serve this within a day or two of making.
expert tips
Storage instructions
- Storage: Store the pie in an airtight container in the refrigerator for up to 3 days. Make sure to cover the pie tightly with plastic wrap or foil.
- Freezer Option: You can freeze the pie crust on its own before baking. Simply wrap the unbaked, shaped dough tightly in plastic wrap and place it in a freezer bag for up to 3 months. For the assembled pie, freezing is not recommended as the fresh strawberries and cream cheese layer may not retain their texture when thawed.
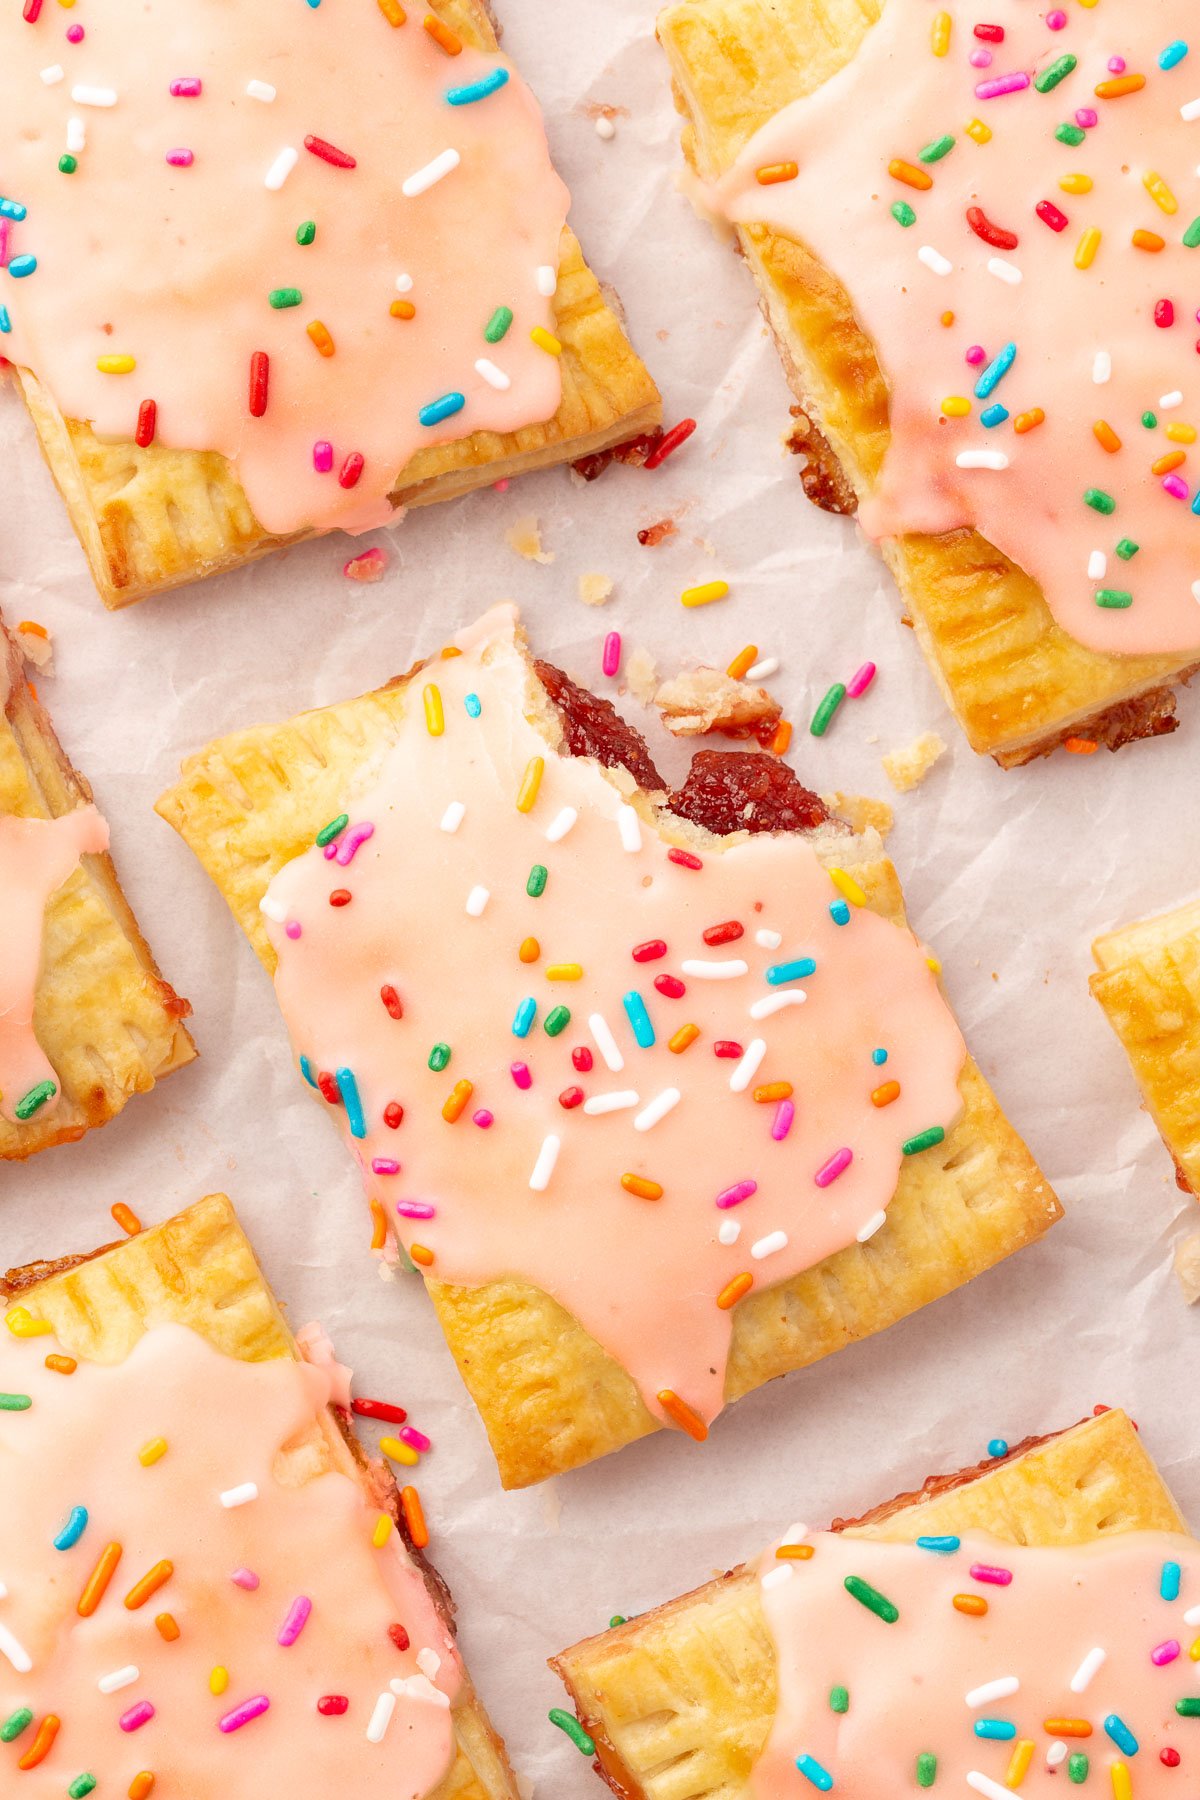
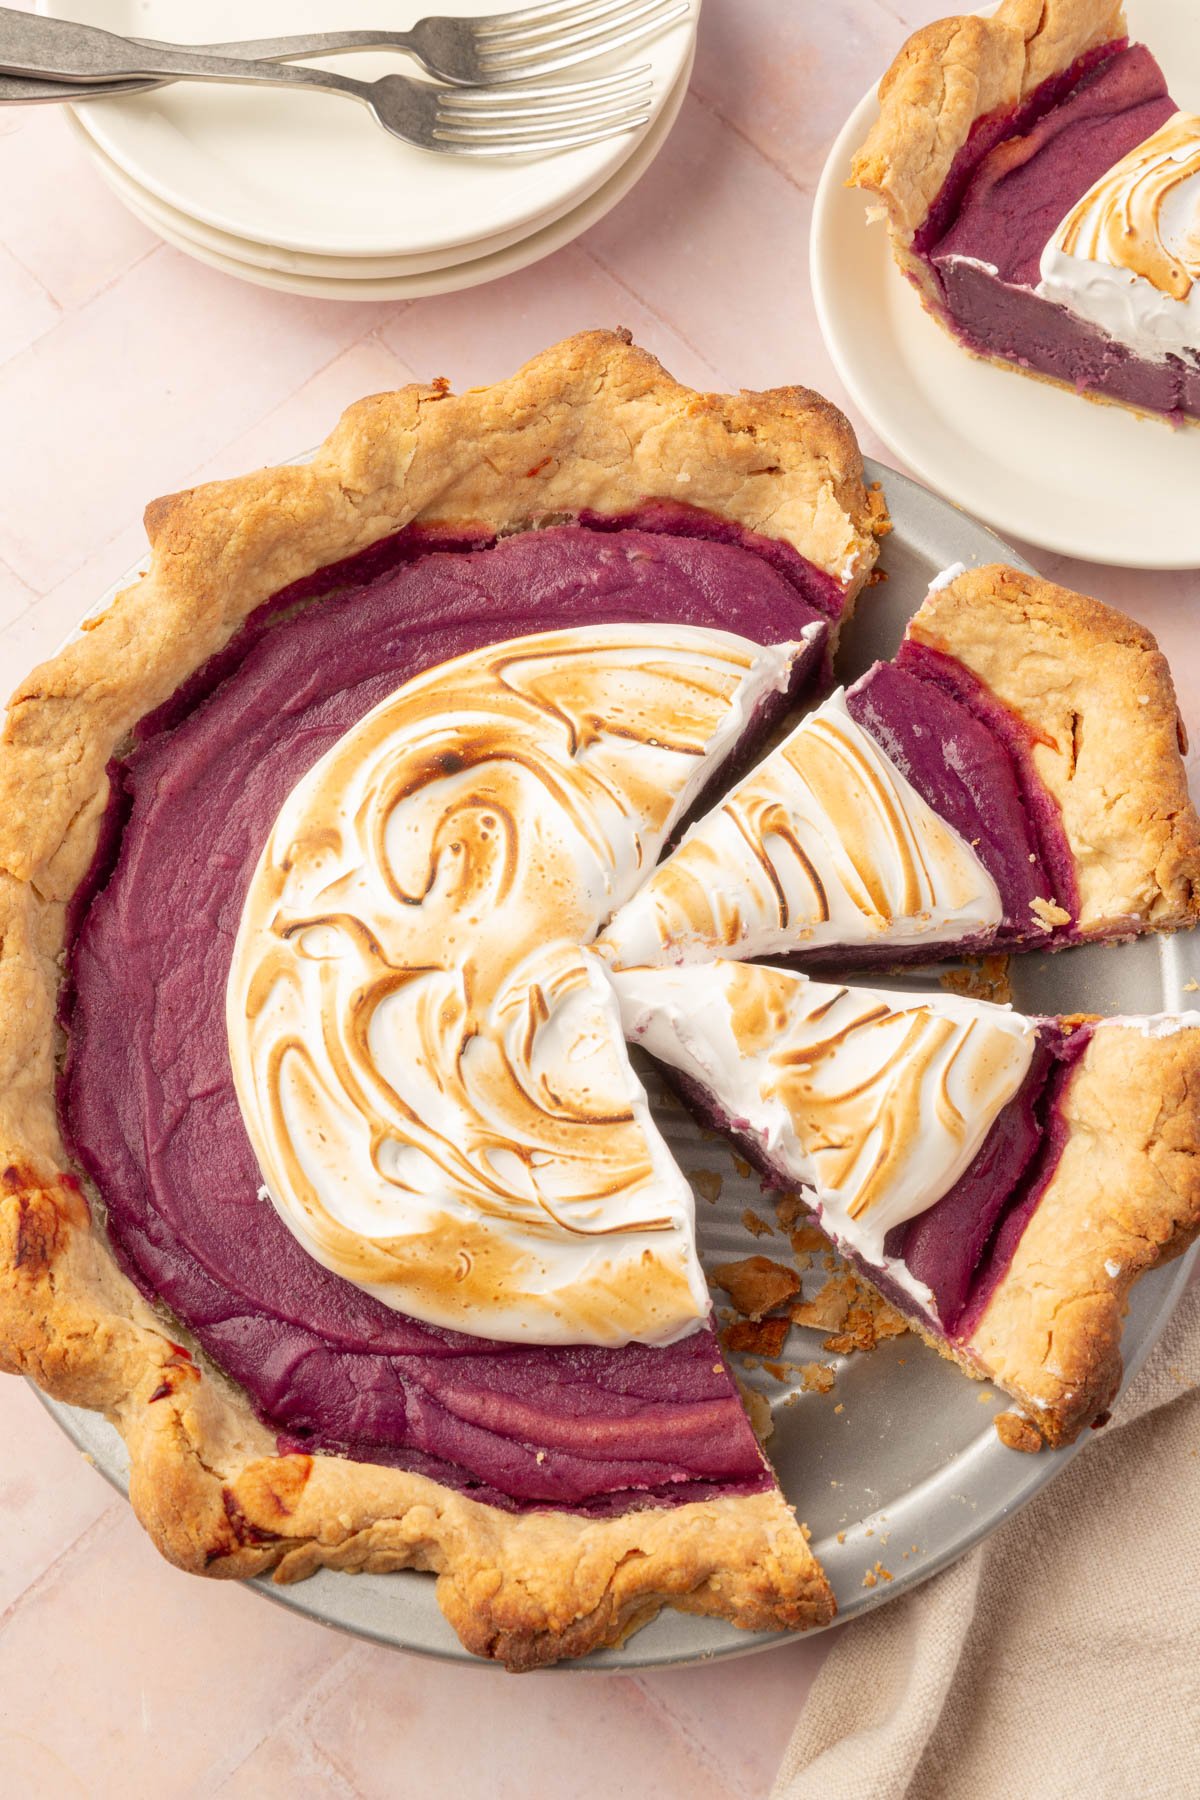
More gluten-free pies to try

Did you make this recipe?
I’d love to know! Please rate it and leave a comment below. You can also share your pictures and tag @adashofmegnut on Instagram.
Gluten-Free Strawberry Cream Cheese Pie
Ingredients
- Gluten-Free Pie Crust - this recipe makes two 9-inch pie crusts, you’ll only need one so you can either make a half batch or freeze the 2nd disk for later
- 2 lbs strawberries - hulled and quartered
- ¾ cup sugar - use up to 1 cup if your strawberries are not as sweet
- 2 tablespoons lemon juice
- 1/2 cup water
- 3 tablespoons cornstarch
- 1 teaspoon vanilla extract
- 8 oz cream cheese - softened
- ½ cup powdered sugar
- 2 tablespoons heavy cream or whole milk
- 1 teaspoon vanilla extract
**Use the toggle button above to turn the instruction photos on and off!
Instructions
For the Pie Crust:
- Make the crust: Prepare a half batch of my gluten-free pie crust or you can make the full batch and freeze half for later, which is what I always do.
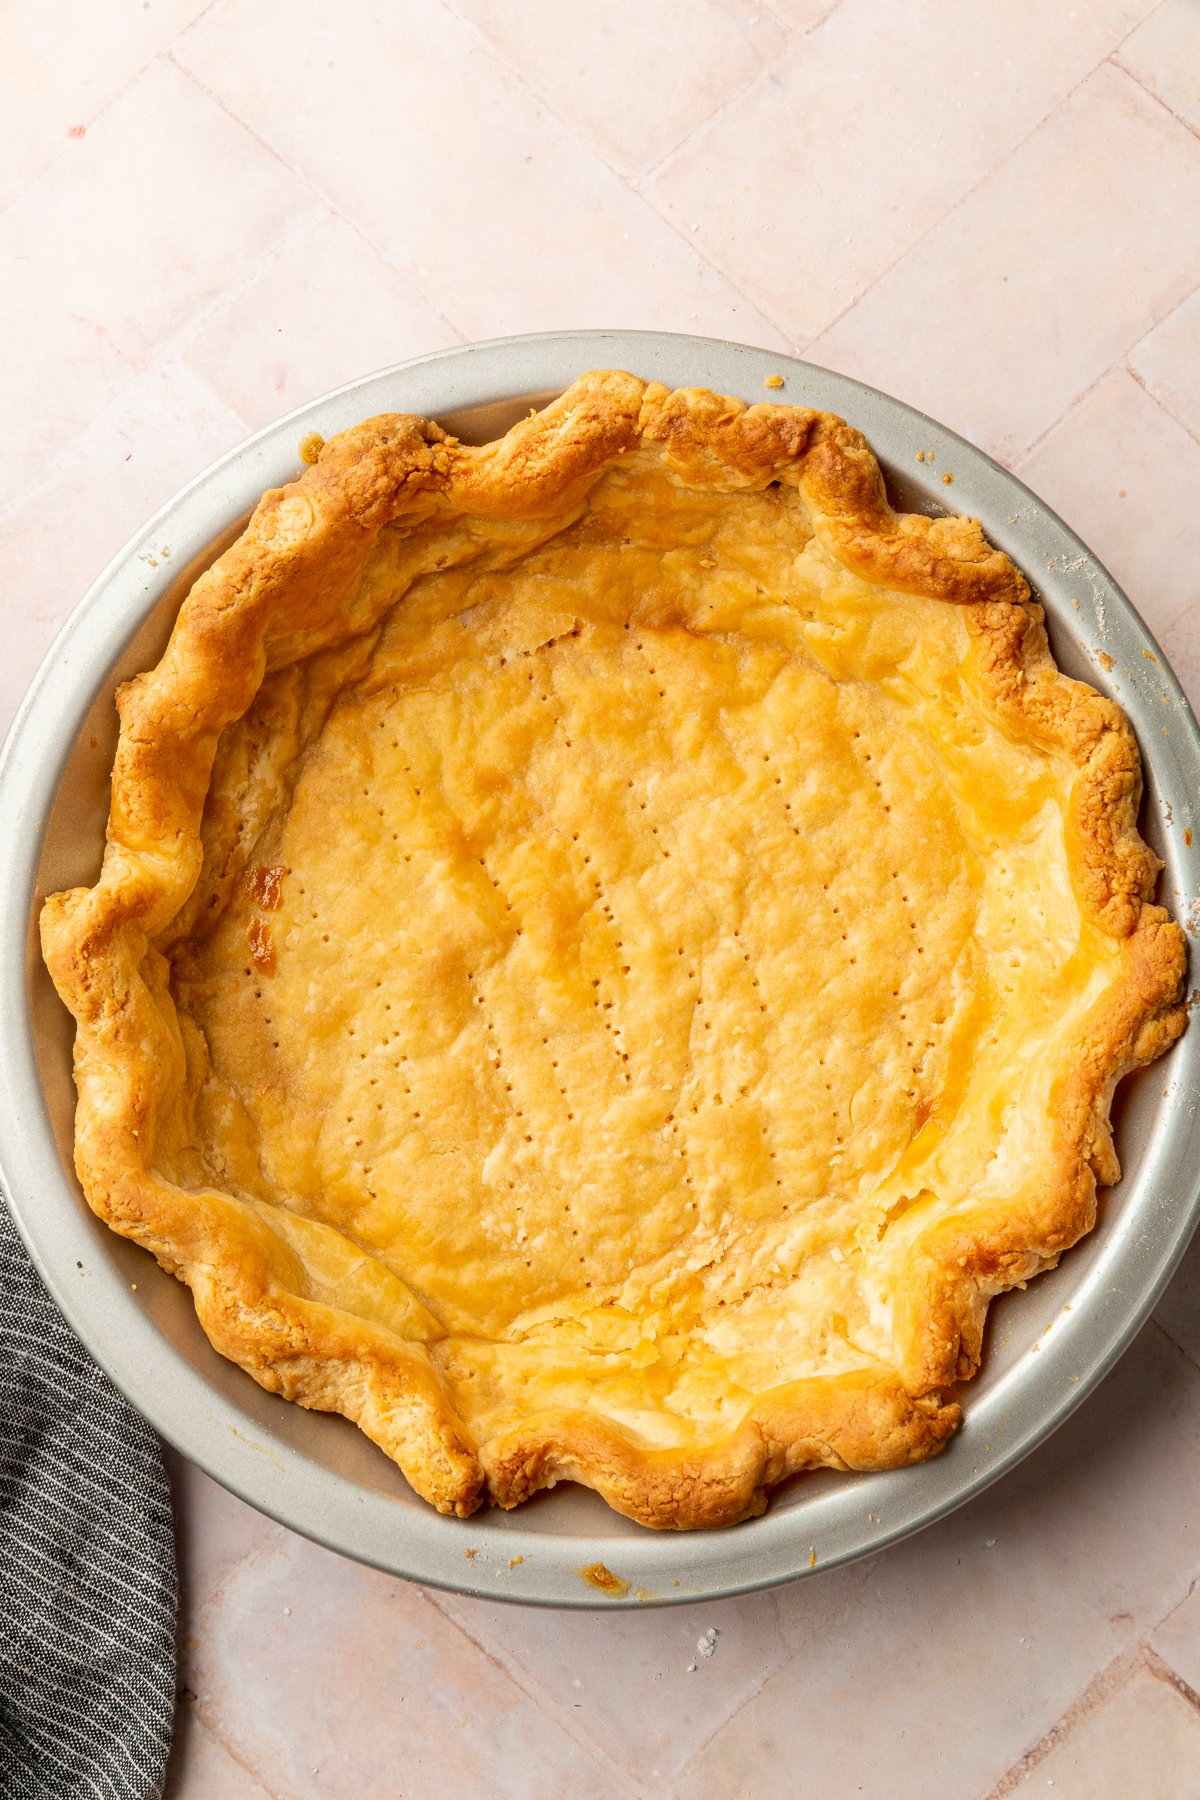
- Preheat your oven to 375°F (190°C).
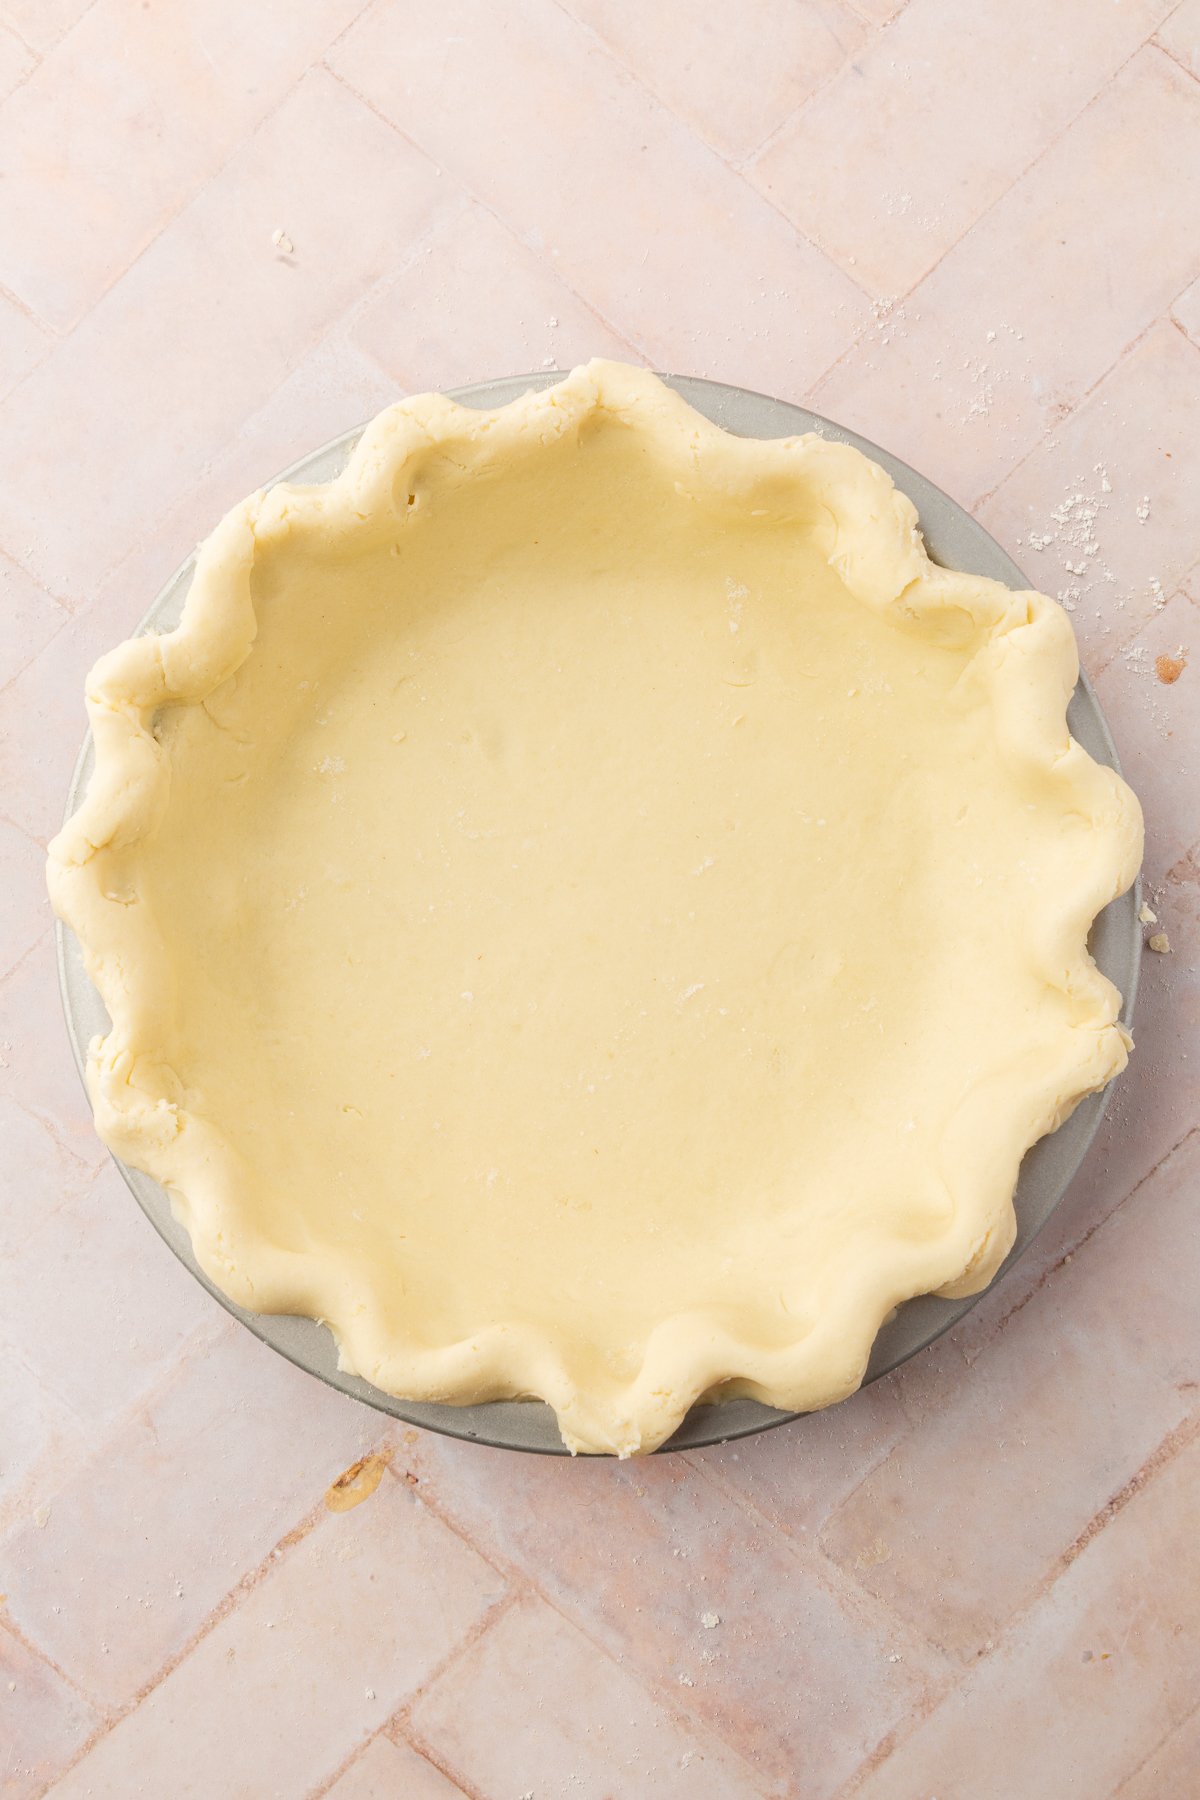
- Roll out the dough: Use a rolling pin to press down on the pie crust disk a few times to soften it. Dust your rolling pin and a piece of parchment paper with gluten-free flour. Roll out the bottom crust into a large circle onto the piece of parchment paper, until it is about ¼ inch thick and 12 inches in diameter for a 9-inch pie dish.
- Place the pie dish upside down on the center of the rolled-out dough. Using the parchment paper for support, carefully flip the dough and pie dish over so the dough lines the inside of the dish. You want to have about 1.5 inches of overhang on all sides. Take the overhang and roll it under itself to create a thick edge.
- Using your fingers, crimp or flute the edges of the dough.
- Place the crust in the freezer to chill for at least 10 minutes.
- Add pie weights: Dock the crust with a fork and line it with parchment paper. Fill with pie weights or dry beans. You’ll want to make sure that the pie weights fill the whole height of the pie crust to make sure that the sides don’t shrink and slide down as they bake.
- Blind bake the crust: Bake at 375°F (190°C) for 15 minutes, remove the pie weights and parchment paper and bake for another 10-15 minutes until the bottom of the crust is golden brown and cooked through.
For the Strawberry Layer:
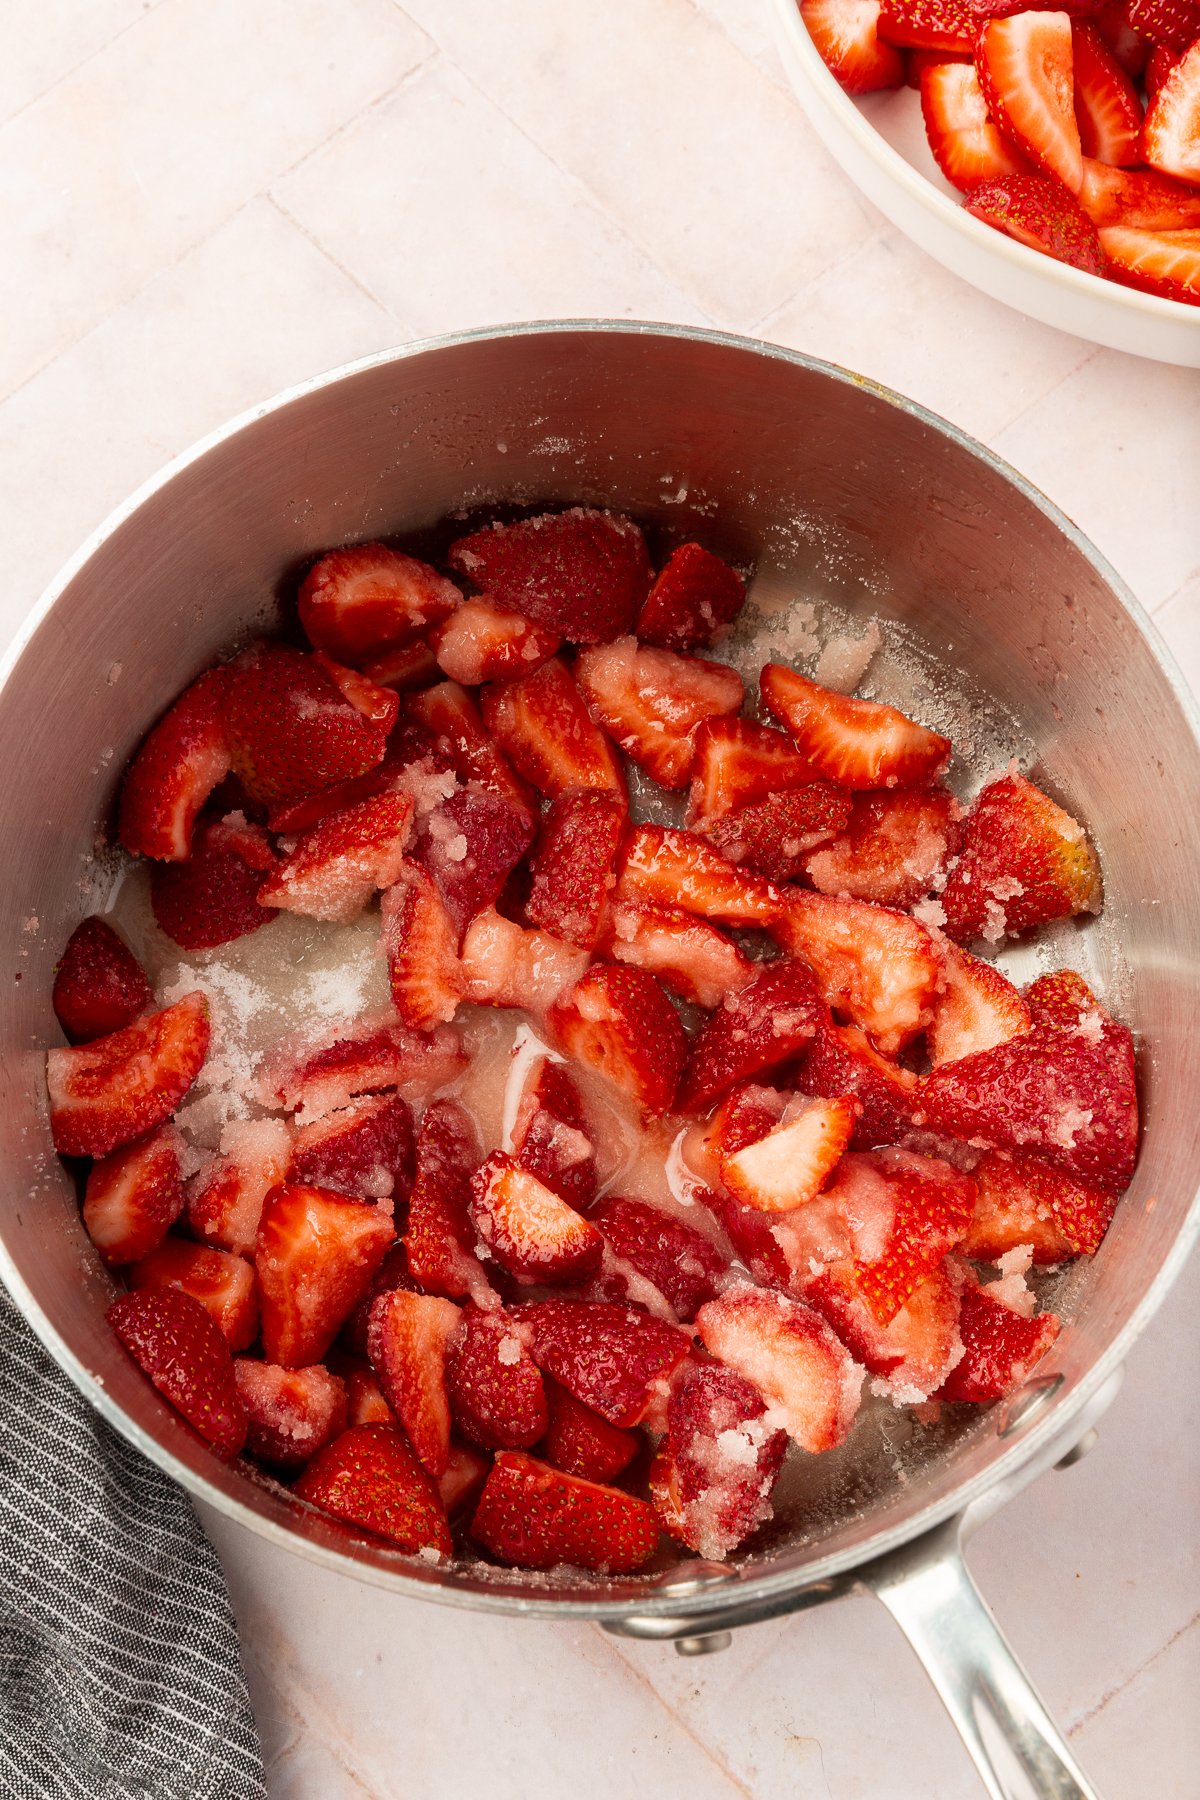
- In a saucepan, add 2 cups of quartered strawberries, sugar, and lemon juice. Cook over medium heat, stirring occasionally until the strawberries soften and release their juices (about 5 minutes).
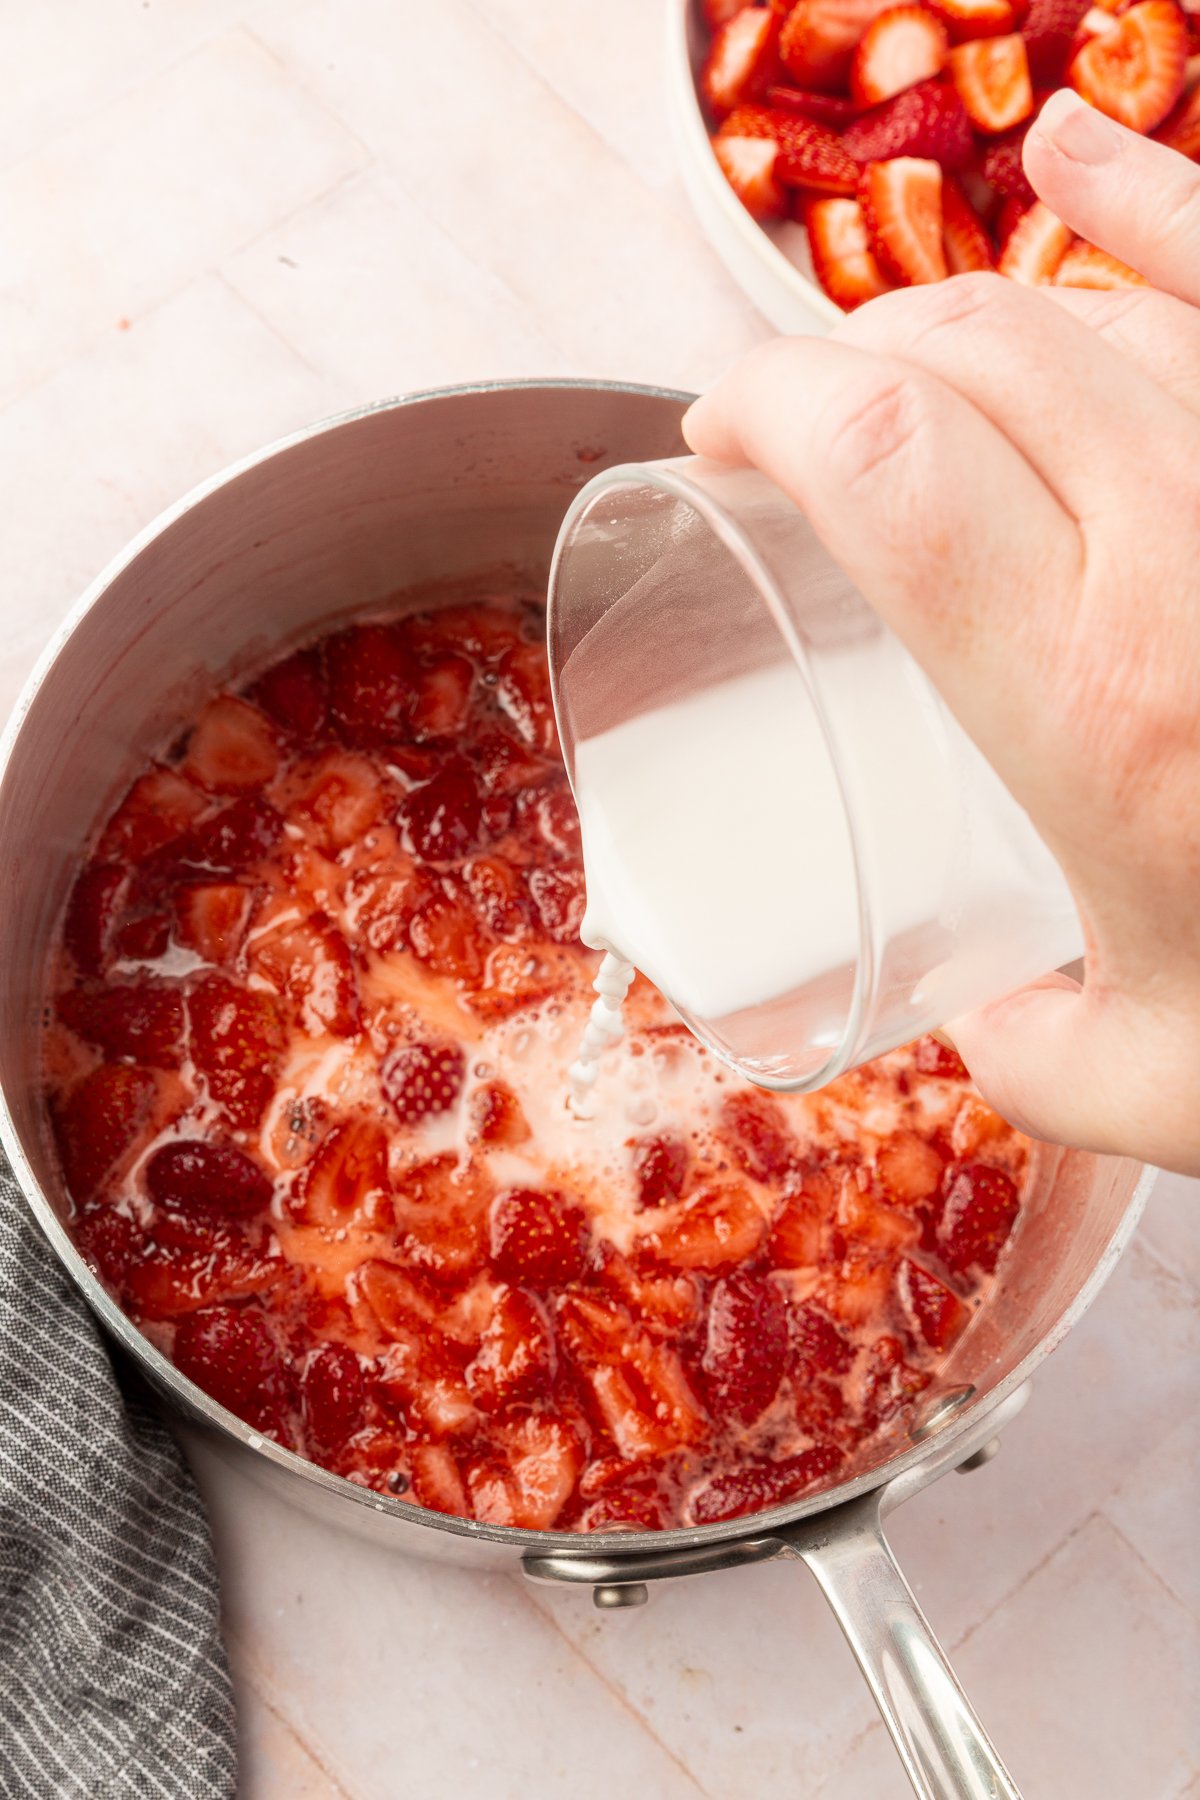
- In a small bowl, whisk together the cornstarch and water until smooth. Stir the cornstarch mixture into the strawberries and cook for another 5 minutes, stirring frequently, until the mixture thickens.
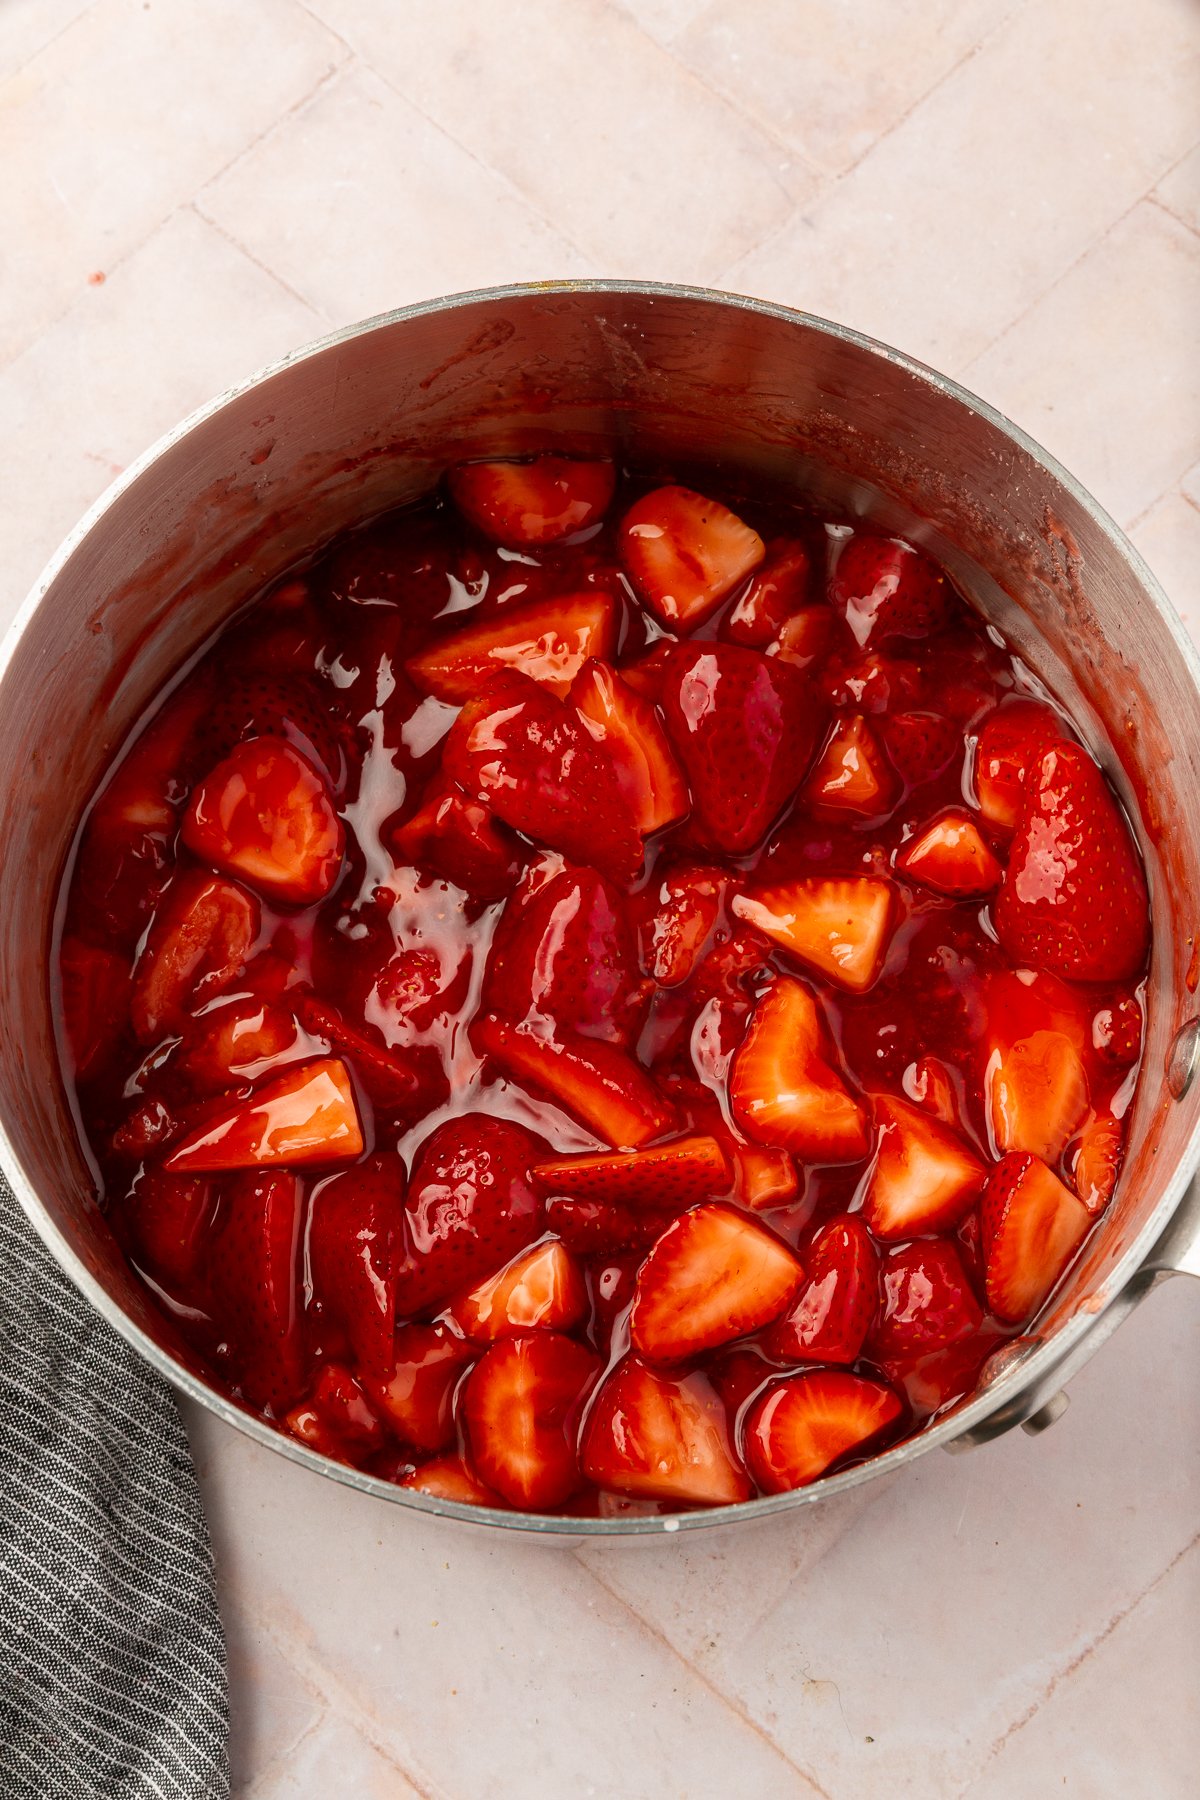
- Remove the pan from the heat and stir in the remaining strawberries and vanilla extract. Let the mixture cool to room temperature.
For the Cream Cheese Layer:
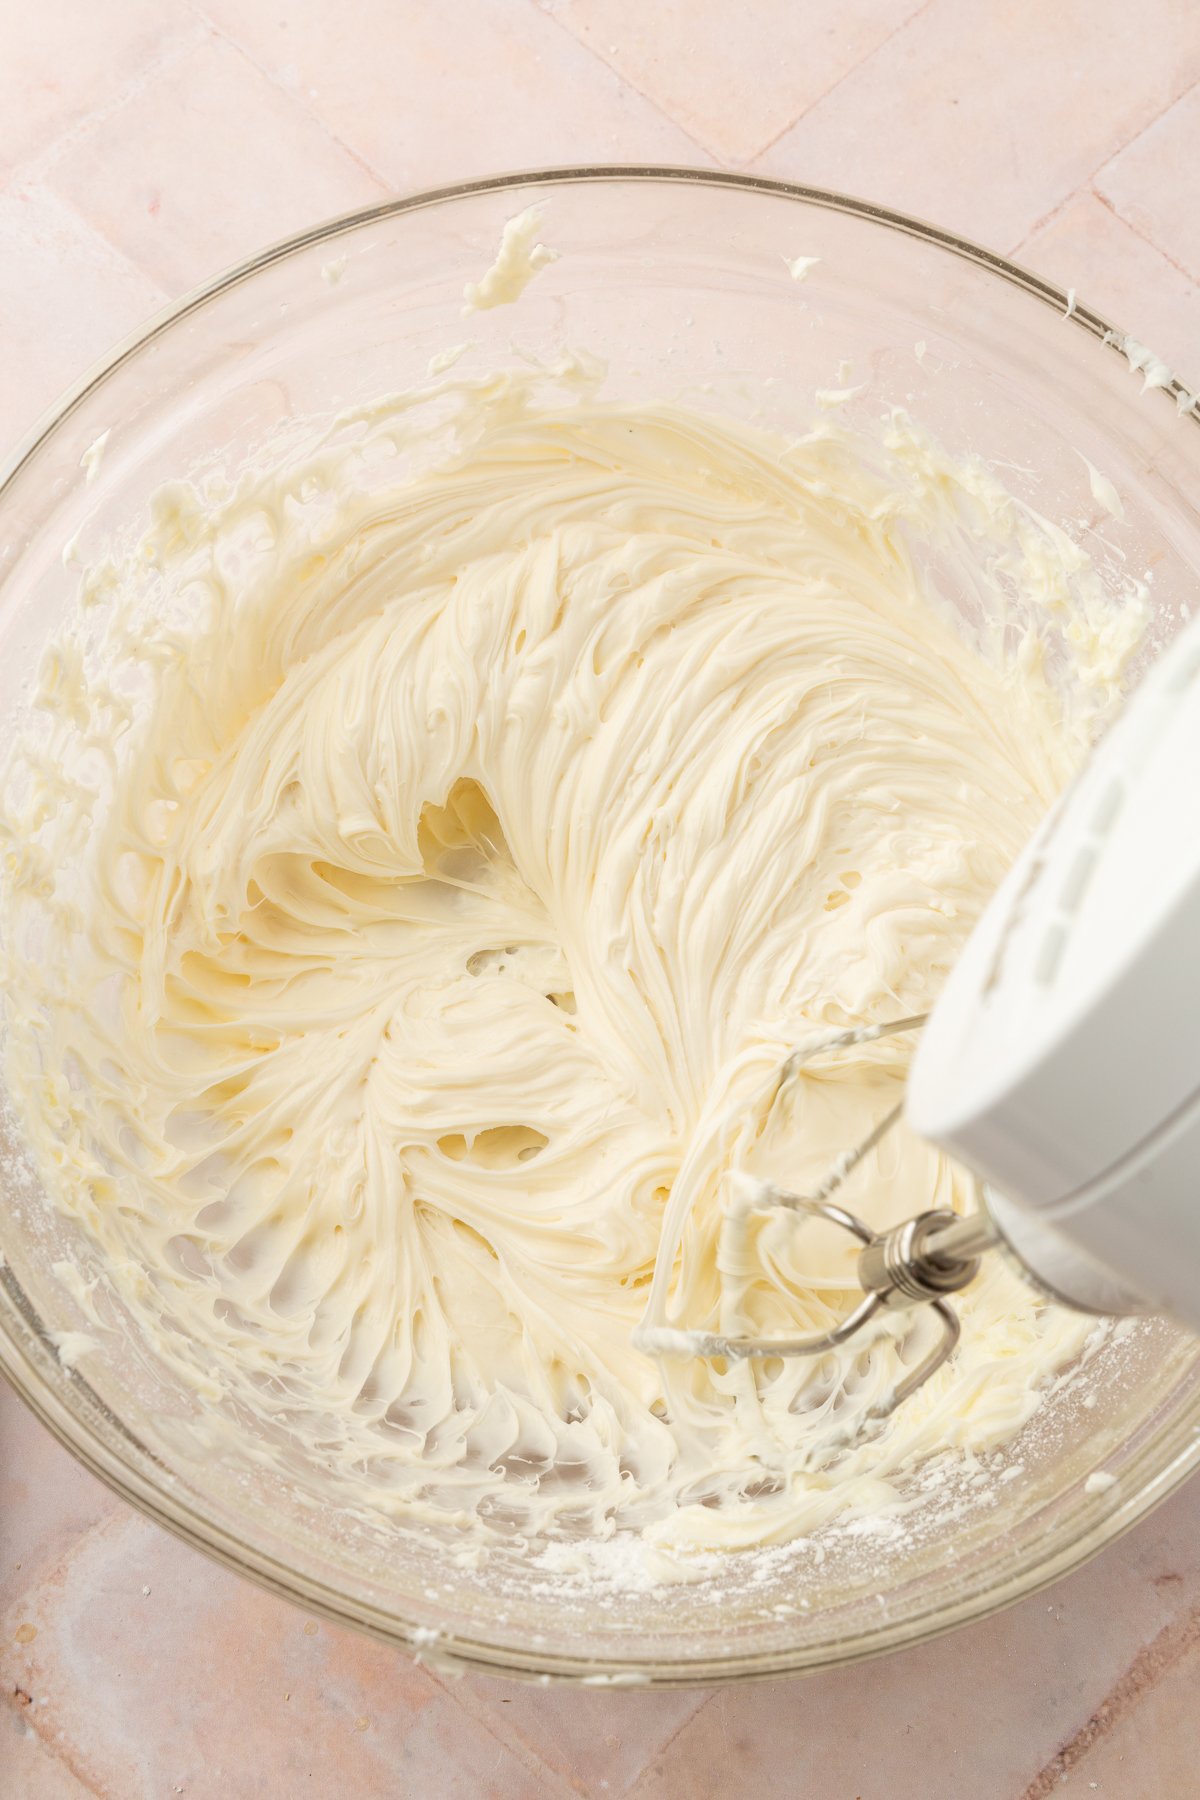
- In a medium bowl, use a hand mixer or stand mixer fitted with a whisk attachment to whip the cream cheese, powdered sugar, heavy cream (or milk), and vanilla extract for about 2 minutes until smooth and creamy.
Assemble the Pie:
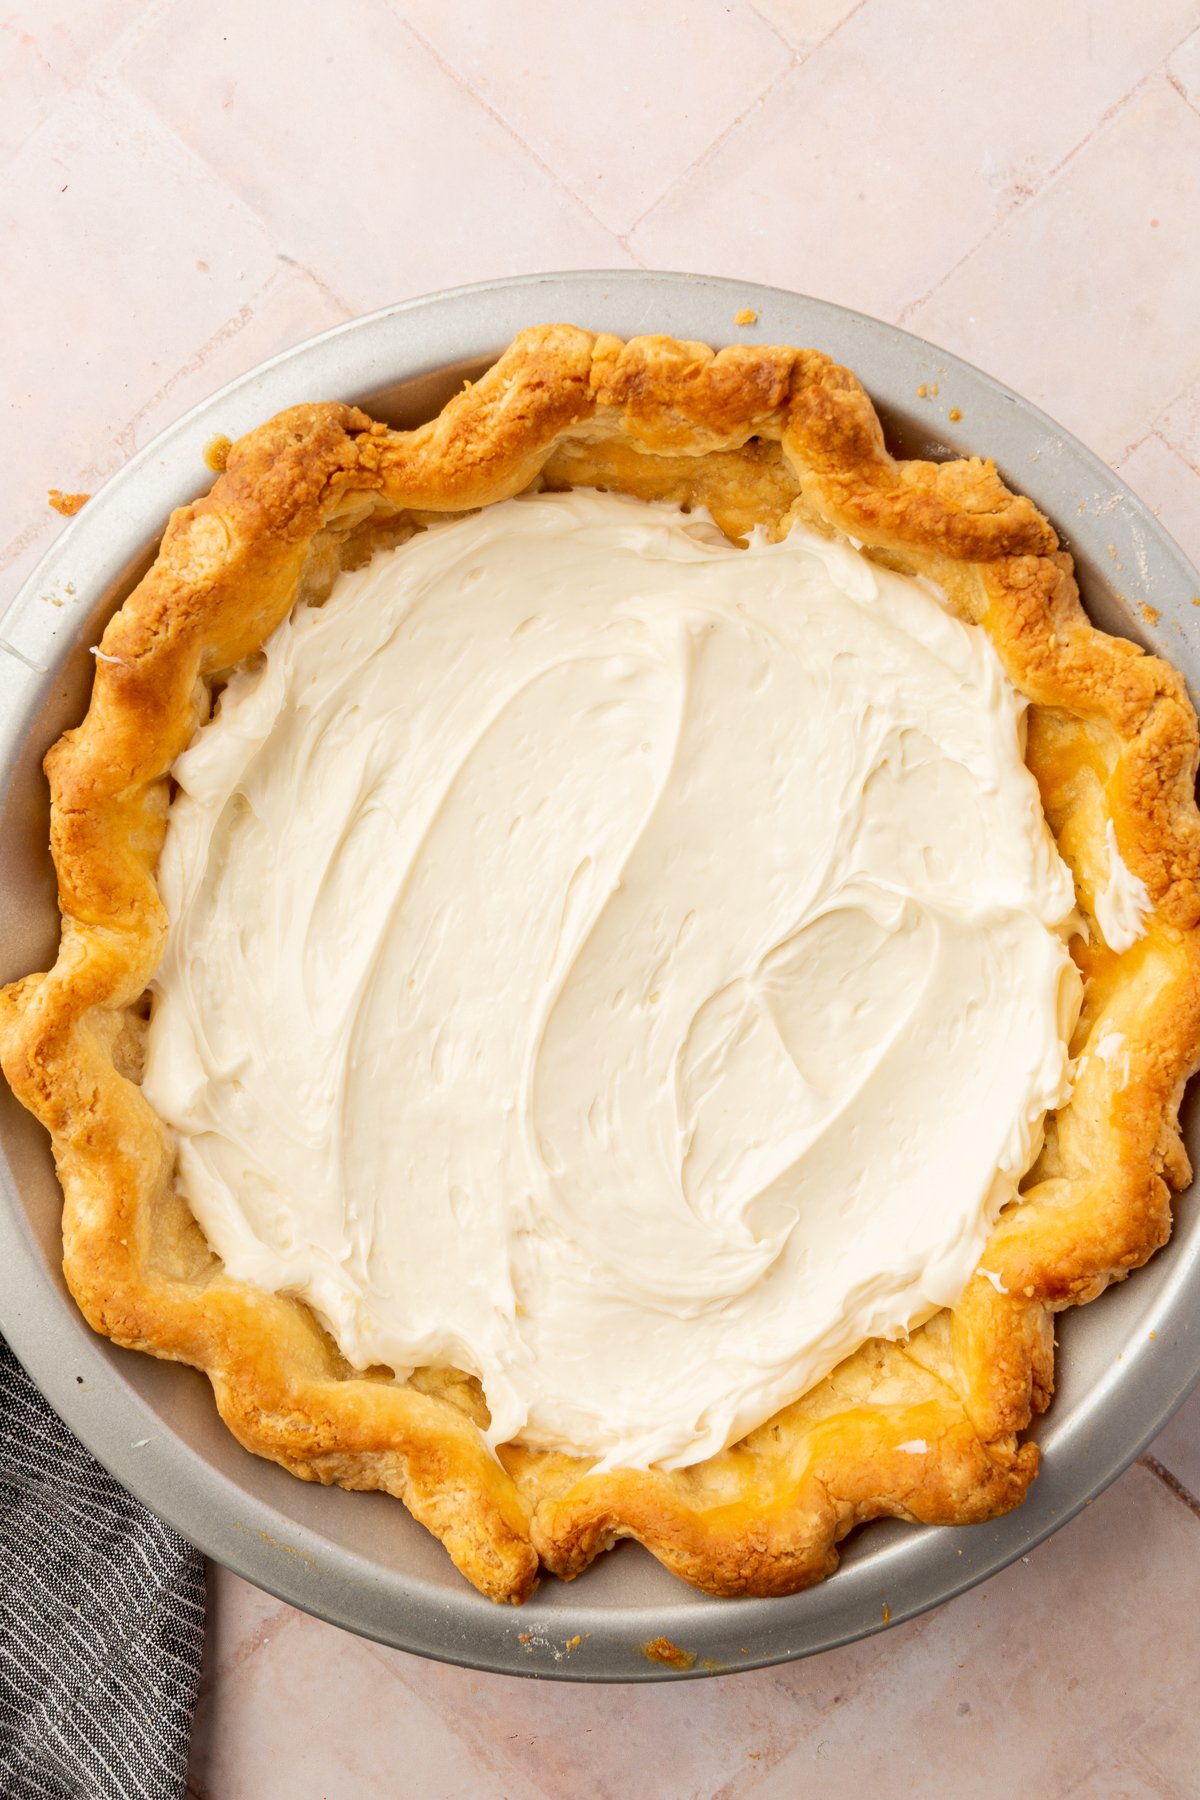
- Spread the cream cheese mixture evenly over the cooled pie crust.
- Spread the cooled strawberry mixture evenly over the cream cheese layer in the pie crust.
- Chill the pie in the refrigerator for 2-3 hours, or until fully set.
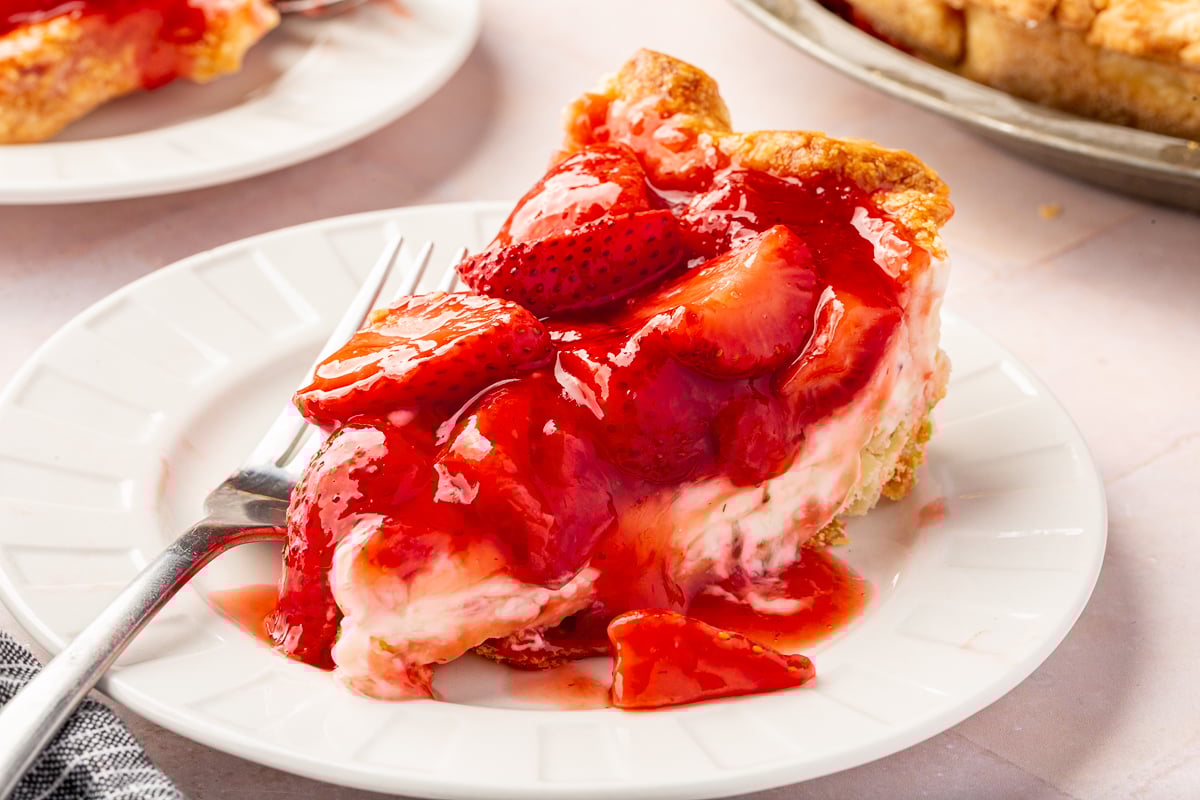
- Slice and serve!
Notes
- Prevent Shrinking: Freeze the shaped crust for at least 10 minutes before baking to hold its shape better while baking.
- Fix Cracks: If cracks form in the crust while crimping, use the warmth of your hands or a little water to seal them.
- Adjust Sweetness: If your strawberries aren’t very sweet, use up to 1 cup of sugar. For ripe strawberries, ¾ cup is perfect. You can also use frozen strawberries that have been thawed for this recipe if it is not strawberry season.
- Alternative Crusts: If you don’t want to use a traditional pie crust, you can use my gluten-free graham cracker crust or my gluten-free Oreo crust instead.