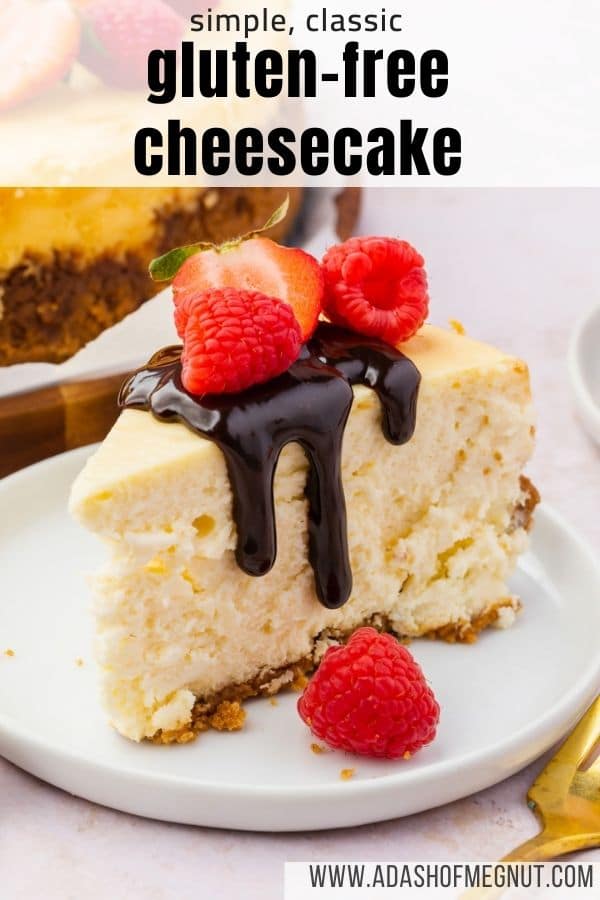
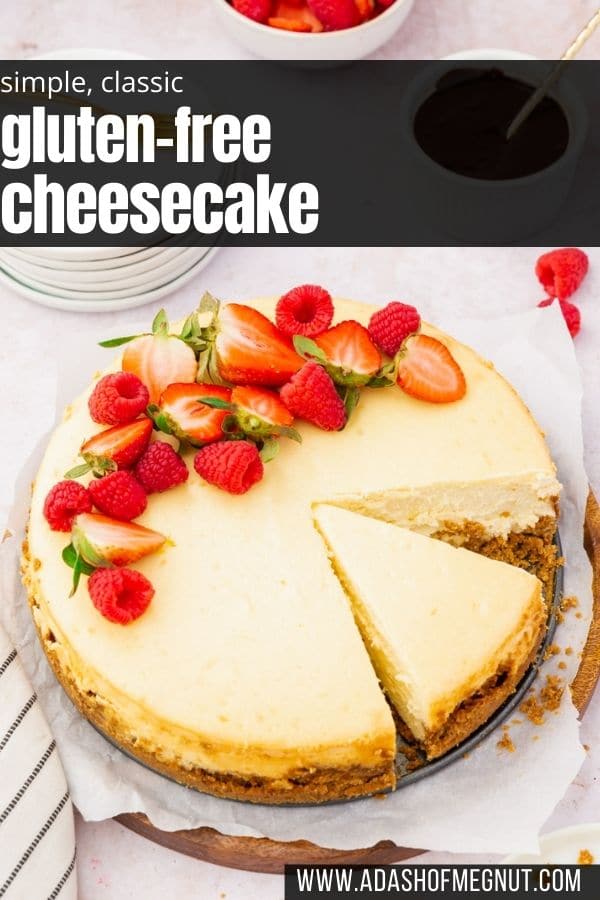
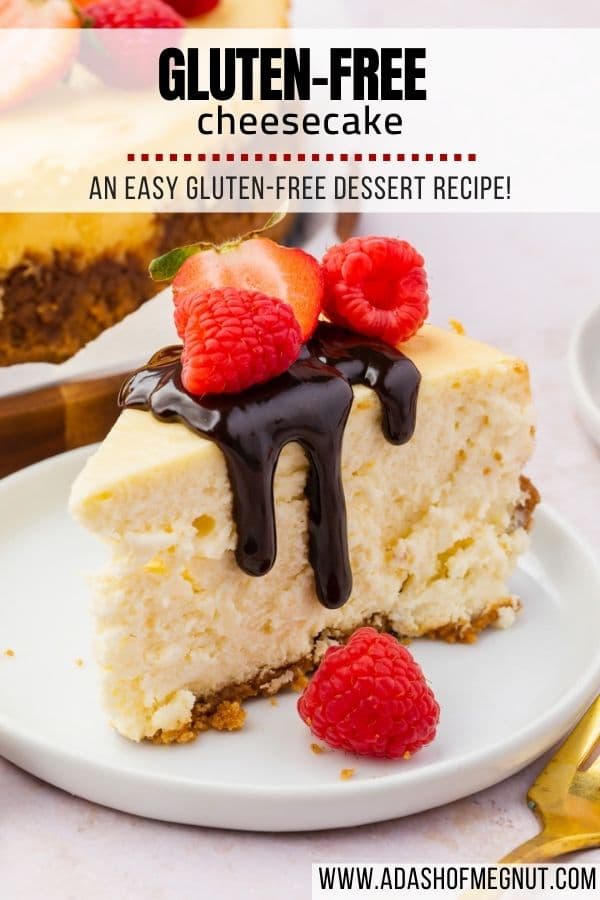
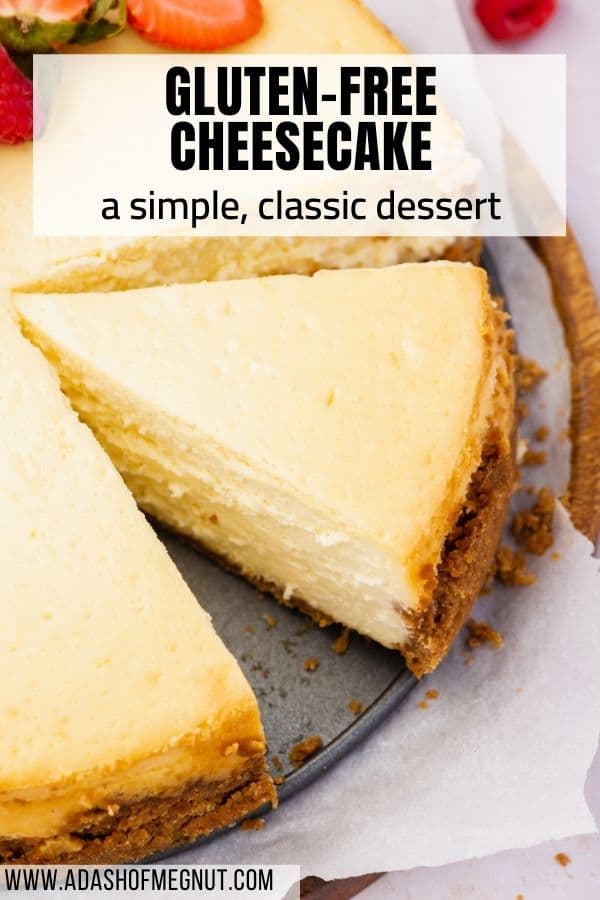

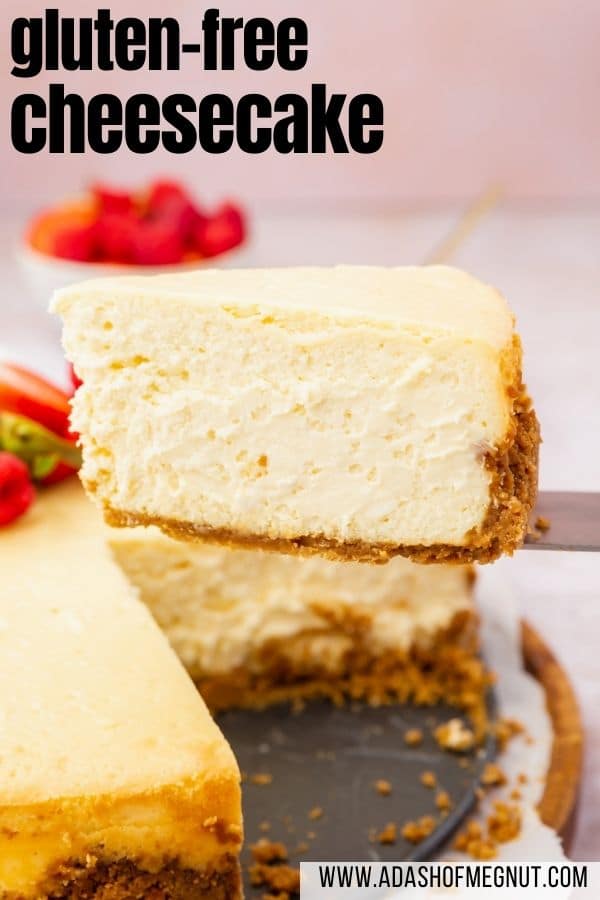
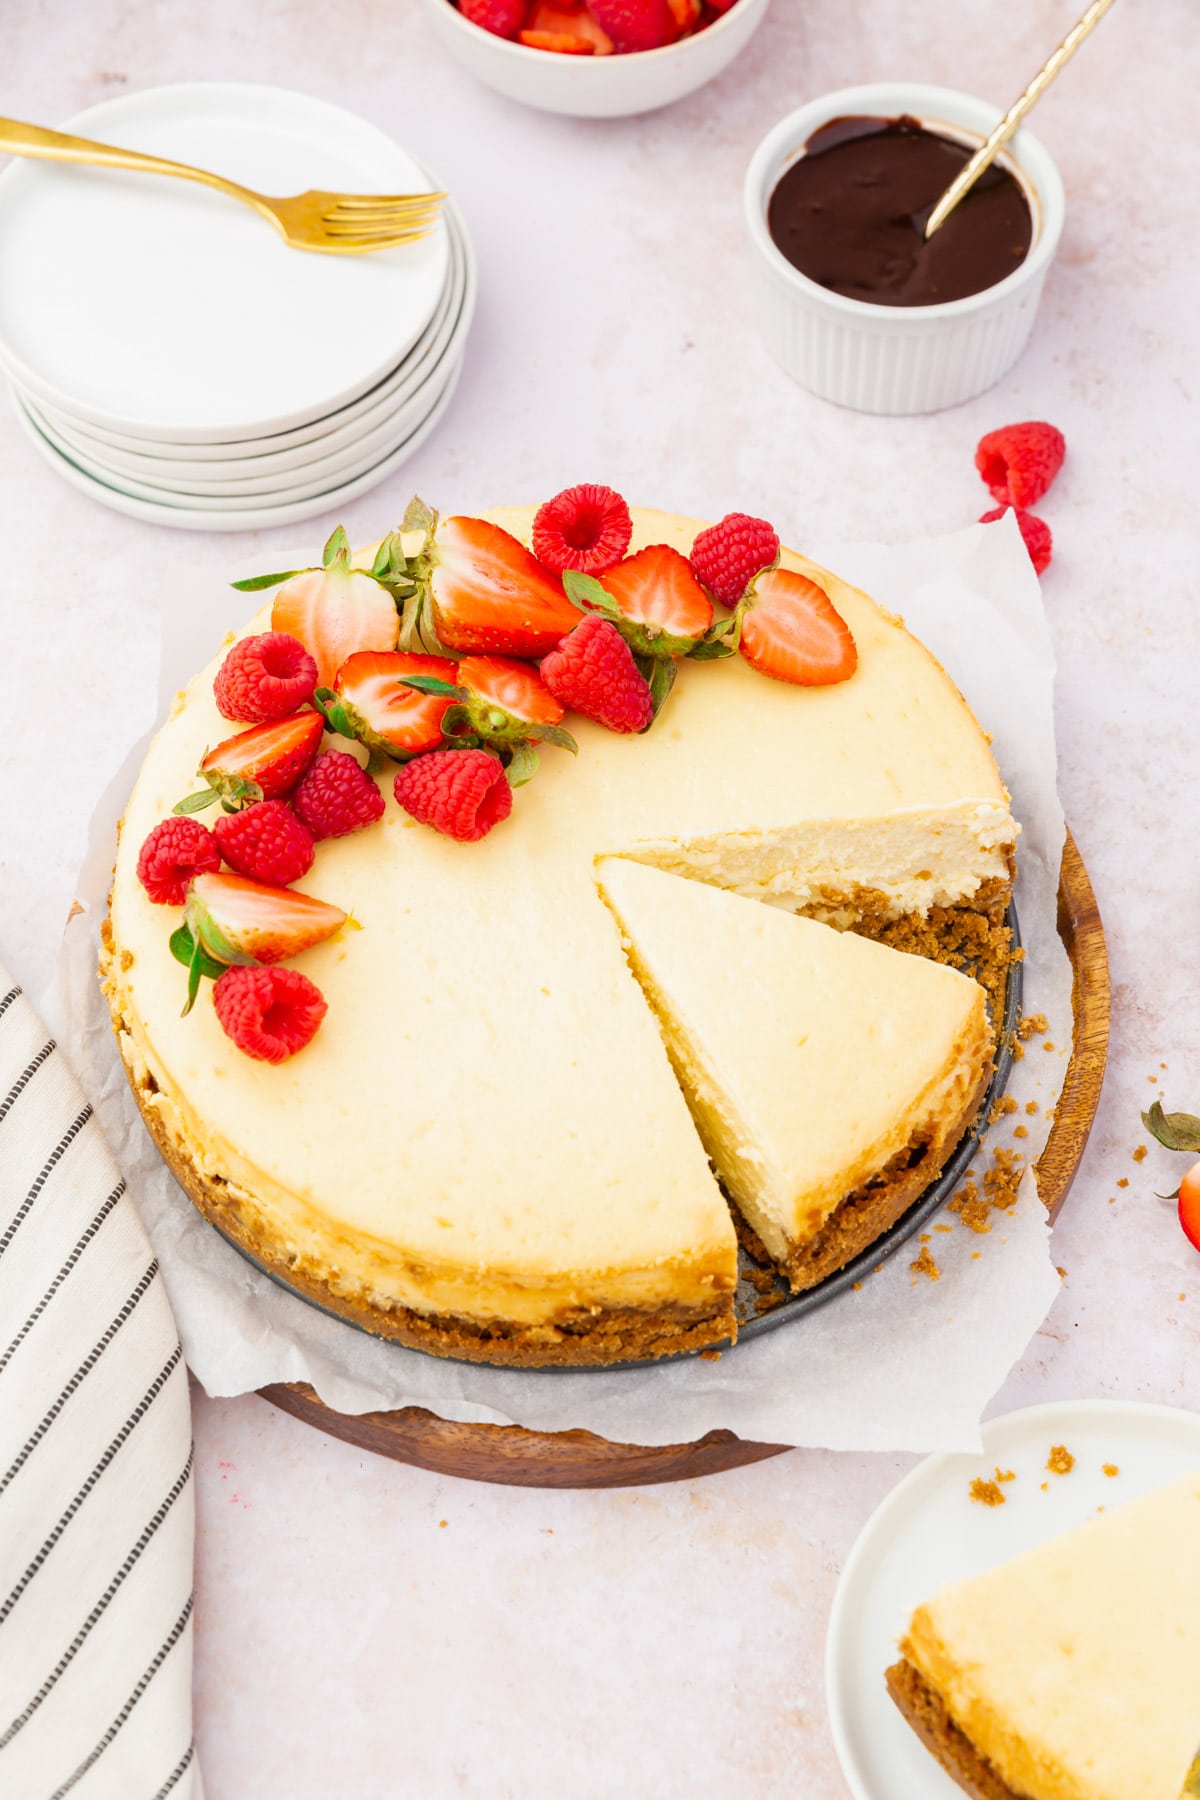
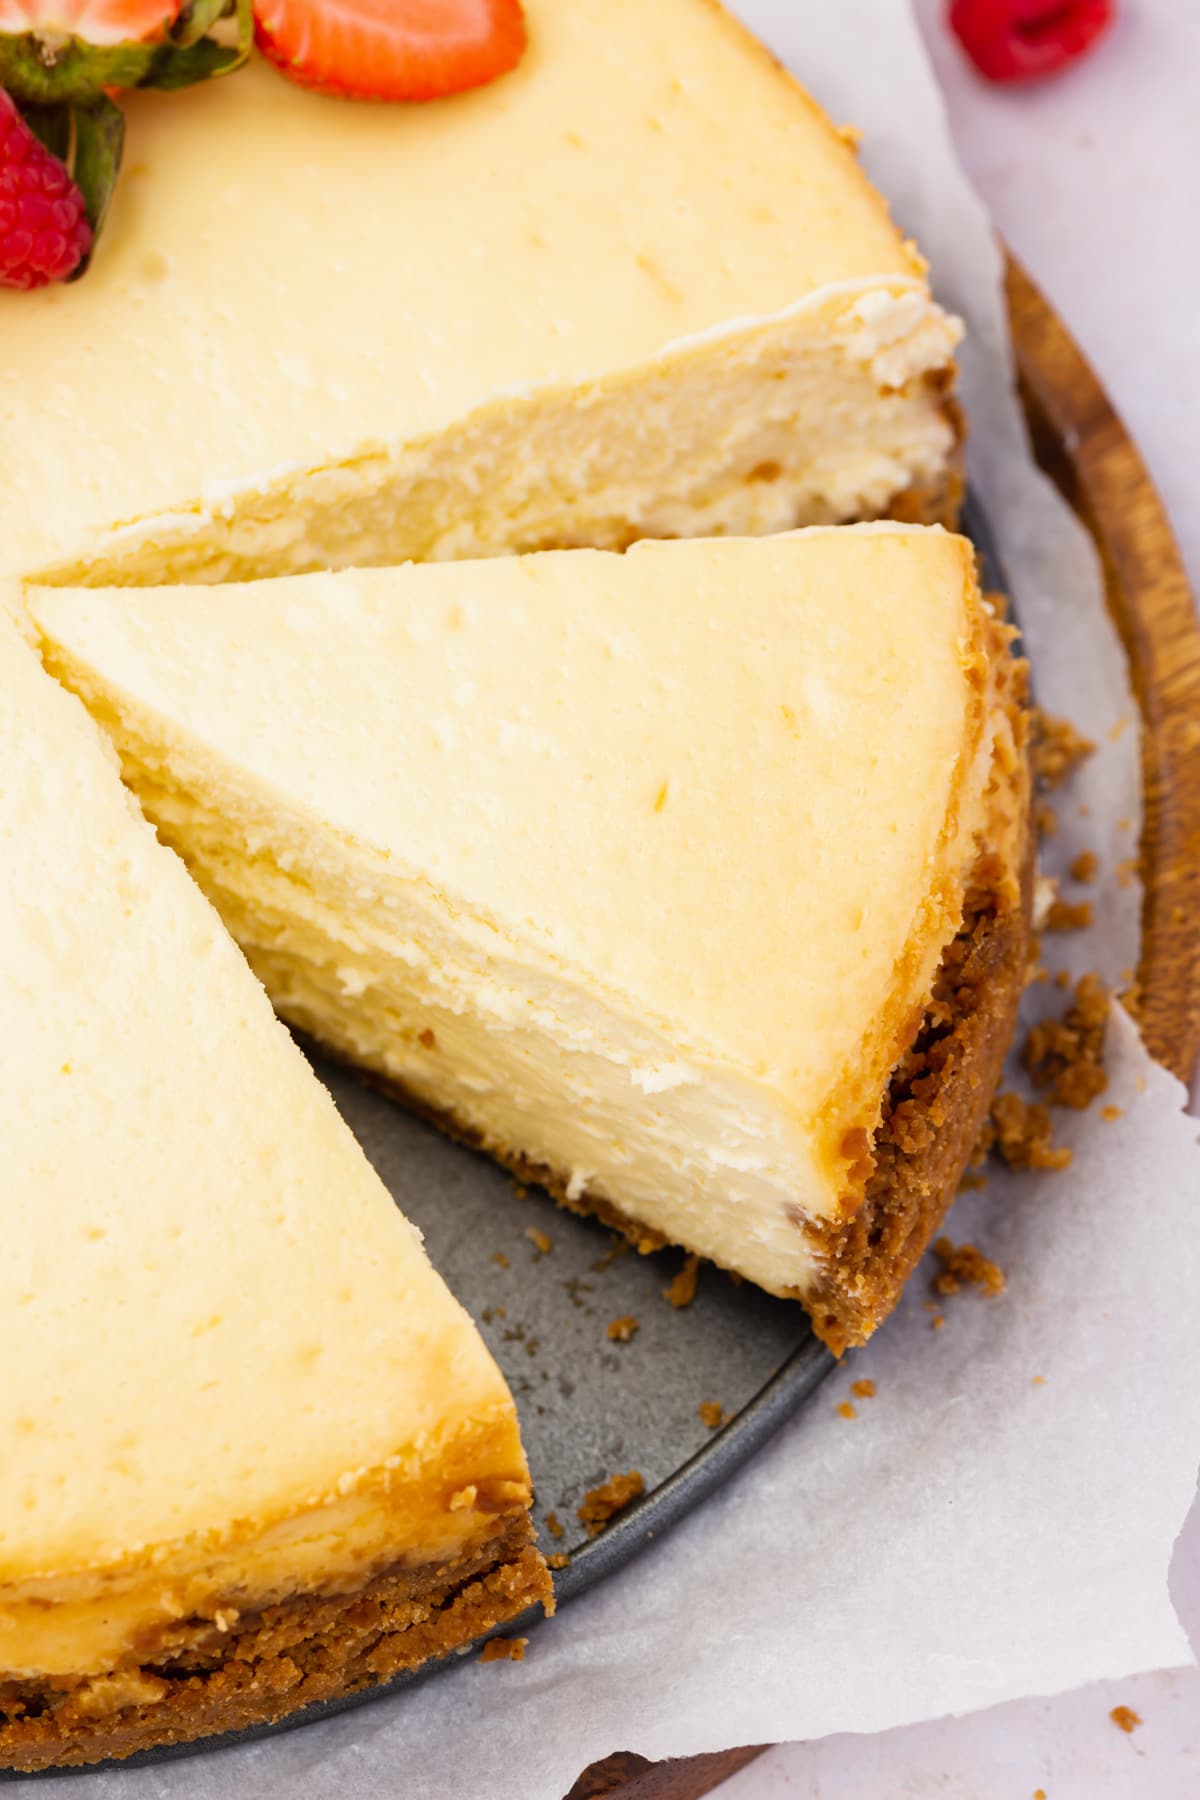
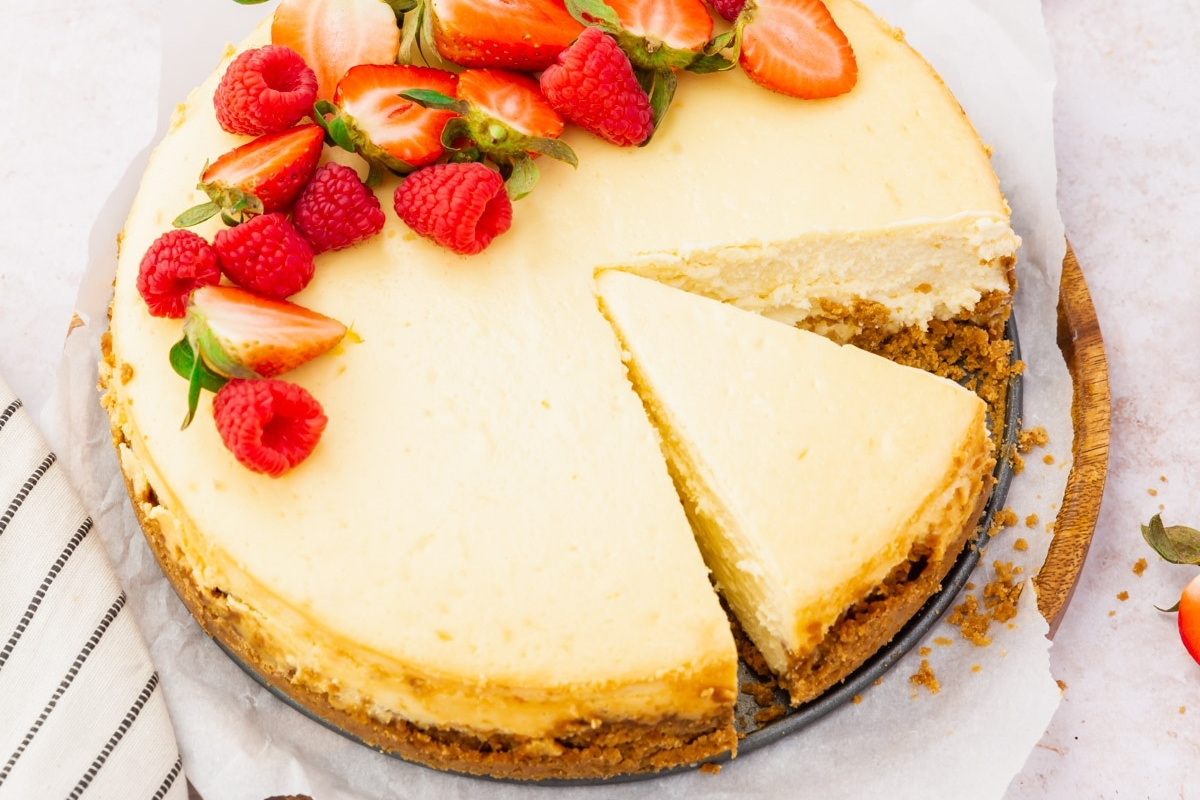
This gluten-free cheesecake has a rich, silky, creamy filling and a buttery gluten-free graham cracker crust. Cornstarch instead of flour, a three-stage cooling process instead of a water bath, and a crack-free top every time. Top with fresh berries, strawberry coulis, or a chocolate drizzle.
This recipe takes a little planning, but if you follow the directions you’ll have a classic gluten-free cheesecake that nobody will know is gluten-free.
Ingredients
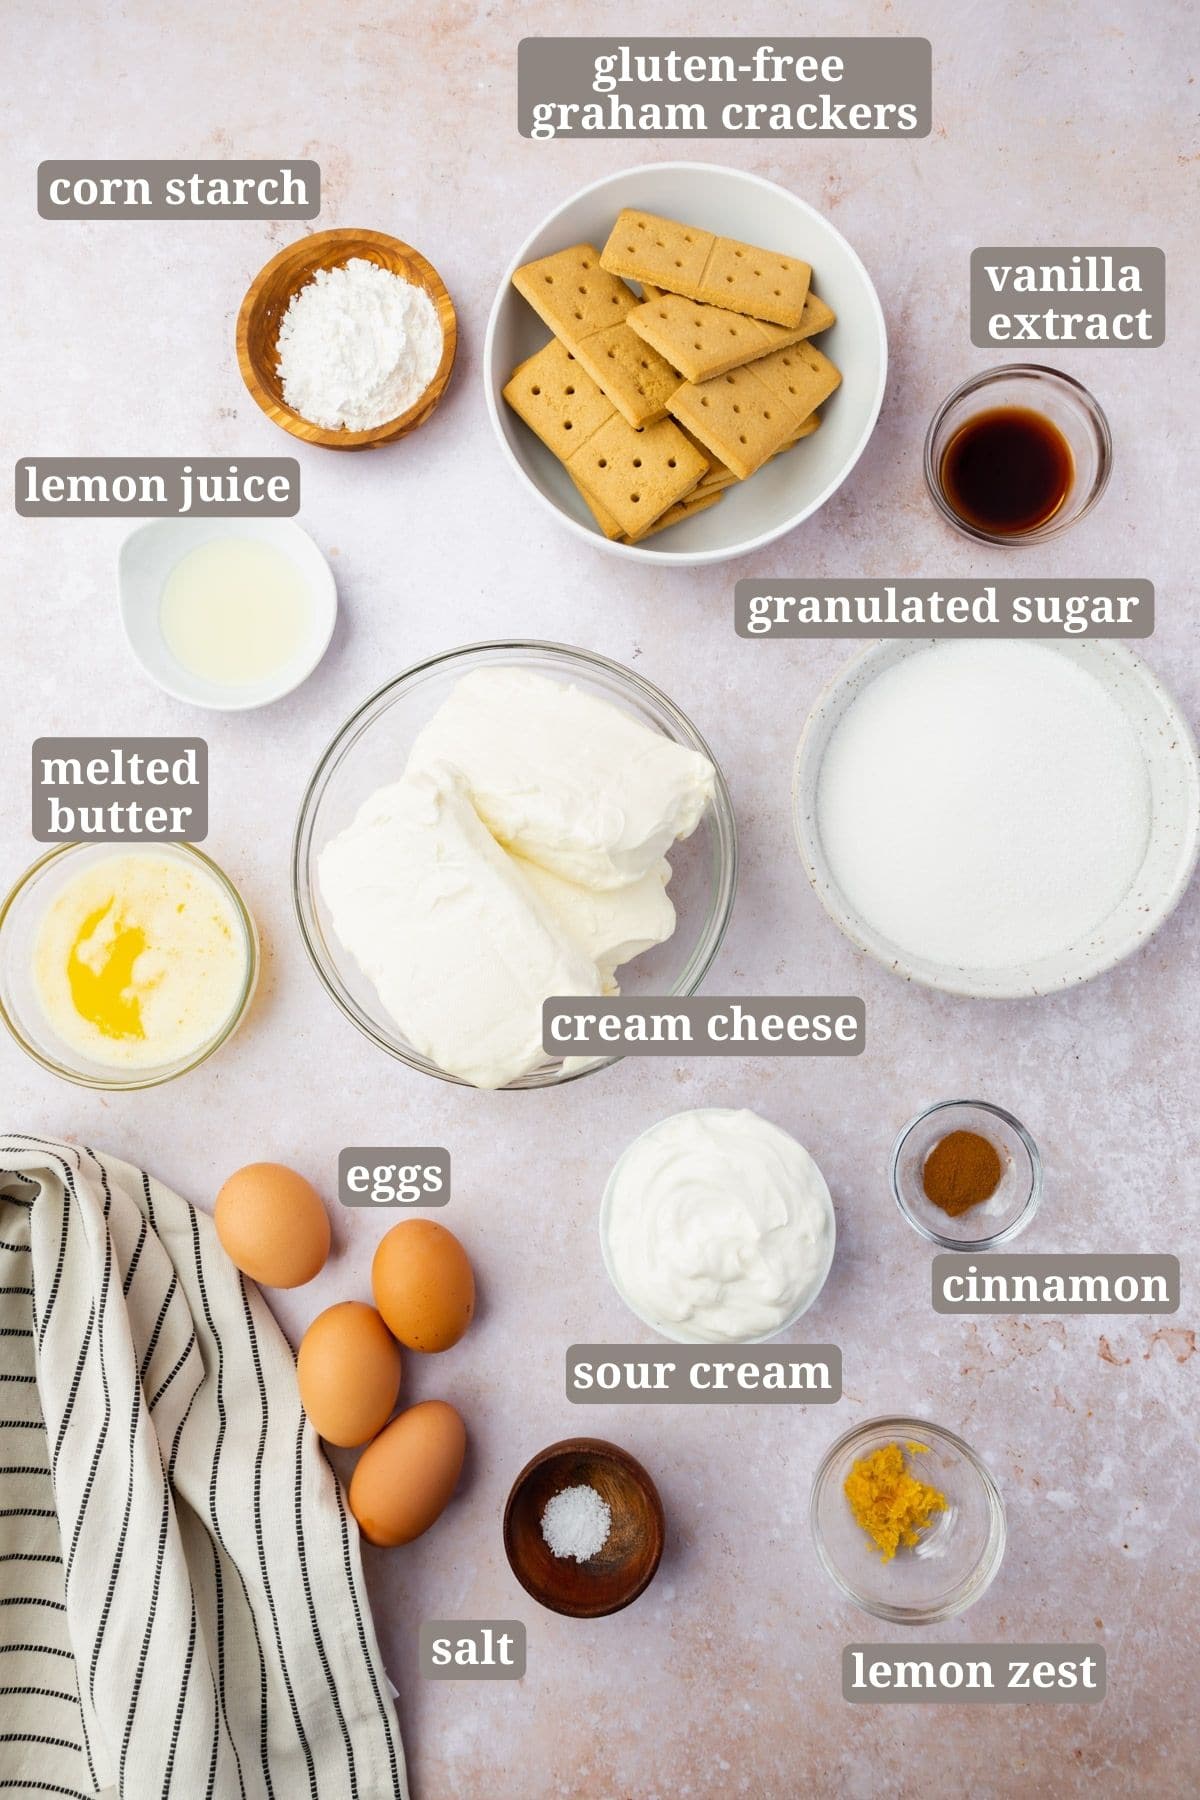
Ingredient Notes
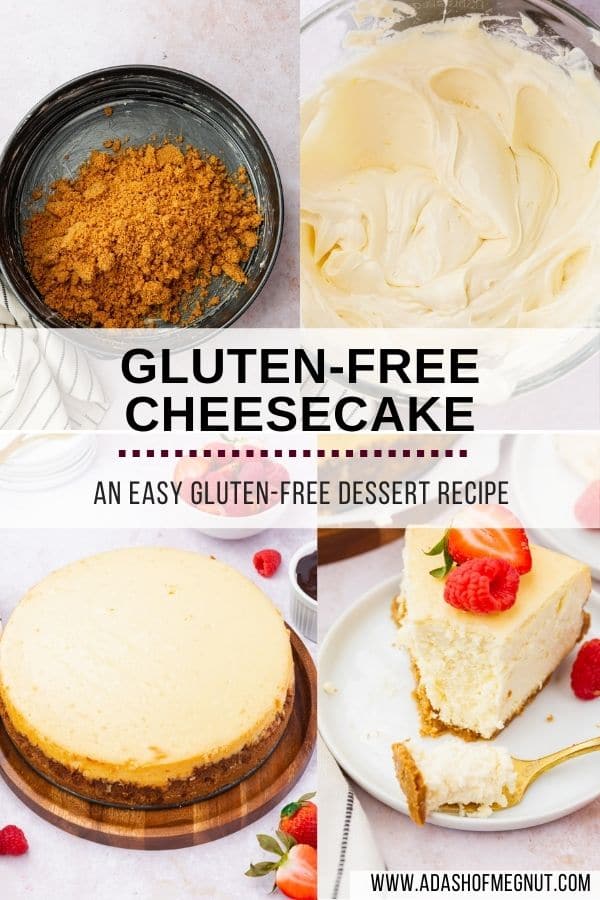
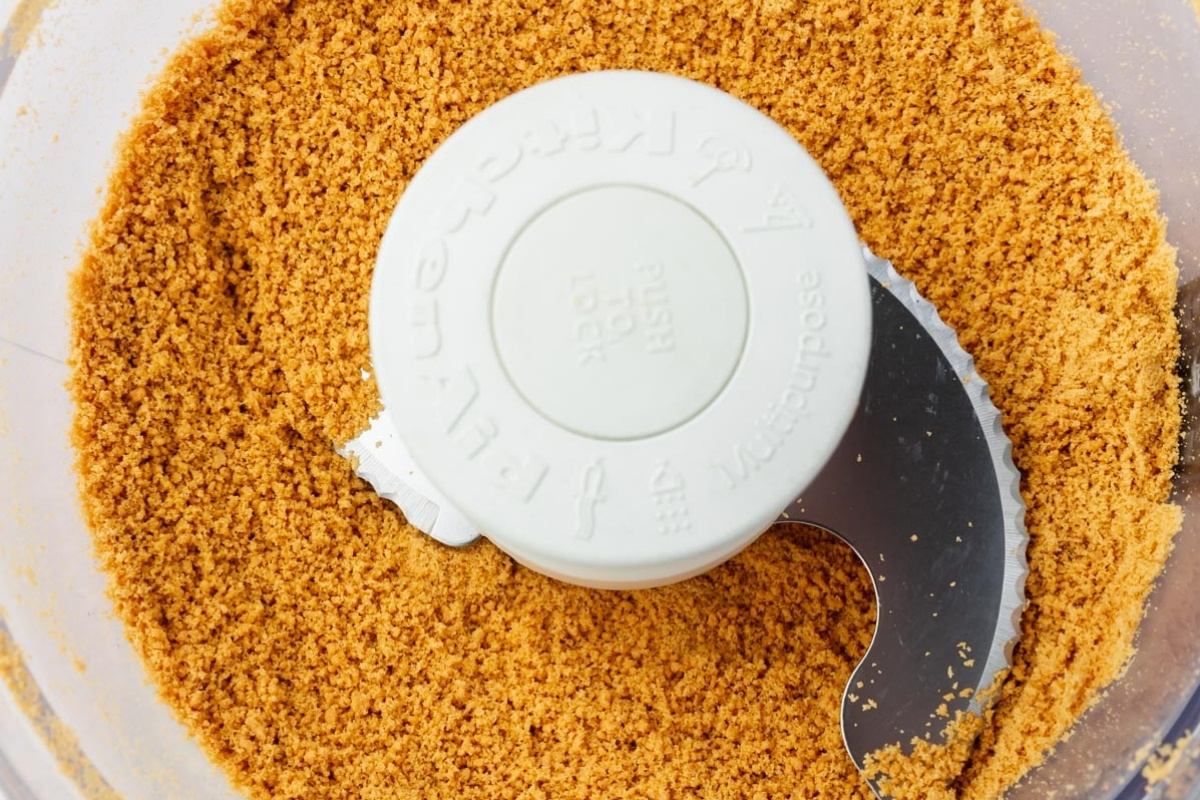
- Graham Crackers – I used Kinnikinnick gluten-free graham crackers for this recipe. Any plain gluten-free graham cracker works. Process them in a food processor until finely ground. You need 1 ¾ cups of crumbs, which is about one 8 oz box.
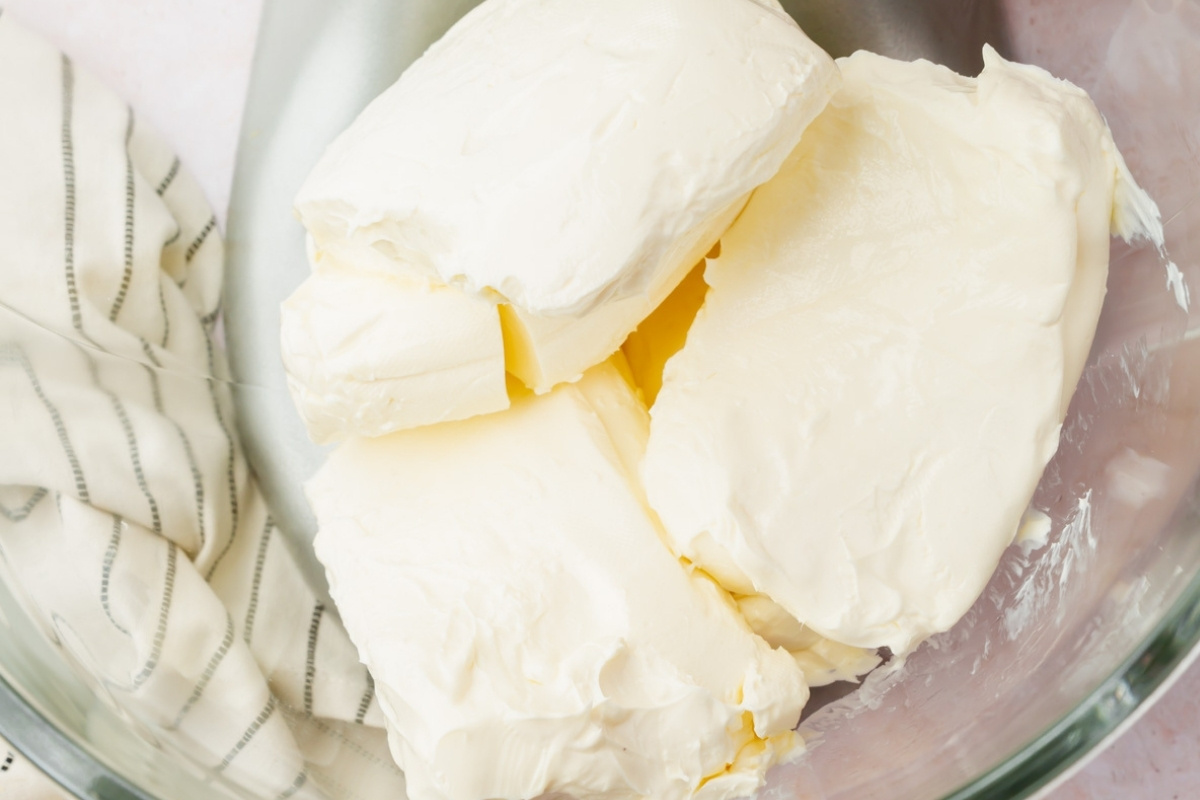
- Cream Cheese – Full-fat, always. It makes the filling creamier, richer, and smoother. Five 8-oz packages, all at room temperature before you start. Cold cream cheese leads to a lumpy filling.
- Sour Cream – Also room temperature. Adds tanginess and keeps the filling silky. Don’t substitute Greek yogurt here, the consistency is different and it can make the filling too dense.
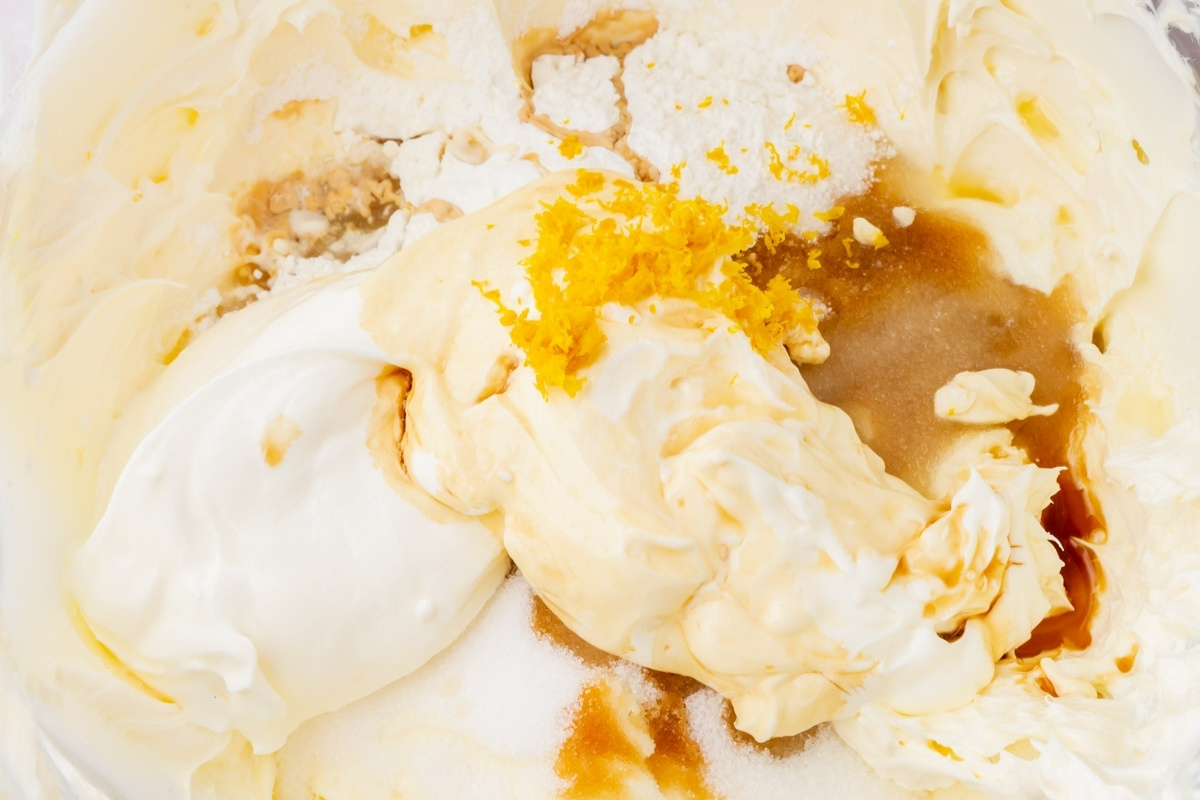
- Cornstarch – Thickens the filling and helps it set without flour. Two tablespoons is all it takes.
- Lemon juice and zest – This isn’t a lemon cheesecake. The lemon is subtle and just brightens the flavor. You won’t taste it, but you’d miss it if it weren’t there. If you don’t have a lemon you can skip it, but I’d include it if you can.
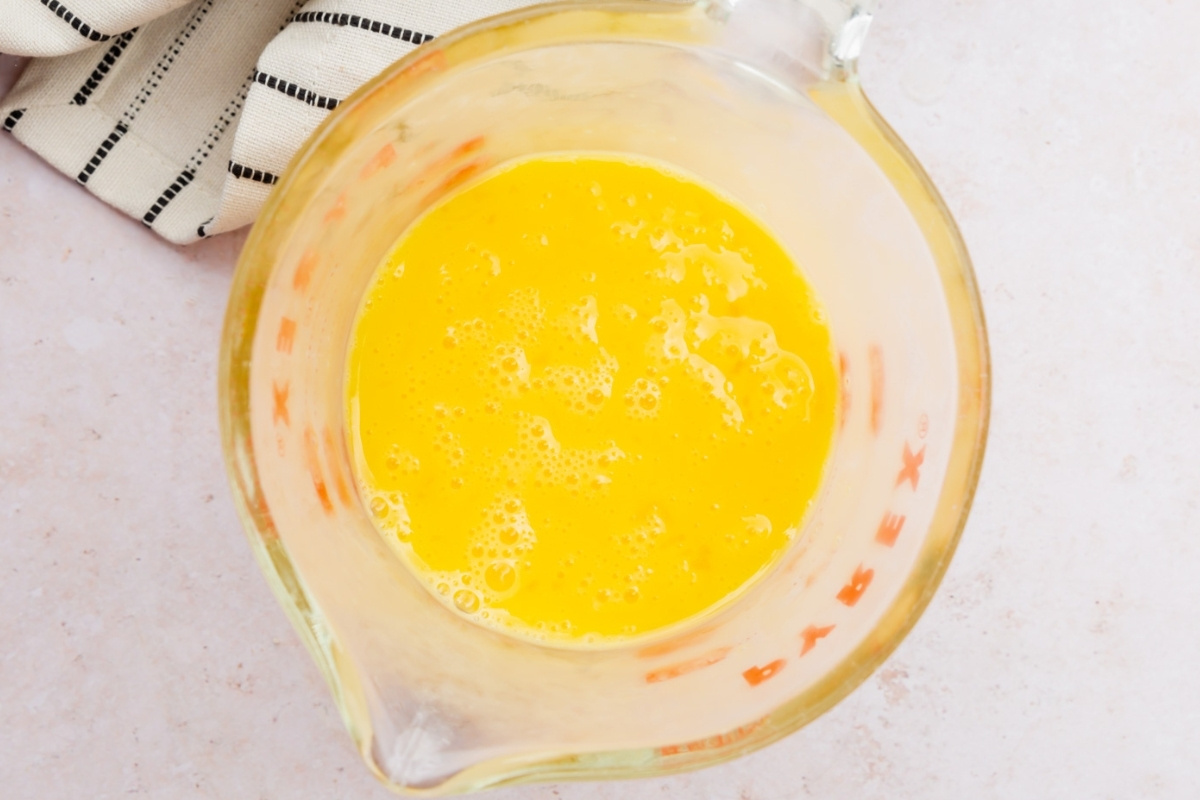
- Eggs – Four large eggs, room temperature. Whisk them separately before adding to the filling so you can incorporate them quickly without overmixing.
Start with Room Temp Ingredients
Every dairy ingredient and the eggs need to be at room temperature before you start. Cold cream cheese won’t beat smooth and you’ll end up with lumps you can’t fix. If you’re short on time, place cream cheese (still in foil) and eggs in a bowl of warm water for 10-15 minutes.
How to Keep Your Cheesecake from Cracking
Expert Tips
Recipe FAQs
The filling usually is, since it’s mostly cream cheese, sugar, eggs, and sour cream. The issue is the crust. Traditional cheesecake uses a graham cracker crust, and most graham crackers contain wheat flour. This recipe uses gluten-free graham crackers and cornstarch instead of flour in the filling, so the whole thing is safe.
Yes, and honestly it’s better that way. The cheesecake needs at least 4 hours in the fridge to set, but overnight is even better. The flavor and texture both improve after a full night in the fridge. You can make it up to 3 days ahead.
If you don’t have it, yes. But if you can get a lemon, use it. It’s not a lemon cheesecake. The lemon is subtle and just brightens the filling so it doesn’t taste flat. You won’t taste lemon, but you’d notice something missing without it.
Yes. A gluten-free oreo cookie crust works well if you want chocolate. You can also use gluten-free shortbread or vanilla cookies instead.
Storage Instructions
Refrigerate – Store in an airtight container or tightly wrapped for up to 4 days. The flavor actually improves after a night in the fridge.
Freeze – Freeze whole or in individual slices wrapped tightly in plastic wrap, then foil, for up to 3 months. Thaw overnight or at least 4 hours in the refrigerator before serving.
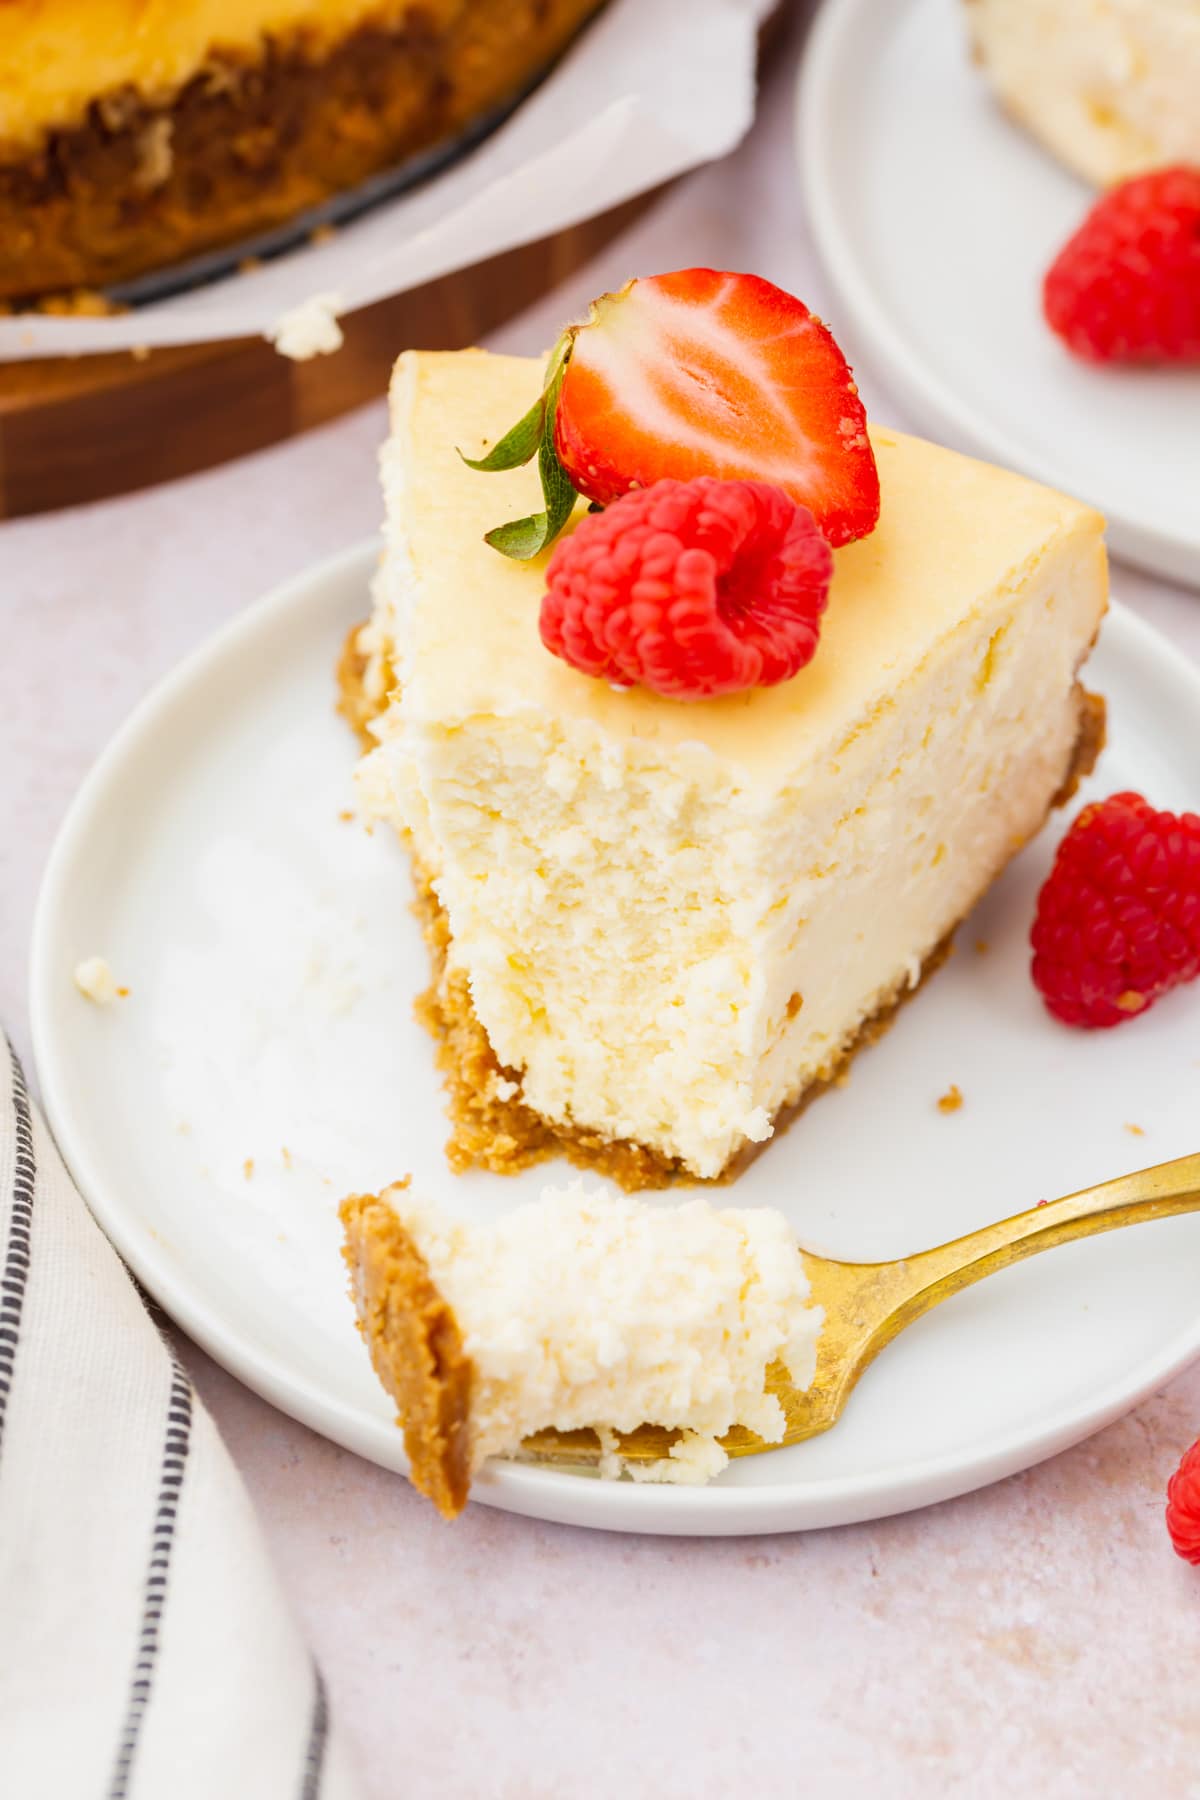
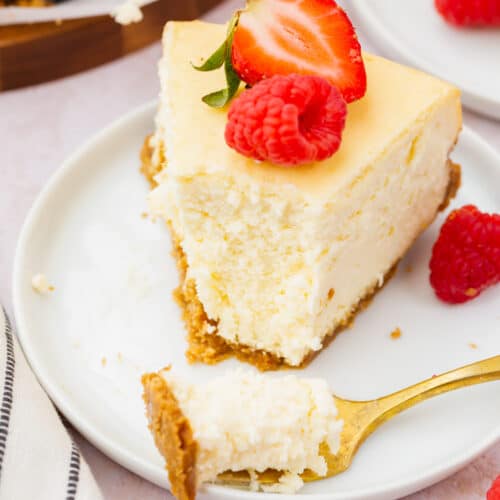
Serving Suggestions
This is one of my go-to birthday and holiday desserts. Top slices with macerated strawberries for a simple berry topping with texture, or drizzle with Nutella ganache for a chocolate-hazelnut twist. If you’re serving a bigger spread, lemon sorbet is a nice light contrast to the richness, and a plate of gluten-free lemon bars or gluten-free chocolate chip cookie bars gives guests something smaller to grab alongside.
Gluten-Free Cheesecake
Ingredients
For the crust:
- 8 oz (226 g) gluten-free graham cracker crumbs - which will yield approximately 1 ¾ cups of crumbs
- 2 tablespoons (24 g) granulated sugar
- ¼ teaspoon ground cinnamon
- ¼ teaspoon kosher salt
- 5 tablespoons (70 g) melted butter
For the filling:
- 40 oz (1.13 kg) full-fat cream cheese - five 8-oz blocks, at room temperature
- 1 ½ cups (300 g) granulated sugar
- 1 cup (230 g) sour cream - at room temperature
- 1 tablespoon (15 g) lemon juice
- 1 teaspoon lemon zest
- 2 tablespoons (16 g) cornstarch
- 2 teaspoons vanilla extract
- 4 (200 g) large eggs - at room temperature
**Use the toggle button above to turn the instruction photos on and off!
Instructions
Make the Crust:
- Preheat the oven to 350°F. Butter the bottom and sides of a 9-inch springform pan.
- Add 8 oz (226 g) gluten-free graham cracker crumbs to a food processor and process until finely ground.

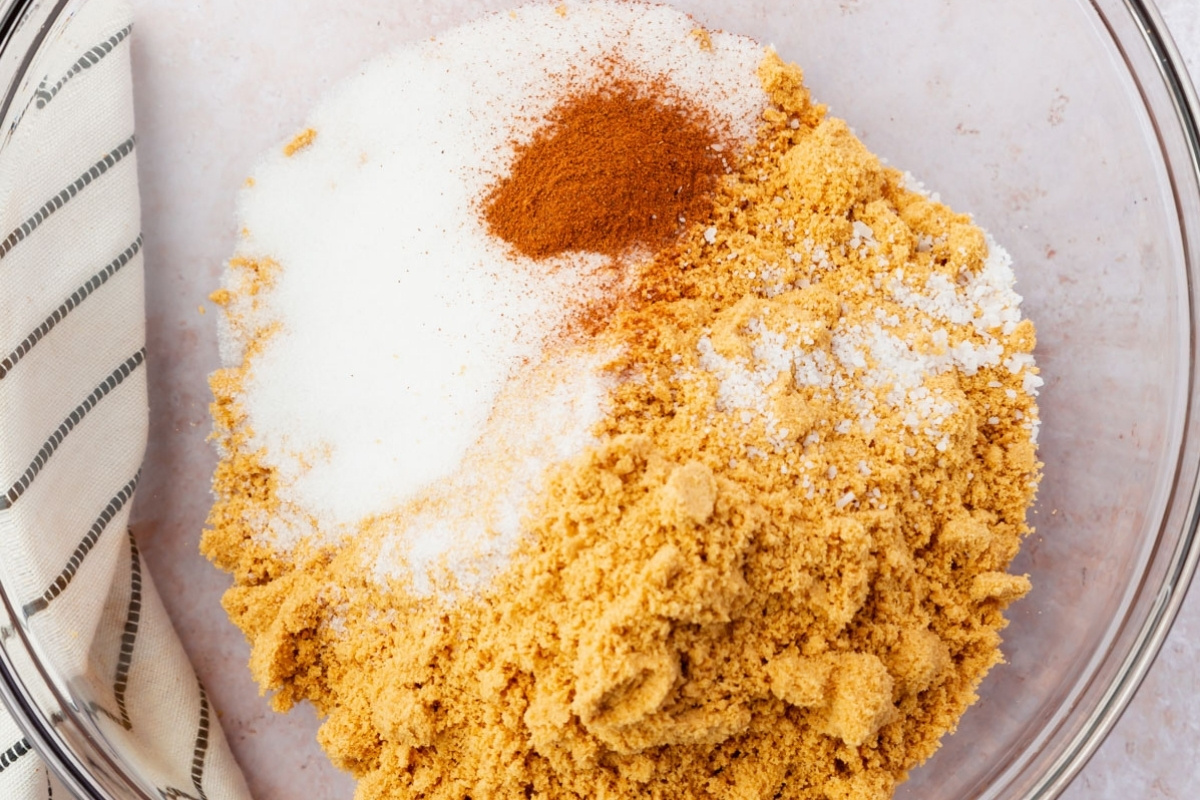
- Pour graham cracker crumbs into a medium sized bowl and whisk together with 2 tablespoons (24 g) granulated sugar, ¼ teaspoon ground cinnamonn, and ¼ teaspoon kosher salt.
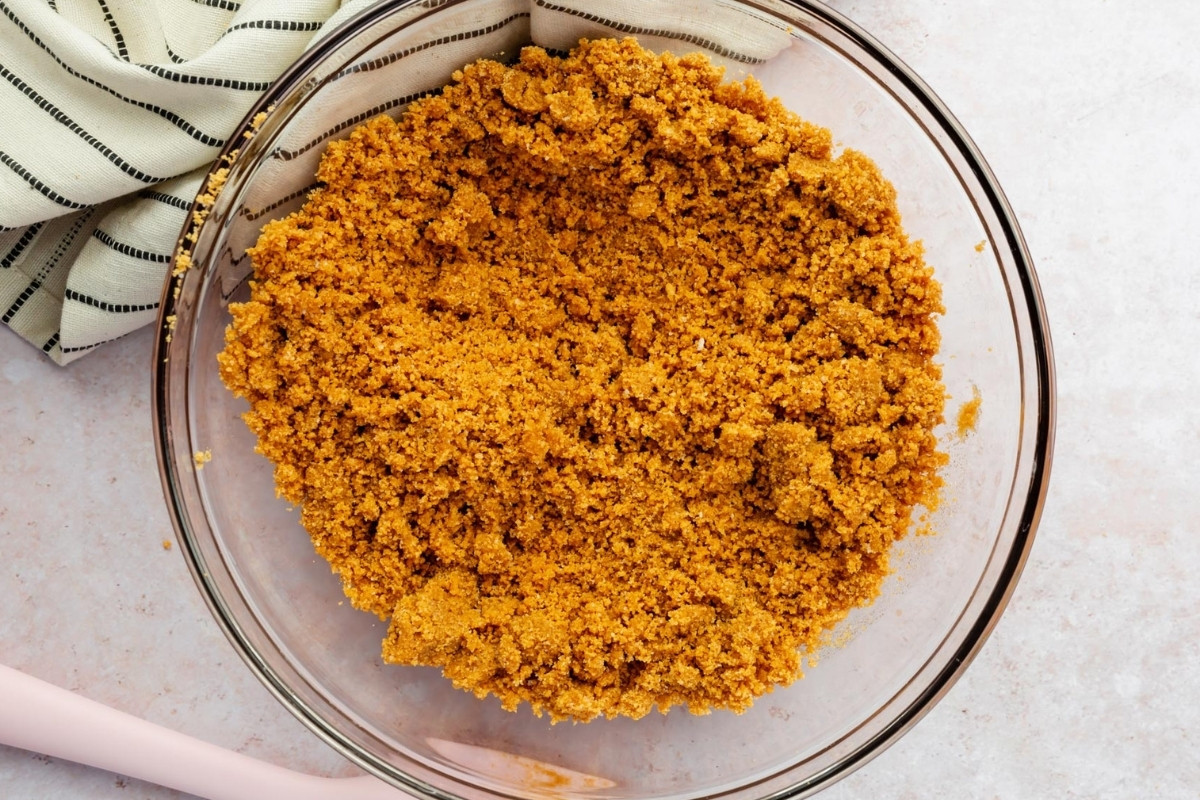
- Stir in 5 tablespoons (70 g) melted butter until the mixture resembles wet sand.
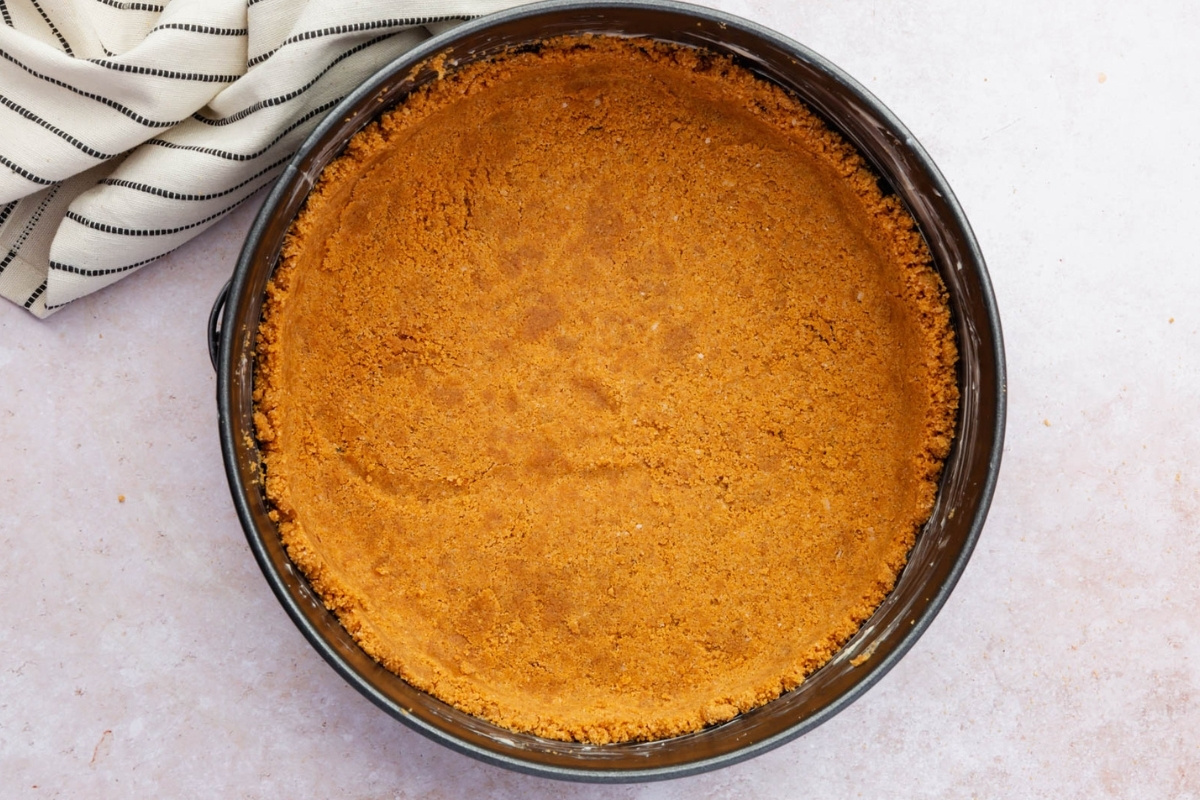
- Press the graham cracker mixture into the bottom of the springform pan and about 1-inch up the sides. I use the bottom of a measuring cup to evenly press the graham cracker crust into the pan.
- Bake the crust at 350°F for 9-11 minutes, until the crust is lightly browned and fragrant. Remove from the oven and cool for at least 10 minutes while preparing the filling.
Make the Filling:
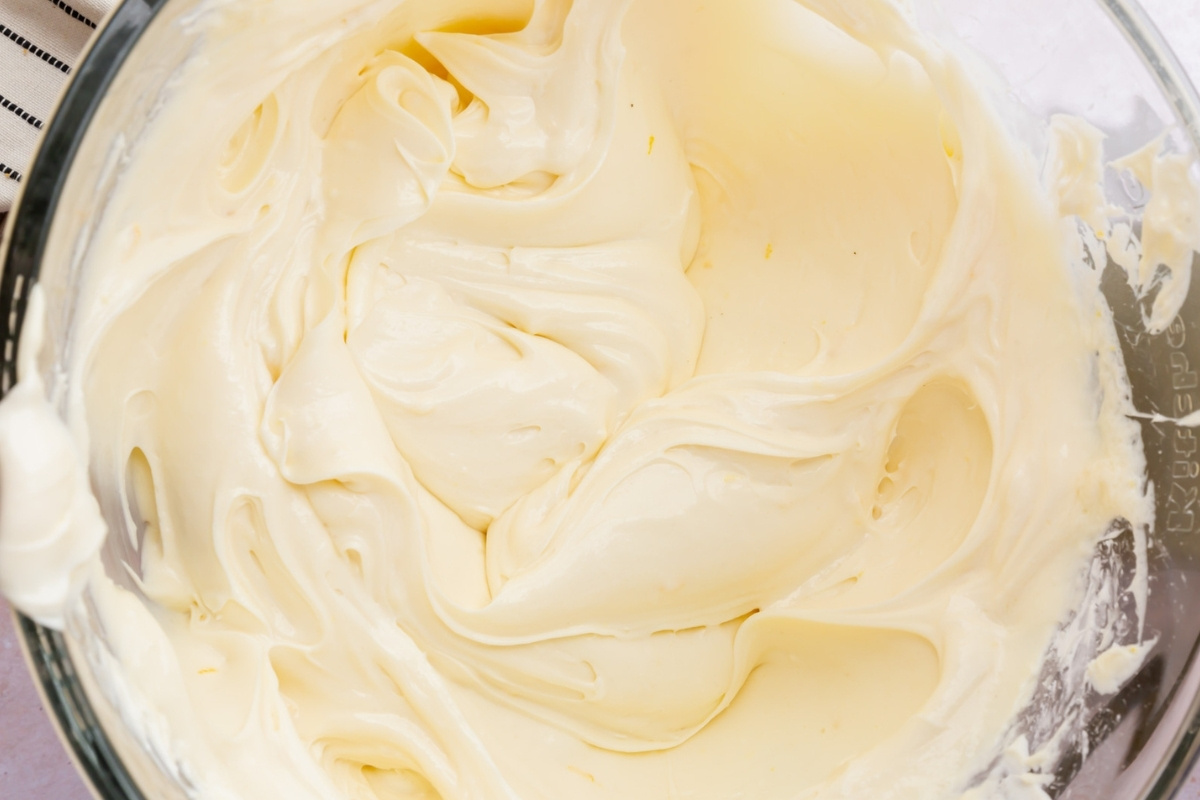
- Place 40 oz (1.13 kg) full-fat cream cheese and 1 ½ cups (300 g) granulated sugar in a large bowl, and beat for 1-2 minutes using an electric mixer until light and smooth.
- Add 1 cup (230 g) sour cream, 1 tablespoon (15 g) lemon juice, 1 teaspoon lemon zest, 2 tablespoons (16 g) cornstarch, and 2 teaspoons vanilla extract. Mix until completely smooth, scraping down the sides as needed.
- In a separate bowl, whisk 4 (200 g) large eggs together with a fork.
- Add half the eggs to the cream cheese mixture and mix until just incorporated. Add the remaining eggs and mix again until just incorporated. Do not overmix.
Assemble and Bake:
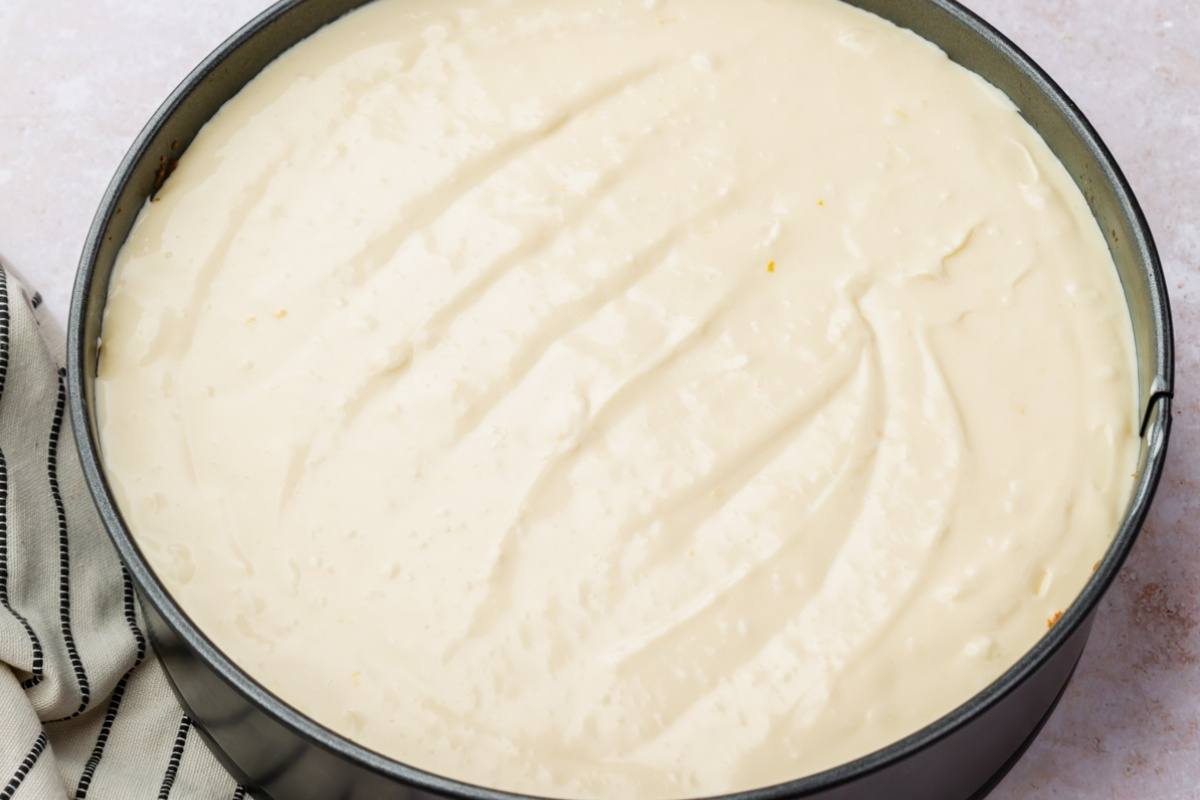
- Pour the filling over the cooled crust and smooth with a spatula.
- (Optional) If using a cake strip, soak the oven-safe fabric strip in water, wring it out, and wrap it snugly around the outside of the springform pan. This evens out the heat and helps prevent cracking without a water bath.
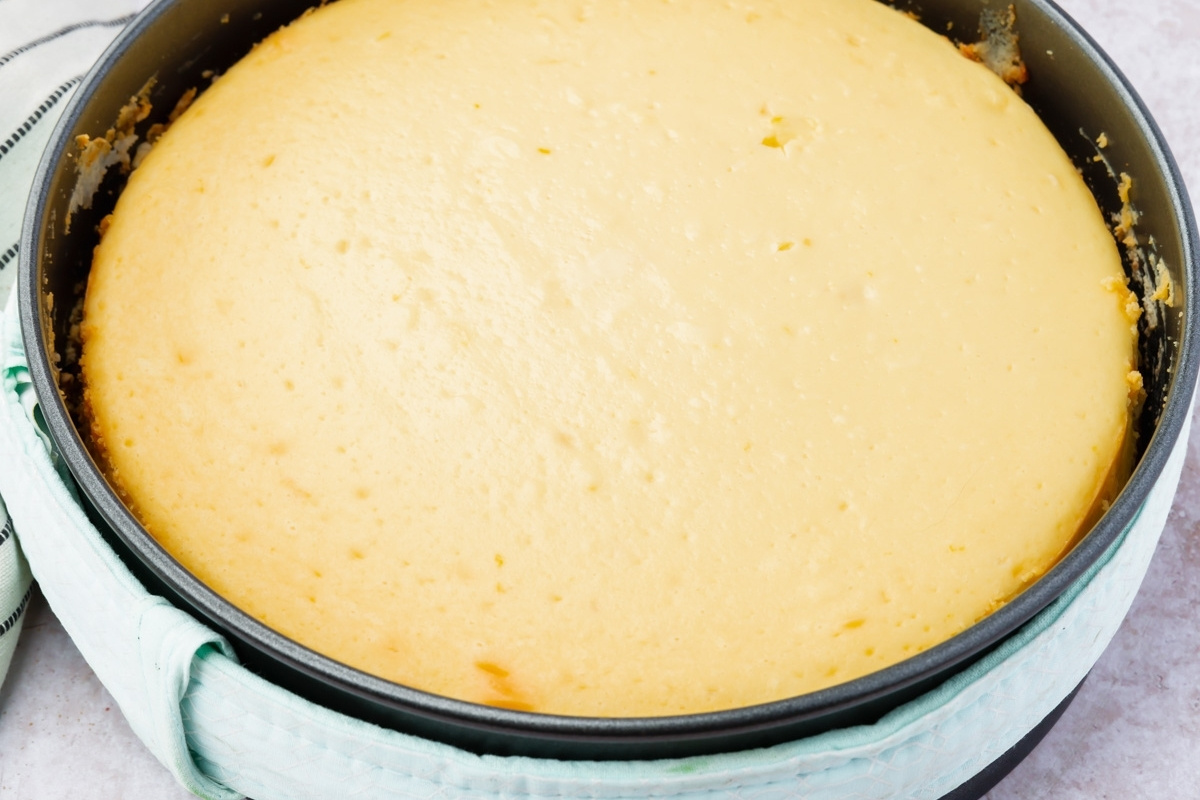
- Bake at 350°F for 20 minutes. Lower the temperature to 250°F without opening the oven door and bake for another 55-65 minutes, until the edges are set but the center 2 inches is still wobbly. Internal temperature should read 145-150°F.
- Turn off the oven. Leave the cheesecake inside with the door closed for 1 hour.
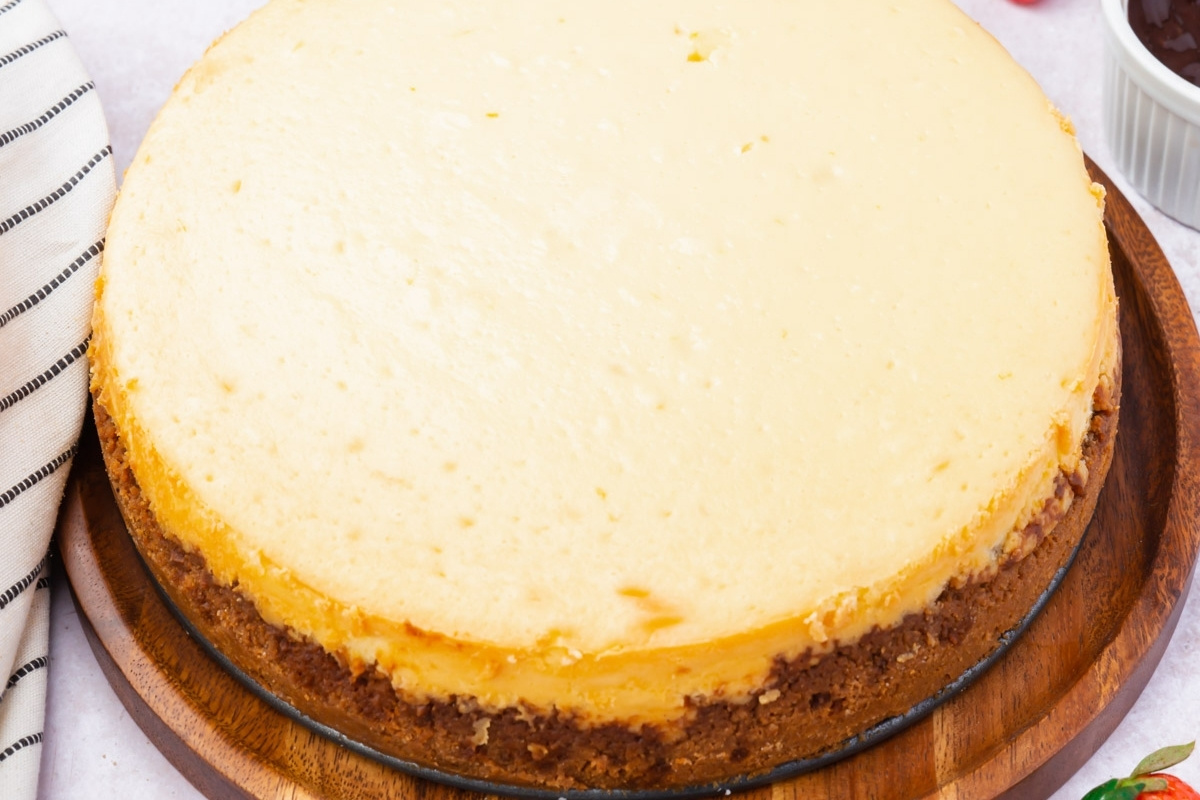
- Remove from the oven. Run a knife along the edges to loosen from the pan. Cool at room temperature for 1 hour.
- Refrigerate for at least 4 hours before serving.
Video
Notes
- Graham crackers – I use Kinnikinnick gluten-free graham crackers. Any plain gluten-free graham cracker works.
- Room temperature ingredients – Cream cheese, sour cream, and eggs must be at room temperature.
- Cake strip – You don’t need one, but it really does help. The wet strip keeps the edges of the pan from getting too hot, so the cheesecake bakes more evenly and you’re less likely to end up with cracks. You can find cake strips at craft stores or online (affiliate link). If you don’t have one, the three-stage cooling process will still do most of the heavy lifting.
I love this cheesecake and want to make it for a party. Could I double the recipe and put it in a 9×13 pan or 2 9×9 pans? If so, how would I change cooking time? I want to have it in a square container to cut it easier and plate it on a serving tray.
taste better than a regular gluten cheesecake! 10/5 stars!!!
So glad you liked this recipe, DD!
Recipe was easy to follow and did not crack! I took it to a dinner party; people were shocked that it was homemade, spent the rest of the evening complimenting it, multiple people took slices home for their kids or husbands and were still talking about it to me the next day
I’m so glad you enjoyed this and got great reviews at your party! Thanks for sharing – this made my day!