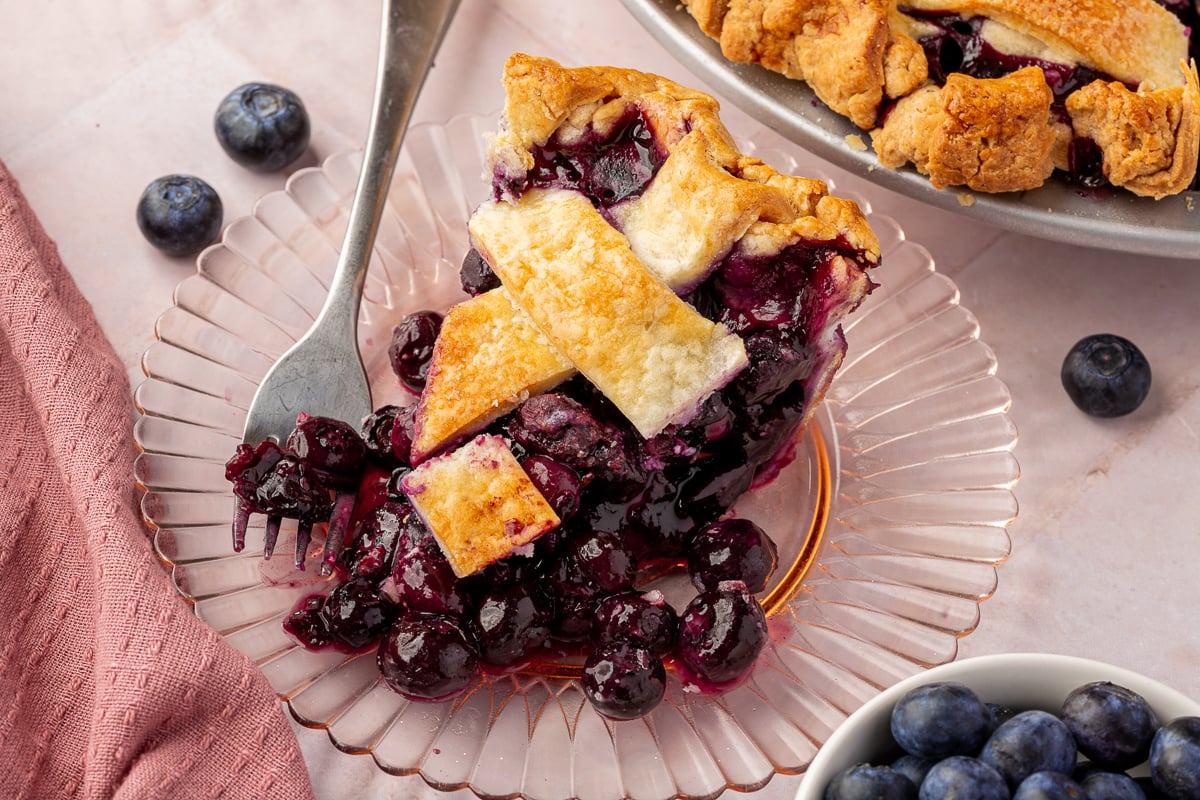


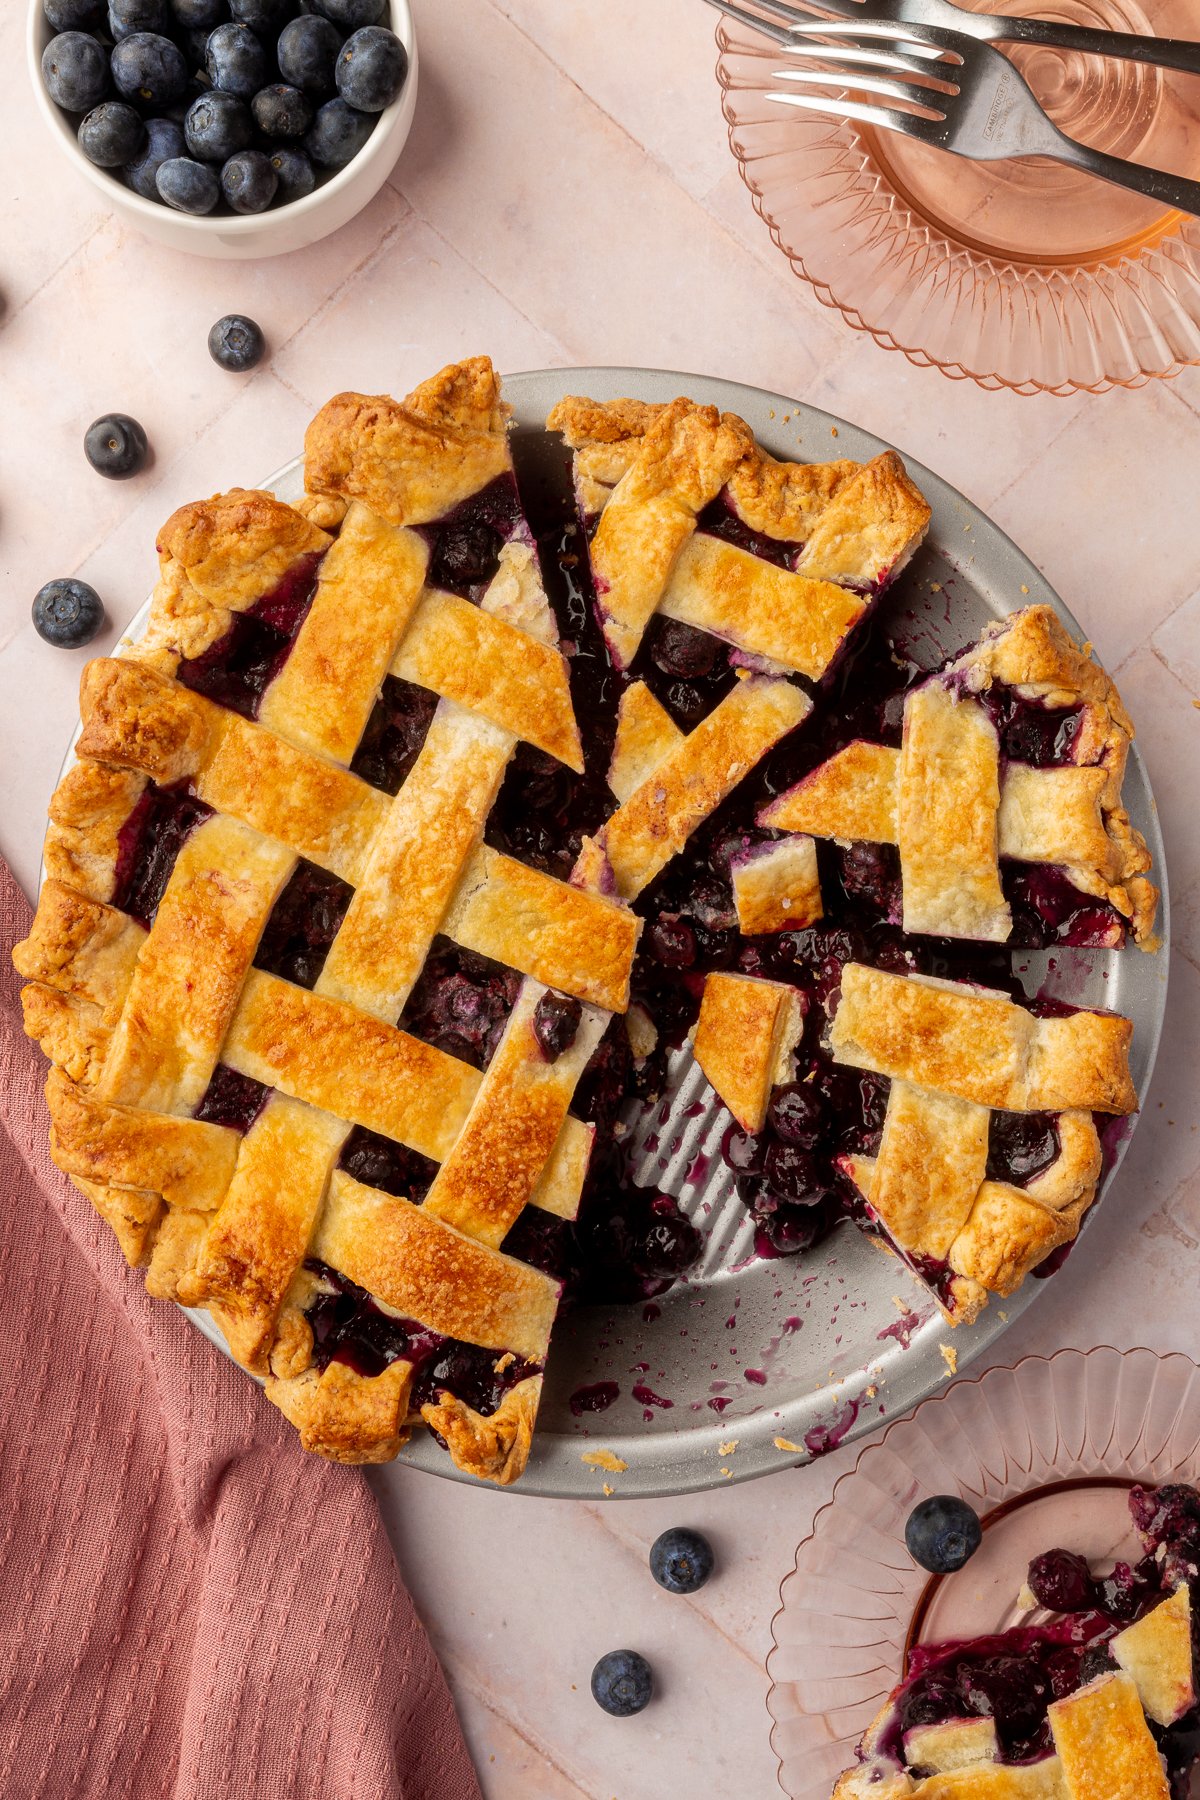
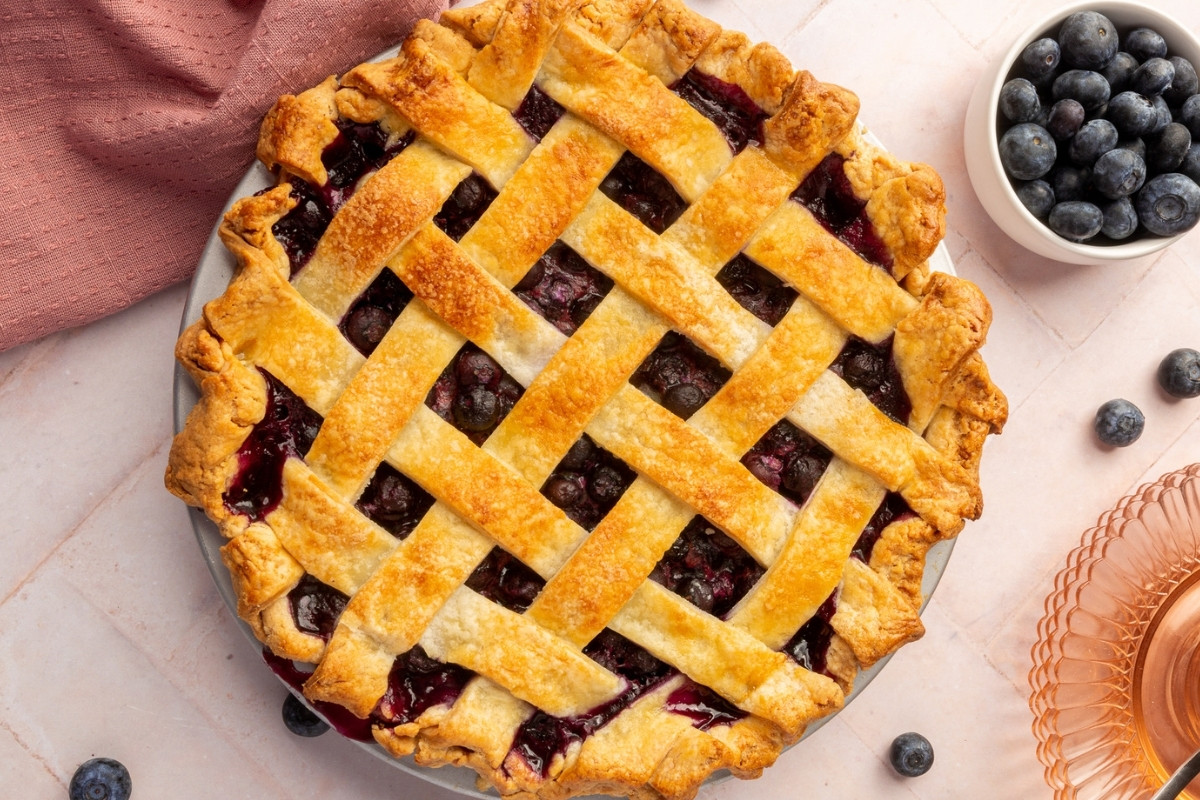
This gluten-free blueberry pie has a flaky, buttery crust and a sweet, juicy filling loaded with fresh blueberries, lemon, cinnamon, and a touch of nutmeg. The lattice top looks impressive but is easier than you think, and I have step-by-step photos below to walk you through it.
The filling uses cornstarch to thicken so the slices hold together without being runny. I dot the top with butter before baking, which melts into the fruit juices and makes the filling richer. This pie is a summer staple at our house and works just as well for a Fourth of July cookout as it does for a casual dinner.
Ingredients
Ingredient Notes
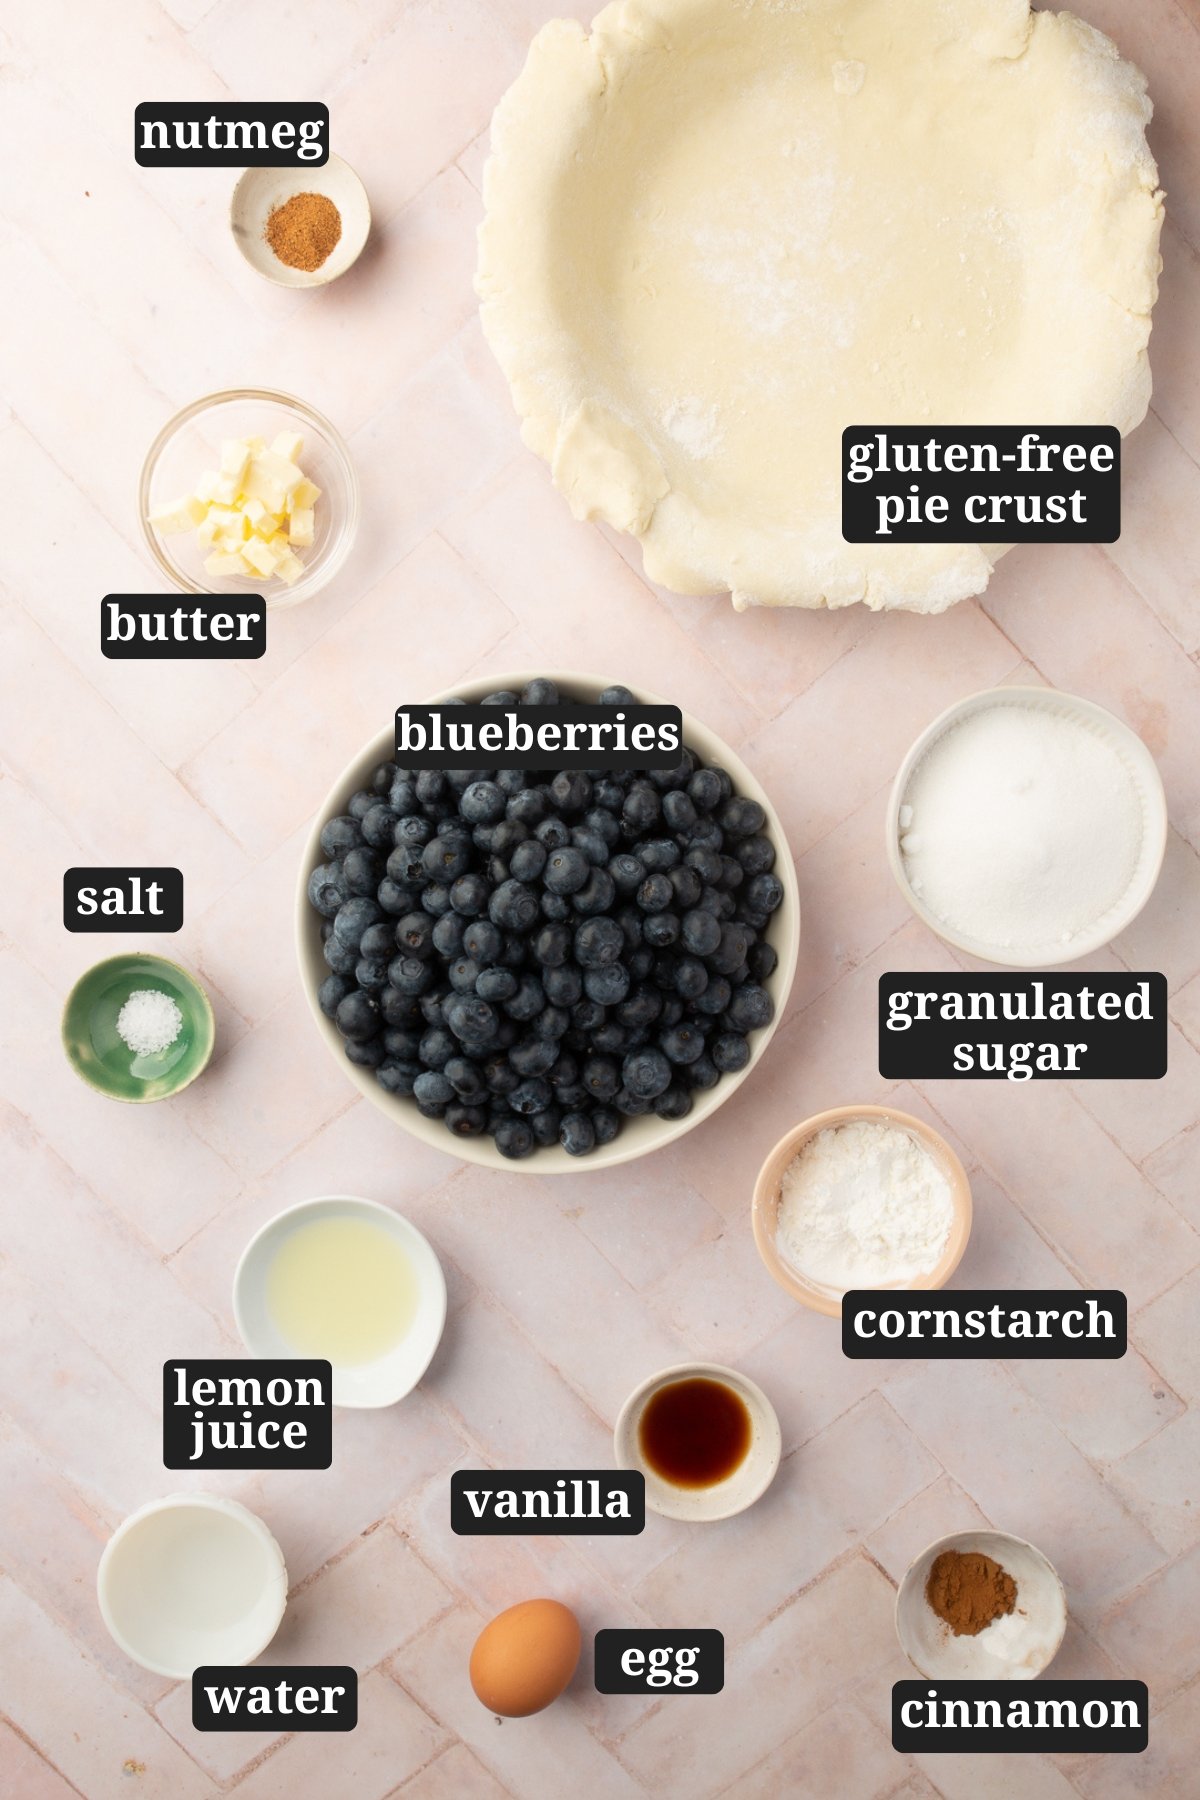
- Blueberries – Look for fresh, plump blueberries with no signs of wrinkling. If fresh blueberries aren’t in season, you can use frozen blueberries. Just be sure to thaw and drain them first to avoid extra moisture in the filling.
- Gluten-Free Pie Crust – I use my homemade gluten-free pie crust for this recipe. My recipe makes two 9-inch crusts, one for the bottom and one for the lattice. If you’re using store-bought, make sure it can be rolled out. You can also skip the lattice and use a crumb topping (like I do in my gluten-free peach crumble pie) instead for a gluten-free blueberry crumble pie.
- Cornstarch – This is what thickens the filling. Don’t reduce the amount or your slices of pie will be runny. Cornstarch is naturally gluten-free but always check the label.
- Butter – Small cubes of butter go on top of the filling before baking. As they melt, they mix with the fruit juices and create a richer, silkier filling.
- Lemon Juice and Zest – You won’t taste the lemon on its own. It just brightens the blueberry flavor and keeps the filling from tasting flat.
Cooling Tip
Let the pie cool for at least 2 hours before slicing. The cornstarch needs time to set after it comes out of the oven. If you cut into it too early, the filling will pour out instead of holding its shape.
How the Two-Temperature Bake Works
I bake all of my fruit pies at two different temperatures. The pie starts at 425°F for the first 15 minutes, which sets the bottom crust quickly so it doesn’t get soggy from the filling. Then I lower the oven to 375°F for the rest of the bake so the filling has time to cook through and thicken without the crust or lattice burning on top. This matters even more with gluten-free pie crust because it tends to brown faster than regular pie crust. I use this same method for my gluten-free strawberry cream cheese pie and gluten-free cherry pie too.
Recipe FAQs
Yes. Thaw and drain them well first to avoid excess moisture in the blueberry filling. You may need an extra tablespoon of cornstarch if the filling seems watery.
You can make the gluten-free pie crust dough ahead of time and refrigerate it for up to 3 days or freeze it for up to 3 months. Just thaw it in the fridge overnight before using.
If the crust starts browning too quickly while baking, you can cover the edges with aluminum foil or use a pie crust shield to prevent burning.
Yes. You can do a full top crust with slits cut for steam, or swap the lattice for a crumb topping for a gluten-free blueberry crumble pie.
Expert Tips

Storage Instructions
Room Temperature: Covered with plastic wrap or foil for up to 2 days.
Refrigerate: Up to 5 days, well covered. The crust may soften but the pie still tastes great.
Freeze: Cool completely, wrap in plastic wrap then foil. Freeze whole or in individual slices for up to 3 months. Thaw overnight in the fridge.
Reheat: Warm individual slices in the microwave for 20-30 seconds, or in the oven at 350°F for 5-10 minutes. If you need to reheat the whole pie, bake in the oven at 350°F for 20-30 minutes.
Serving Suggestions
This pie is great on its own, but a warm slice with a scoop of vanilla ice cream is hard to beat. My husband’s family always serves their blueberry pie with a slice of white cheddar cheese on the side, and I was skeptical at first but the combination is really good.
When this is the dessert at a summer cookout, I’m usually serving my Instant Pot BBQ pulled pork or gluten-free fried chicken as the main, with my gluten-free pasta salad and dill cabbage coleslaw on the table. A pitcher of cucumber lemonade rounds everything out and the whole spread is gluten-free.

Gluten-Free Blueberry Pie
Ingredients
Crust:
- (1) Homemade Gluten-Free Pie Crust - my recipe makes two 9-inch crusts; one for the bottom and one for the top
Filling:
- 2 lbs (907 g) fresh blueberries - about 6 cups
- ¾ cup (150 g) granulated sugar
- ¼ cup (32 g) gluten-free cornstarch
- 1 tablespoon (15 g) lemon juice
- 1 teaspoon lemon zest
- ½ teaspoon ground cinnamon
- ¼ teaspoon ground nutmeg
- ¼ teaspoon salt
- 1 teaspoon vanilla extract
Topping:
- 2 tablespoons (28 g) butter - cut into small cubes for topping the pie
- 1 (50 g) large egg
- 1 tablespoon (15 g) water
- 1 teaspoon (4 g) turbinado coarse sugar - or demerara
**Use the toggle button above to turn the instruction photos on and off!
Instructions
Prep:
- Make the crust: Prepare a full batch of my (1) Homemade Gluten-Free Pie Crust. Divide dough into two disks, wrap individually, and refrigerate until ready to use.
- Preheat your oven to 425°F (220°C).
Make the Filling:
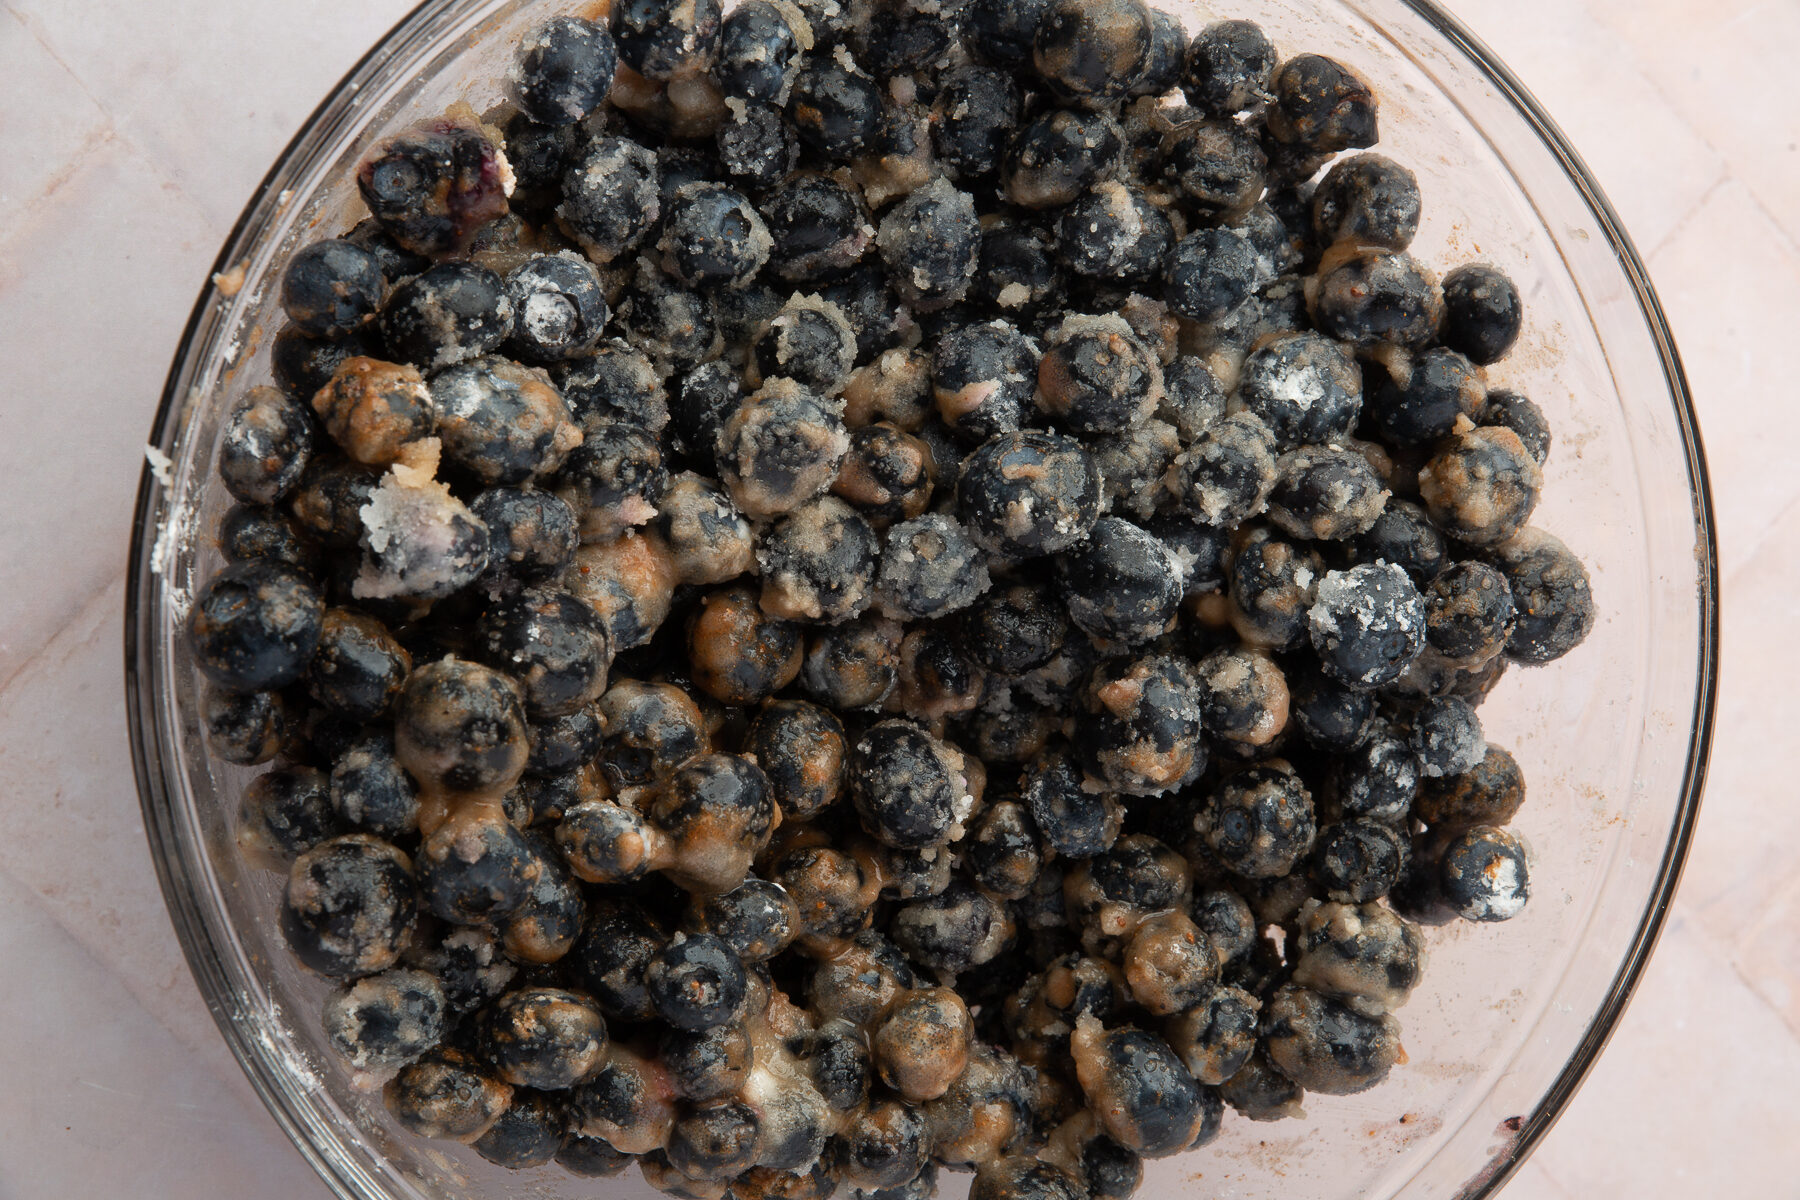
- In a large bowl, combine 2 lbs (907 g) fresh blueberries, ¾ cup (150 g) granulated sugar, ¼ cup (32 g) gluten-free cornstarch, 1 tablespoon (15 g) lemon juice, 1 teaspoon lemon zest, ½ teaspoon ground cinnamon, ¼ teaspoon ground nutmeg, ¼ teaspoon salt, and 1 teaspoon vanilla extract. Gently toss to combine. Set aside.

Shape the Bottom Crust:
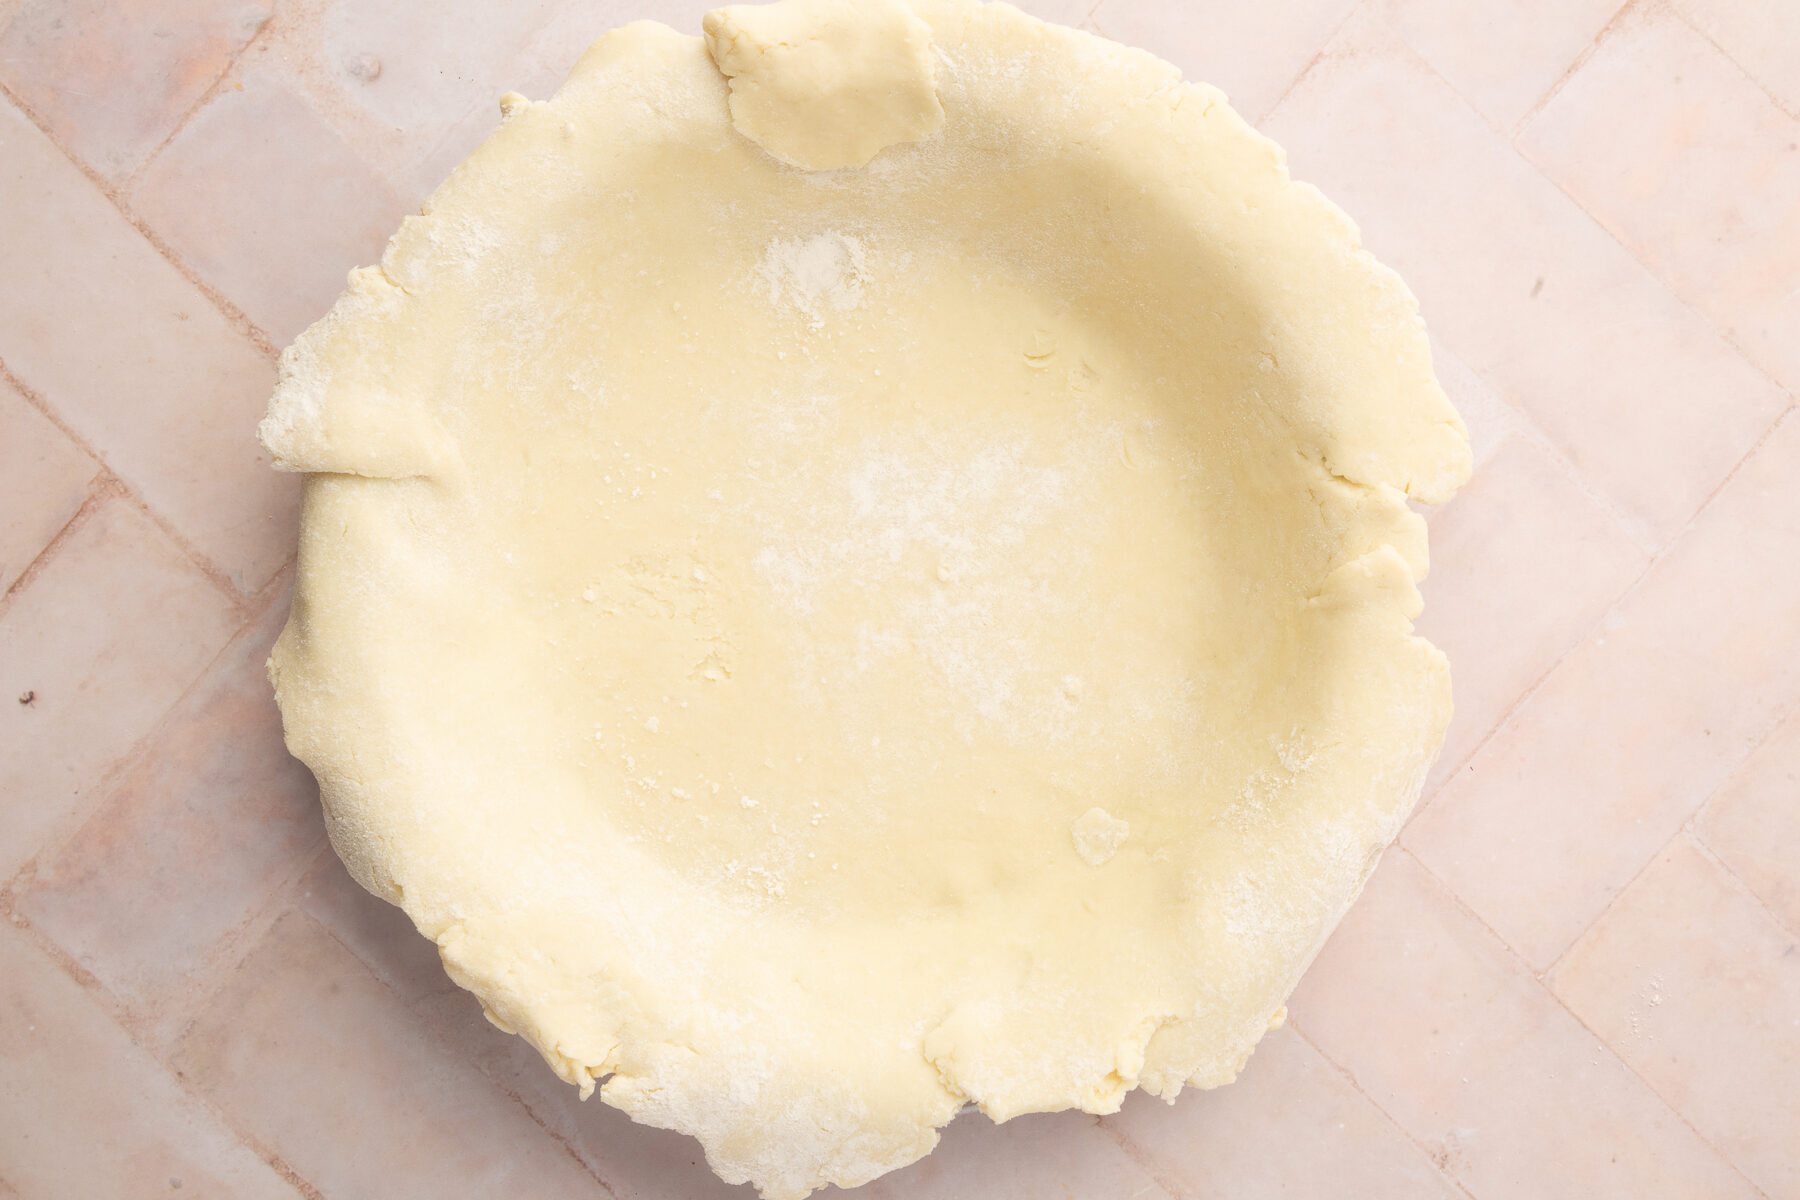
- Take one disk of dough from the fridge. Press it a few times with a rolling pin to soften. Dust your rolling pin and a sheet of parchment paper with gluten-free flour.
- Roll out the dough on the piece of parchment paper into a large circle, until it is about ¼ inch thick and 12 inches in diameter for a 9-inch pie dish.
- Place the pie dish upside down on the center of the rolled-out dough. Using the parchment paper for support, carefully flip the dough and pie dish over so the dough lines the inside of the dish. You want to have about 1.5 inches of overhang on all sides.
- Place the crust in the refrigerator to chill while you prepare the lattice.
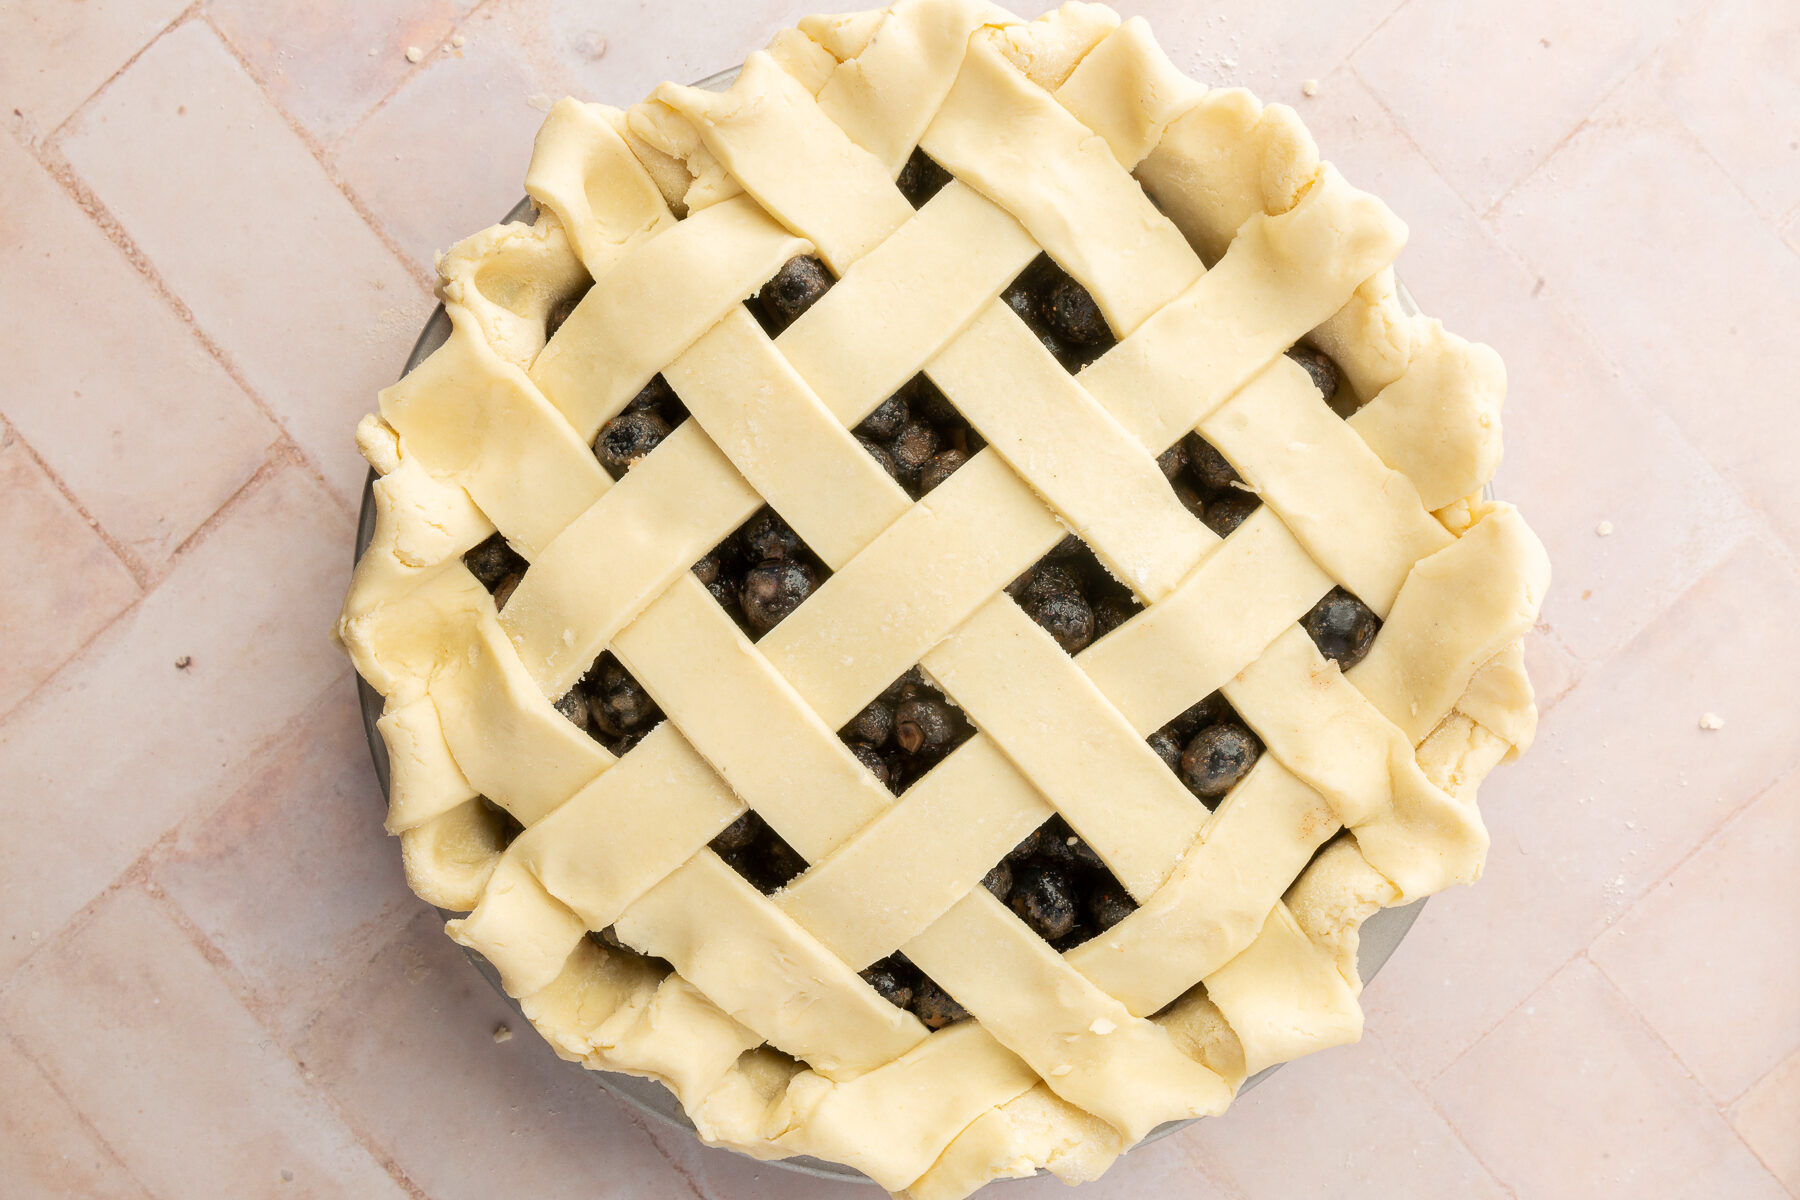
Make the Lattice Top:
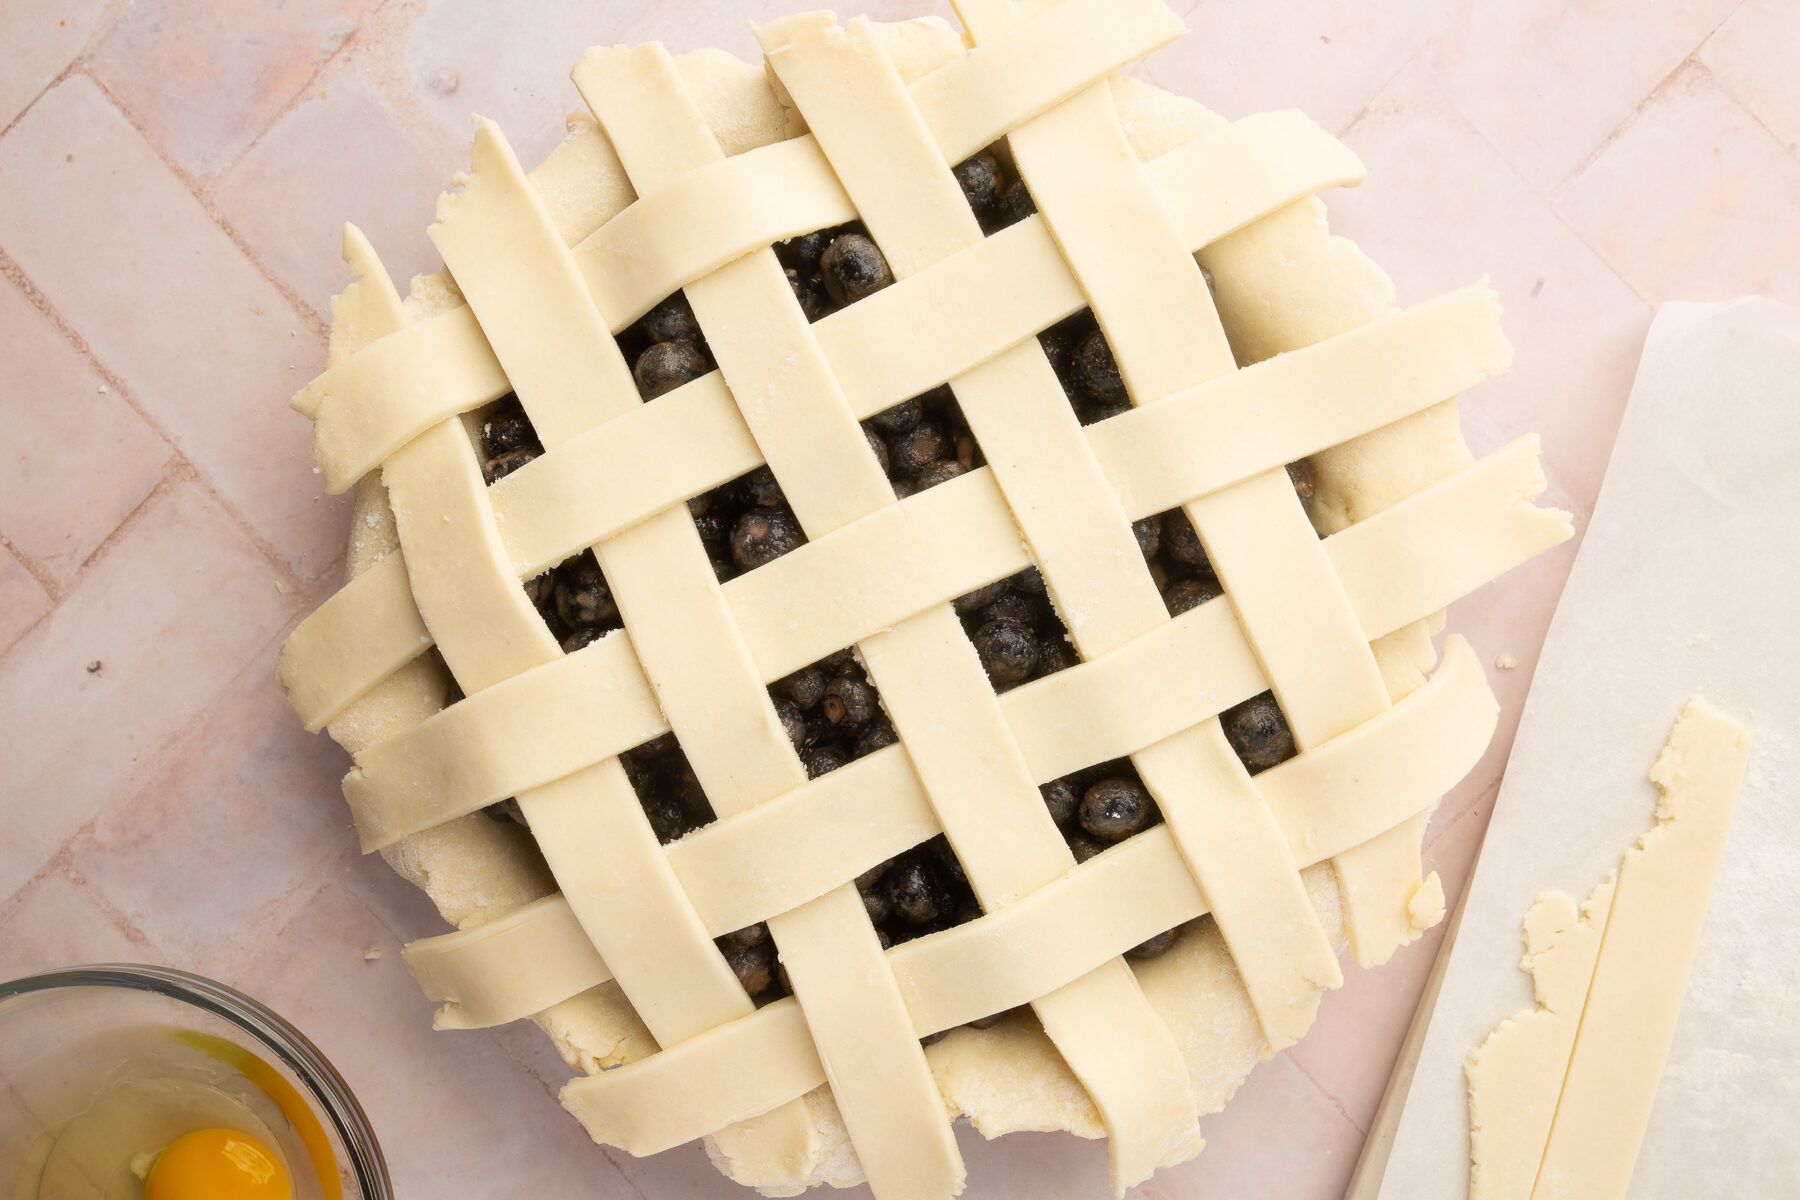
- Roll out the second disk of dough into a large circle, about 12-inches in diameter. Cut it into 1-inch strips using a pizza cutter or a knife. You should have about 10-12 strips.
Assemble the Pie:
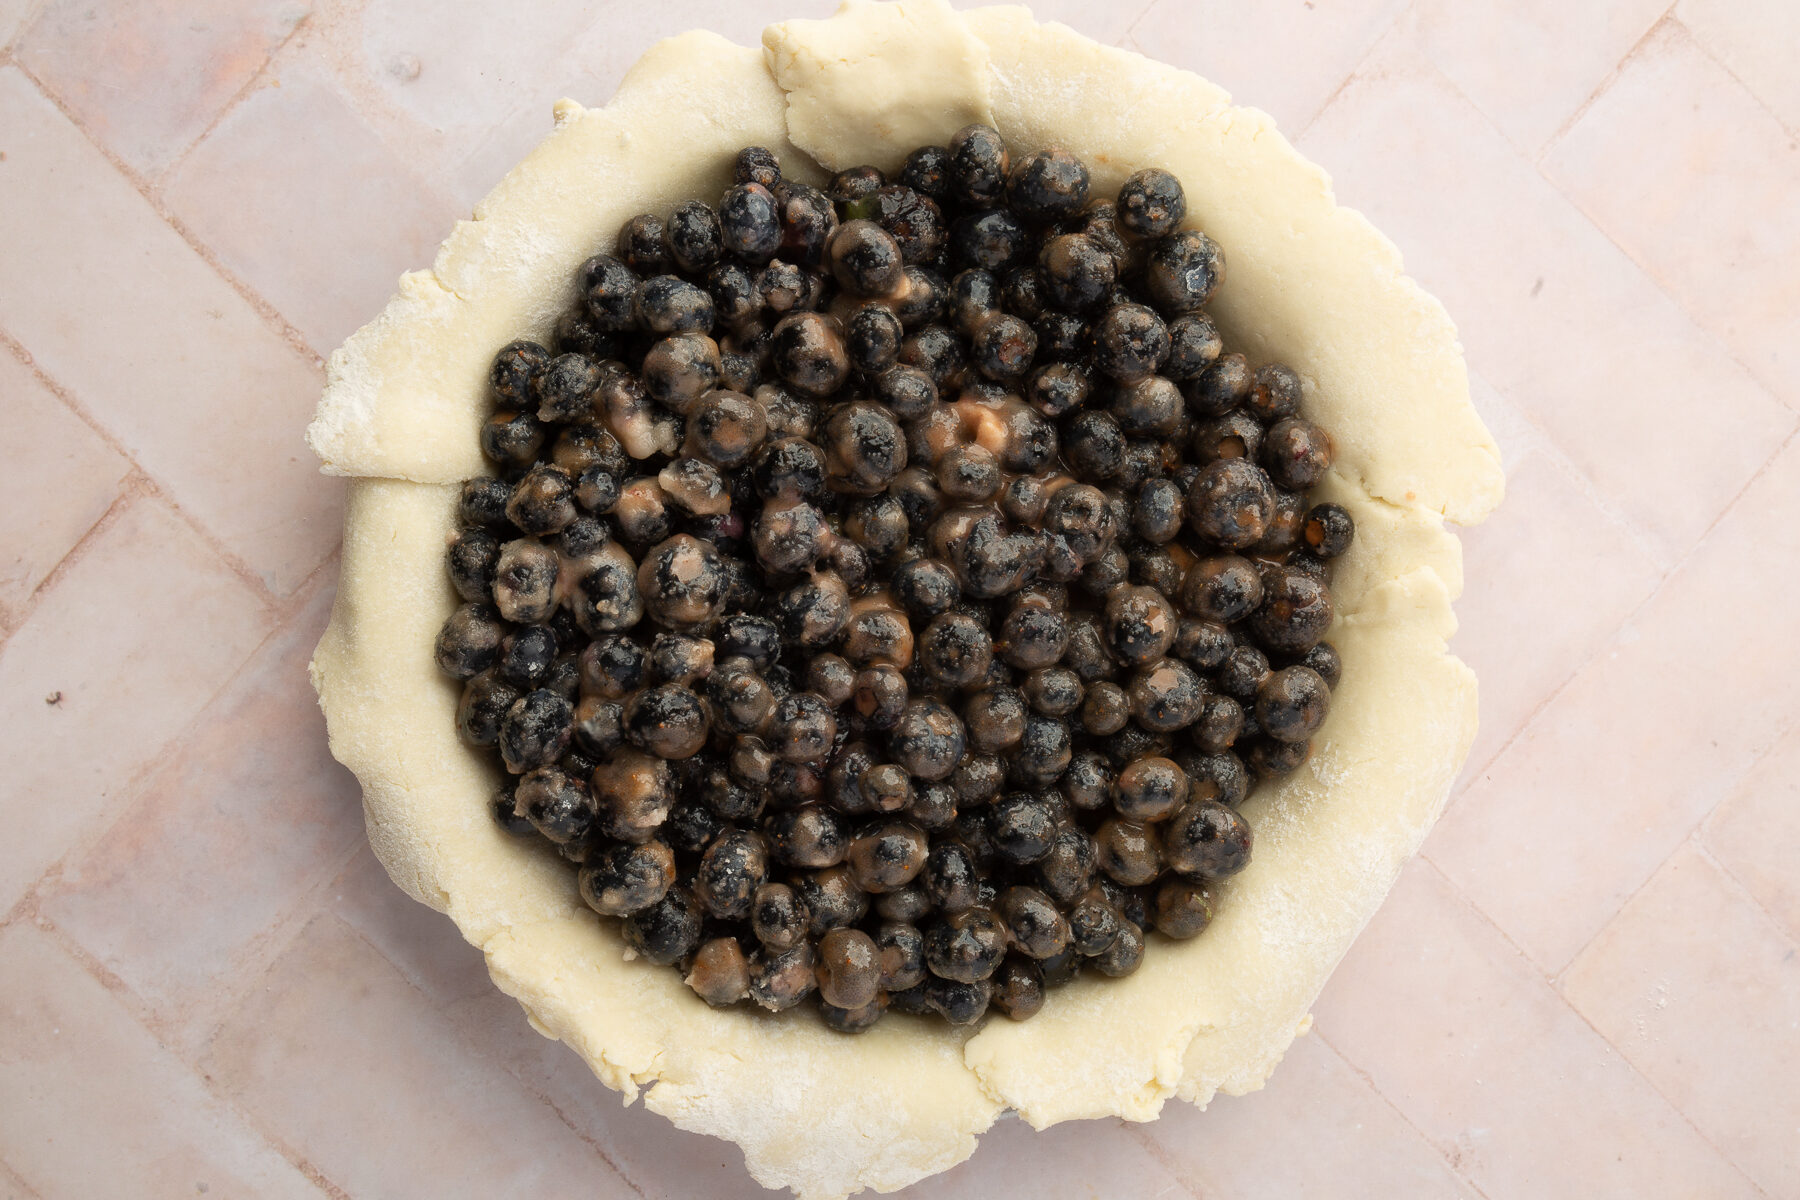
- Remove the bottom crust from the fridge. Pour the blueberry filling into the crust and spread evenly.
- Lay 5-6 strips across the pie in one direction, spacing them evenly, with about 1 inch in between each strip.
- Fold back the first, third, and fifth strips halfway. Lay one new strip in the center across the pie in the opposite direction. Unfold the folded strips back over the new strip.
- Now fold back the second, fourth, and sixth (if using) strips. Lay another new strip next to the first one. Unfold.
- Repeat this pattern, alternating which strips you fold back, until the lattice covers the pie.
- Trim any strips that hang too far over the edge. Tuck the overhanging dough from the bottom crust and strips under itself to create a thick edge. Crimp with your fingers or press with a fork.
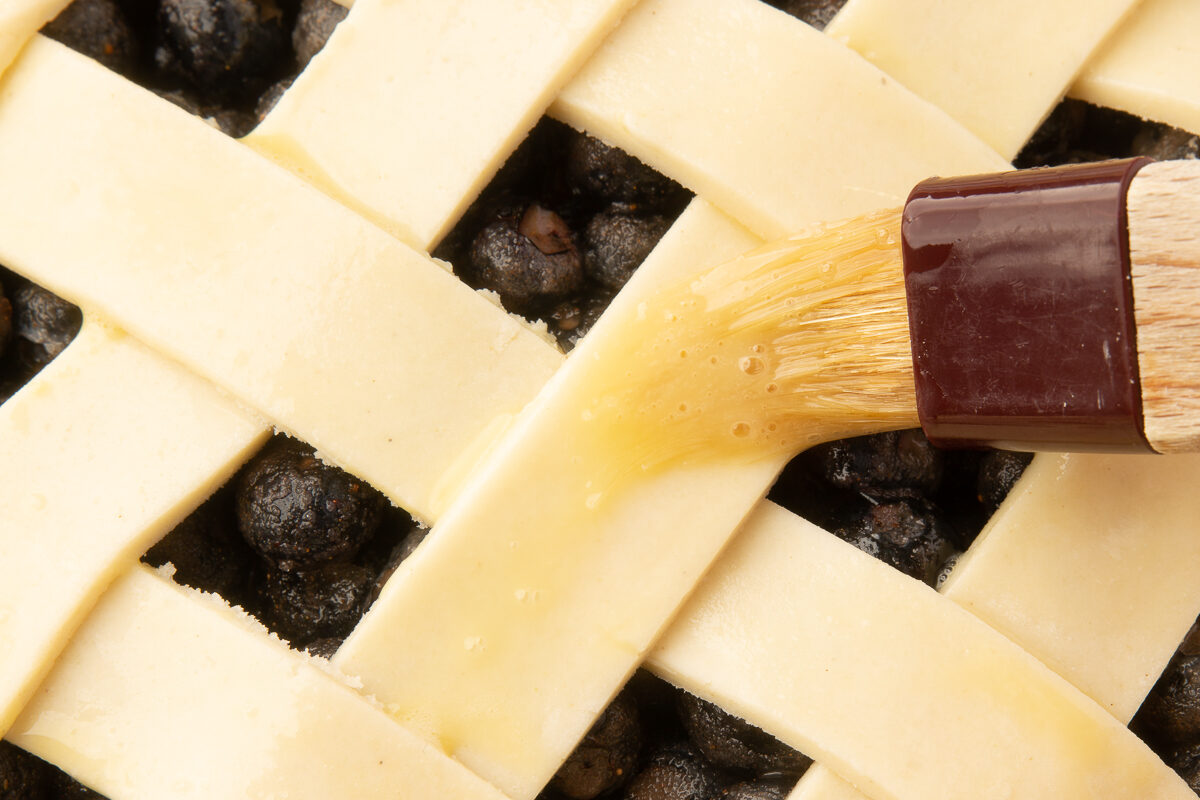
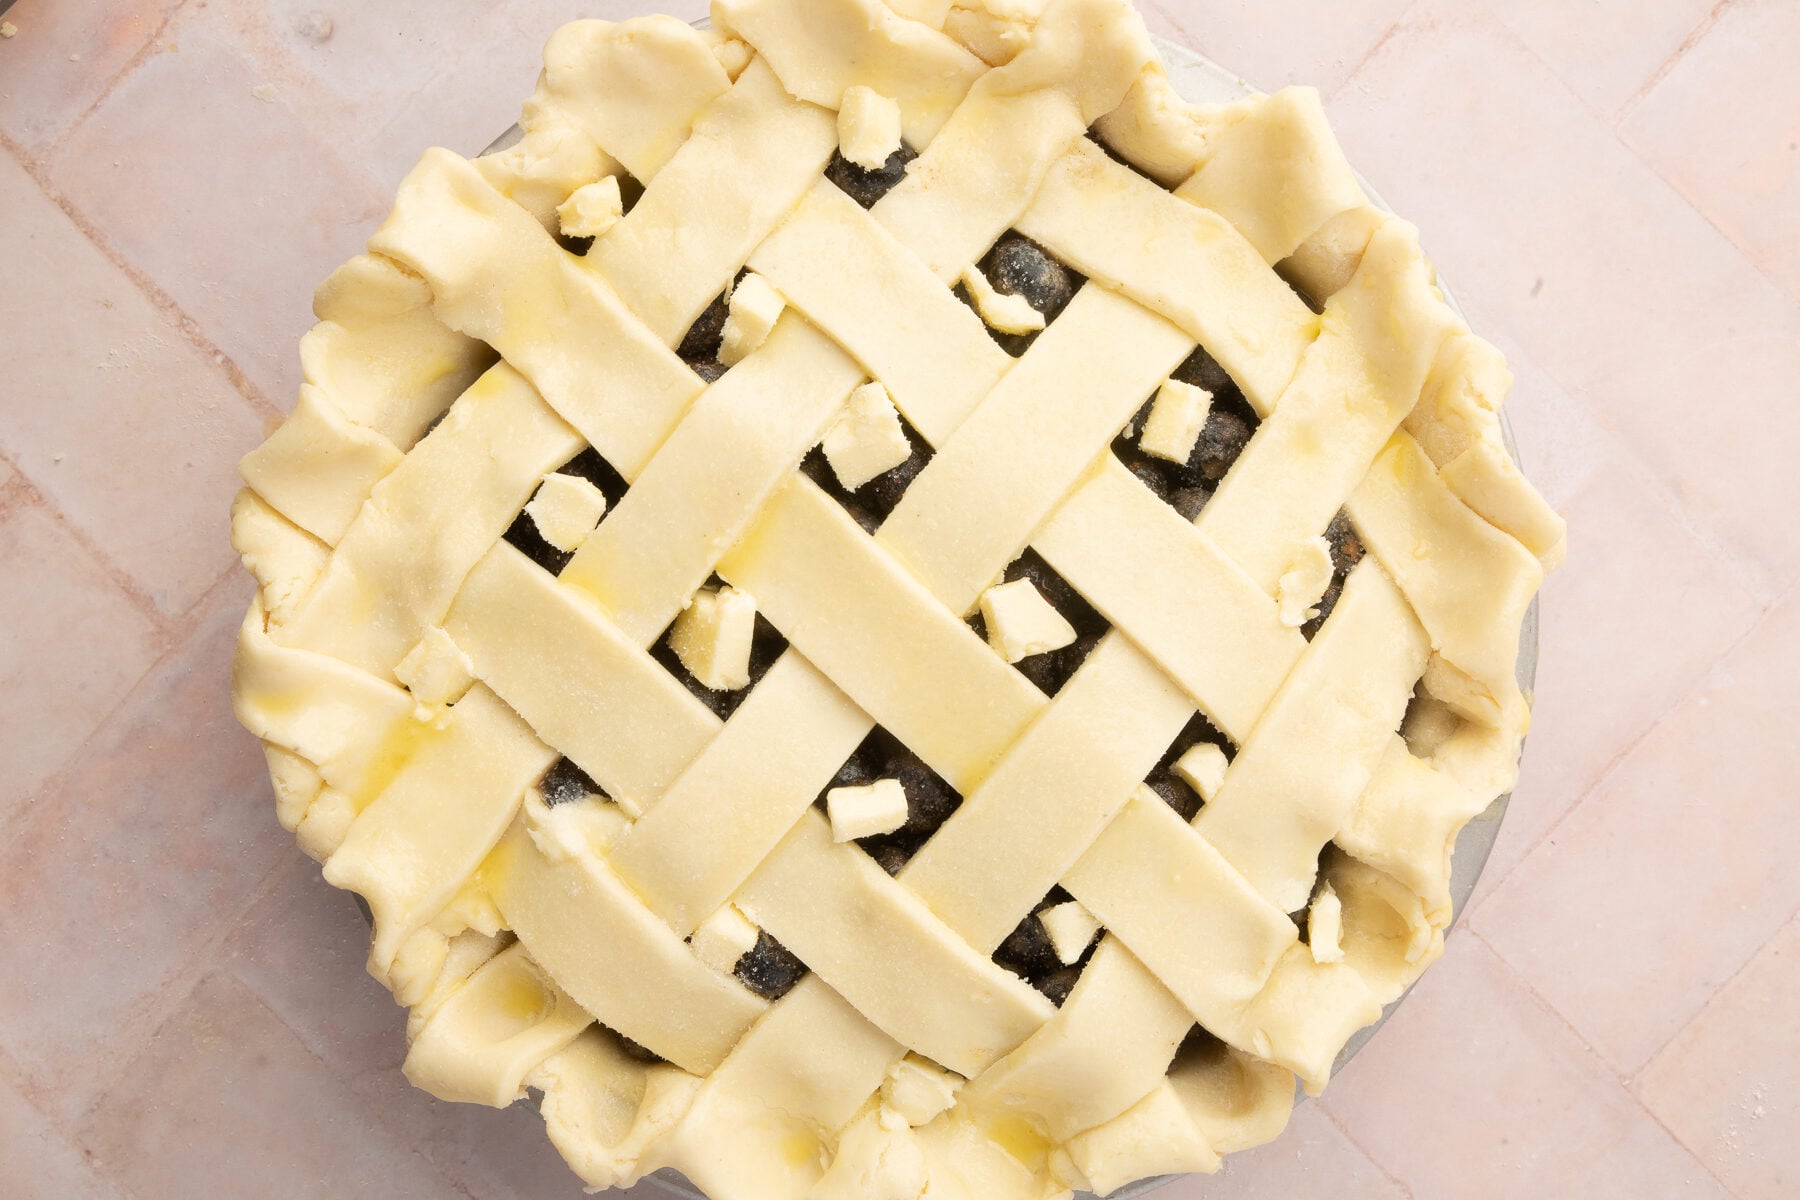
- Egg wash: In a small bowl, beat 1 (50 g) large egg with 1 tablespoon (15 g) water. Brush the egg wash evenly over the lattice and edges.

- Place 2 tablespoons (28 g) butter (cubed very small) in the openings between the lattice strips. Sprinkle the top with 1 teaspoon (4 g) turbinado coarse sugar.
Bake:
- Place the pie on a baking sheet to catch any drips. Bake at 425°F (220°C) for 15 minutes. Reduce the oven temperature to 375°F (190°C) and continue baking for 45 minutes to 1 hour, or until the crust is golden brown and the filling is bubbling. If the pie is browning too quickly, place aluminum foil over the top of the pie to protect the lattice topping and edges from burning.
- Remove the pie from the oven and let the pie cool on a wire rack for at least 2 hours before serving. Cooling completely allows the blueberry filling to set and thicken, making slicing easier and ensuring that the filling doesn’t pour out of each slice of pie.
Notes
- Pie Tin: I use a 9-inch metal pie pan for my pies. I think it’s the most consistent in distributing heat and results in a perfectly flaky pie crust that is super sturdy.
- Storage: Store leftover pie covered at room temperature for up to 2 days or in the refrigerator for up to 5 days. The crust may soften over time, but the pie will still taste delicious!
Nutrition