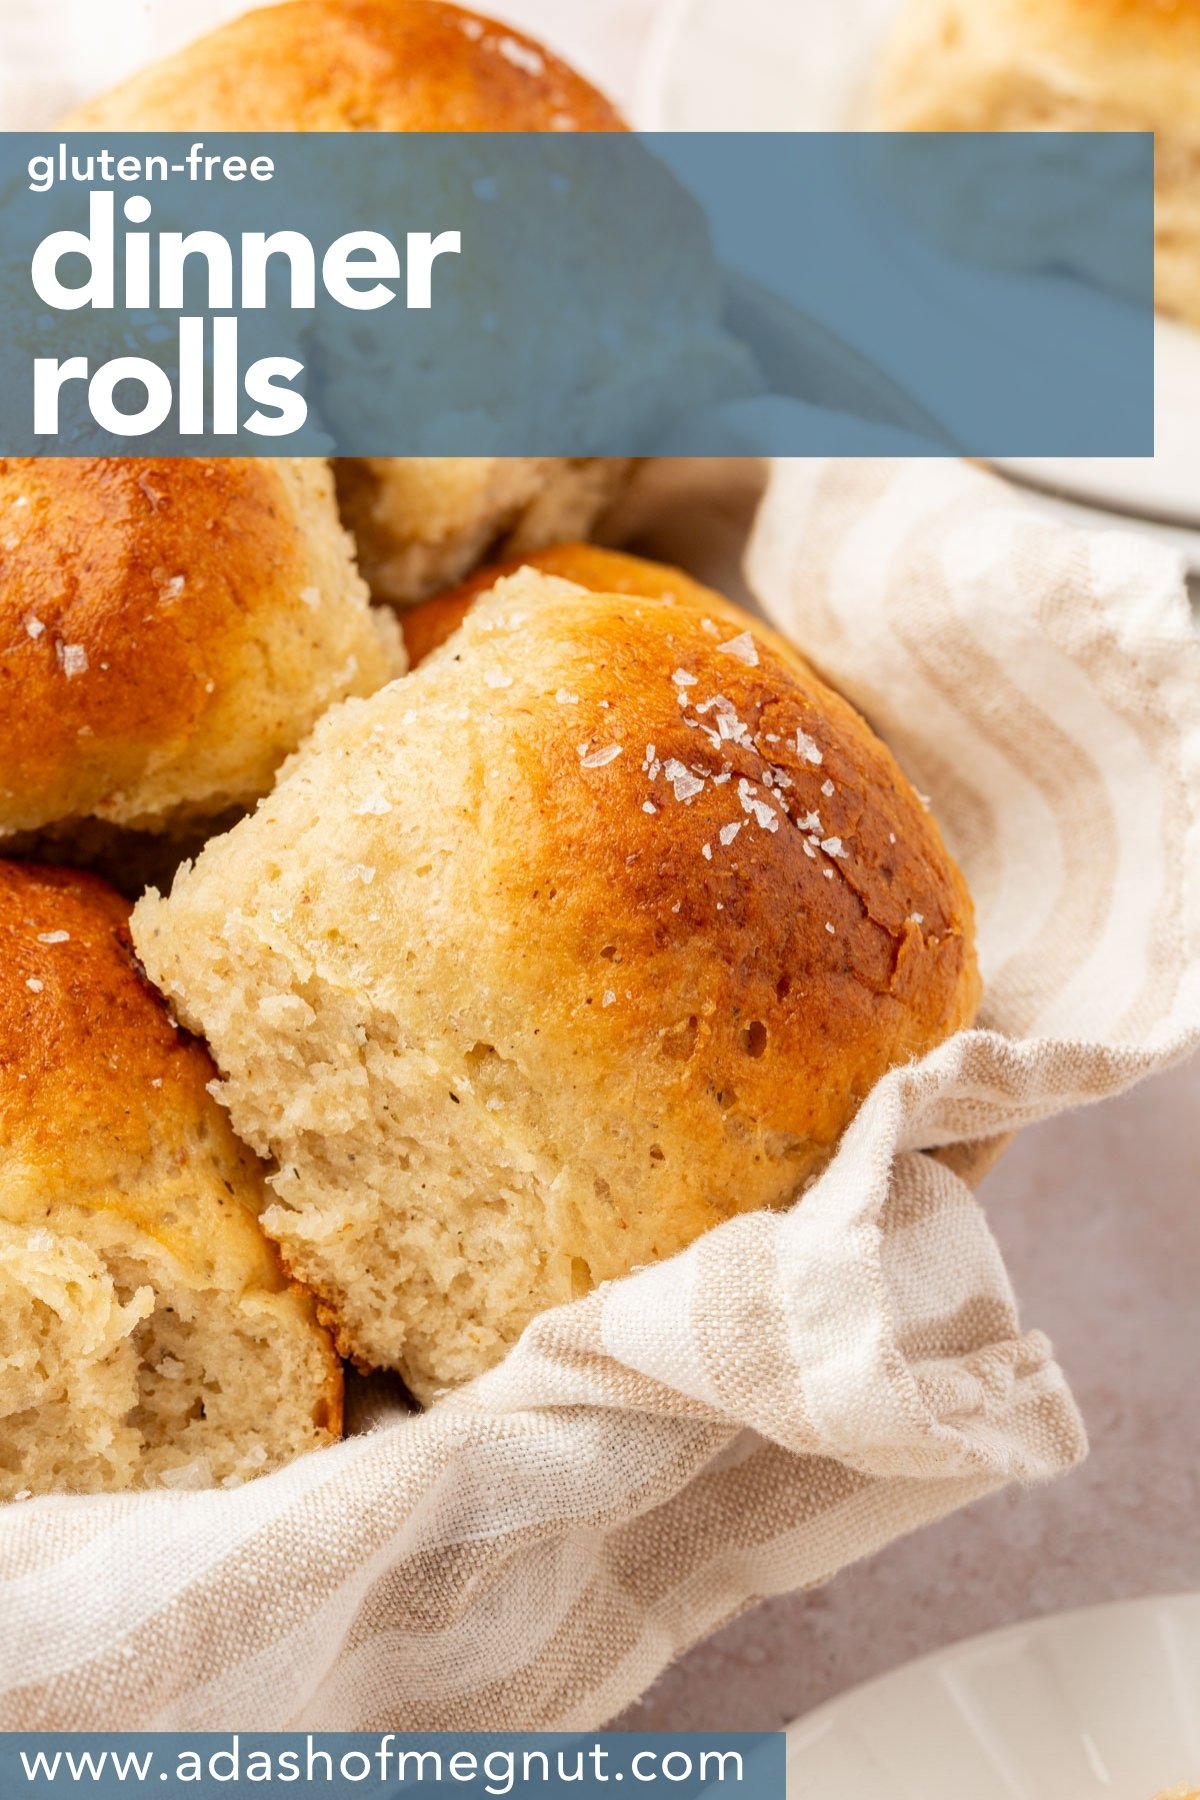
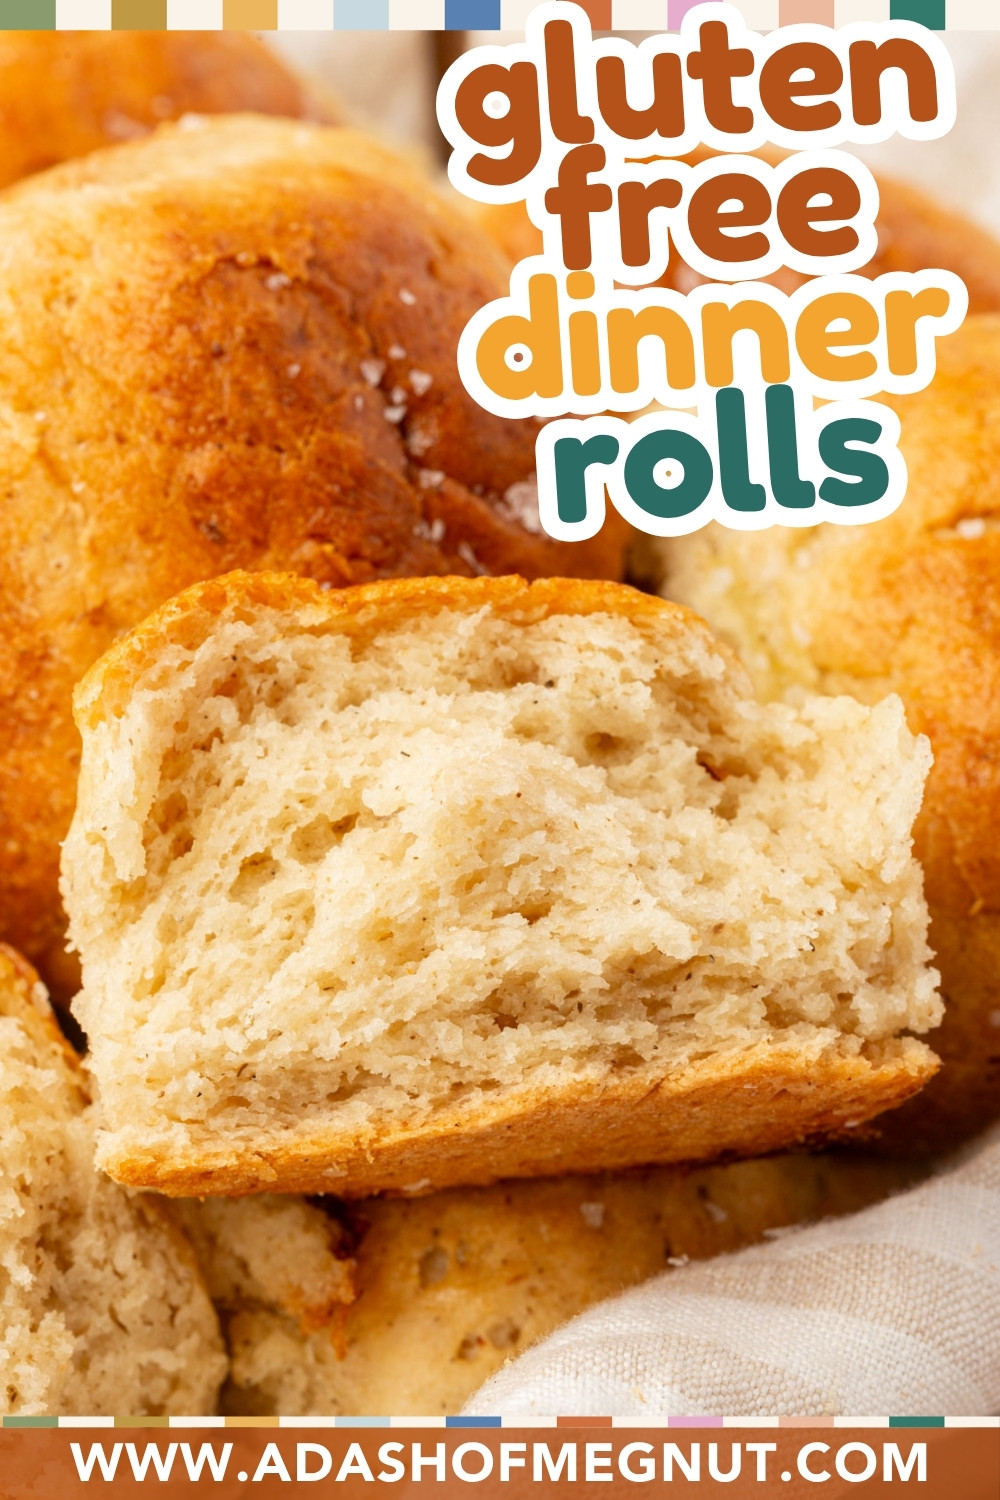
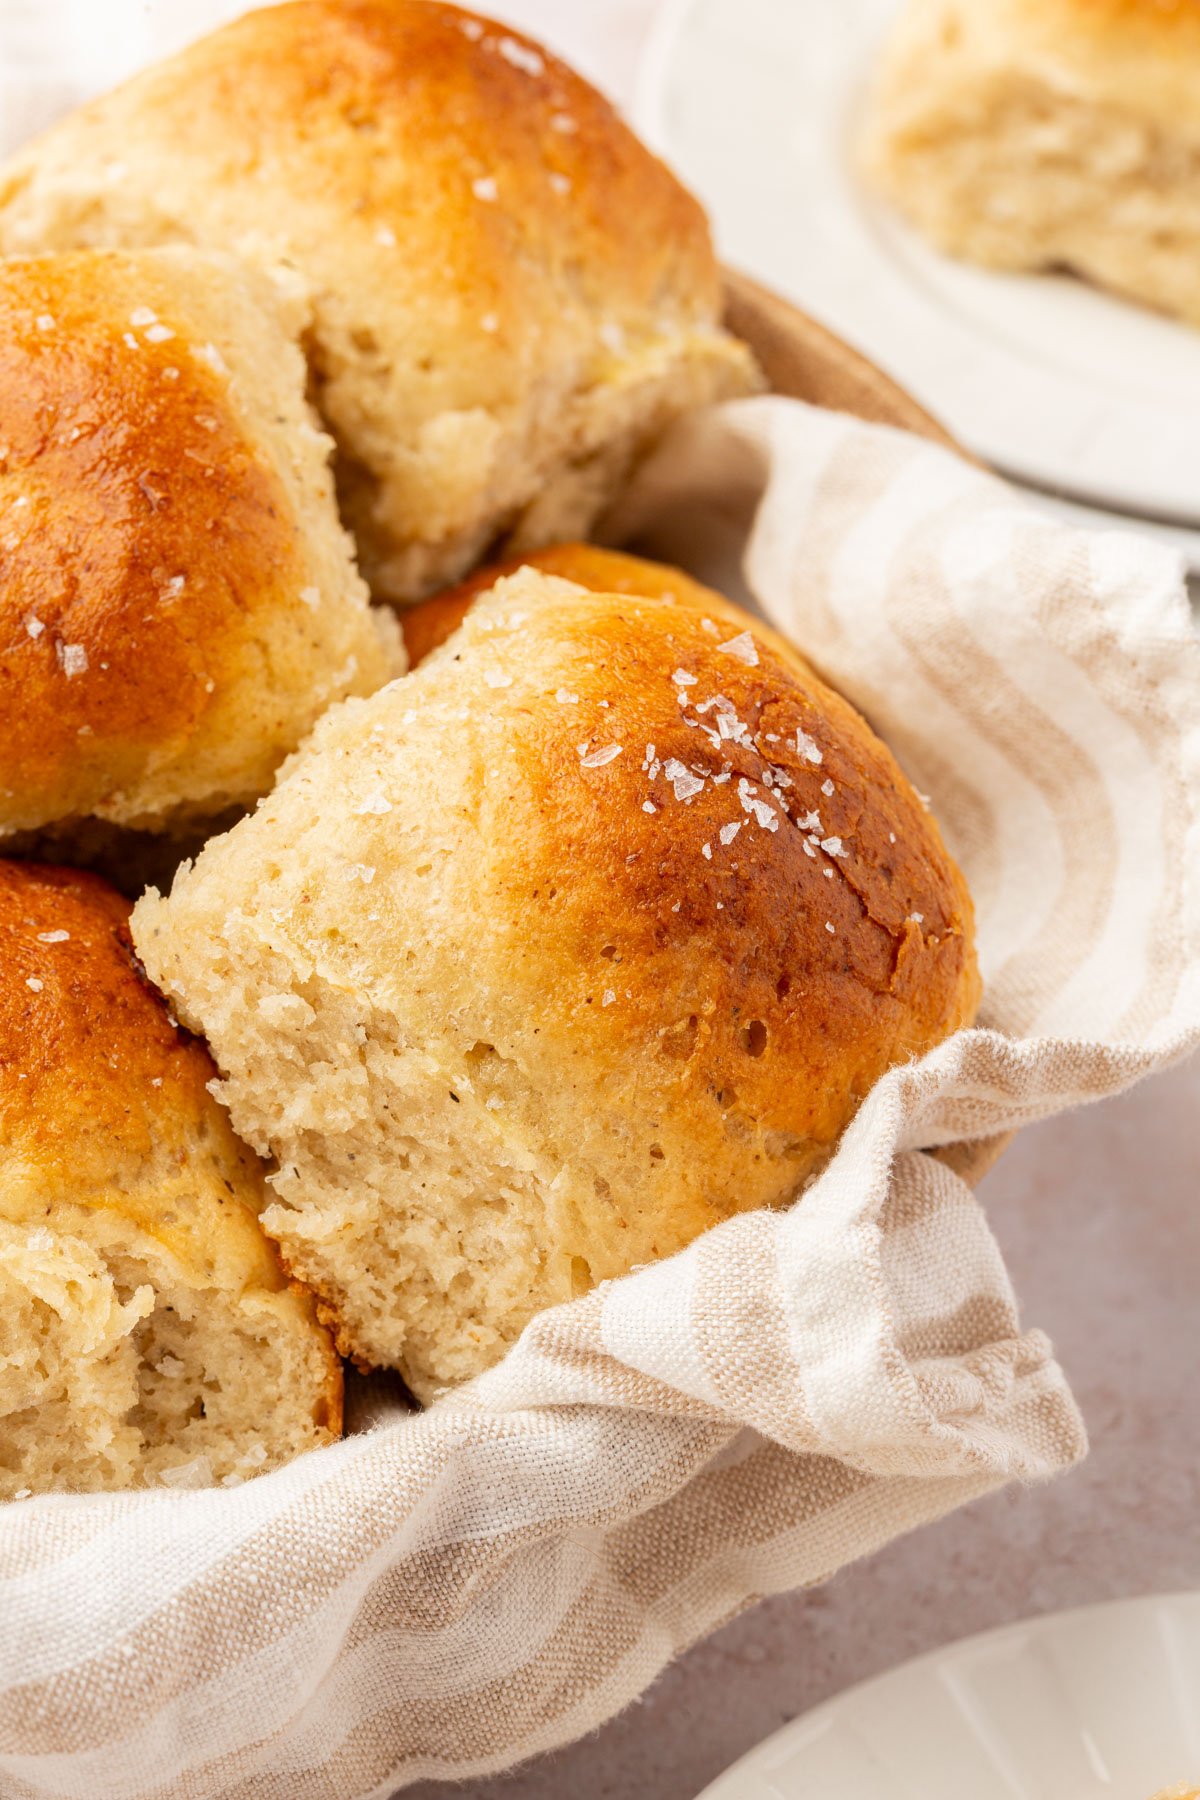
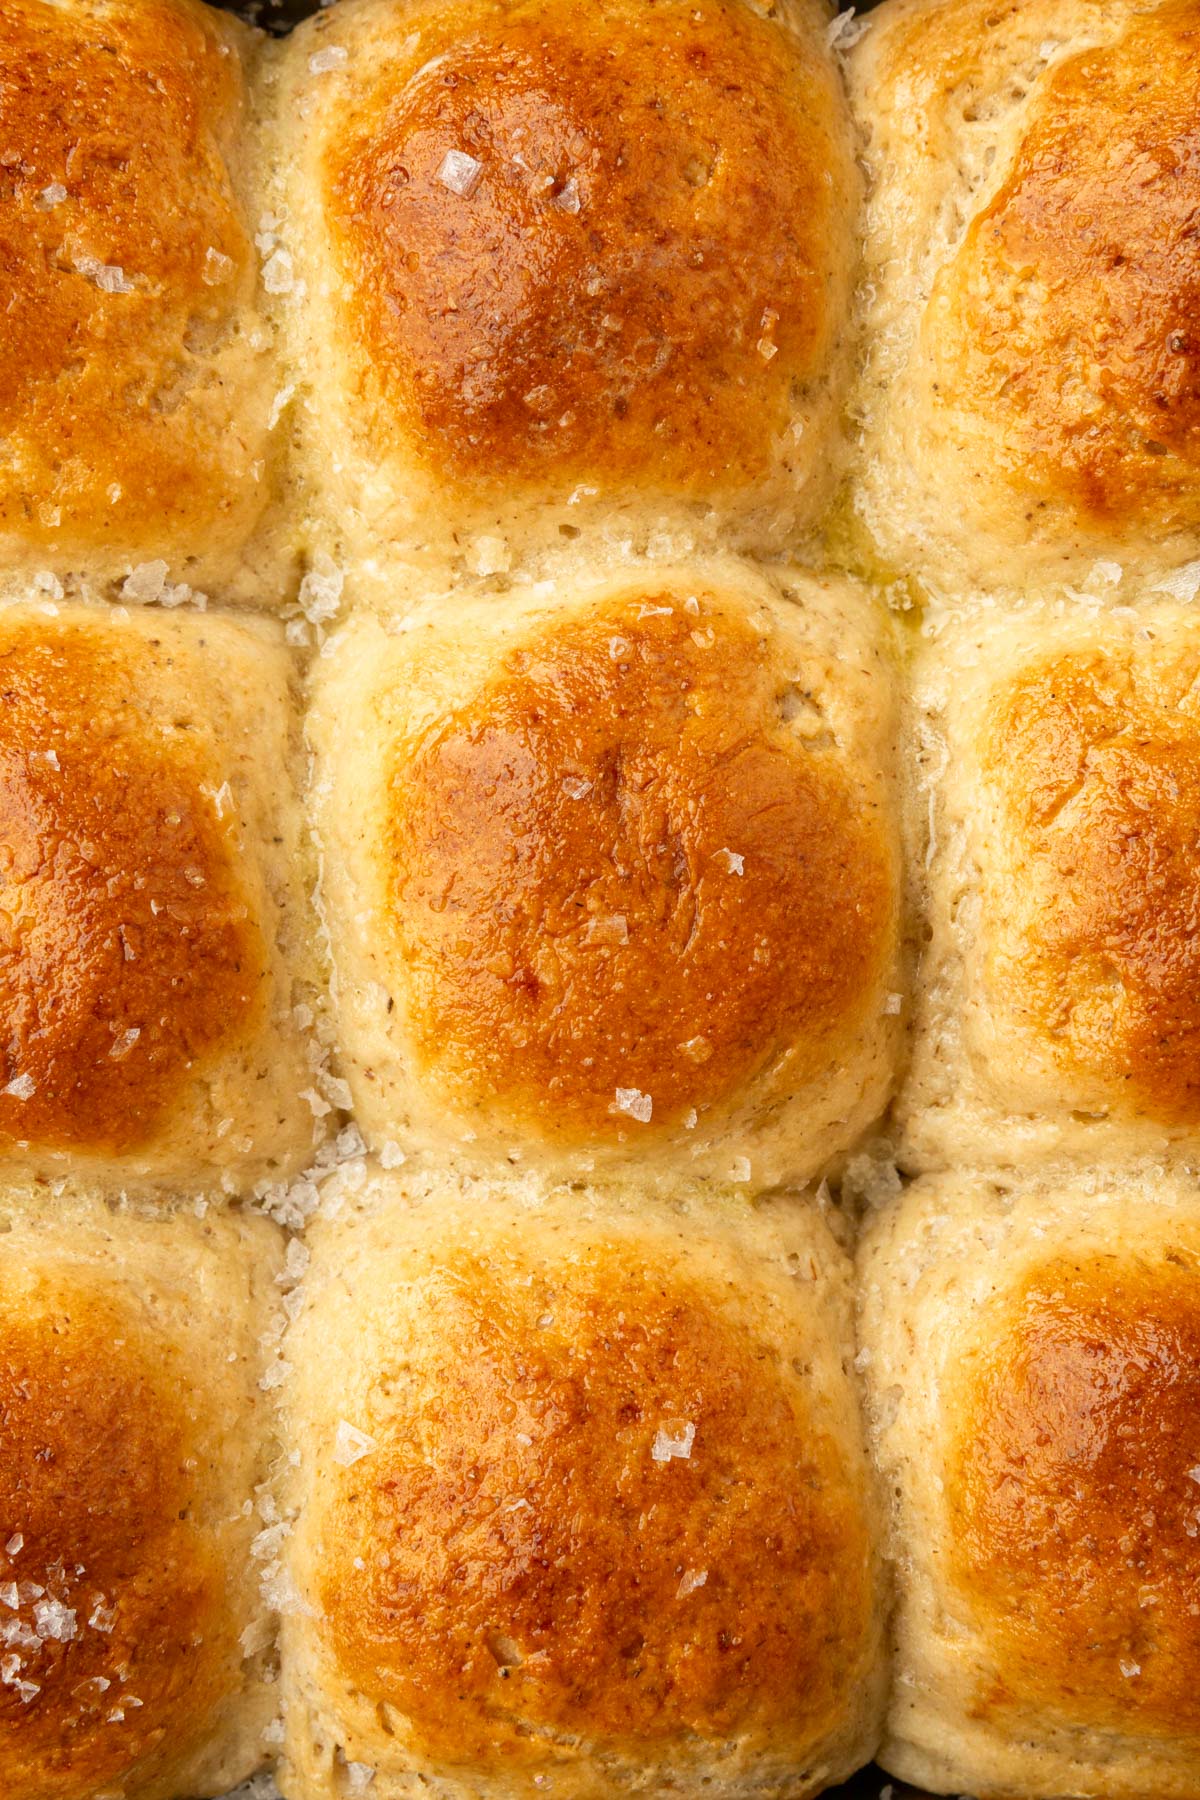
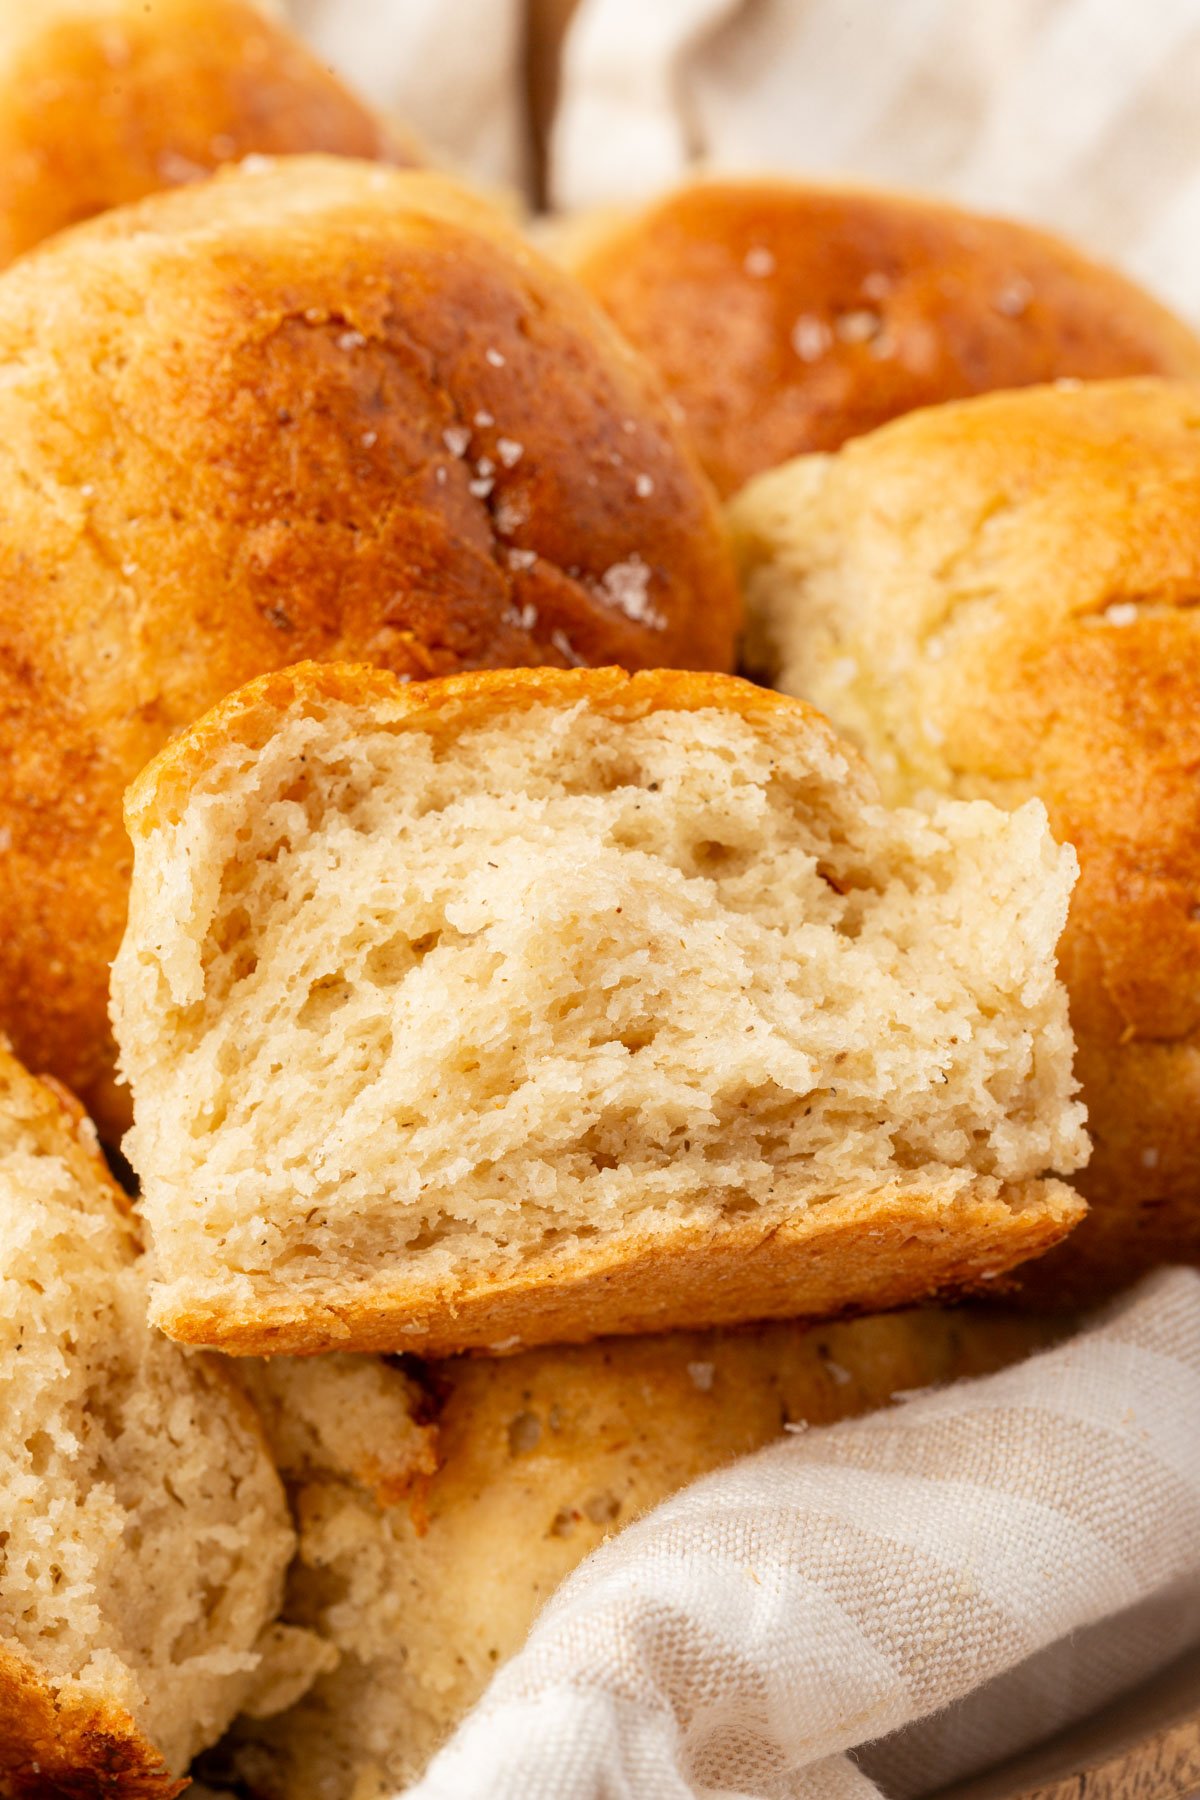
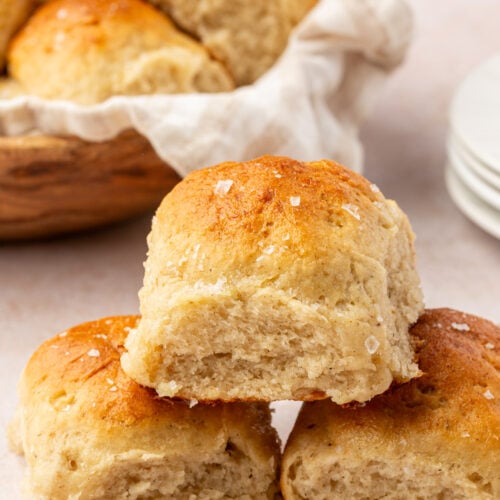
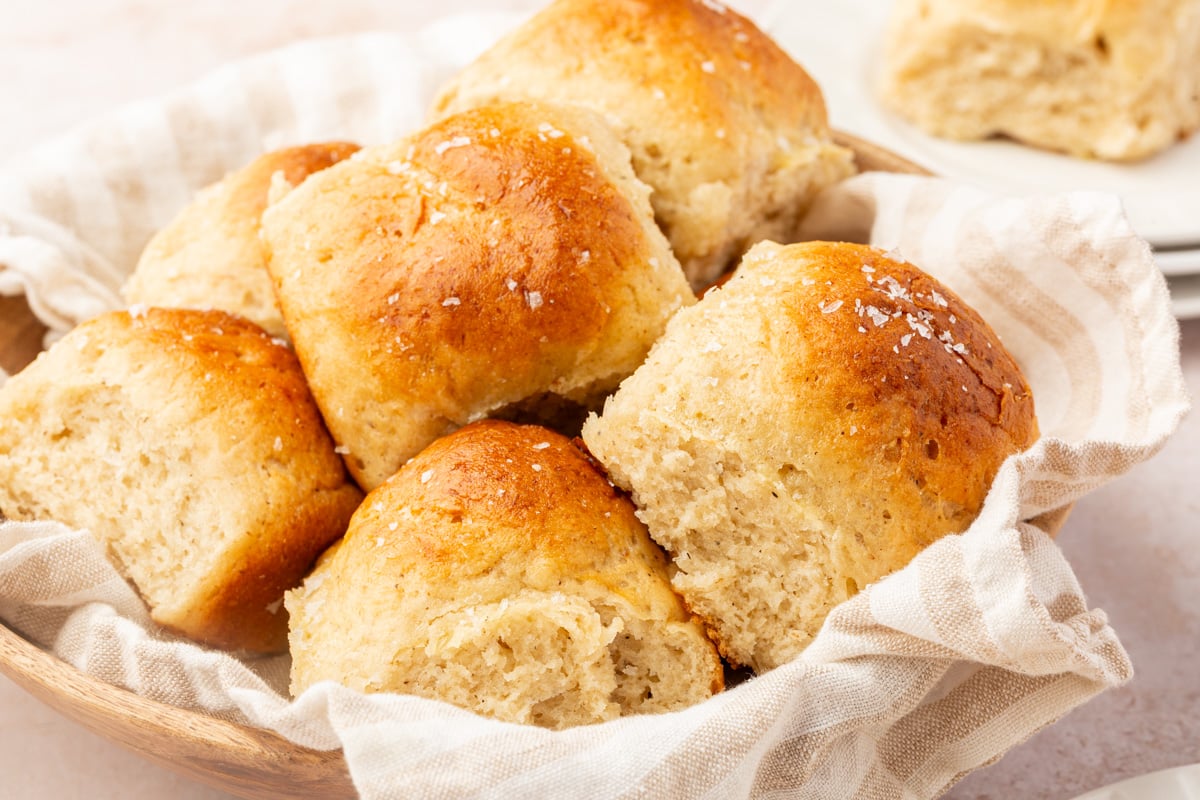
There’s nothing quite like a basket of warm, buttery dinner rolls on the table, and these gluten-free dinner rolls prove you don’t have to miss out. After years of testing gluten-free yeast doughs, I finally created a soft, fluffy roll that bakes up golden and pull-apart tender every time.
This recipe uses my enriched gluten-free dough base made with milk, butter, and eggs for that classic bakery-style texture. Whether you’re planning a Thanksgiving feast or just want fresh bread for a weeknight dinner, these rolls deliver that comforting, homemade taste you’ve been missing.
Why You’ll Love this Recipe
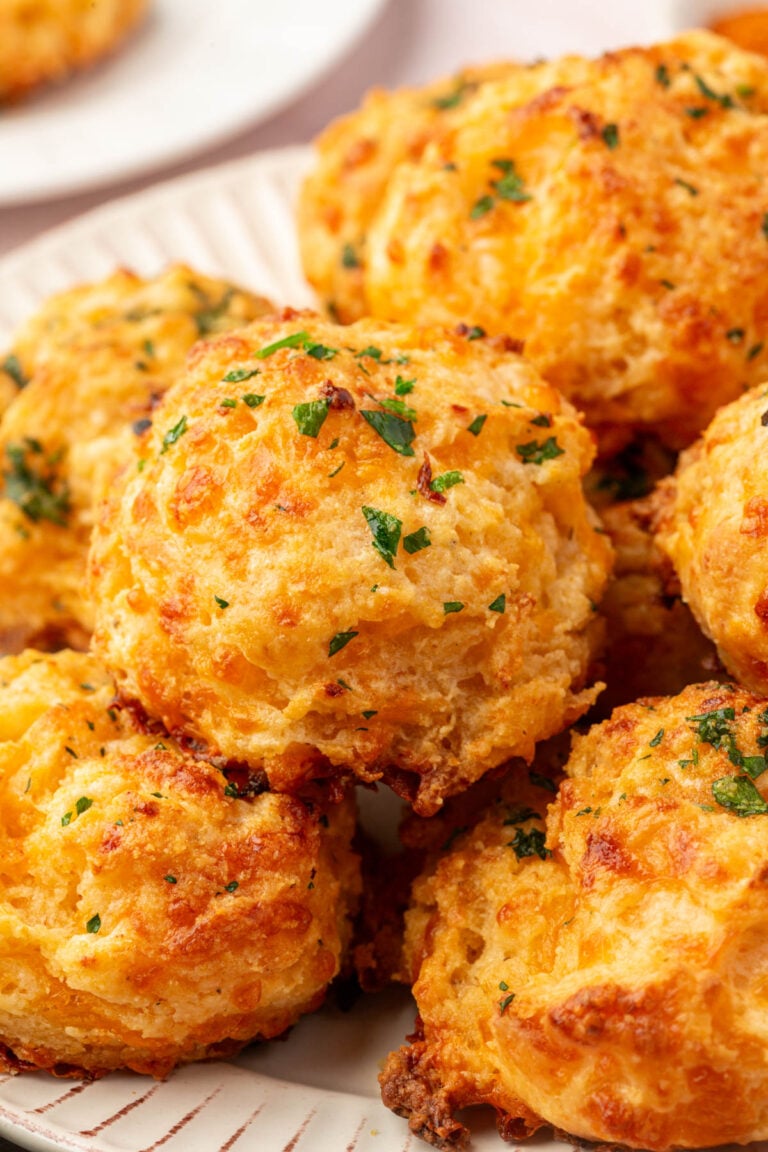
Searching for more gluten-free bread recipes? gluten-free focaccia / gluten-free cheddar biscuits / gluten-free irish soda bread
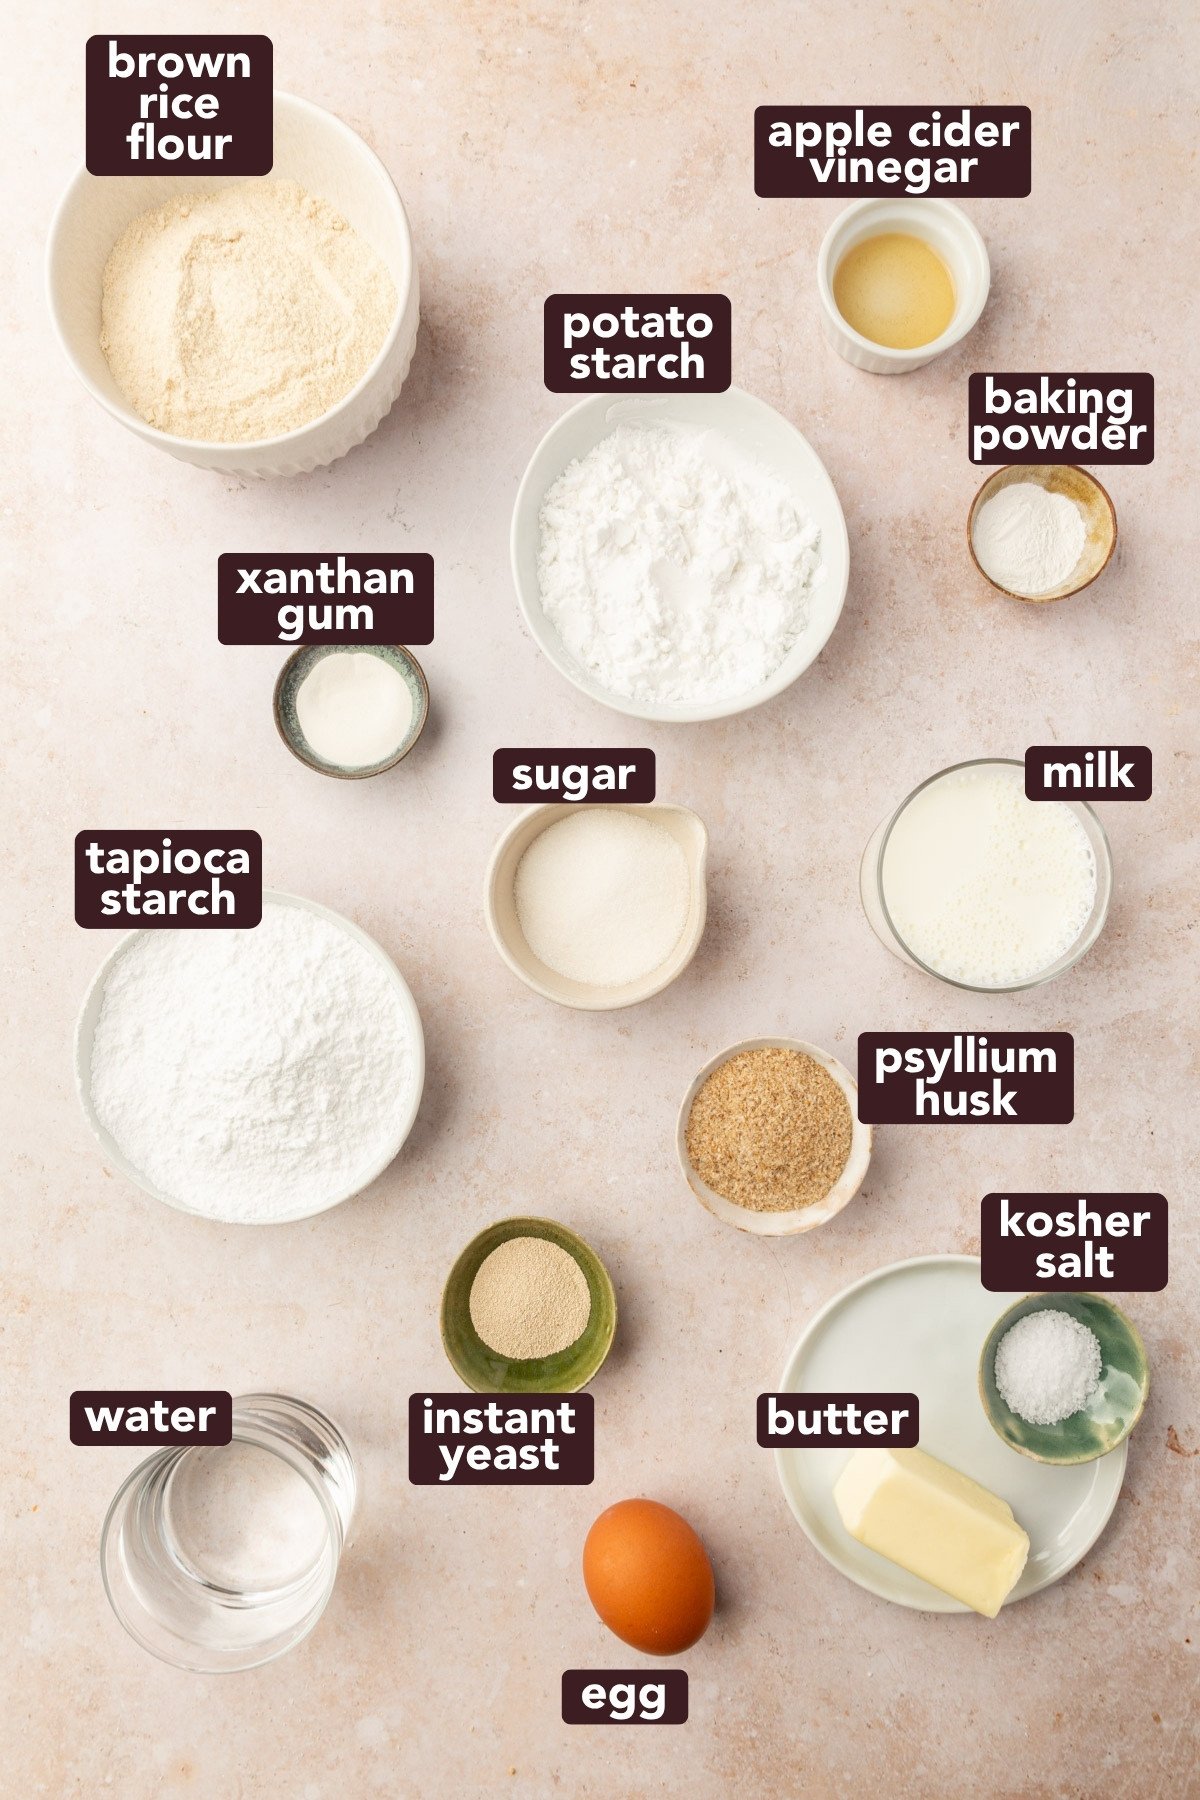
Ingredients
TIP
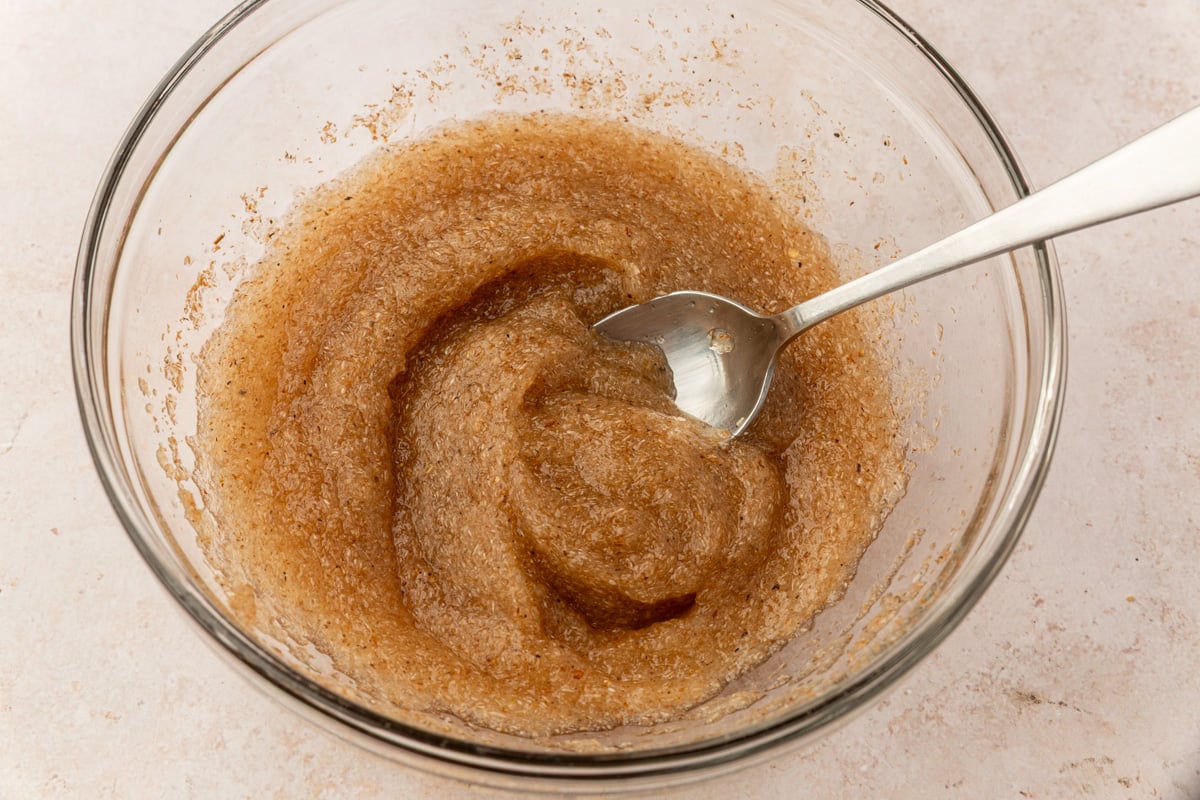
The secret to these soft, fluffy rolls is the psyllium husk gel. It helps trap moisture and gives structure to the dough. I use whole psyllium husk (not the powder!) because it mixes more evenly and makes the dough easier to shape.
Ingredient Notes
- Brown Rice Flour – This forms the base of our flour blend and gives structure and a mild flavor. It’s light enough to help the rolls rise without feeling dense.
- Tapioca Starch & Potato Starch – These two starches work together to create that soft, fluffy, pull-apart texture. Tapioca adds elasticity while potato starch gives tenderness and helps the rolls brown beautifully.
- Xanthan Gum – Essential for binding and giving the dough stretch. It replaces the gluten and keeps the rolls from crumbling once baked.
- Whole Psyllium Husk – This ingredient is key. When hydrated with warm water, it forms a gel that strengthens the dough and makes it easy to shape — no dry, cracking dough here. I prefer whole psyllium husk over psyllium powder, which can get really clumpy.
- Yeast – Instant yeast makes this recipe quick and reliable. You can mix it straight into the dry ingredients, no need to proof it first.
- Milk, Butter, and Eggs – These are what make this an enriched dough. They add richness, flavor, and that soft, tender crumb you expect from a great dinner roll.
- Sugar – A small amount feeds the yeast and adds a touch of sweetness to balance the salt. I promise the dinner rolls do not taste sweet.
About This Dough
This recipe starts with my Gluten-Free Enriched Dough — made with milk, butter, and eggs for a soft, tender crumb and golden color. It’s the same base I use for my gluten-free cinnamon rolls, but this version is halved and slightly less sweet, making it perfect for savory dinner rolls.
Getting the texture right for this dough took a lot of testing. I really wanted to simplify the process by skipping the psyllium gel step and just mixing psyllium powder straight into the dry ingredients. But every time I tried it, the dough took much longer to hydrate and the texture was inconsistent — sometimes sticky, sometimes dry, and never as soft as I wanted.
When I switched back to hydrating whole psyllium husk in warm water first to form a gel, everything clicked. The dough came together beautifully every time — soft, elastic, and easy to shape. That step may feel extra, but it’s absolutely worth it. It’s what gives these rolls their pillowy structure and that bakery-style rise that’s so hard to achieve in gluten-free baking.
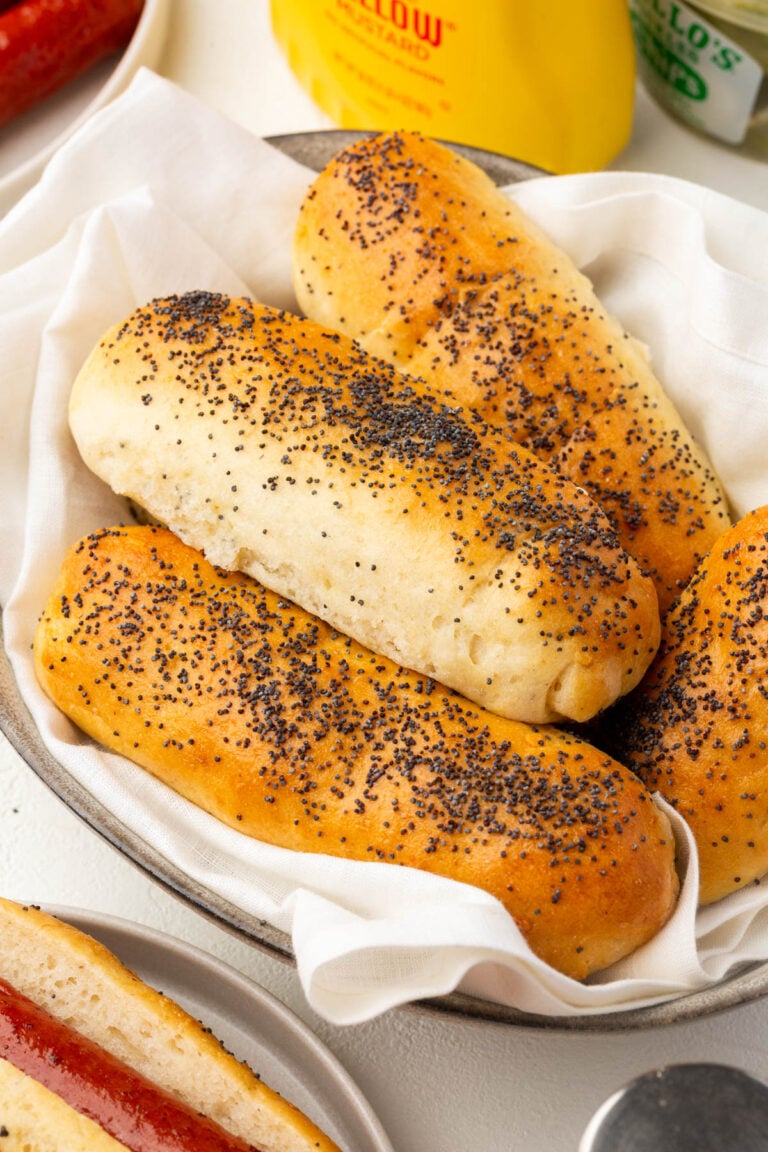
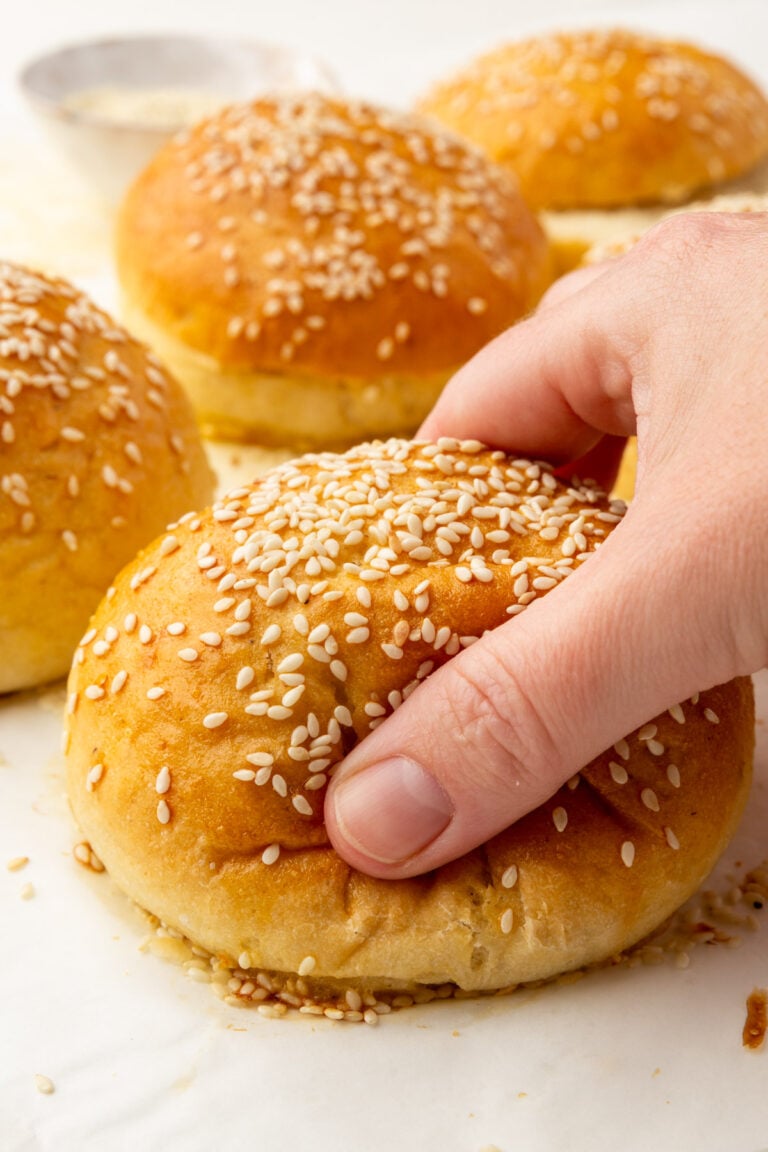
Once you’ve mastered this dough, you can use it for so many recipes — from fried donuts to crescent rolls. It’s a versatile base that opens up a whole world of soft, fluffy, gluten-free breads.
How to Make Gluten-Free Dinner Rolls
For the ingredient list with measurements, full instructions, printable recipe, and additional notes, please scroll down to the recipe card.
Recipe FAQs
I don’t recommend it. Most gluten-free flour blends aren’t formulated for yeast doughs — they tend to absorb liquid differently and can make the rolls dense or dry. My blend was tested specifically for this recipe to get that soft, pillowy texture.
Yes! Psyllium husk gives gluten-free dough strength and flexibility so you can knead and shape it easily. Without it, the dough won’t rise as well and the texture will be more crumbly. I recommend whole psyllium husk, not the powder.
Definitely. Shape the rolls, cover them tightly, and refrigerate overnight. The next day, let them sit at room temperature for about an hour to finish rising before baking.
Most often, it’s from under-proofing or using the wrong flour blend. Make sure your dough doubles in size before baking and stick with the blend listed in the recipe. Every ingredient contributes to that light, fluffy texture.
Expert Tips
Storage instructions
These gluten-free dinner rolls are best enjoyed the day they are baked because that is when the texture is at its softest.
Storing Baked Rolls:
If you have leftovers, store them in an airtight container at room temperature for up to 2 days.
Reheating:
To refresh the texture, wrap rolls in foil and warm in a 300°F oven for 5 to 7 minutes until soft and steamy again. You can also microwave a single roll for about 15 seconds, covered with a damp paper towel to keep it moist
Freezing:
Allow baked rolls to cool completely, then wrap tightly in foil and place in a freezer-safe bag for up to 2 months. To reheat, thaw overnight in the refrigerator and warm in a 325°F oven until soft and heated through.
Make Ahead Option
You can prepare the dough a day in advance. After shaping the rolls, cover the pan tightly with plastic wrap and refrigerate overnight. The next day, let them sit at room temperature for about an hour to finish rising before baking. This is perfect for holidays or hosting when you want fresh-baked rolls without the rush.
Serving suggestions
These gluten-free dinner rolls pair perfectly with cozy soups, hearty mains, and holiday meals. Try them alongside my gluten-free broccoli cheddar soup, gluten-free chicken noodle soup, or gluten-free beef stew for an easy weeknight dinner.
They’re also great with gluten-free gravy or red wine cranberry sauce on the Thanksgiving table. If you’re serving a crowd, warm the rolls just before dinner and brush them with a little salted butter or garlic butter for extra flavor and shine.
More gluten-free breads to try
Did you make this recipe?
I’d love to know! Please rate it and leave a comment below. You can also share your pictures and tag @adashofmegnut on Instagram.
Gluten-Free Dinner Rolls
Ingredients
Dry Ingredients
- 160 g brown rice flour - about 1 cup
- 115 g tapioca starch - about 1 cup
- 75 g potato starch - about ½ cup
- 50 g (¼ cup) granulated sugar
- 8 g (½ tablespoon) kosher salt
- 7 g instant yeast - about 2 ¼ teaspoons – 1 packet
- 6 g xanthan gum - about 2 teaspoons
- 8 g baking powder - about 2 teaspoons
Psyllium Mixture
- 16 g whole psyllium husk - about 2 tablespoons
- 160 g warm water - about ⅔ cup – about 100°F
Wet Ingredients
- 160 g warm whole milk - about ⅔ cup – 100–110°F
- 1 large egg - about 50 g
- 57 g (4 tablespoons) unsalted butter – melted and slightly cooled
- 5 g (1 teaspoon) apple cider vinegar
For Brushing
- 1 egg - beaten (for egg wash)
- 28 g (2 tablespoons) melted butter
- 1/2 teaspoon flaky sea salt - for finishing, such as Maldon salt
**Use the toggle button above to turn the instruction photos on and off!
Instructions
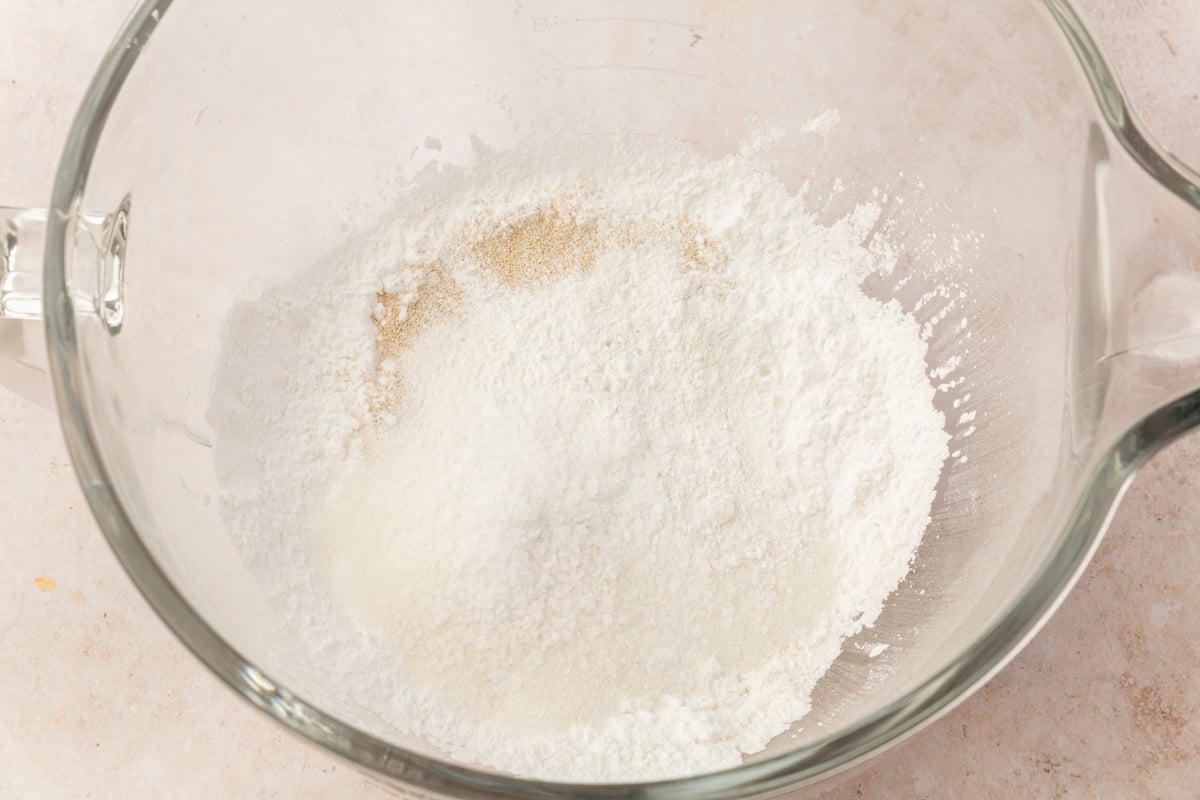
- Mix the dry ingredients: In the bowl of a stand mixer, combine 160g brown rice flour, 115g tapioca starch, 75g potato starch, 50g sugar, 8g salt, 7g instant yeast, 6g xanthan gum, and 8g baking powder. Whisk to combine evenly.
- Make the psyllium gel: In a small bowl, whisk together 16g whole psyllium husk and 160g warm water until thickened into a gel. Set aside for about one minute to hydrate fully.
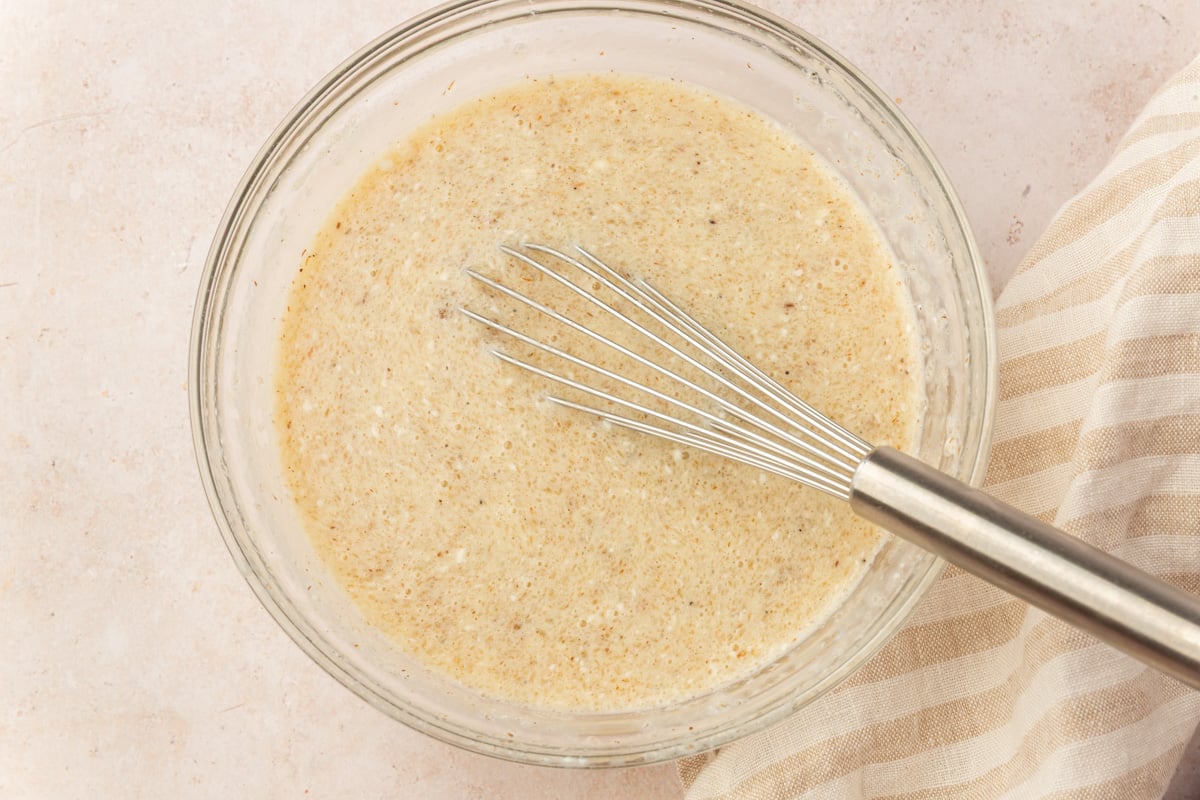
- Combine the wet ingredients: In a medium bowl, whisk together 160g warm milk, 1 egg, 57g melted butter, and 5g apple cider vinegar. Add in the psyllium gel and whisk until smooth and uniform.
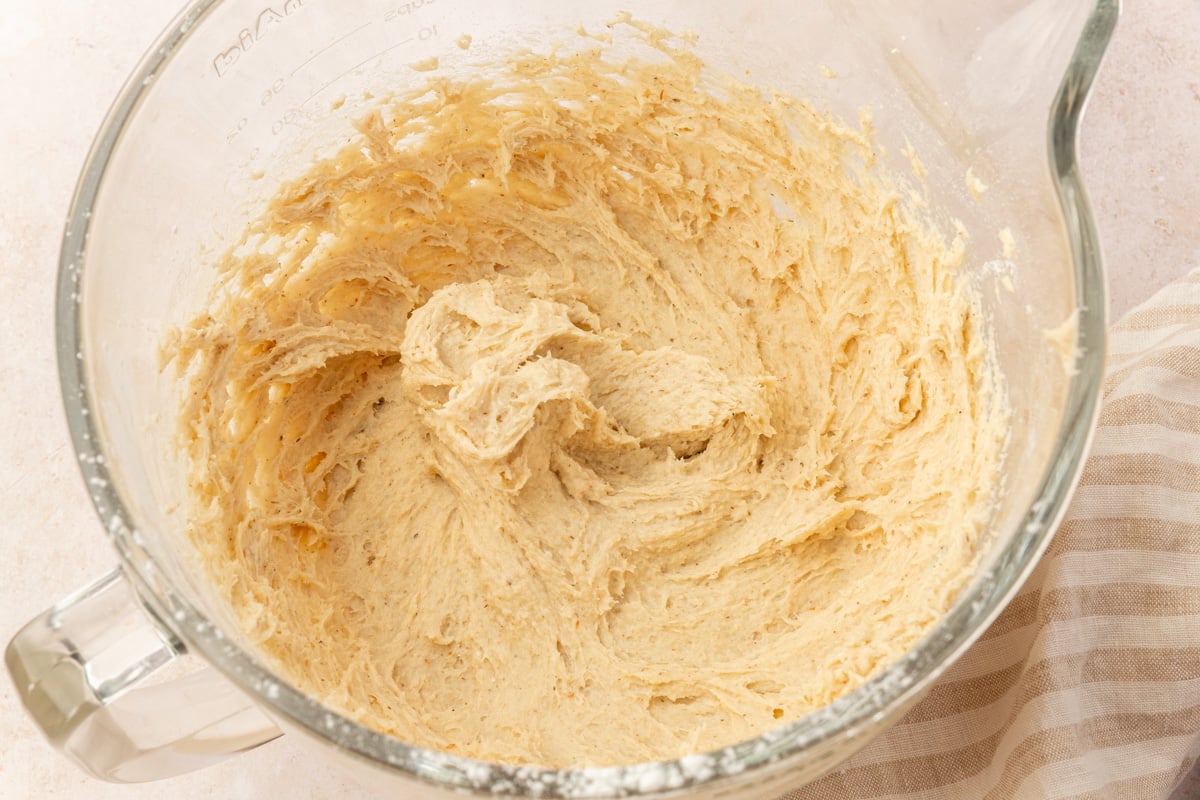
- Make the dough: Pour the wet ingredients into the dry ingredients. Using the dough hook attachment, mix on medium speed for about 5 minutes, scraping the sides and bottom of the bowl as needed. The dough should be soft, thick, and slightly sticky.
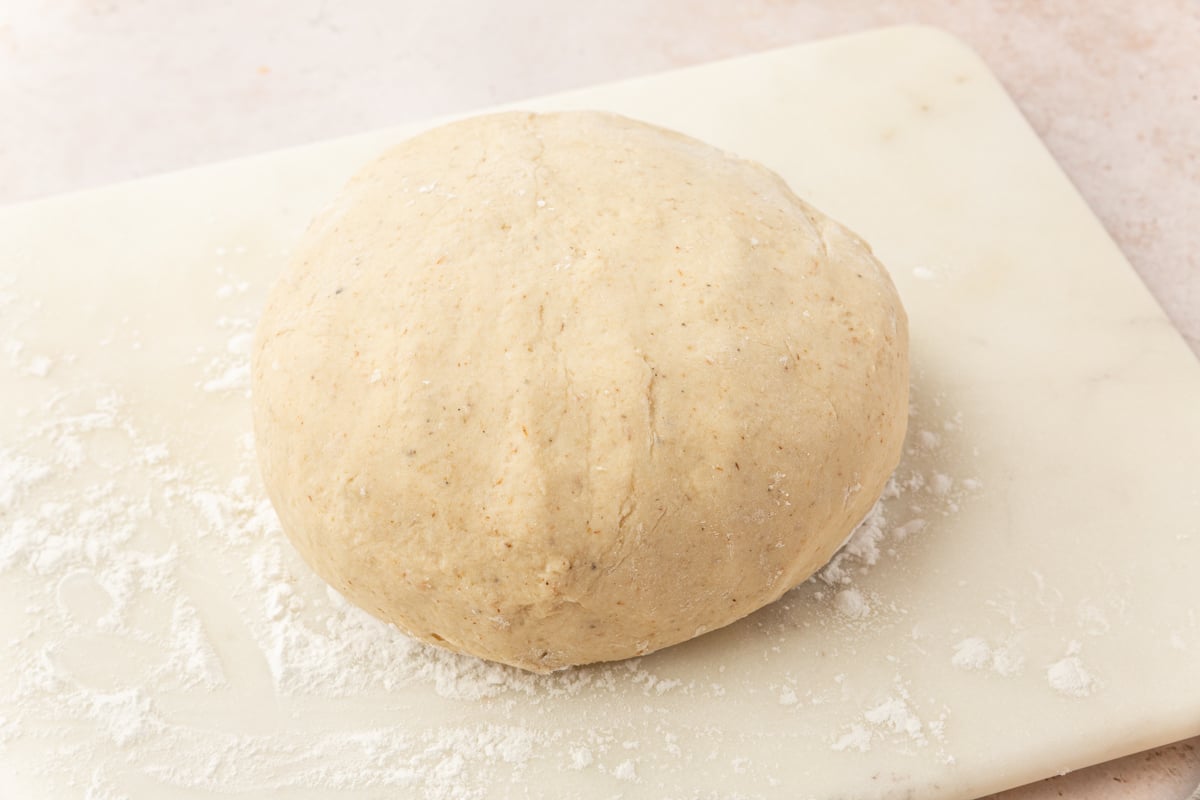
- Knead the dough: Dust your work surface with tapioca starch. Turn out the dough and knead by hand for 1 to 2 minutes until smooth.
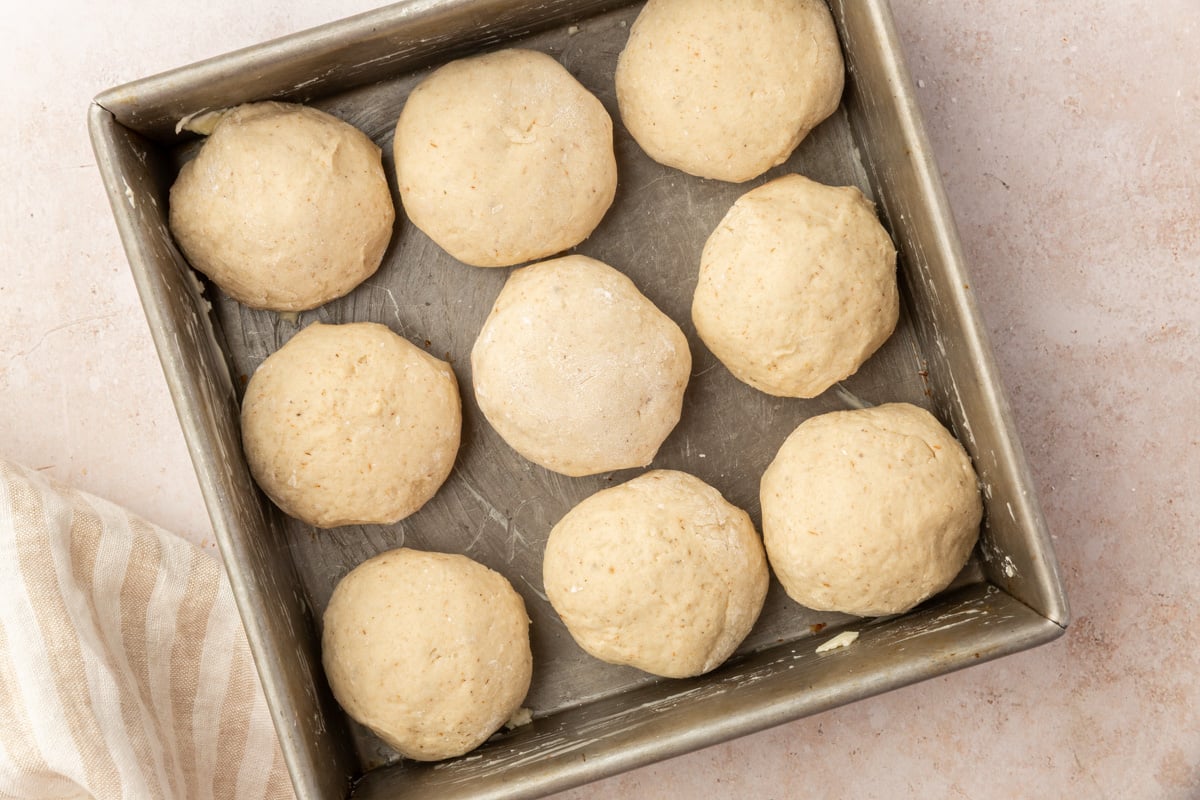
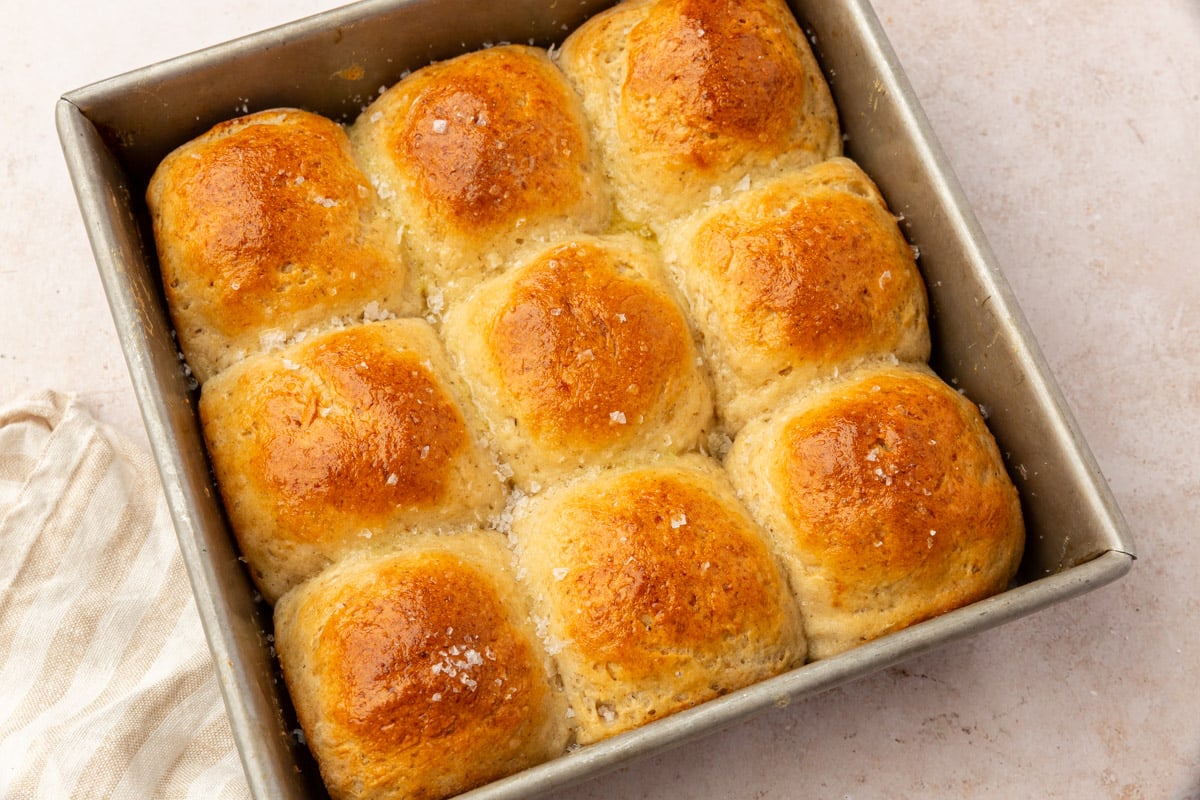
- Shape the rolls: Divide the dough into 8–9 equal pieces (about 95–100 g each). Fold the edges of each piece over themselves toward the center to create a smooth top, pinch the seams closed, then flip seam-side down. Roll each piece under your hand in a loose claw shape until round and smooth. Arrange evenly in a greased 8×8-inch pan (3×3 grid for 9 rolls).
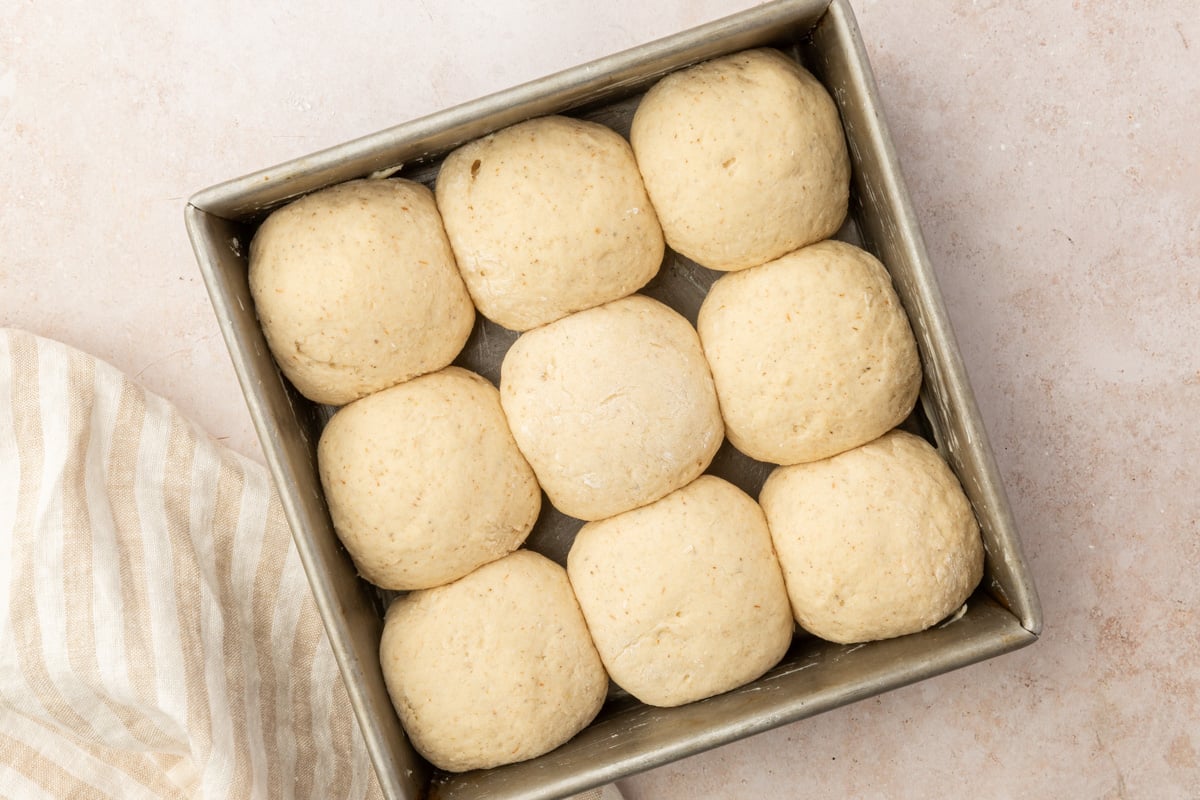
- Proof the rolls: Cover the pan loosely and let rise in a warm spot (75–80°F) for about 45–60 minutes, or until puffy, nearly doubled, and just starting to touch.
- Bake: Preheat the oven to 375°F (190°C). Brush the tops with 1 beaten egg for shine. Bake for 23–26 minutes, or until golden brown and the centers reach 195°F. Tent with foil during the last 5 minutes if browning too quickly.
- Finish: While still warm, brush the tops with 28g (2 tablespoons) melted butter and sprinkle lightly with flaky sea salt. Let cool for a few minutes before serving.
Notes
- Flour Blend: Store-bought gluten-free blends don’t perform well in yeast recipes. This custom blend gives the best soft, fluffy texture.
- Make-Ahead: Shape and proof for about 30 minutes, then cover and refrigerate for up to 18 hours. Let finish rising at room temperature before baking.
- Best Served: Fresh on the day they’re baked. Reheat leftovers gently in the oven, wrapped in foil, for 5–10 minutes.
Nutrition
These turned out amazing!