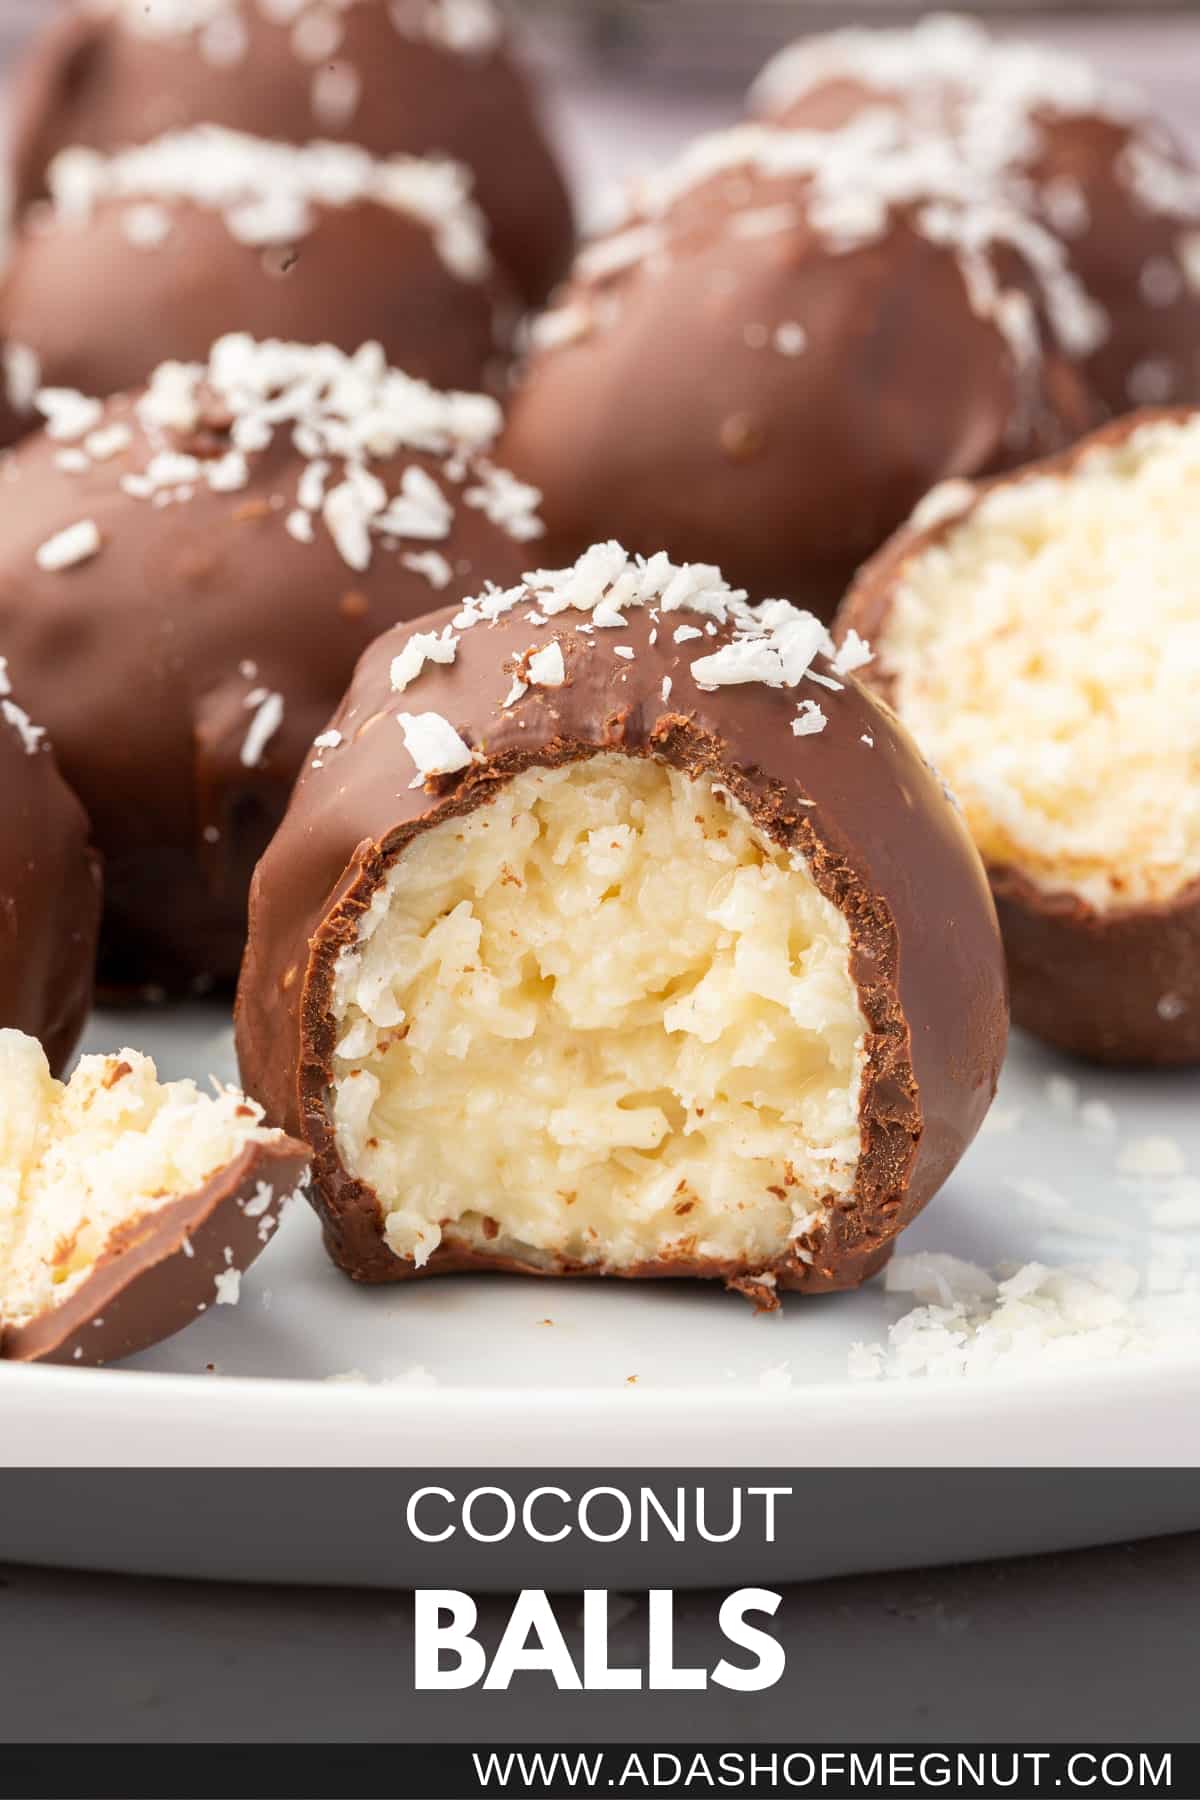
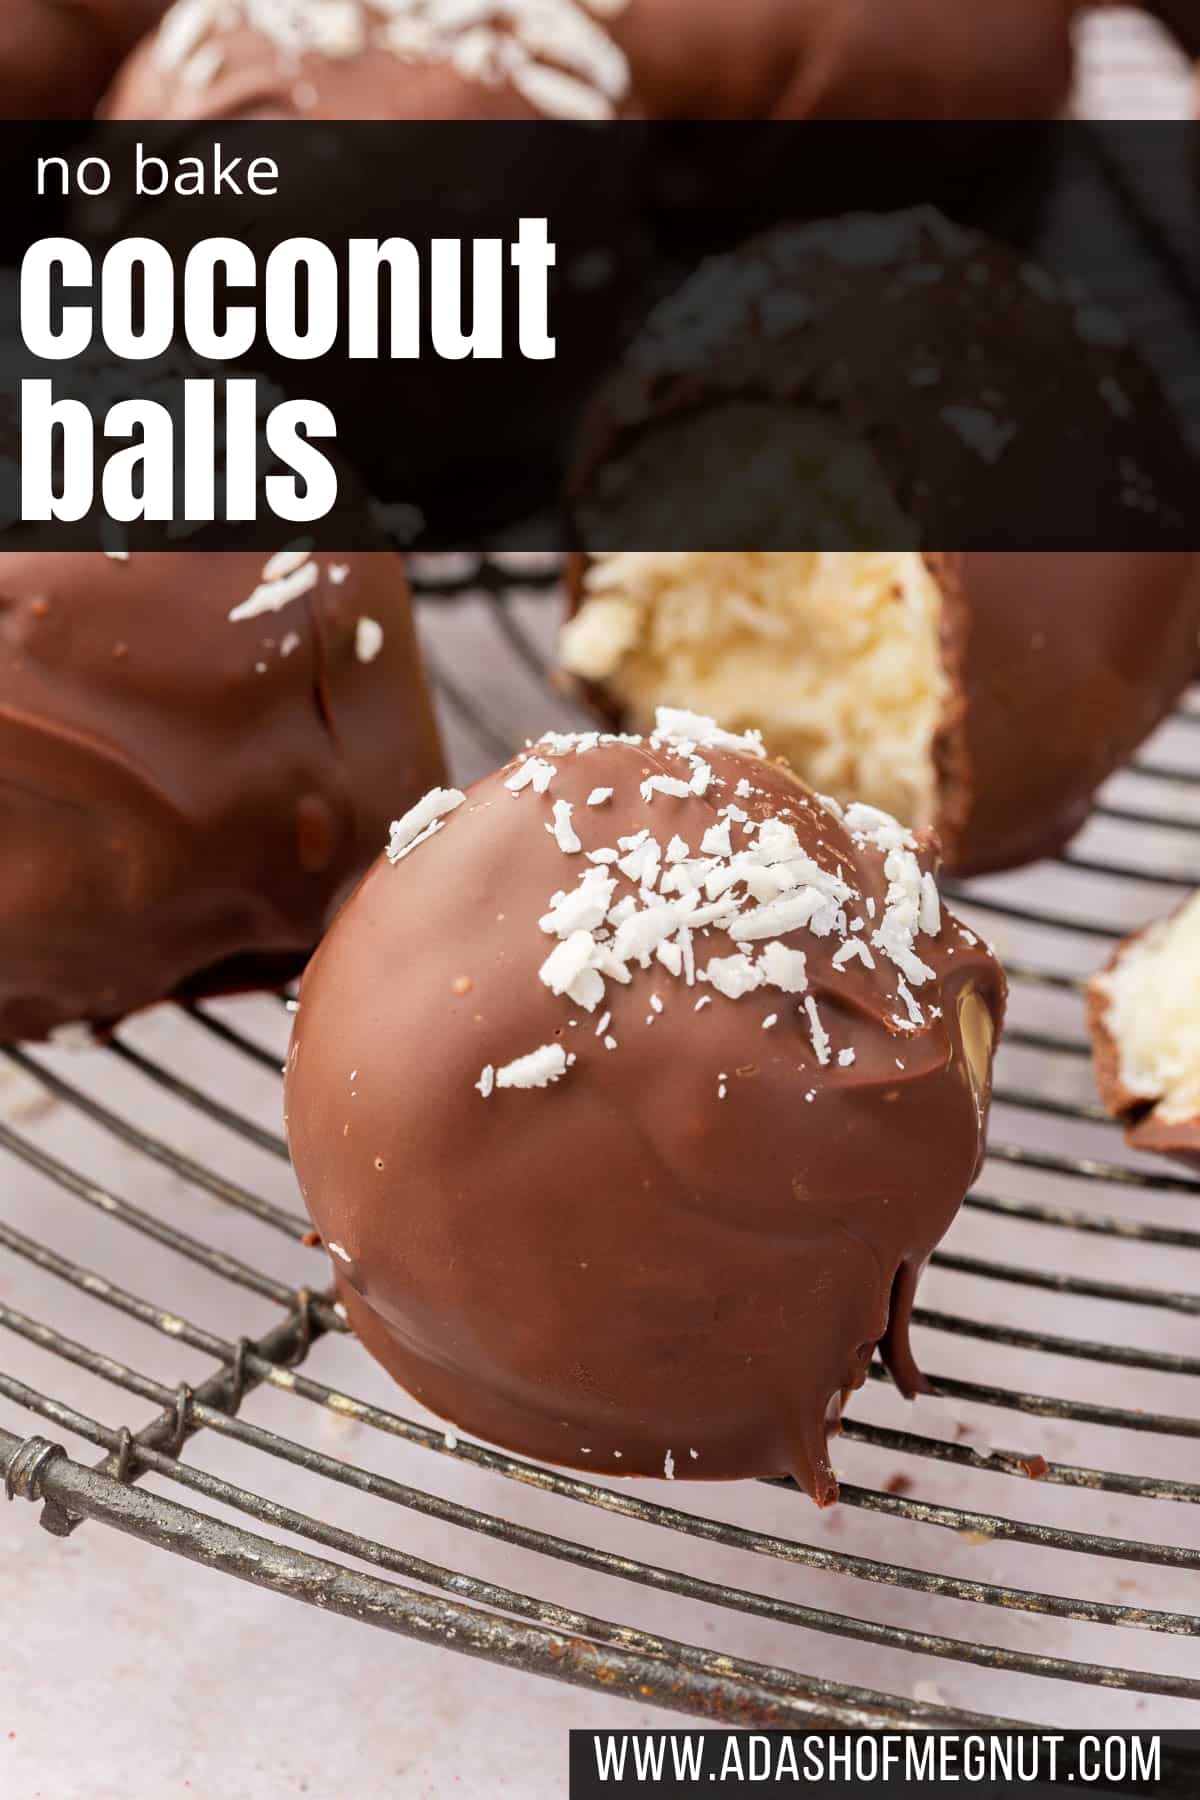
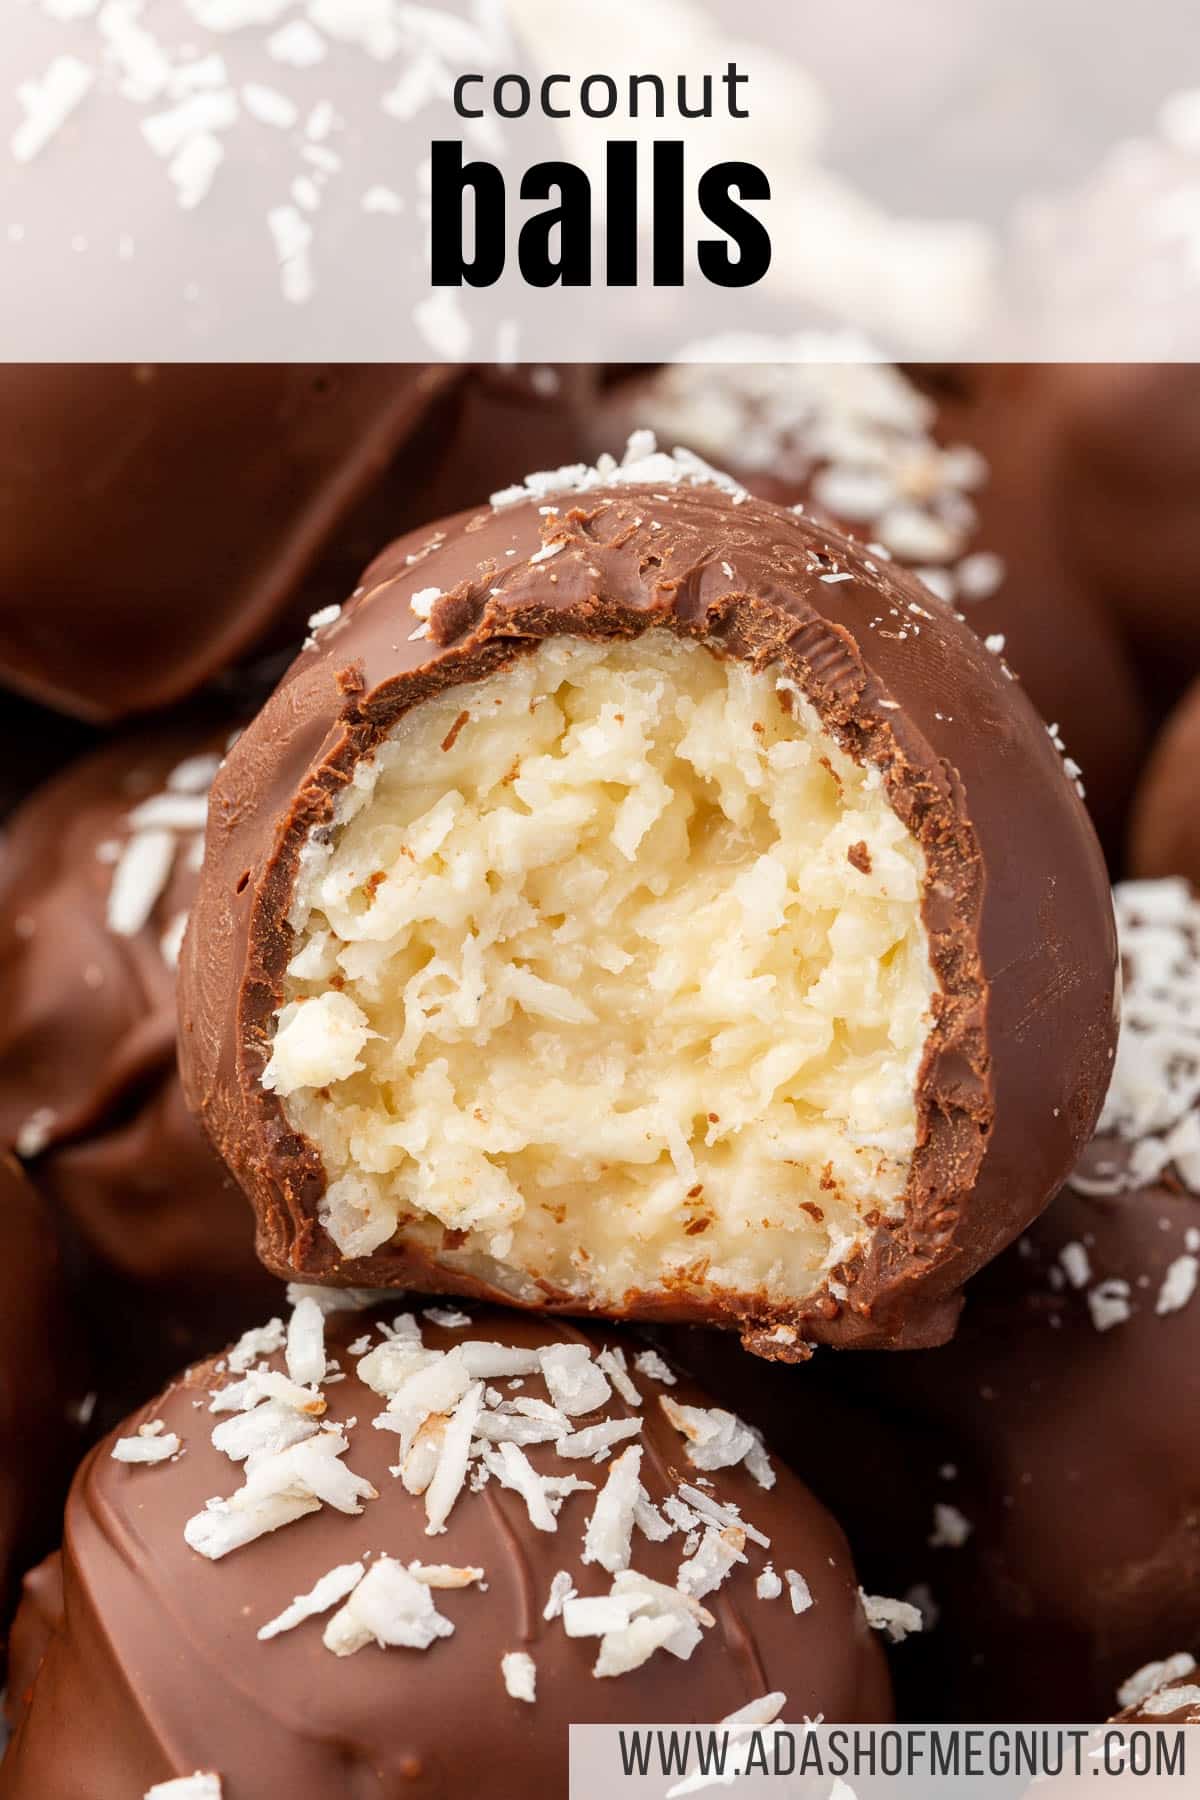
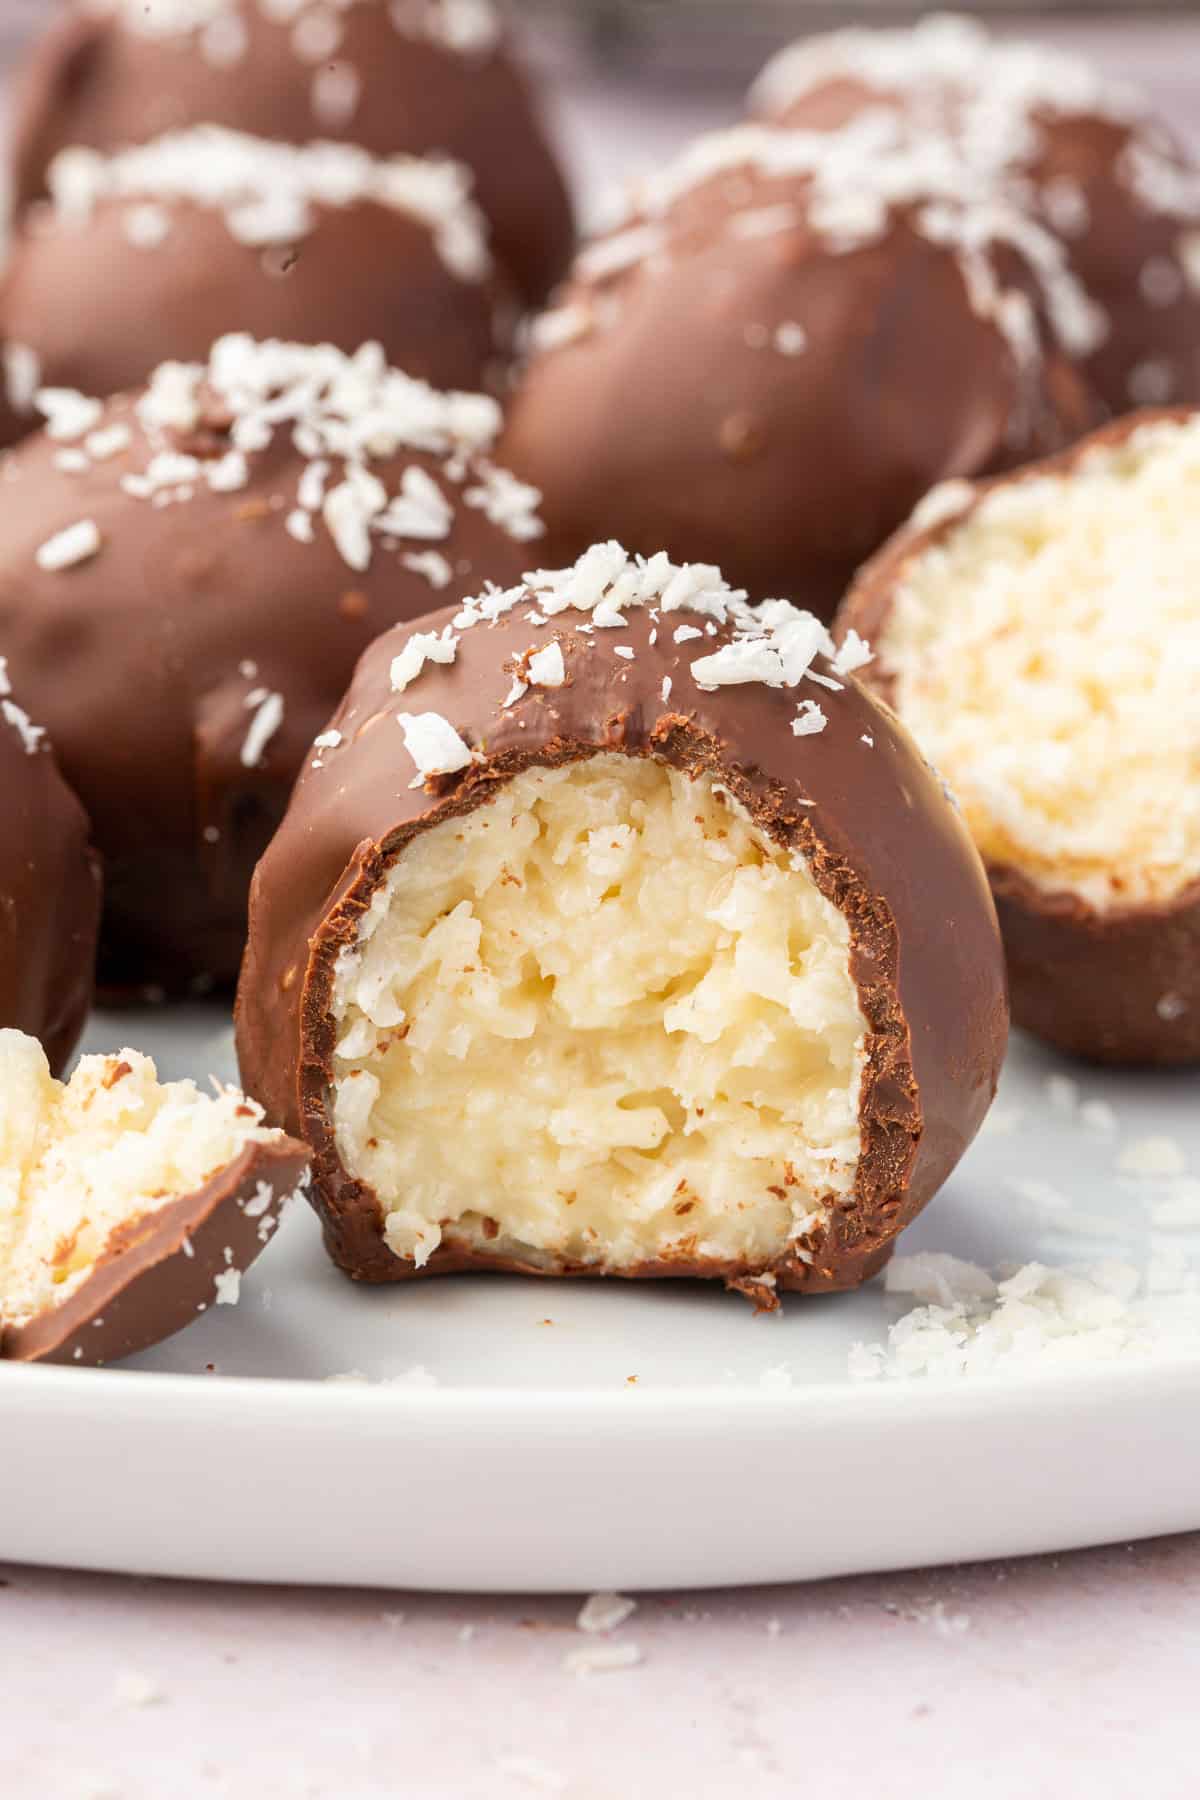
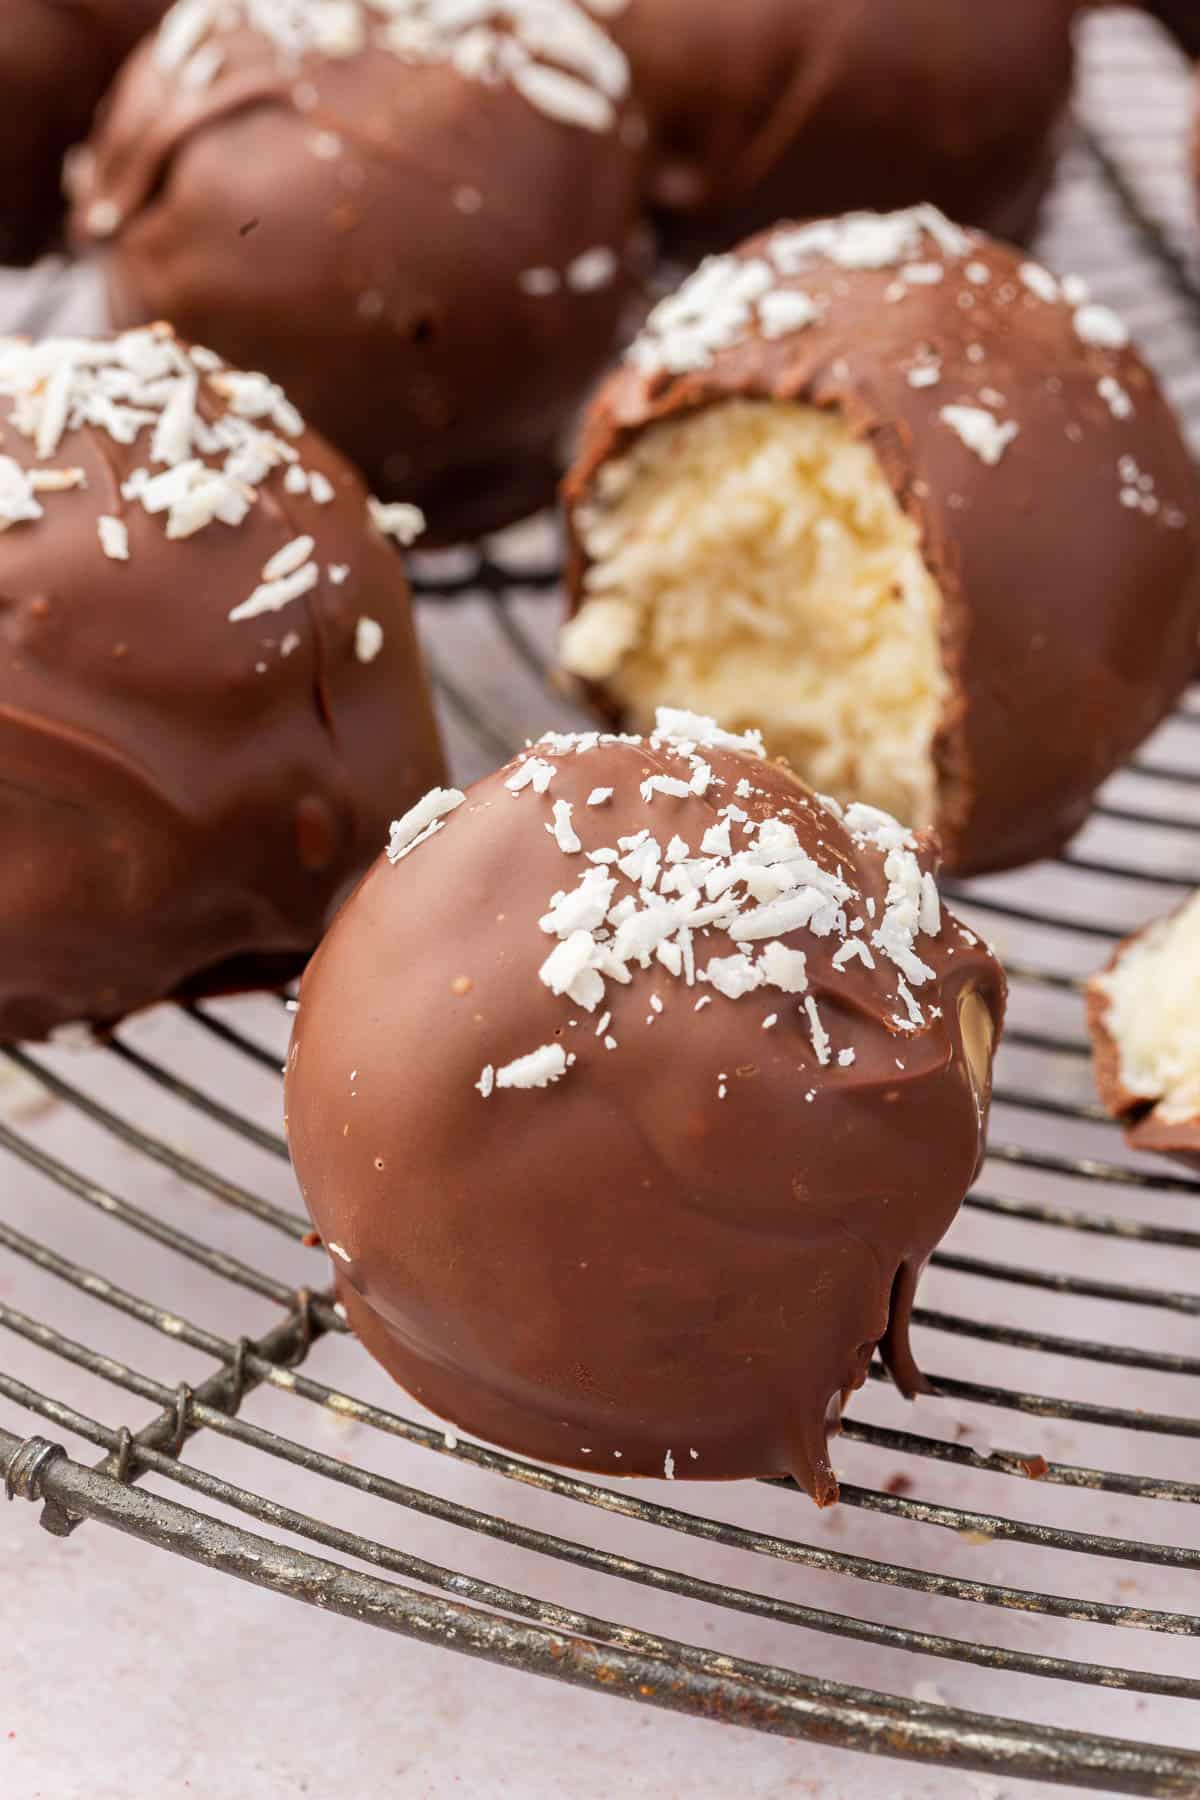
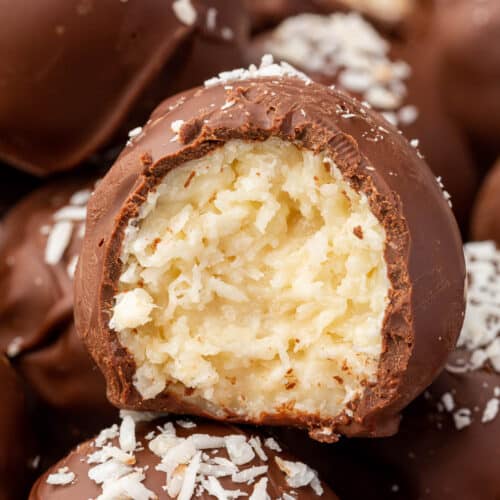
These chocolate coconut balls are no-bake, naturally gluten-free, and made with just 6 ingredients. Shredded coconut and sweetened condensed milk get rolled into balls, dipped in dark chocolate, and topped with more coconut for a little crunch.
They look impressive but take almost no effort. Perfect for holiday cookie trays, parties, or anytime you want something sweet without turning on the oven.
Why You’ll Love this Recipe
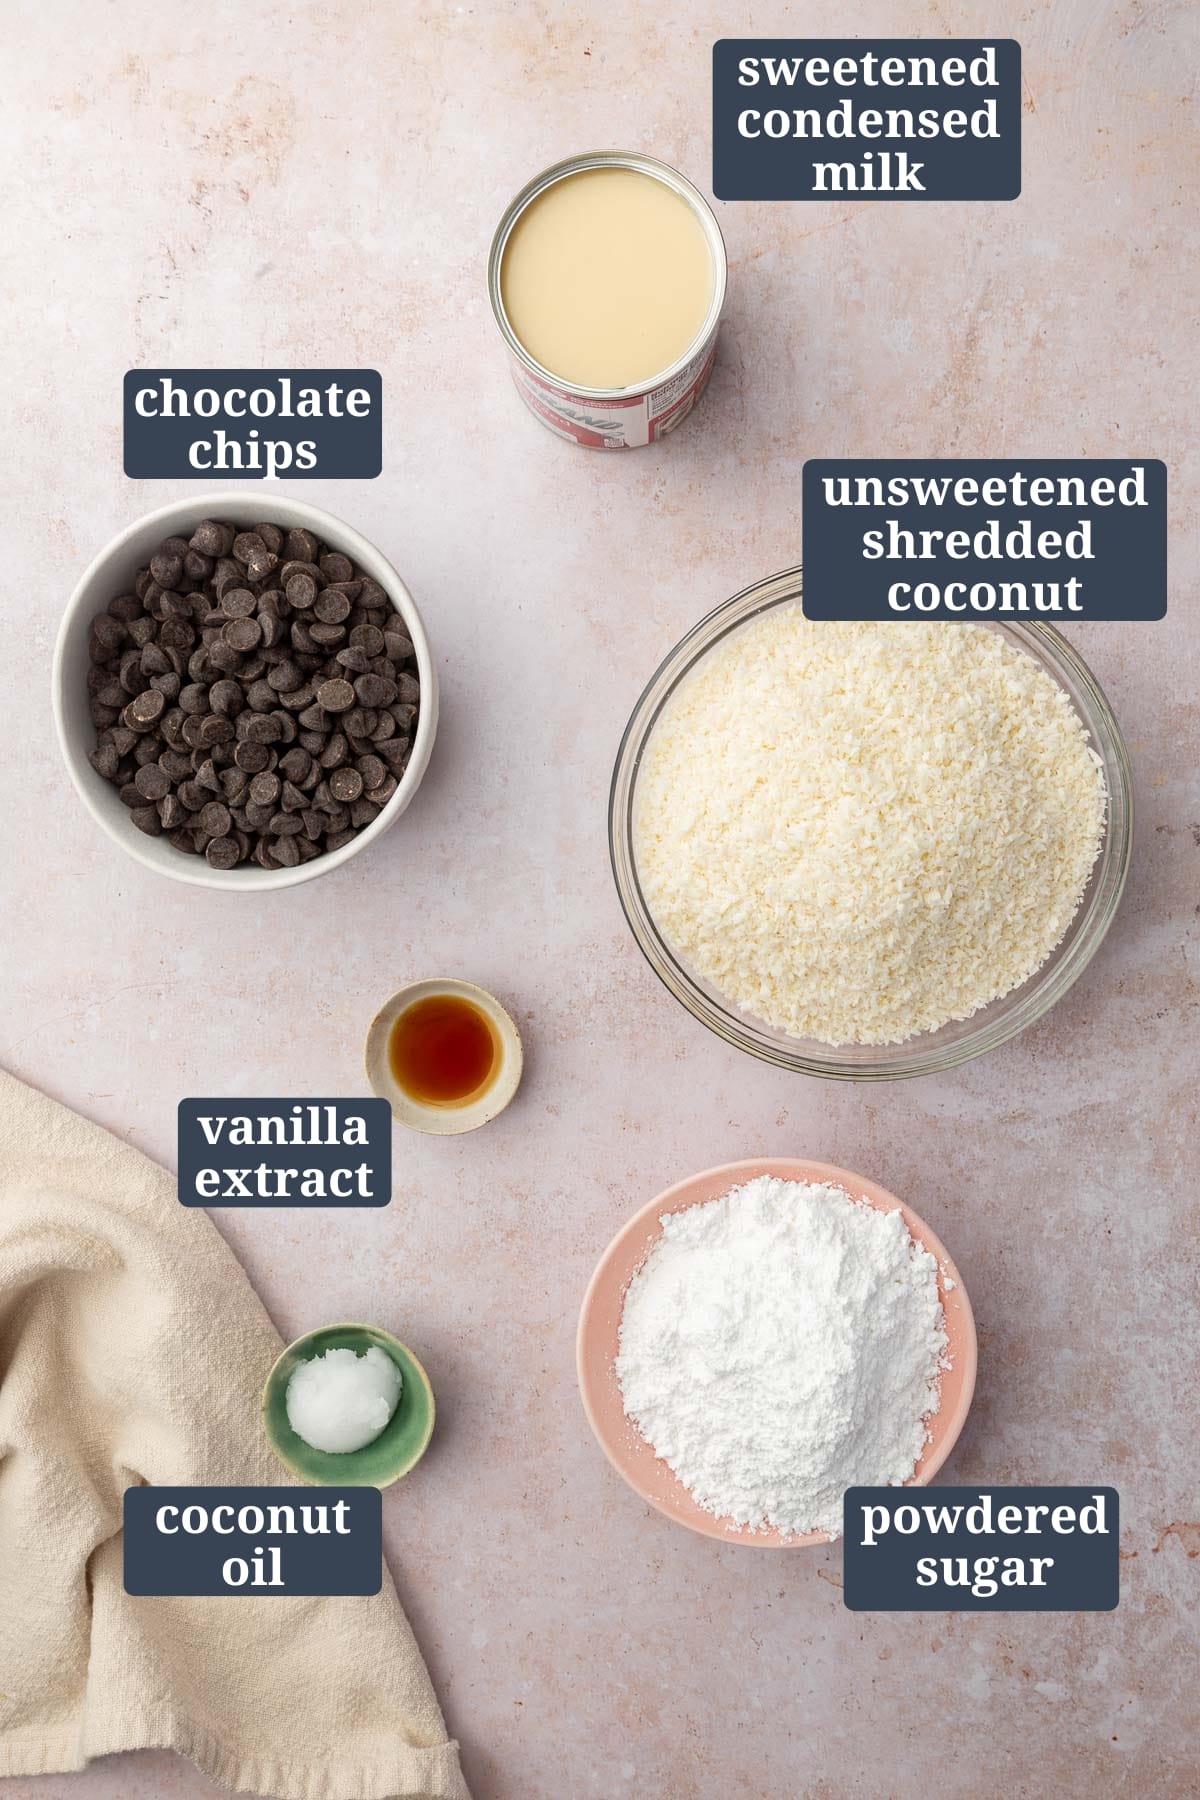
Ingredients
Ingredient Notes
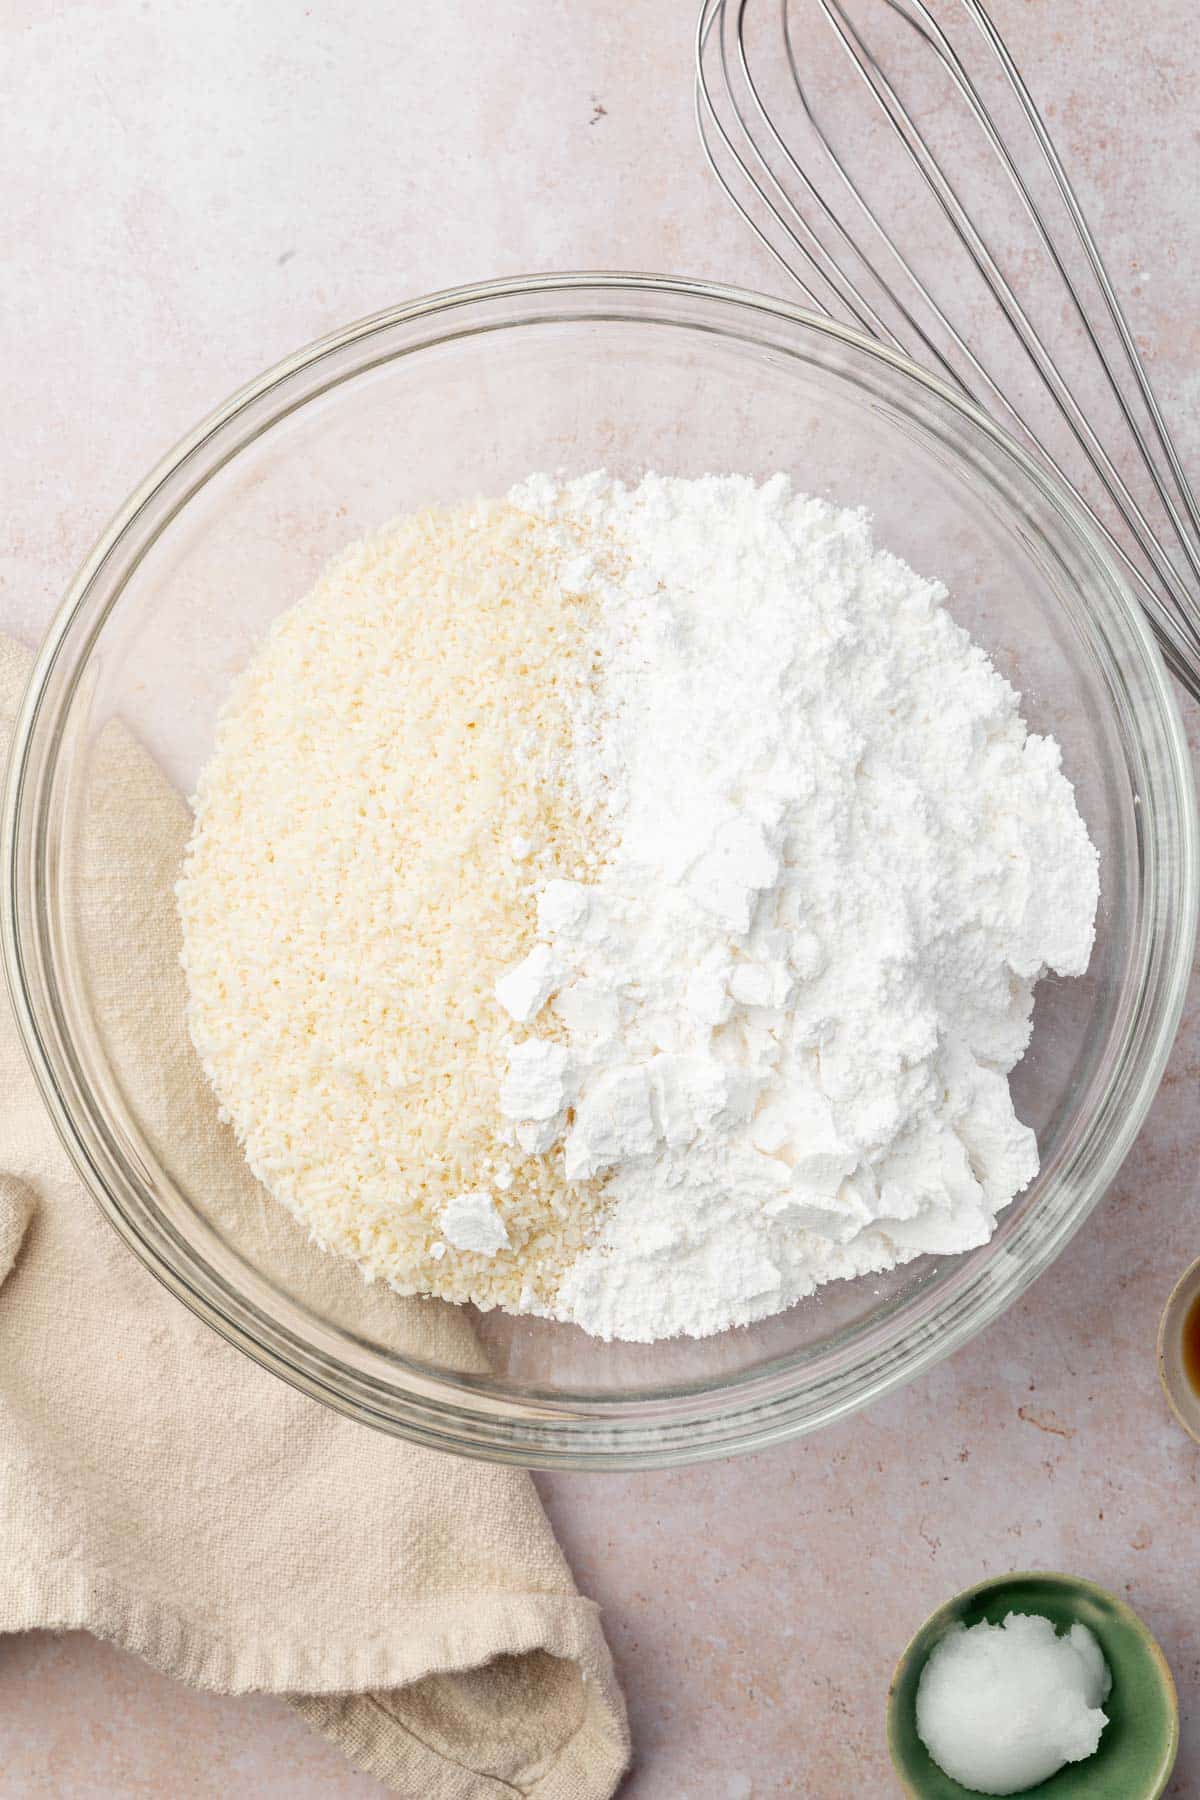
- Unsweetened shredded coconut – I tried this recipe with various types of coconut flakes, sweetened coconut flakes, larger coconut flakes, and finely shredded coconut. All of these types of desiccated coconut worked in the recipe, but my favorite is absolutely unsweetened shredded coconut. The shredded coconut is finer than flakes so that you aren’t getting large strands of coconut in each bite. I also find that the sweetened coconut can be just a bit too sweet when combined with the sweetened condensed milk and powdered sugar.
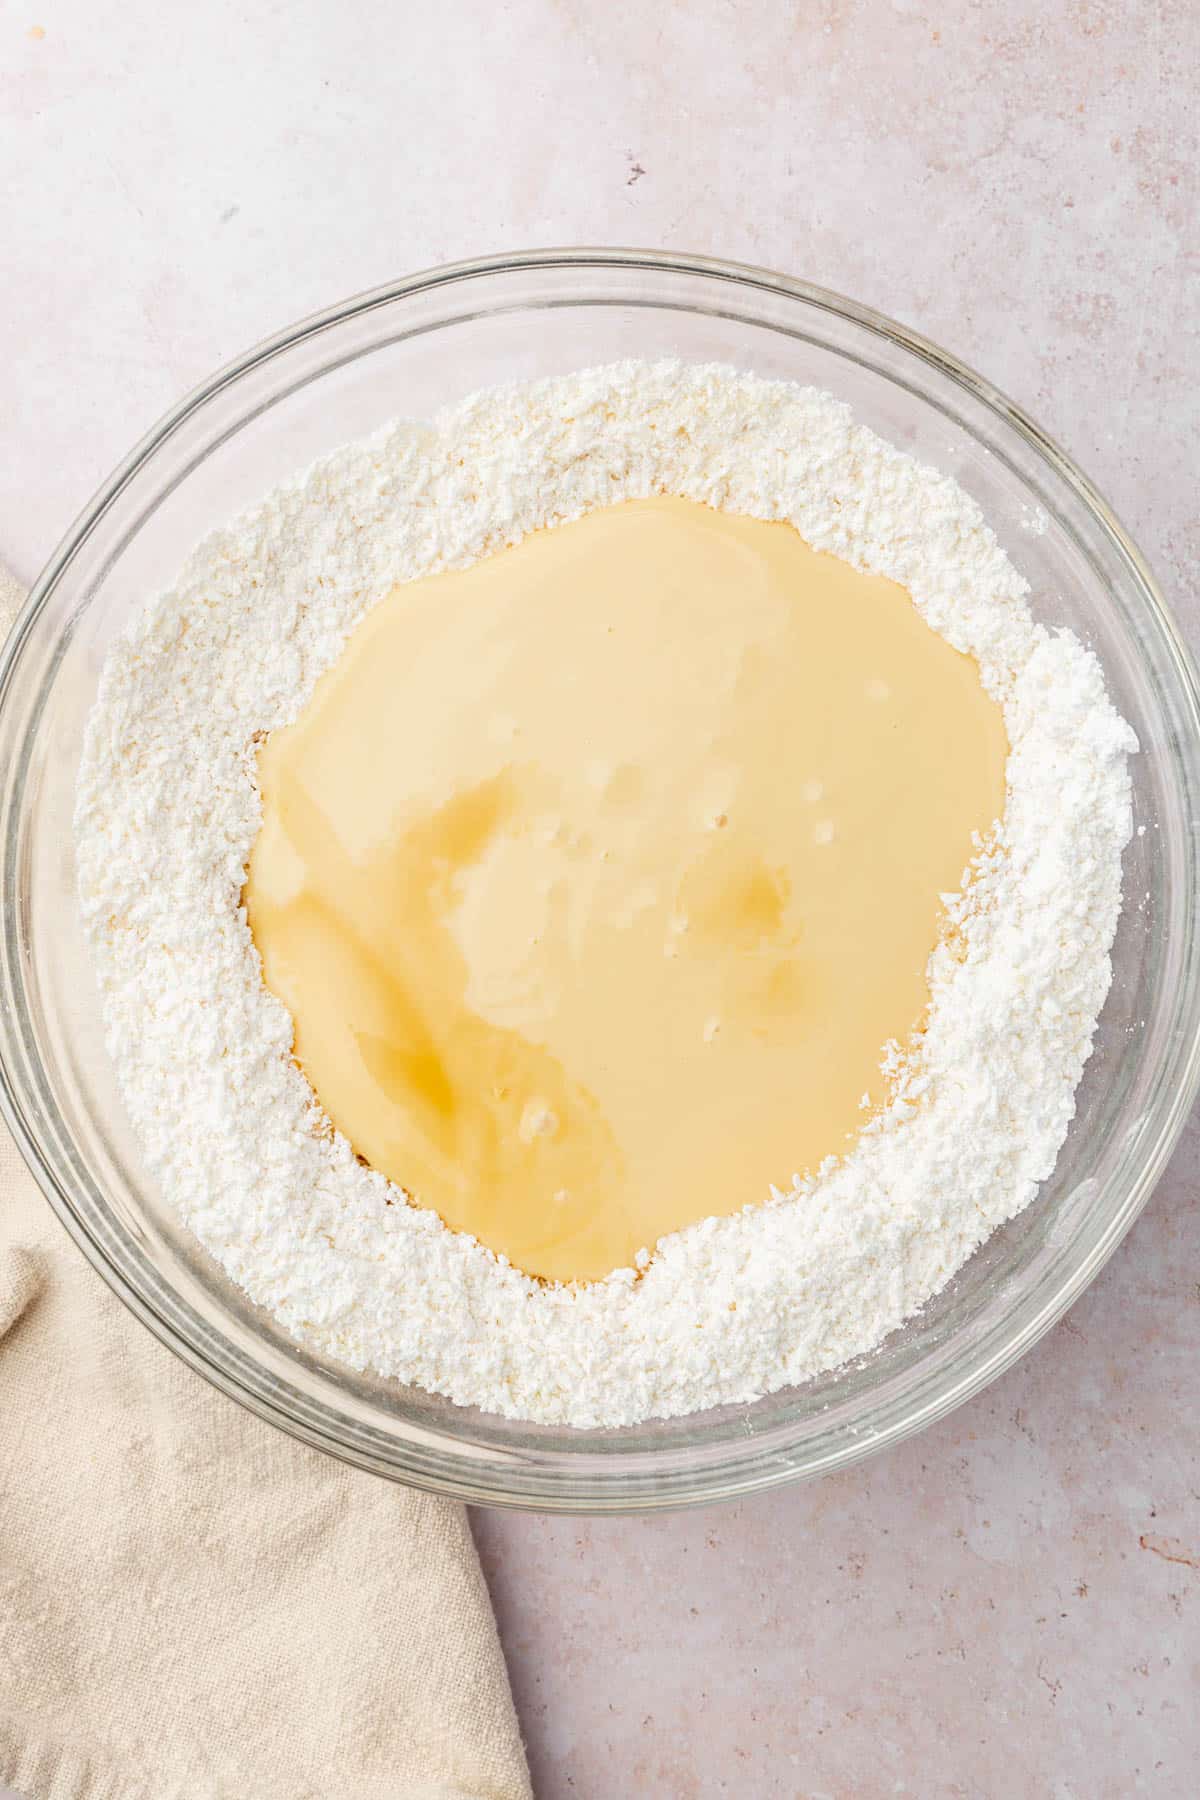
- Sweetened condensed milk – This is what will make your coconut balls chewy, sweet, and rich. This recipe was formulated to use an entire can of sweetened condensed milk so you don’t have to worry about what to do with the extras. Evaporated milk will NOT work in this recipe.
- Powdered sugar – This is what I find to be the secret ingredient of these coconut balls with condensed milk. I tested this recipe with and without the powdered sugar, and found the batch with powdered sugar to have the perfect mouthfeel after chilling. It gives the coconut balls a little more chew, more similar to a coconut truffle.
- Vanilla extract – Use a pure vanilla extract for best flavor, because you will definitely taste it in these coconut bites.
- Dark chocolate chips – I love the flavor of dark chocolate, but you can also use milk chocolate, bittersweet chocolate or semi-sweet chocolate if you prefer. I think white chocolate might be a bit too sweet for these bites. You can also omit the chocolate coating if you are not a chocolate person.
- Coconut oil – Thins the chocolate and helps it harden with a nice shine. I love the slight bit of coconut flavor that coconut oil brings to this recipe as well.
Almond Joy Variation
Swap the vanilla extract for almond extract and press a whole roasted almond into the center of each ball before dipping into the chocolate. Instant Almond Joy vibes!
Step-by-Step instructions
It’s very easy to make these coconut balls covered in dark chocolate with just a few simple ingredients you probably already have in your pantry.
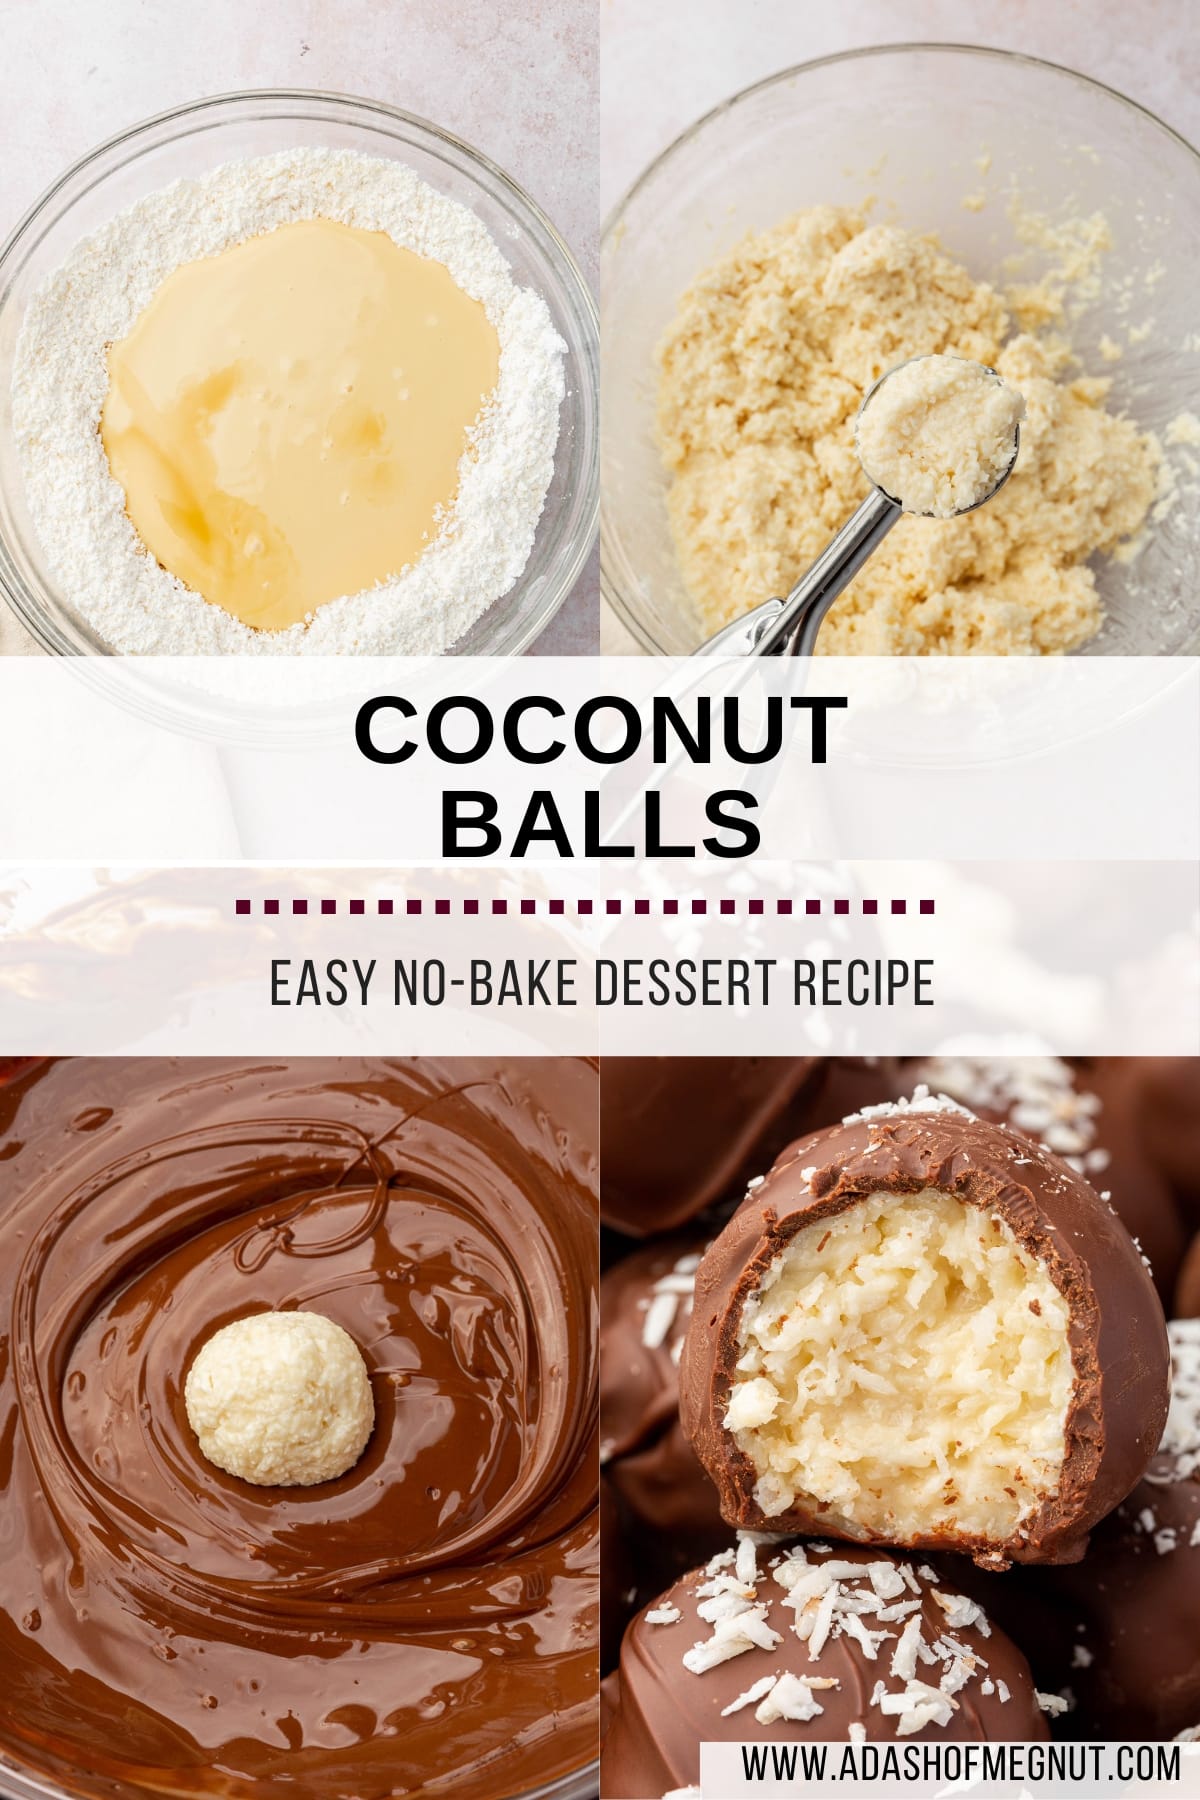
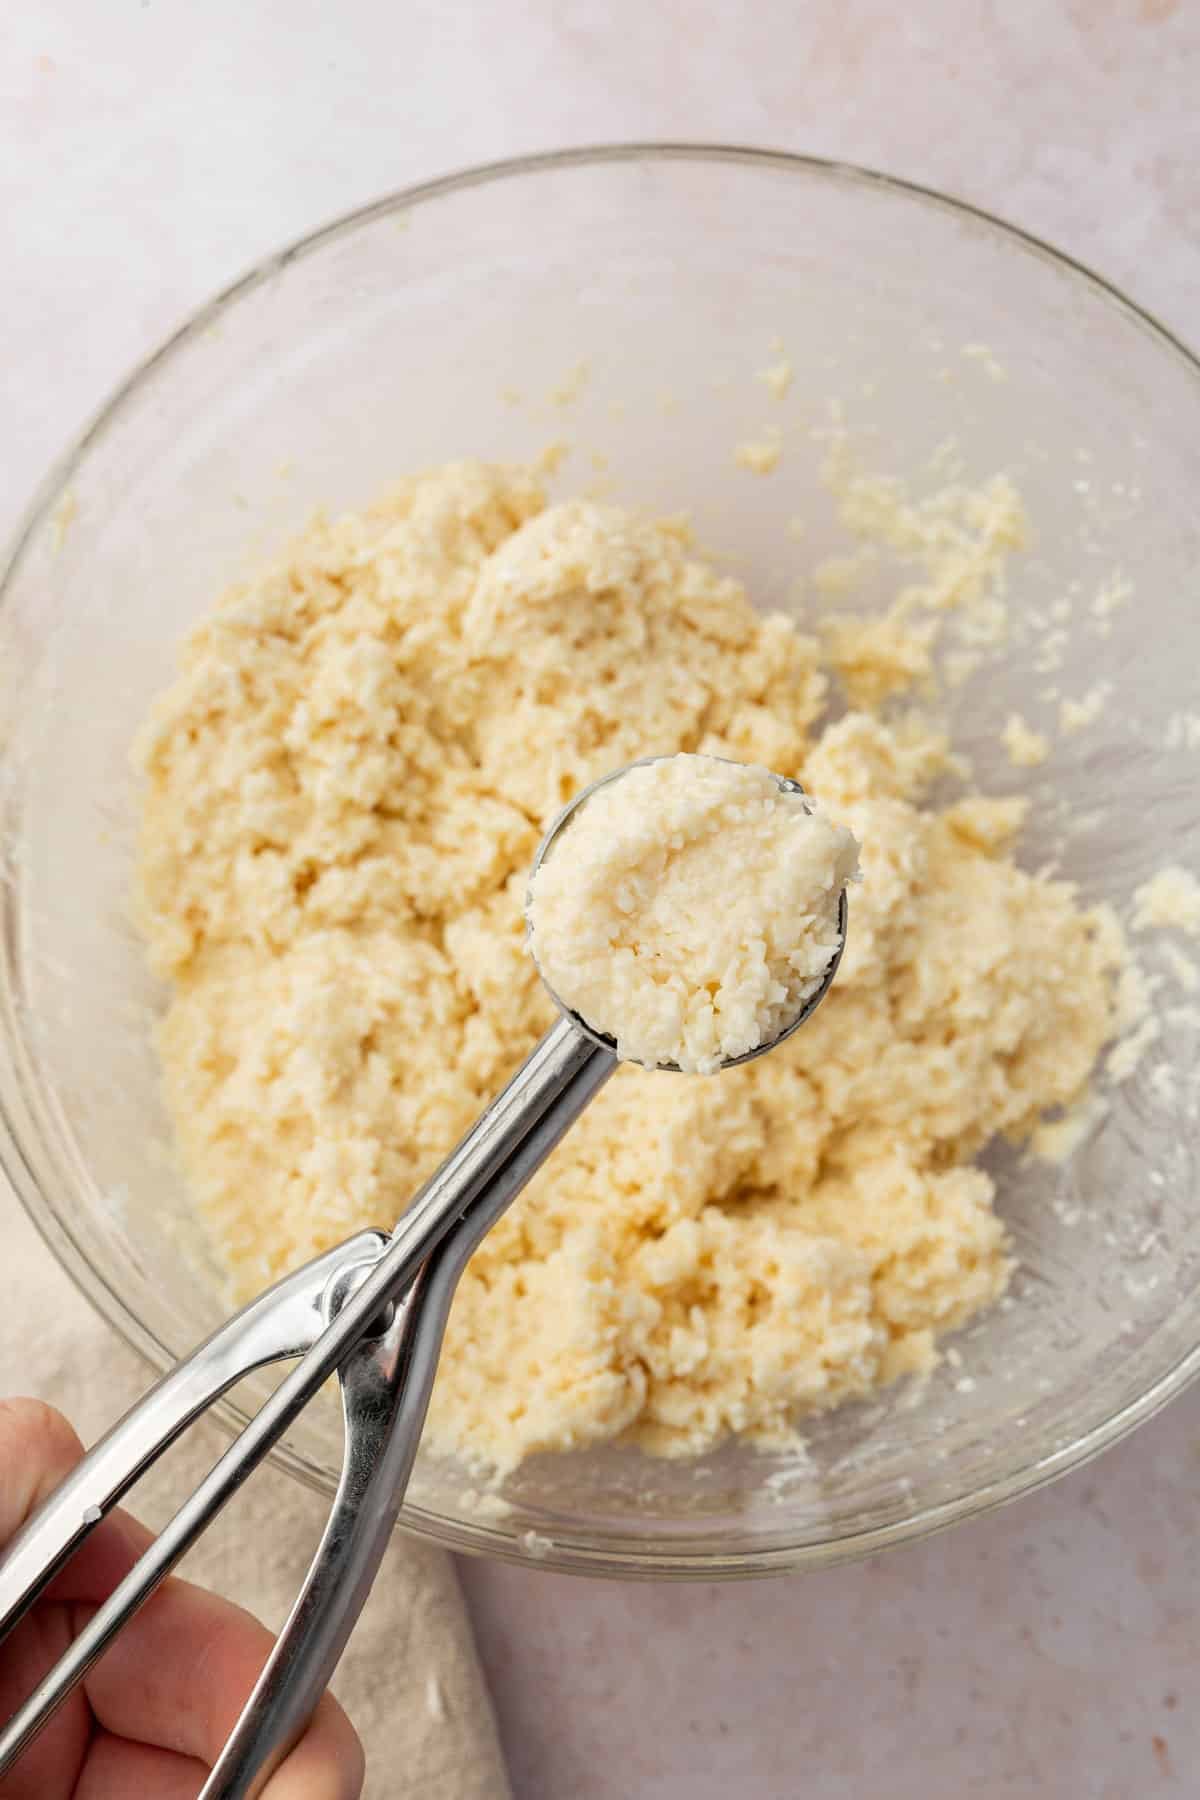
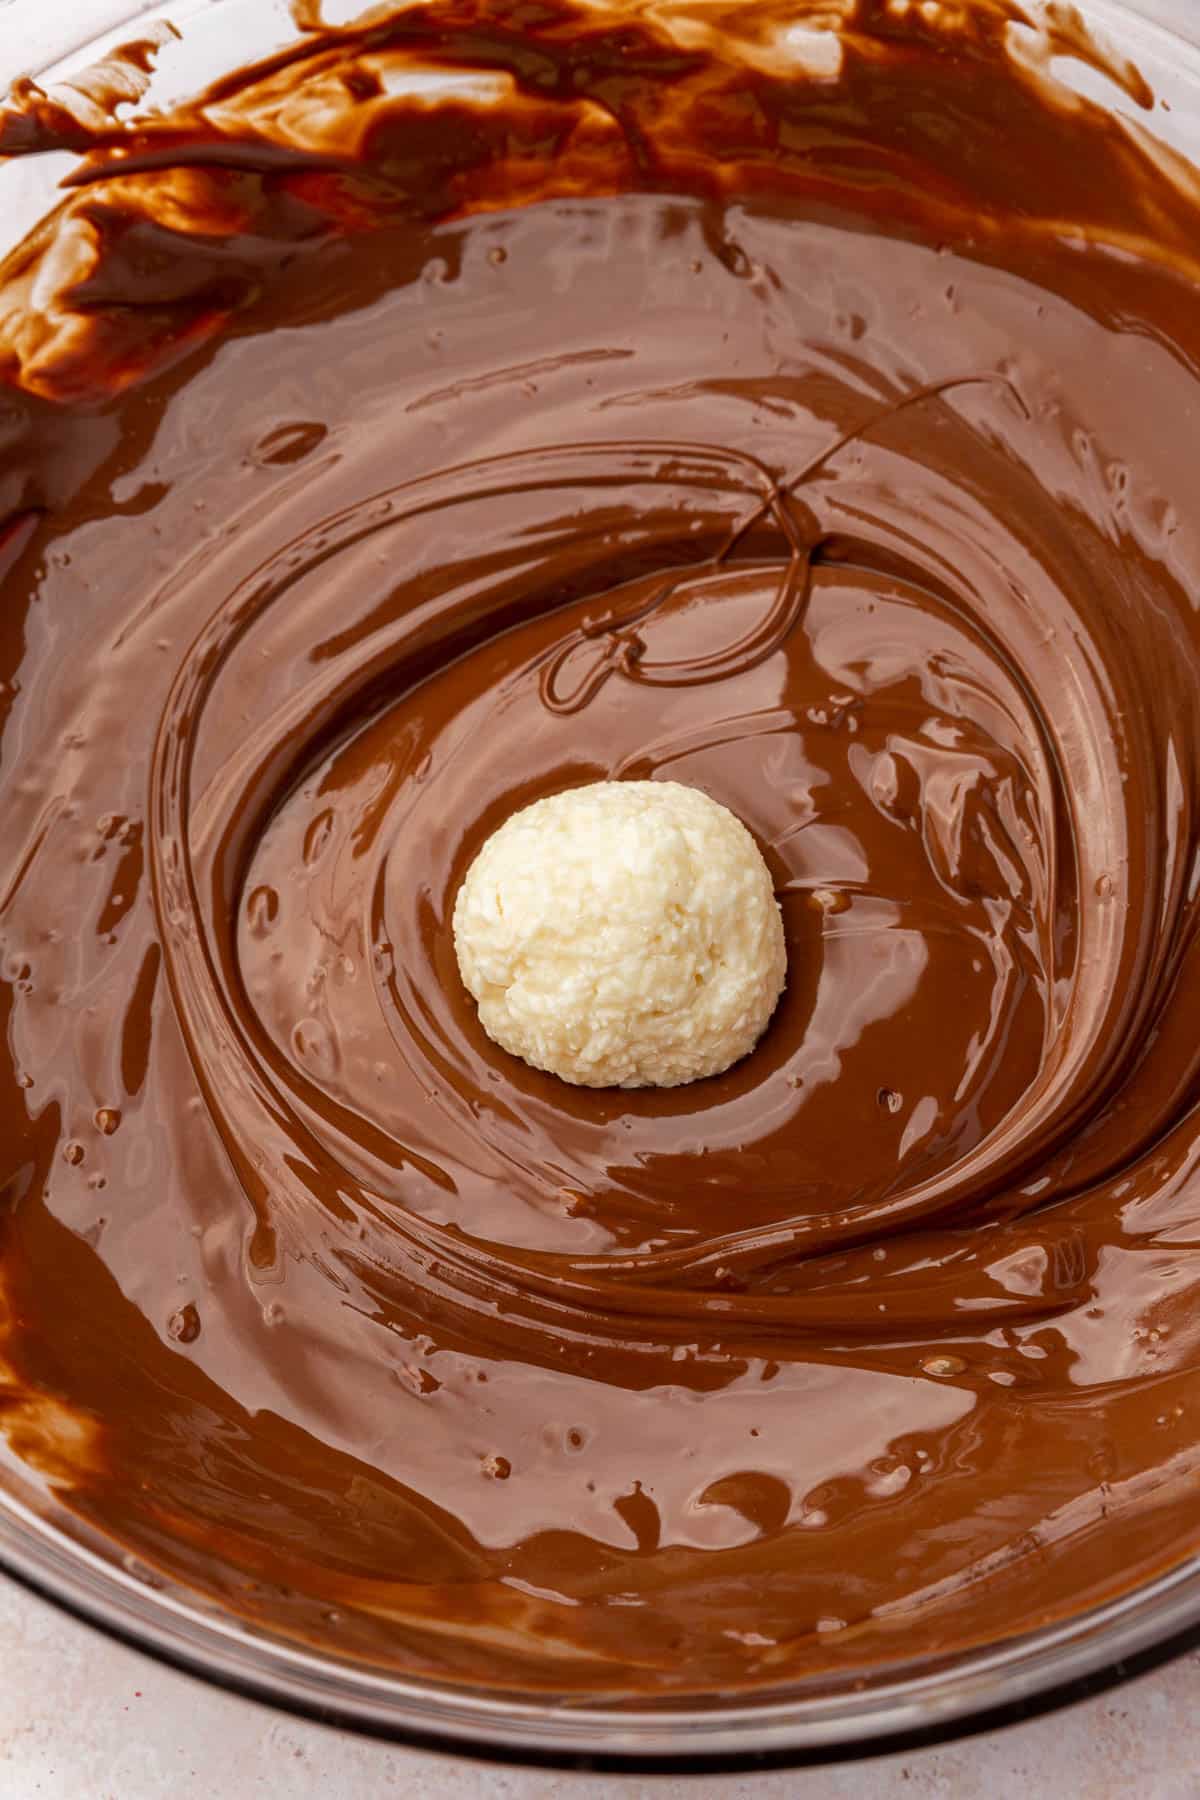
The below step-by-step instructions with matching photos are meant to help you see the recipe made at various stages. Place special attention to the size of the coconut shreds, coconut dough texture, the size of the coconut truffles once scooped and how to dip your coconut balls in chocolate using a fork.
For the ingredient list with measurements, full instructions, printable recipe, and additional notes, please scroll down to the recipe card.
Recipe FAQs
You can, but the balls will be much sweeter. I also find that the sweetened coconut flakes are a bit larger in size than the unsweetened shredded coconut, so the texture is different.
Yes, they freeze very well. Place them in a freezer bag or freezer-safe container once hardened for up to 3 months. You can eat them straight from frozen or let them thaw at room temperature for about 30 minutes.
Yes. Roll the finished balls in extra coconut or powdered sugar instead for a simpler version.
Add another teaspoon of coconut oil and microwave for 10 seconds. It should coat smoothly without clumping.
Expert Tips
Storage instructions
- Storage: Store coconut balls in an airtight container in the refrigerator for up to 1 week.
- Freezer Option: Store coconut balls in an airtight container in the freezer for up to 3 months.
- Defrost: Coconut balls are best enjoyed chilled, but you can let them sit at room temperature for a few minutes before eating.
Serving suggestions
These coconut balls are perfect for holiday cookie exchanges, Valentine’s Day, or a DIY dessert board. Package a few in a small box for an easy homemade gift. They pair well with chocolate chia jam peanut butter cups, gluten-free Oreo balls, and white chocolate strawberry truffles for a no-bake candy spread.
Did you make this recipe?
I’d love to know! Please rate it and leave a comment below. You can also share your pictures and tag @adashofmegnut on Instagram.
Chocolate Coconut Balls
Ingredients
Coconut Balls:
- 3 1/2 cups (350 g) unsweetened shredded coconut
- 1 1/2 cups (180 g) powdered sugar
- 14 oz (396 g) can sweetened condensed milk
- 1/2 teaspoon vanilla extract
Chocolate Coating:
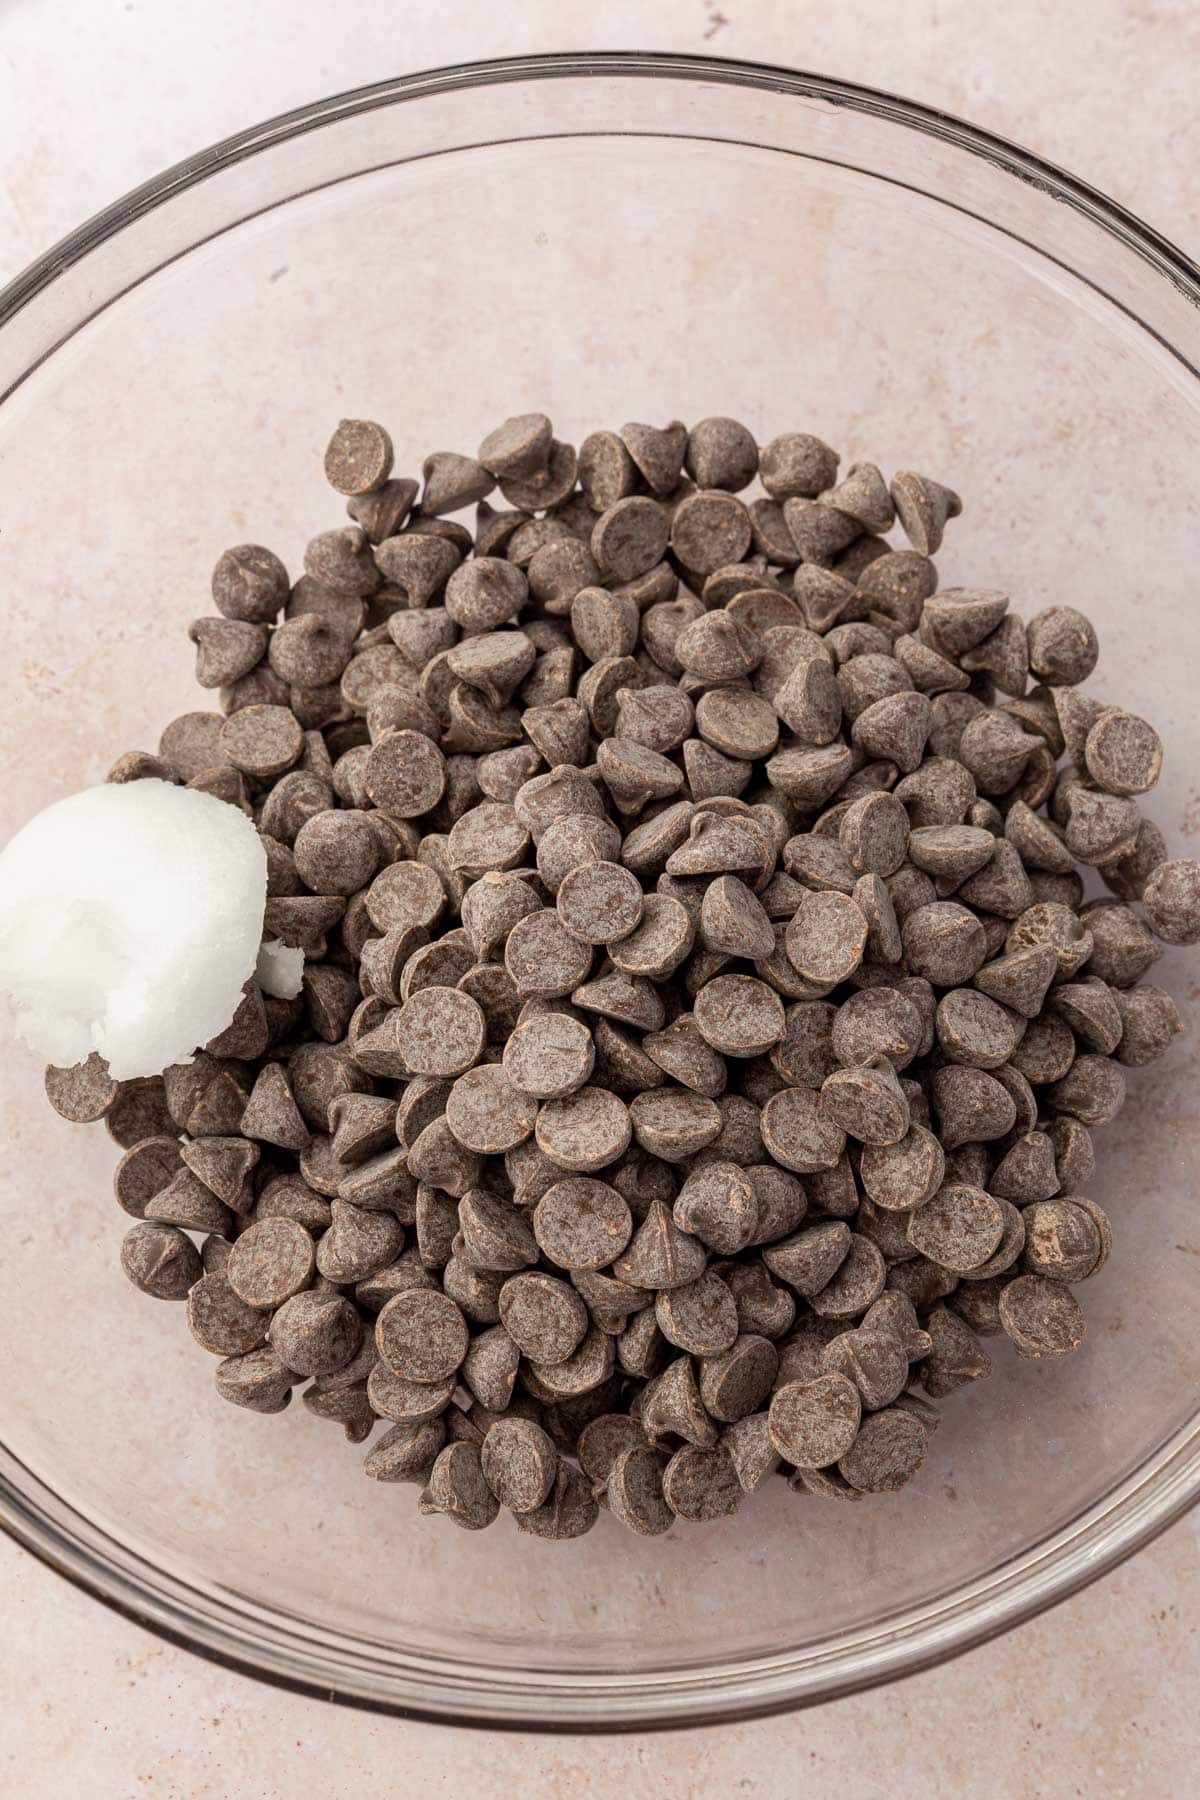
- 2 cups (360 g) dark chocolate chips
- 1 tablespoon (14 g) coconut oil
Topping:
- 2 tablespoons (15 g) unsweetened shredded coconut
**Use the toggle button above to turn the instruction photos on and off!
Instructions
Coconut Balls:
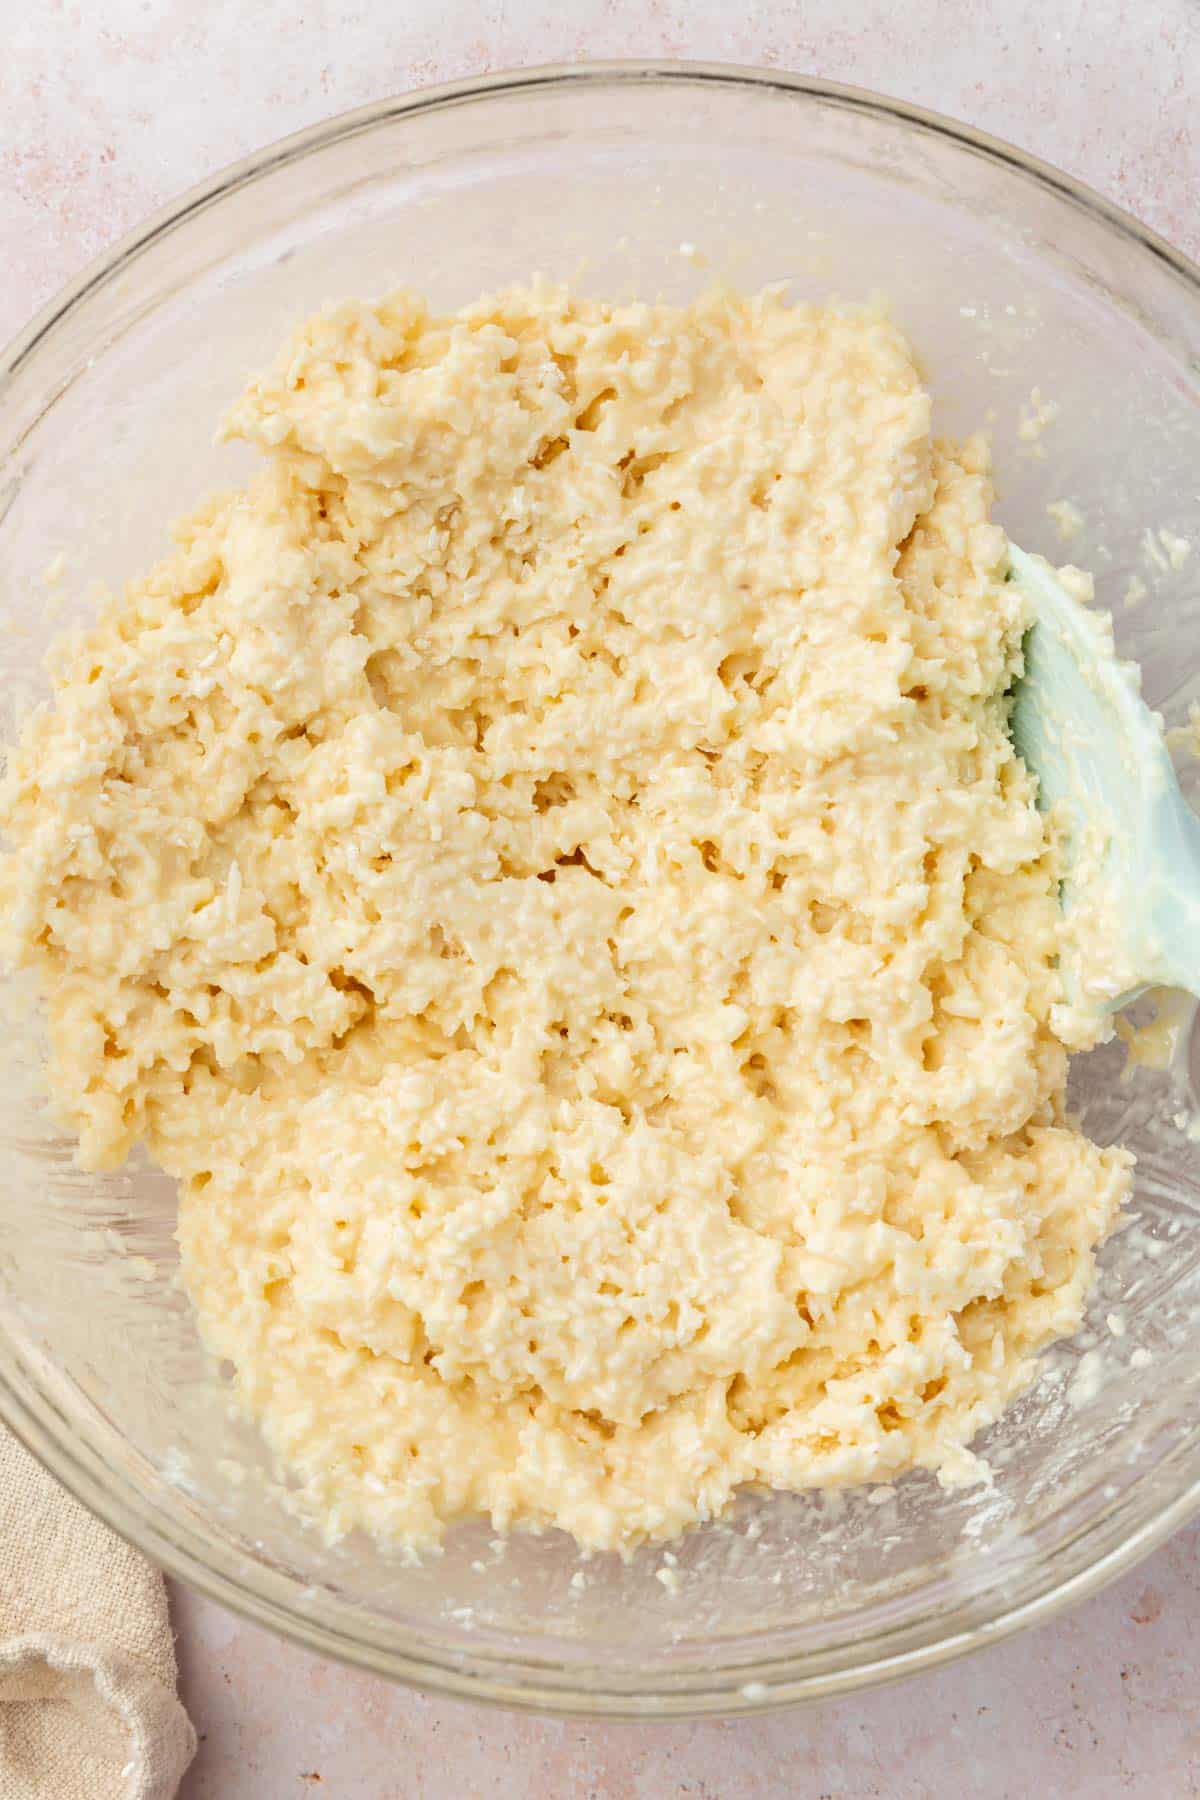
- Add 3 1/2 cups (350 g) unsweetened shredded coconut to a large bowl. Whisk in 1 1/2 cups (180 g) powdered sugar.
- Add 14 oz (396 g) can sweetened condensed milk and 1/2 teaspoon vanilla extract. Stir until a dough forms. Refrigerate for 20 minutes.
- Scoop the mixture into 1-tablespoon balls and roll between your hands to smooth. You should get about 36 balls.
- Place on a parchment-lined baking sheet and refrigerate for at least 1 hour.
Chocolate Coating:
- Add 2 cups (360 g) dark chocolate chips and 1 tablespoon (14 g) coconut oil to a microwave-safe bowl. Microwave in 30-second increments, stirring between, until melted (60-90 seconds total).
- Add the chocolate chips and coconut oil to a microwave-safe bowl.
- Microwave in 30-second increments, stirring in between, until the chocolate is melted. This should about 60-90 seconds total.
Assembling:
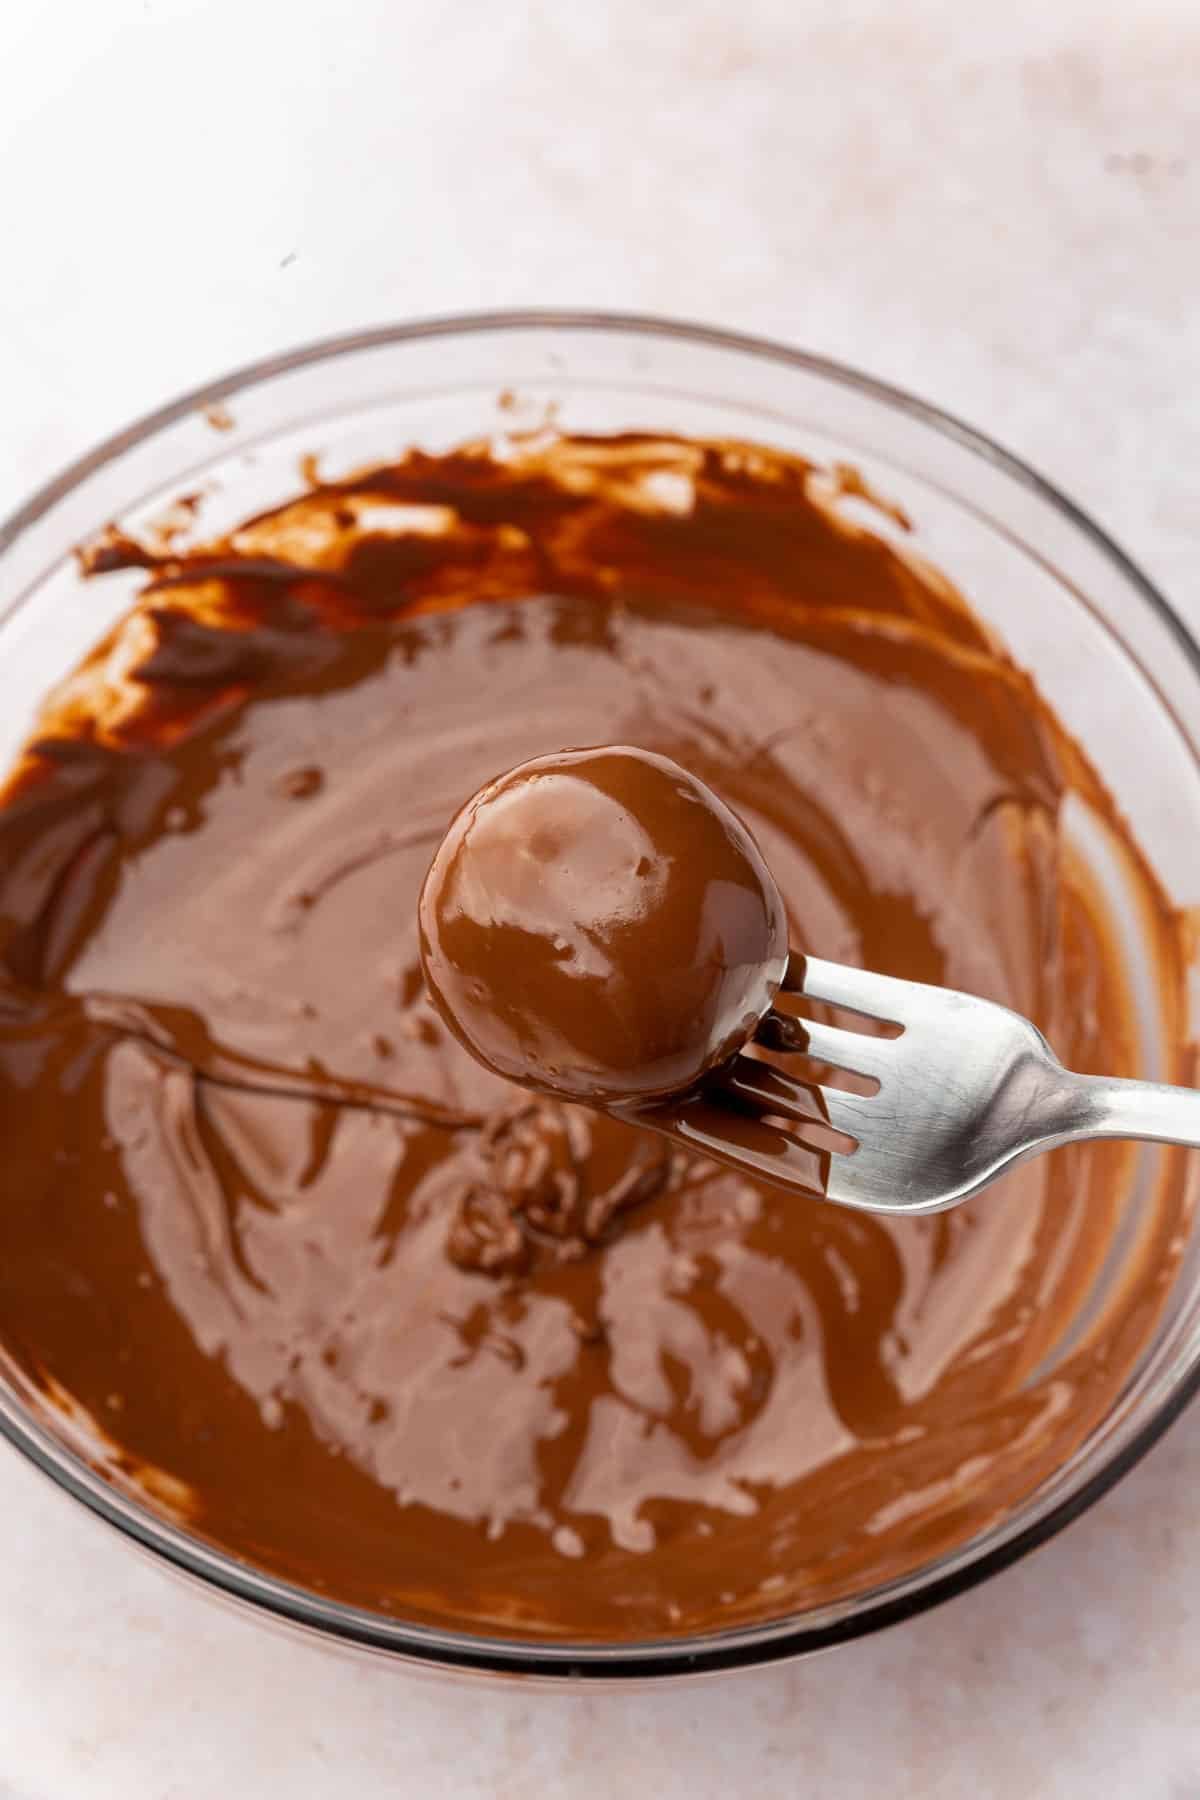
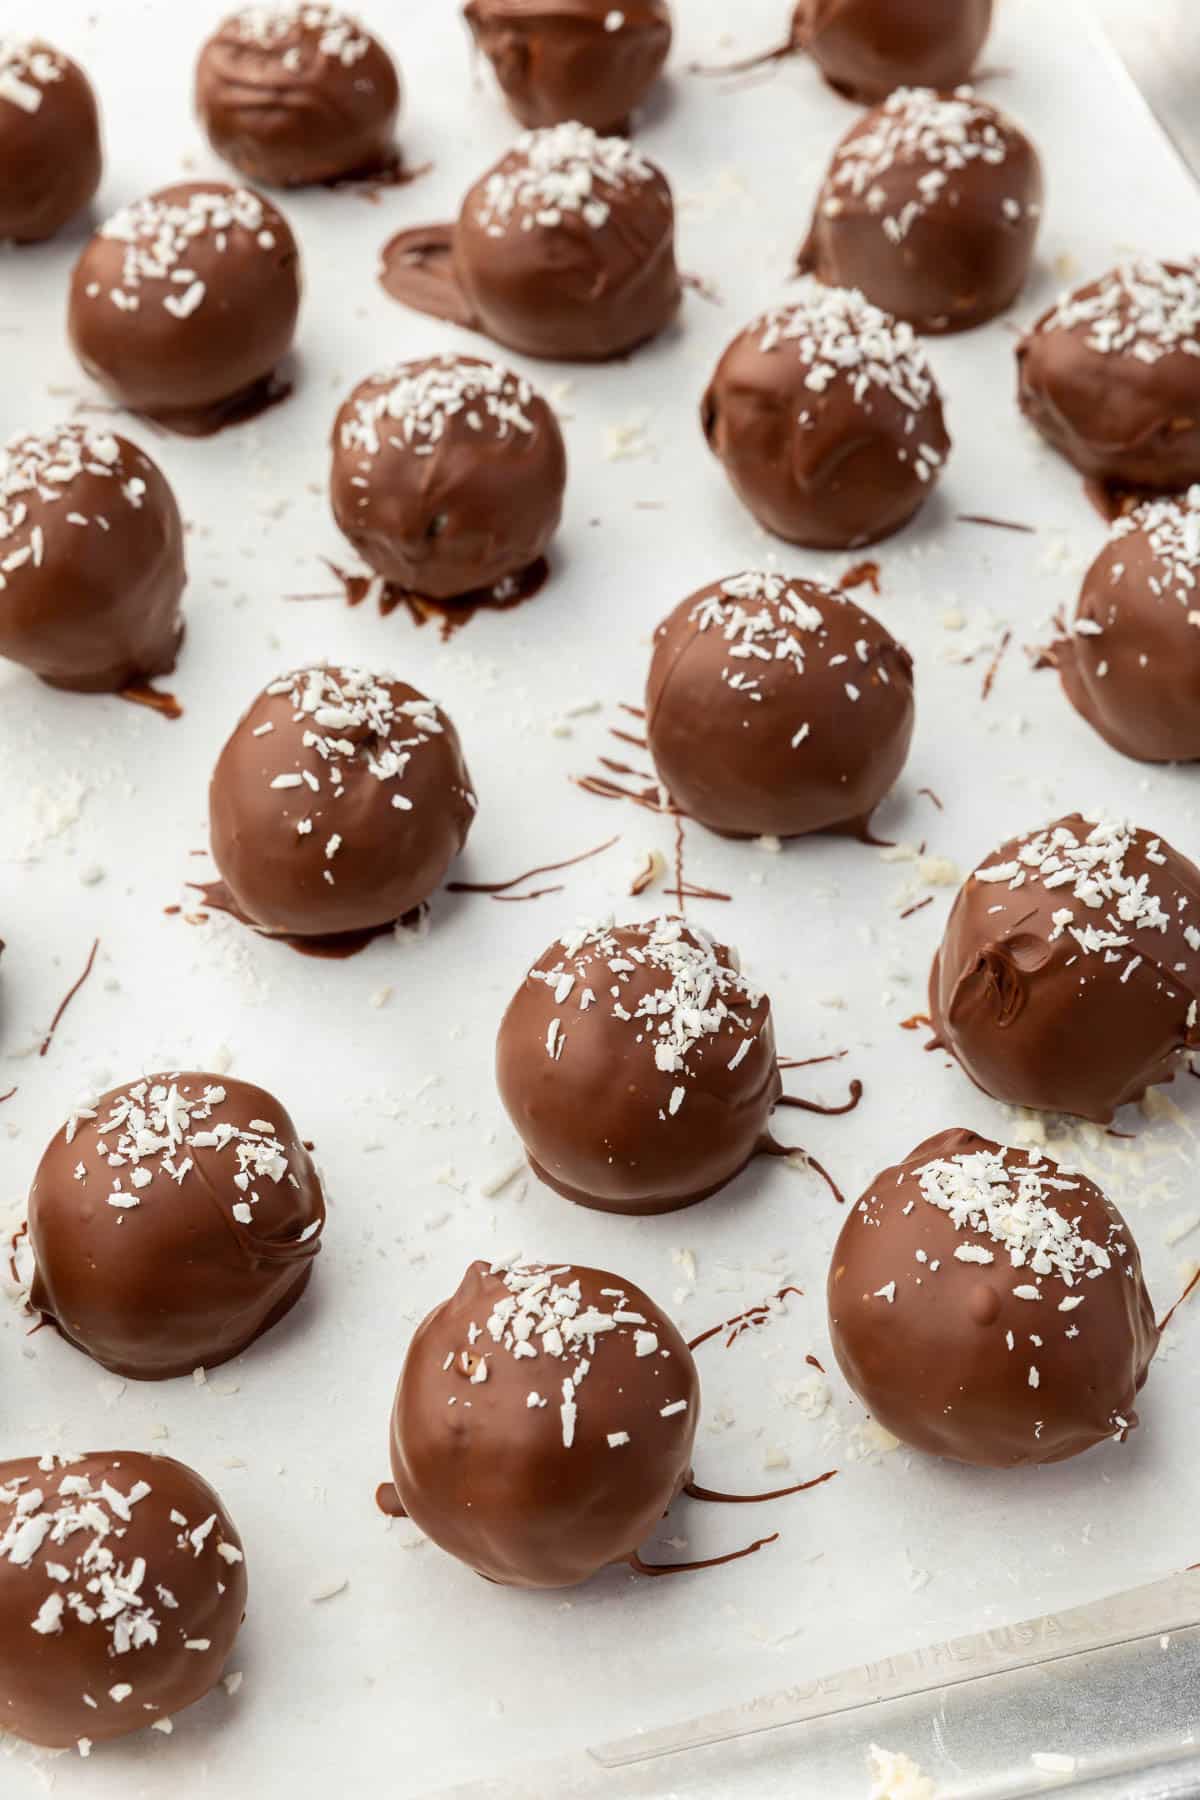
- Use a fork to dip each ball into the chocolate, tapping off the excess.
- Return to the baking sheet and sprinkle 2 tablespoons (15 g) unsweetened shredded coconut over the tops, dividing evenly amongst the coconut balls.
- Let the chocolate set for 30 minutes before serving.
Notes
- Coconut: Use finely shredded, not flakes. Flakes are larger and give a stringier texture.
- Gluten-free: This recipe is naturally gluten-free, but always double check labels.
- Dairy-free: Use coconut sweetened condensed milk and dairy-free chocolate chips.
- Work quickly: Sprinkle coconut on each ball right after dipping—the chocolate sets fast.
- Storage: Refrigerate up to 1 week or freeze up to 3 months.
This is a great recipe! I’d love it if you would share it on my latest corn-free link party. http://www.creatingsilverlinings.com/corn-free-everyday-feb-28-2015/
Thank you Jillian! I just shared it on your corn-free link party! I love your blog!