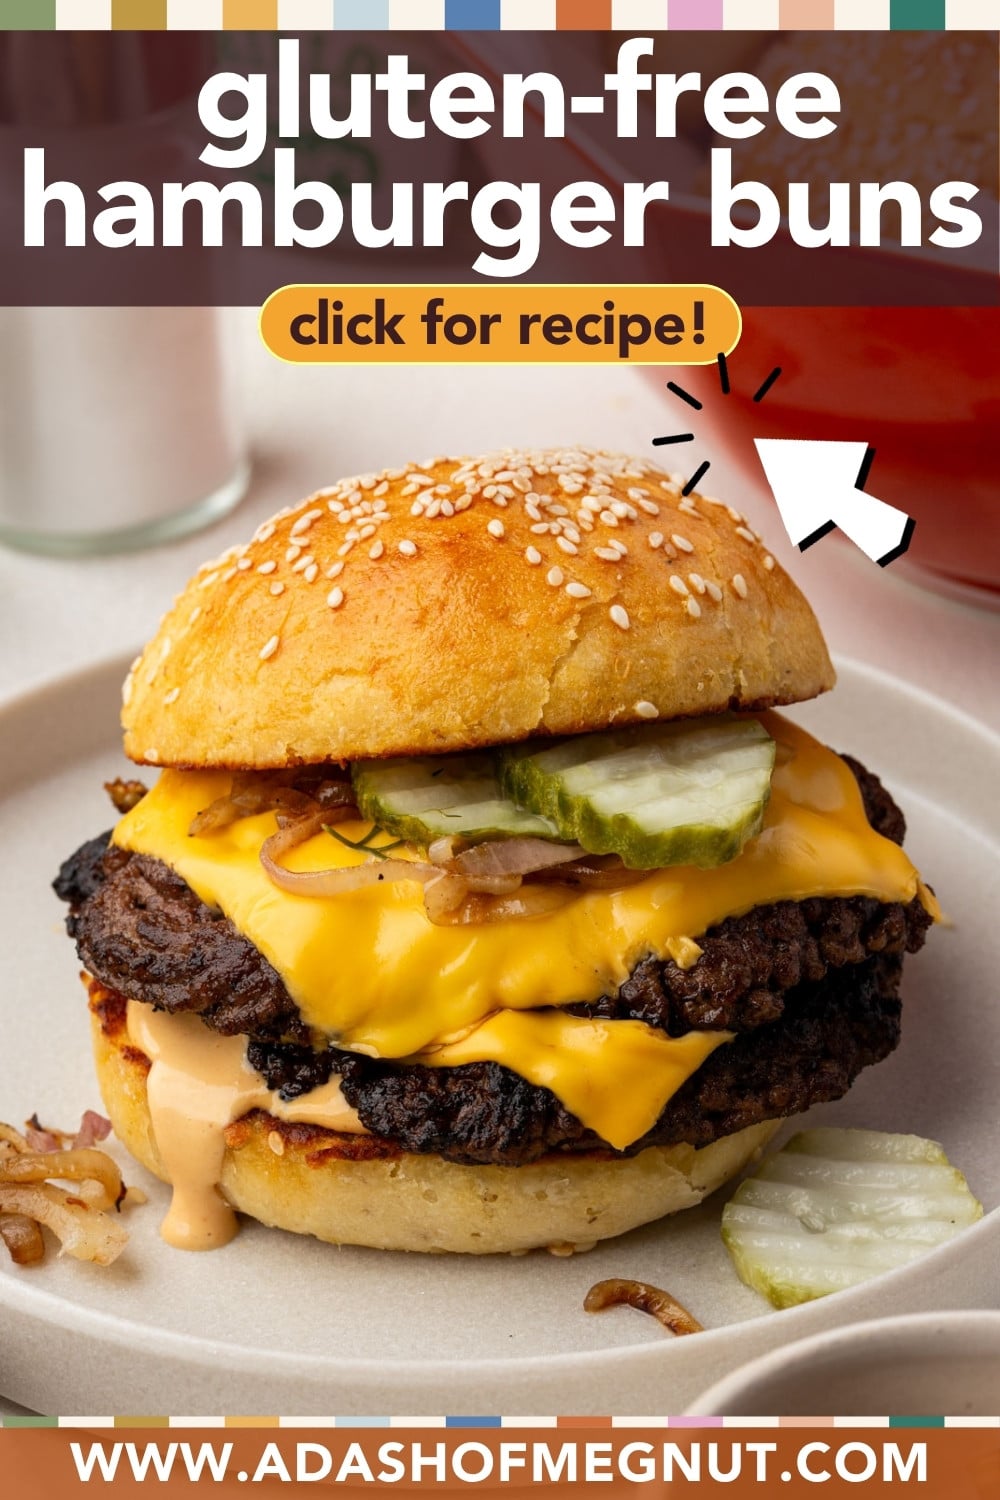
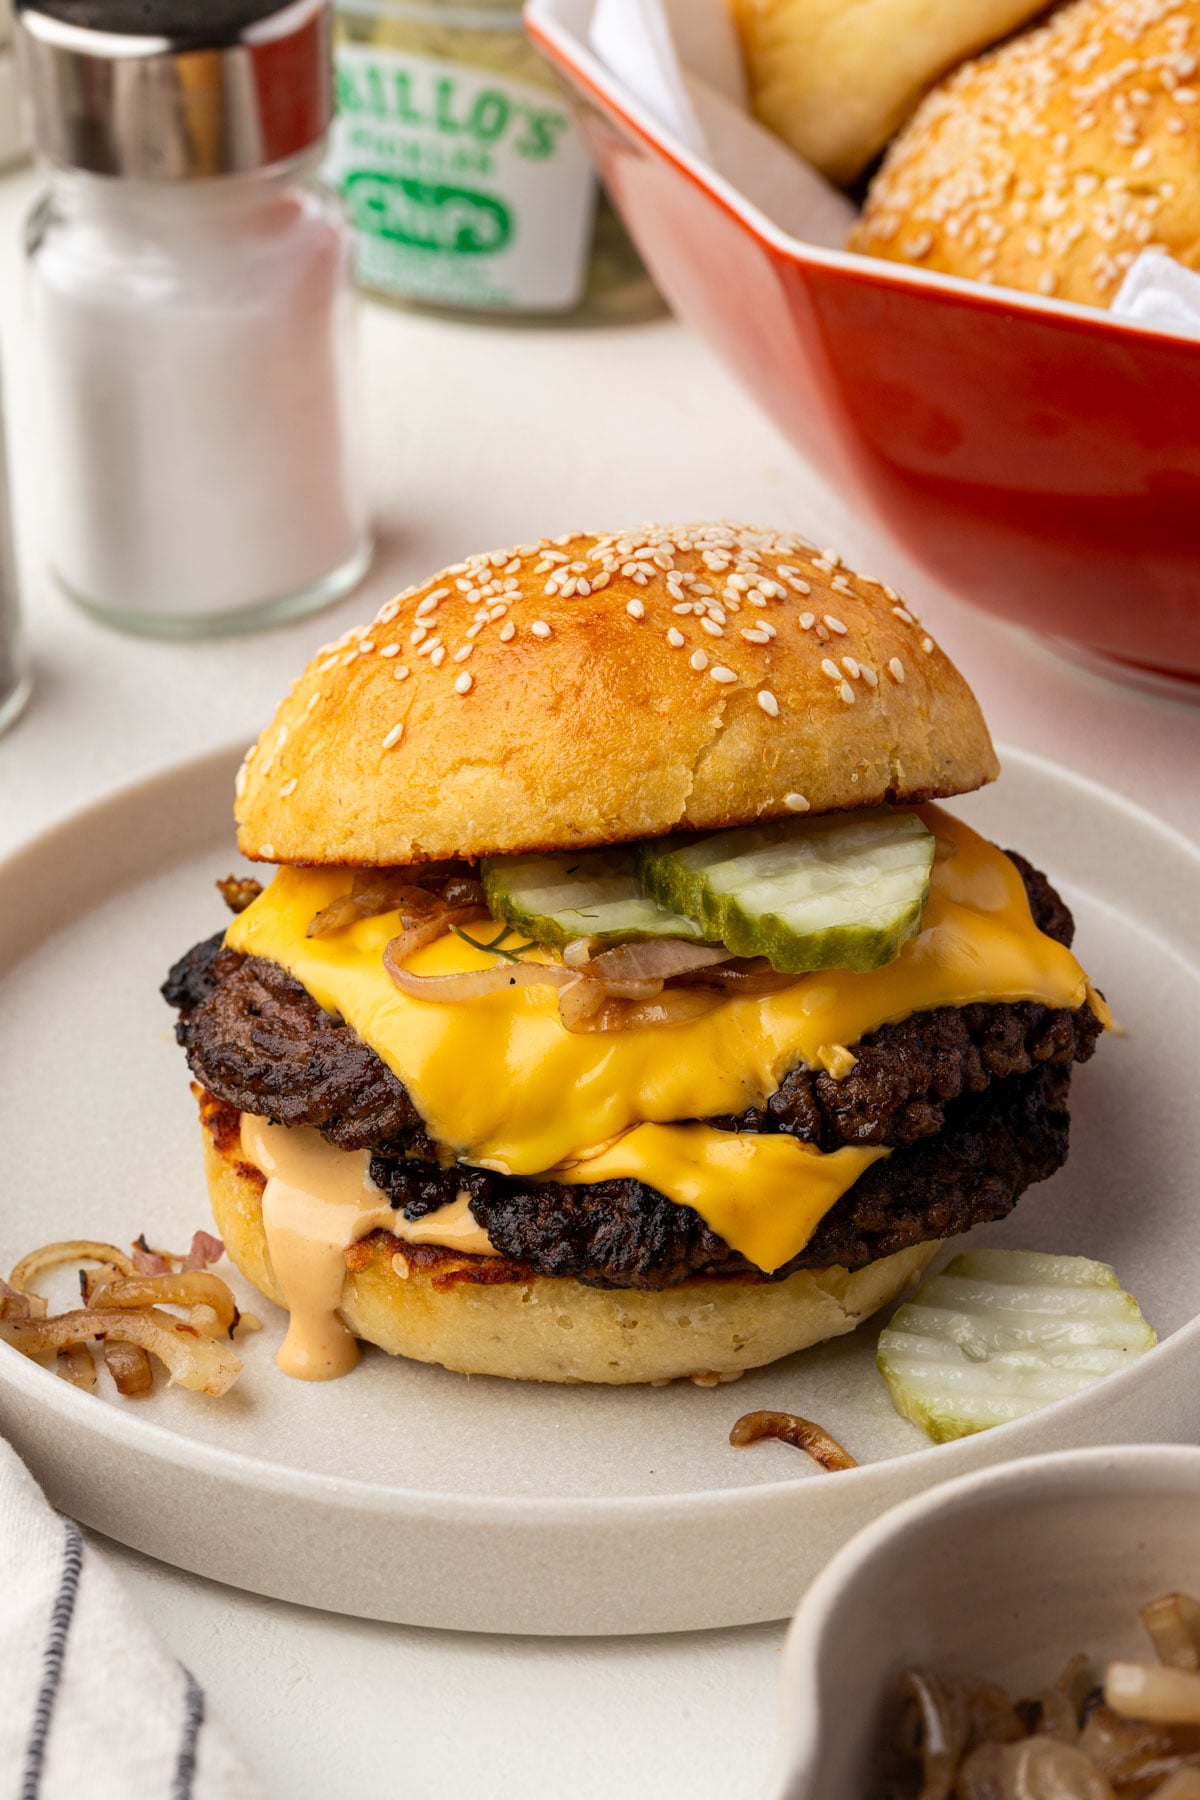
Gluten-free hamburger buns are one of those things that sound simple until you actually try to make them. The bun needs to be soft enough to bite through but sturdy enough to hold together under a burger with all the toppings. Most gluten-free buns from the store either crumble the second you pick them up or taste like cardboard. These don’t.
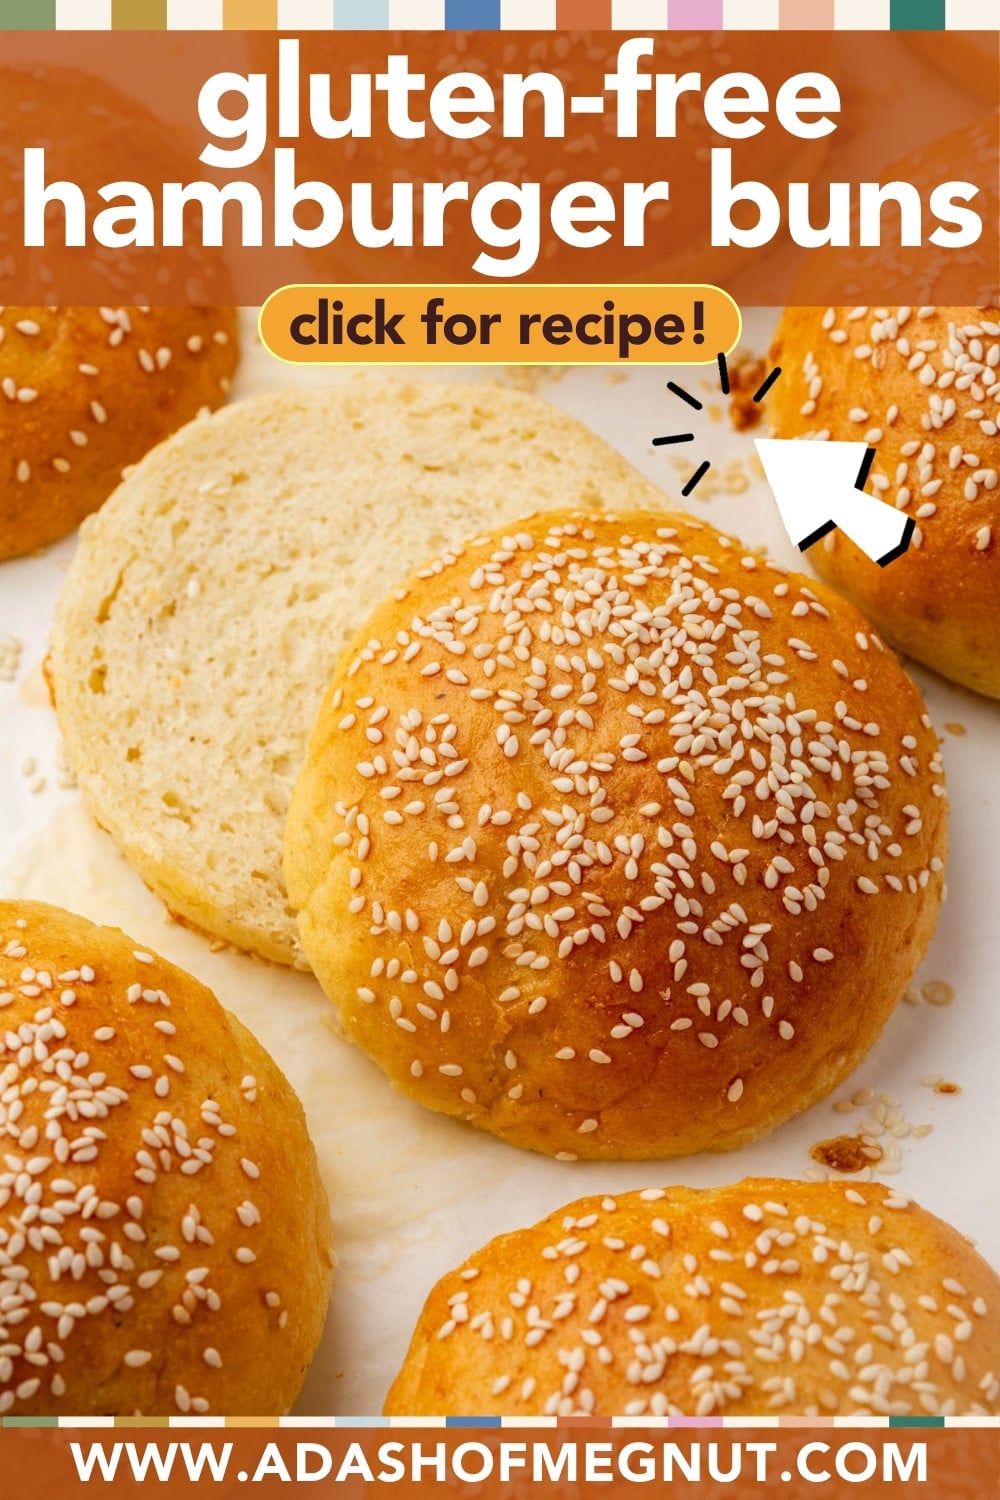
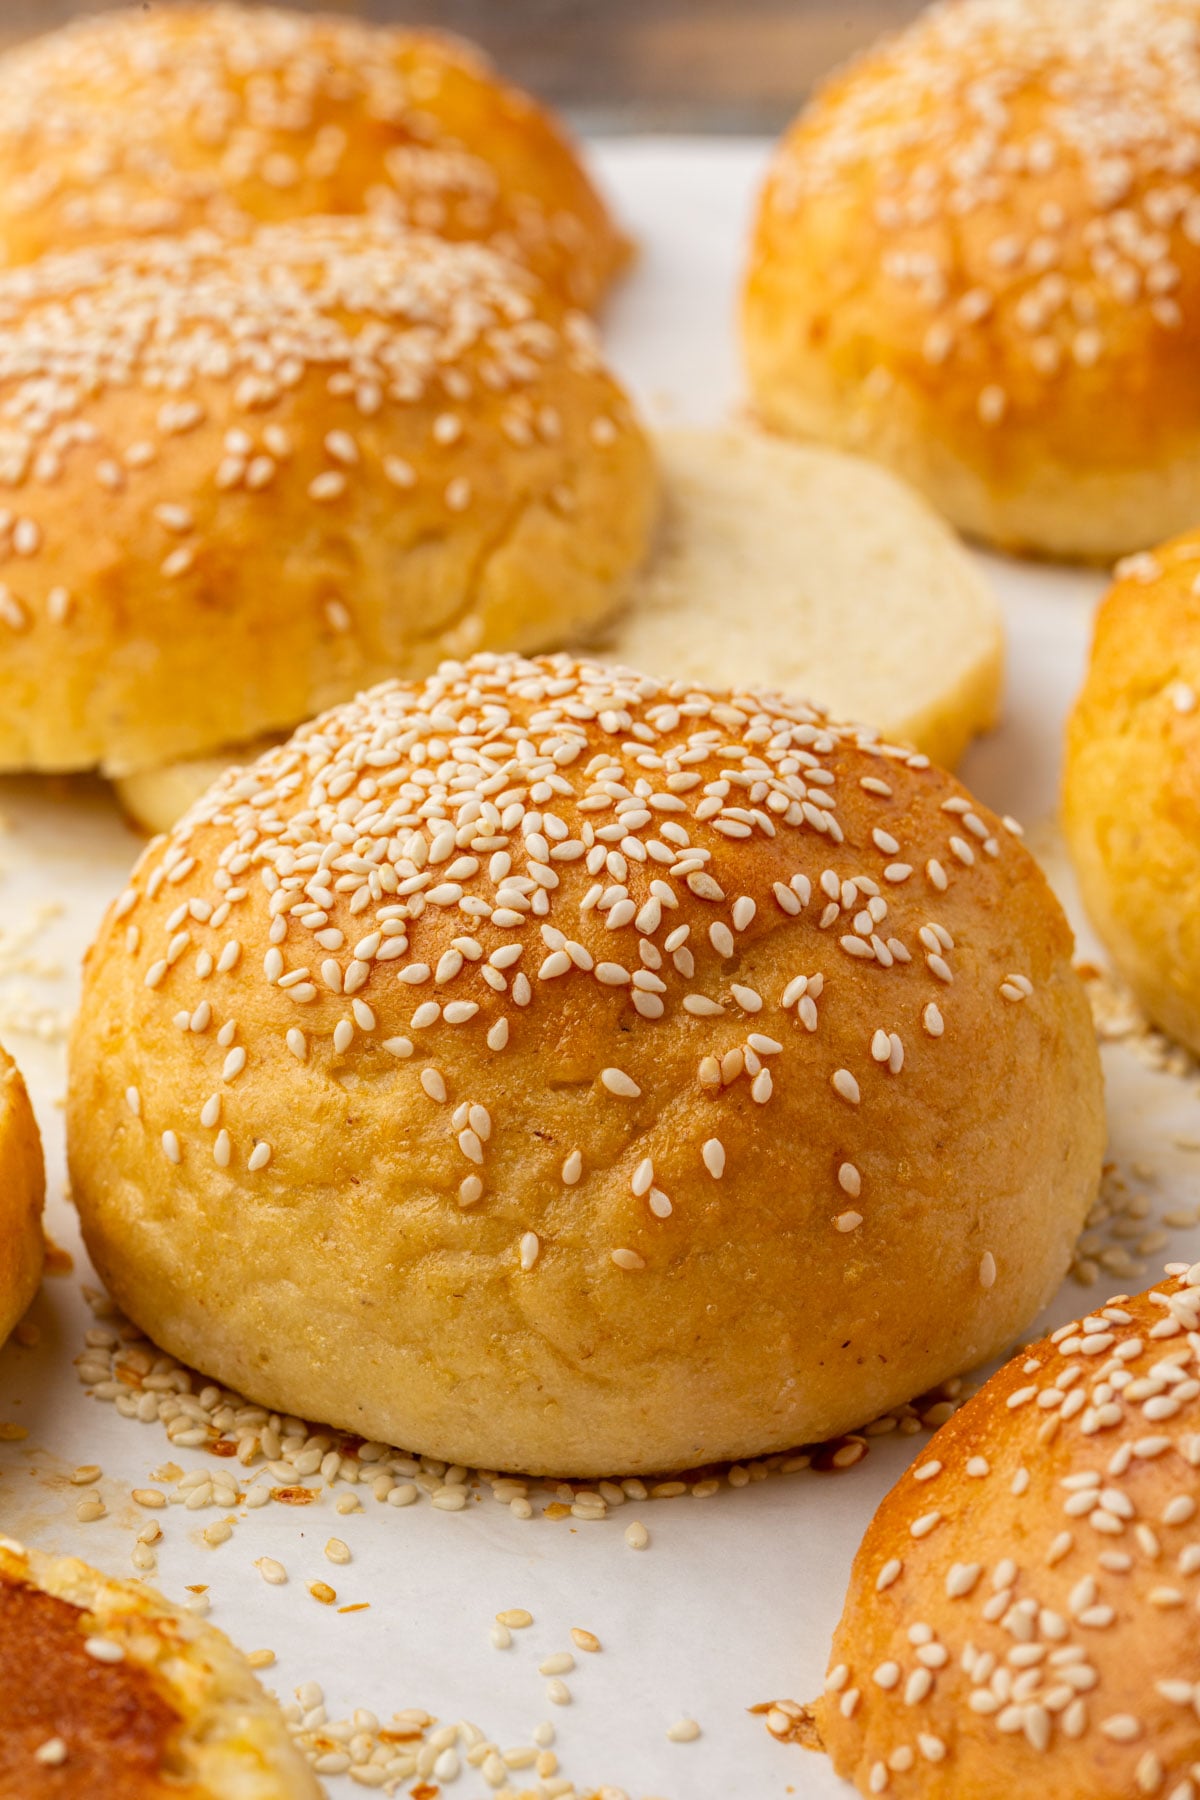
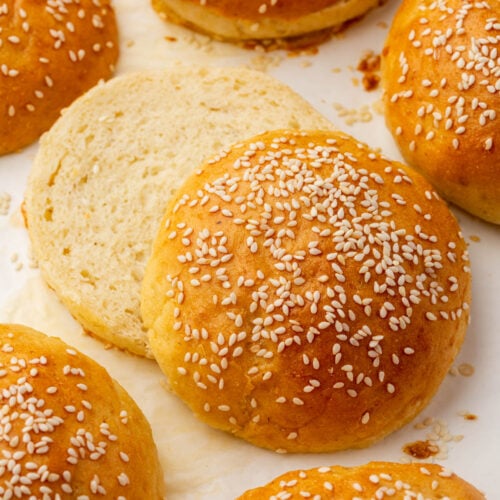
This recipe uses the same enriched yeast dough base from my Gluten-Free Dinner Rolls, with one key swap: avocado oil in place of butter. The oil keeps the crumb soft without weighing the bun down. Each bun is 140g of dough, flattened before proofing so it rises out instead of up, then baked at 400°F for about 16 minutes. Once you have this dough down, it’s the same base I use for my Gluten-Free Cinnamon Rolls, Gluten-Free Fried Donuts, and Gluten-Free Crescent Rolls, so the time you put into learning it here applies to a lot of other recipes.
Why You’ll Love This Recipe
How I Tested This Recipe
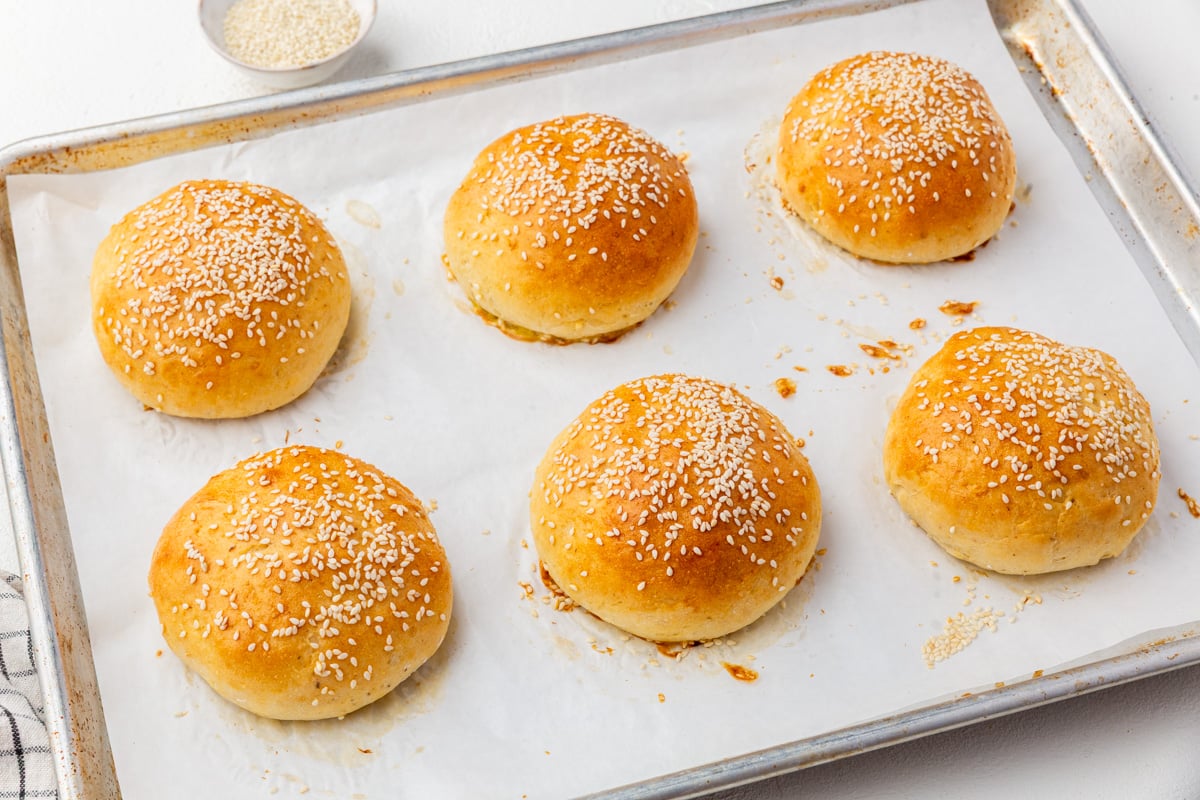
The first round of buns came out too tall. I used the same shaping method as the dinner rolls, rounded the dough into balls, and let them proof without flattening first. They rose beautifully but turned into tall, domed buns with too much bread relative to the burger. Not what I was going for.
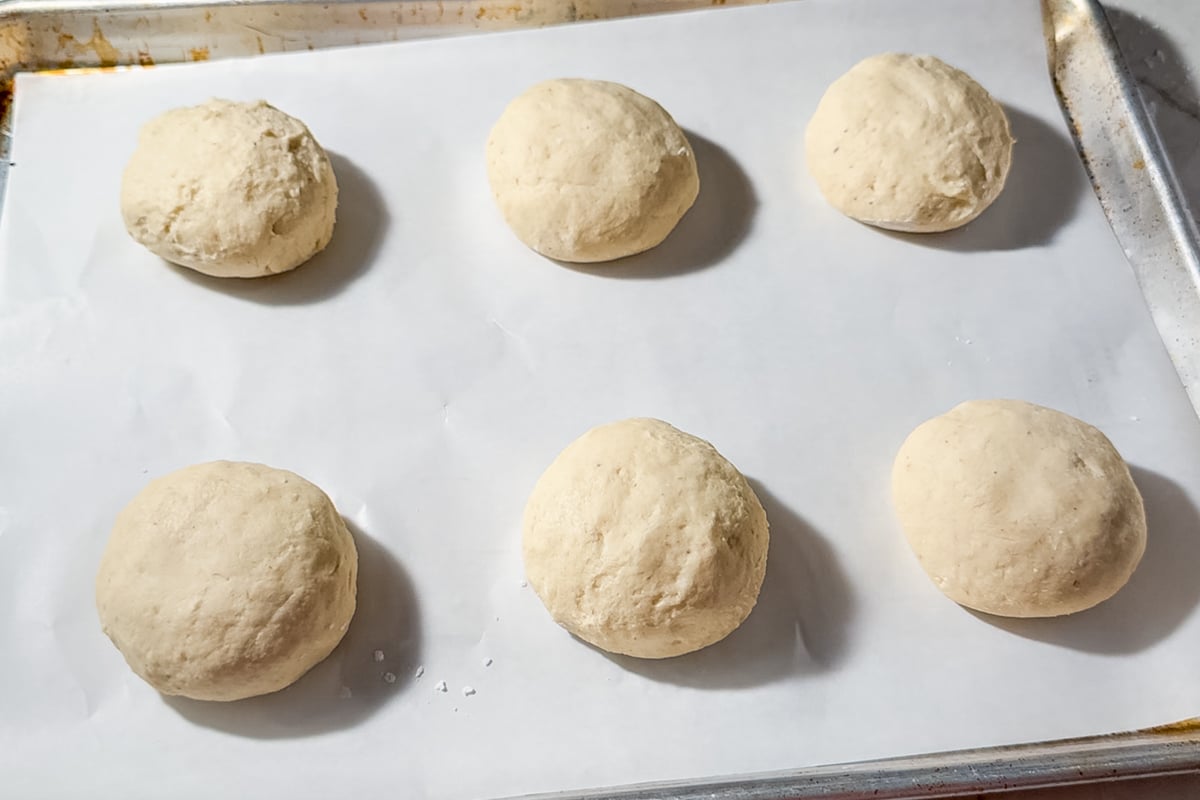
The fix was simple. Before proofing, I flatten each dough ball into a disc. The bun still rises during proofing and in the oven, but it rises outward instead of straight up. The result is a bun that’s proportional to a burger patty and easier to eat without the top half sliding off.
I also swapped butter for avocado oil in this version of the dough. Oil keeps the crumb softer longer than butter does. These are best fresh out of the oven on day one, but I keep a batch in the freezer all summer for burgers. Pull one out, slice it, butter it, and toast it on the grill or in a cast iron skillet and it comes right back.
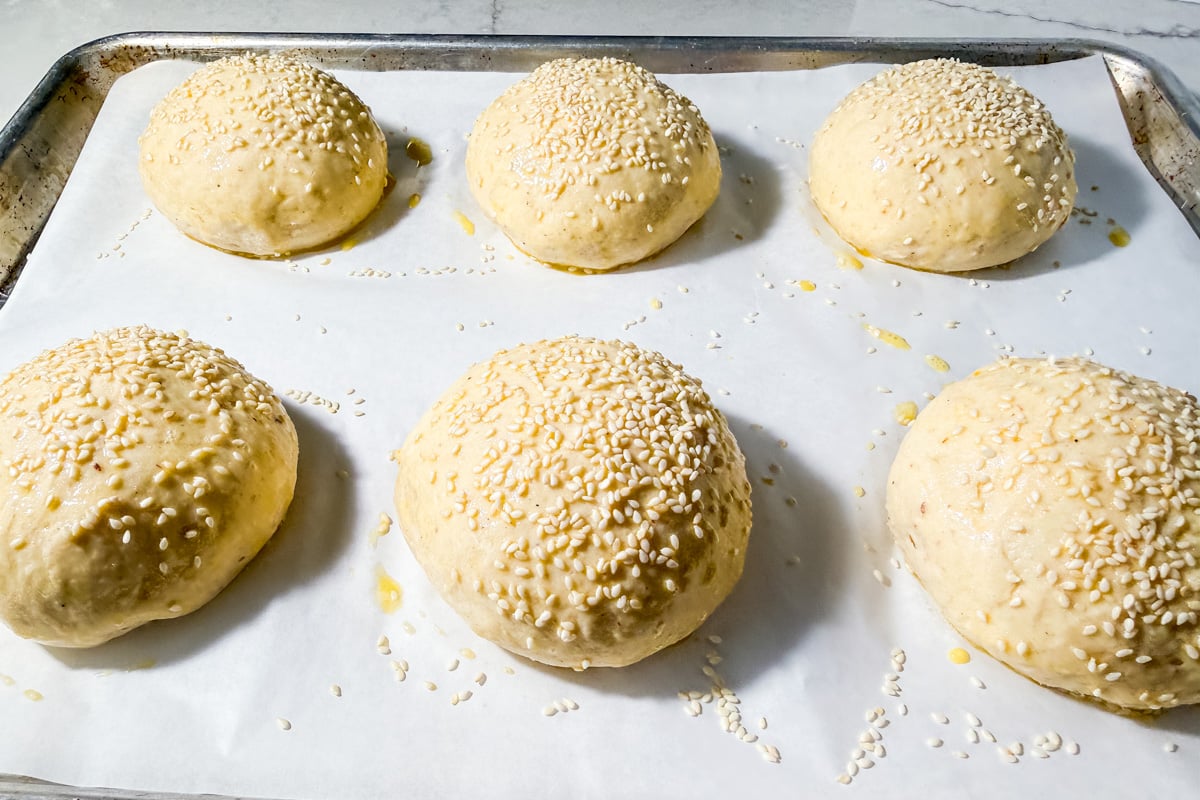
I also tested a few topping variations during round one since I didn’t have sesame seeds on hand. Plain buns work well. Poppy seeds are a good alternative. Sesame seeds are classic (they get so toasty in the oven!) and what I’d recommend if you’re serving these for a cookout.
A Dash of Megnut is a participant in the Amazon Services LLC Associates Program, an affiliate advertising program designed to provide a means for us to earn fees by linking to Amazon.com and affiliated sites.
Ingredient Notes
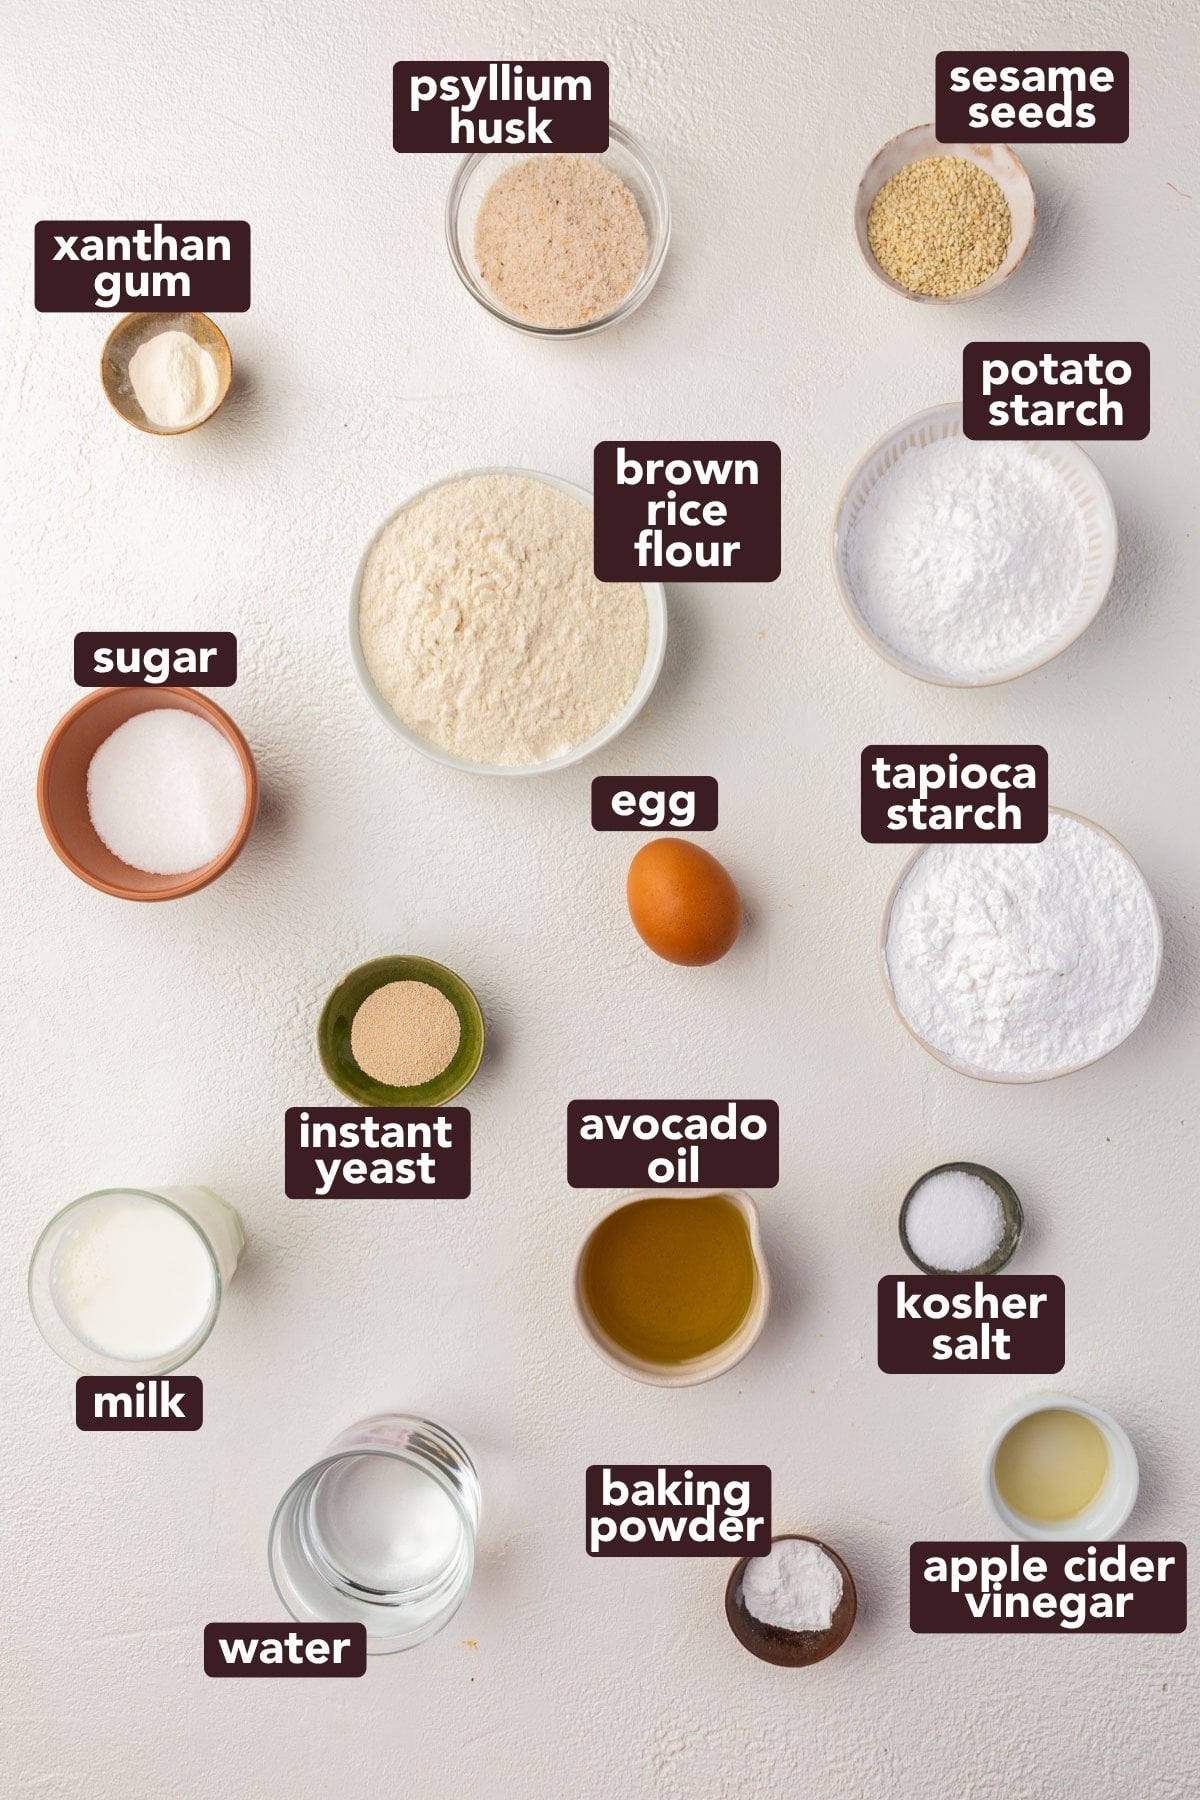
- Brown rice flour, tapioca starch, and potato starch – The same flour blend from the dinner rolls. Don’t substitute with an all-purpose gluten-free blend. The ratios are specific to this dough and a pre-made blend won’t behave the same way.
- Whole psyllium husk – Use whole, not powder. The powder gets clumpy. Mix it with warm water first to form a gel before it goes into the dough. I use Anthony’s whole psyllium husk.
- Instant yeast – One packet is all you need. I prefer instant yeast over active dry yeast because it skips the activation step. Just make sure it’s not expired. Dead yeast is the most common reason this dough doesn’t rise.
- Avocado oil – This replaces the butter from the dinner roll recipe. Oil keeps the crumb softer longer than butter does, which is why these hold up well over a few days and freeze well.
- Sesame seeds – Optional but worth it. Brush the egg wash on first and then sprinkle the seeds so they stick. Plain buns work just as well if you don’t have seeds on hand.
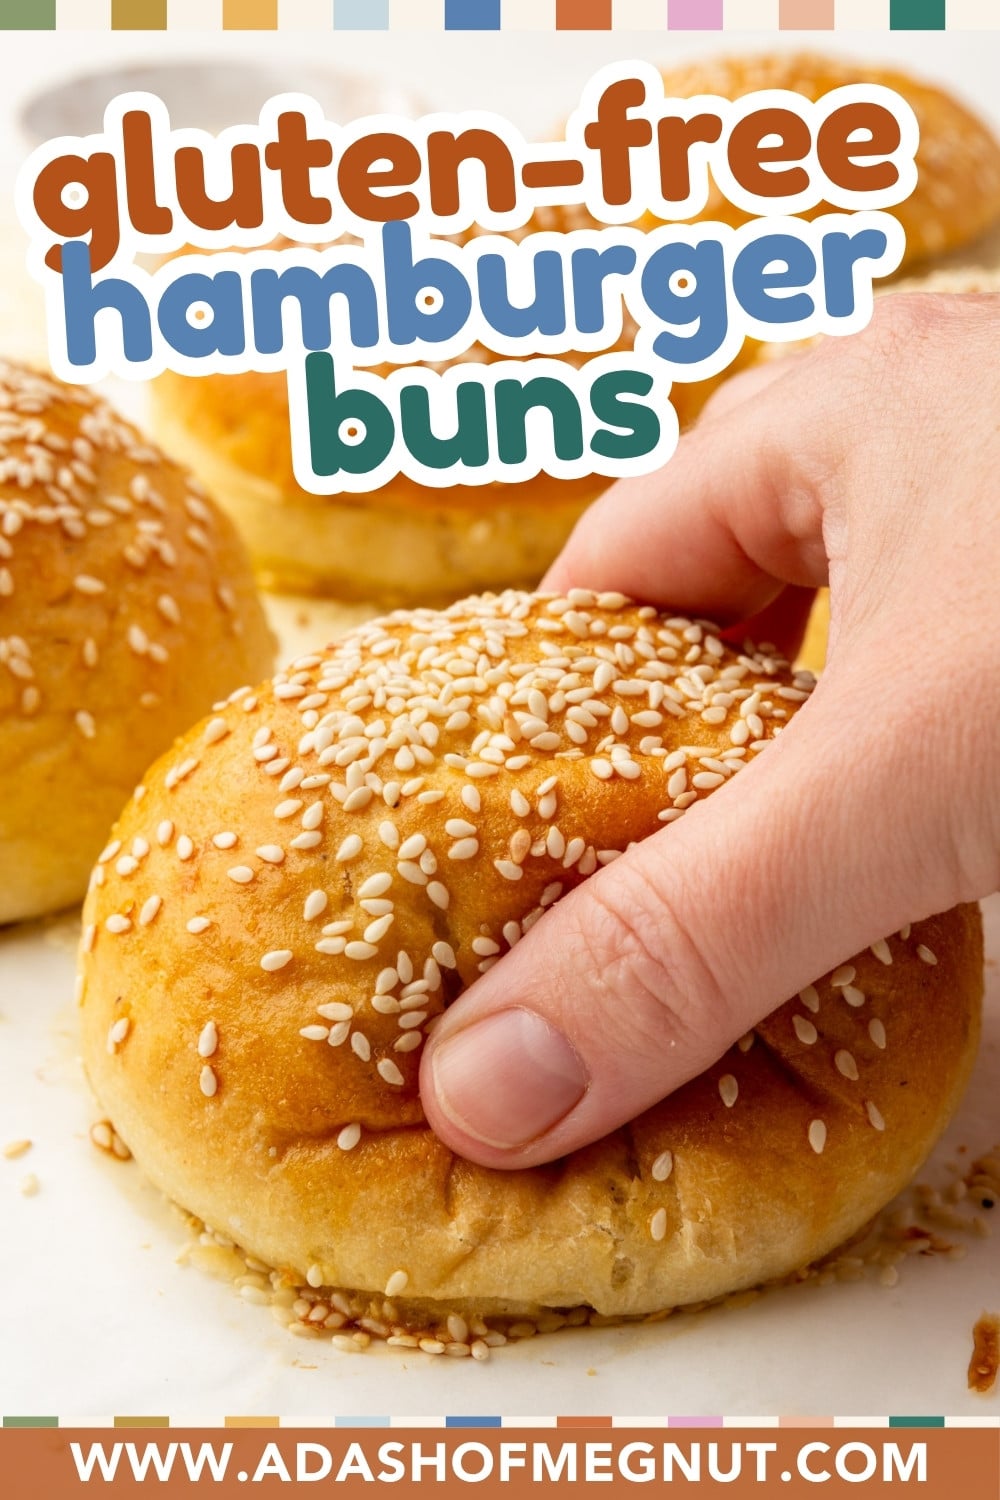
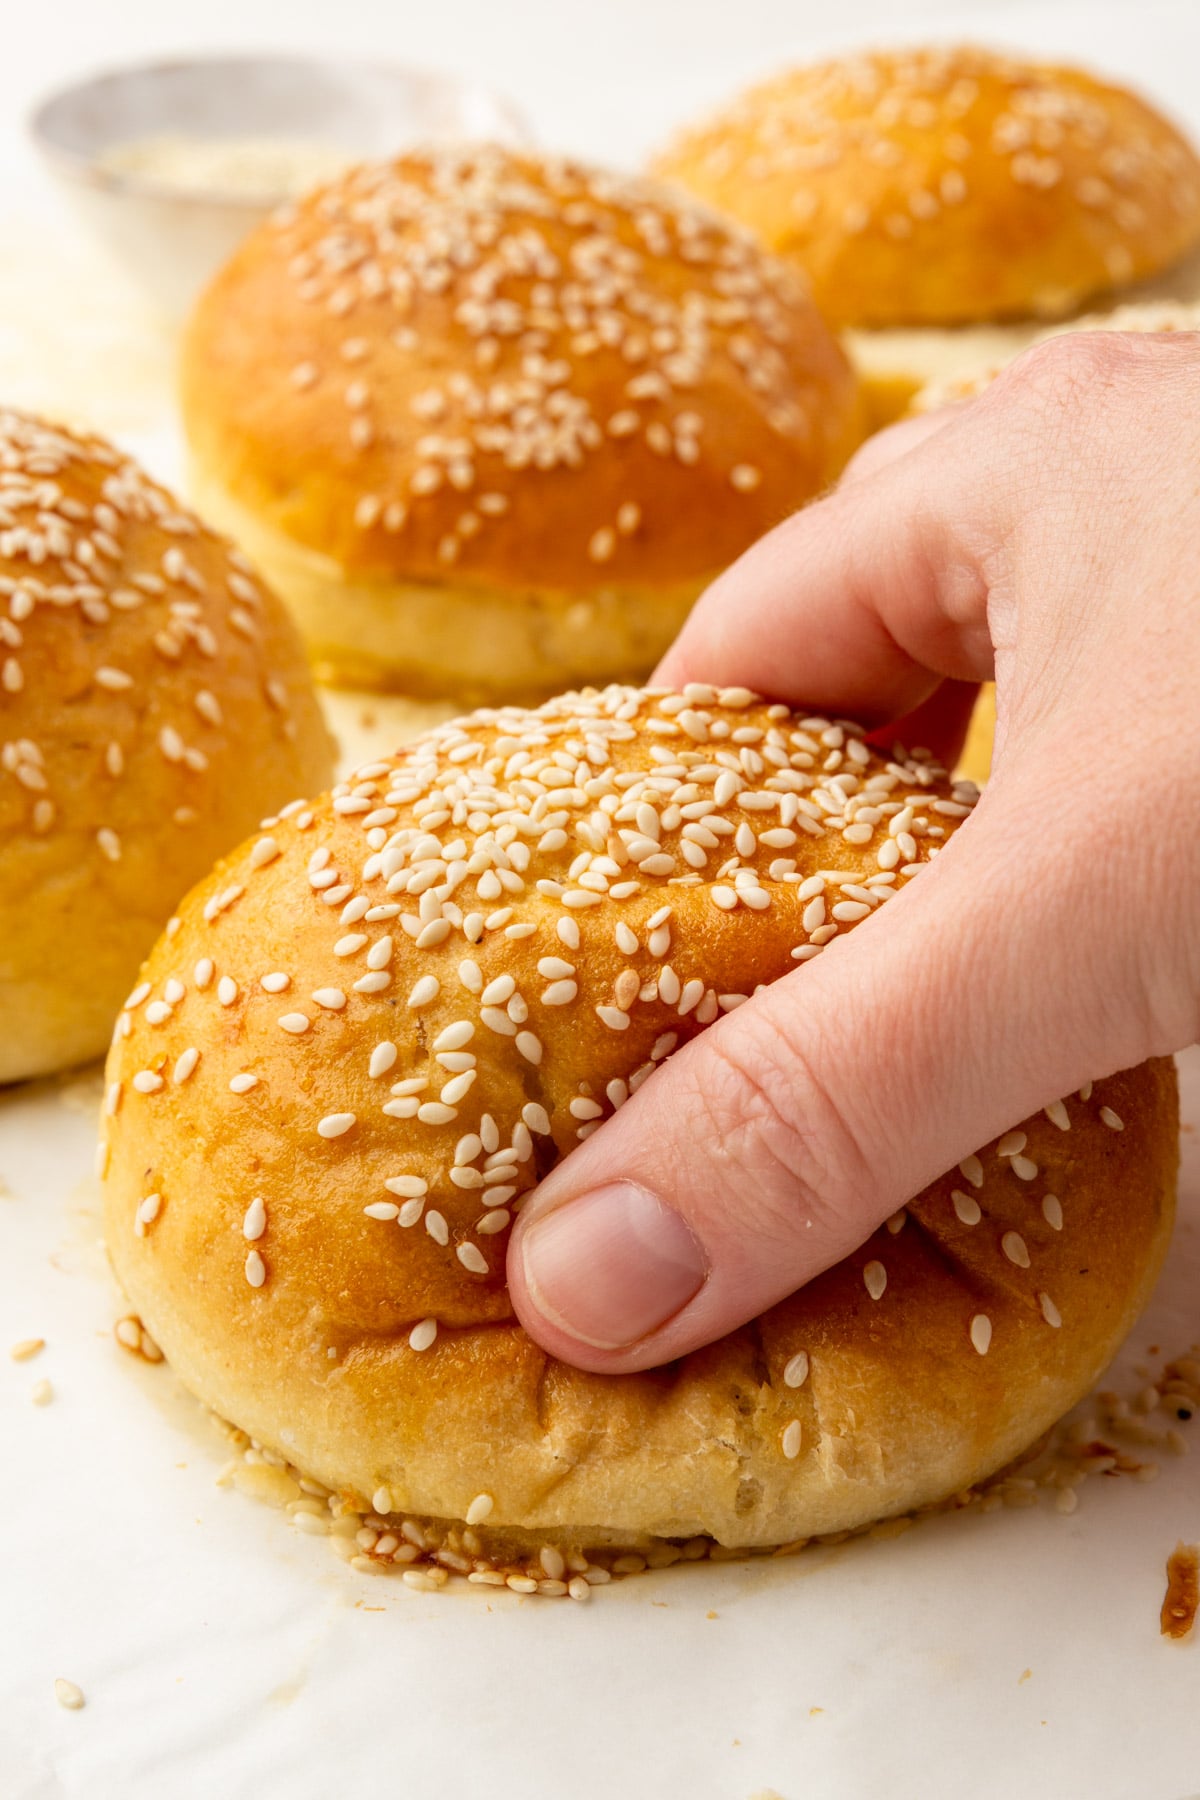
Flatten the Dough Before Proofing
This is the step that makes the difference between a bun that’s proportional to a burger and one that’s too tall and bready. After shaping each dough ball, press it down gently to about 1 inch in height before it goes on the baking sheet to proof. You’re not flattening it all the way, just giving it a head start so it rises outward instead of straight up.

Recipe FAQs
No. This recipe is built around a specific ratio of brown rice flour, tapioca starch, and potato starch. A pre-made blend like King Arthur or Bob’s Red Mill 1-to-1 has different ratios and added ingredients that will change how the dough behaves. Buy the individual flours and measure by weight.
A few things could be the cause. First, check that your yeast isn’t expired. Second, make sure your water and milk were in the 100°F to 110°F range. Third, your kitchen temperature matters more than people realize. If it’s cold, put the dough in a turned-off oven with just the oven light on. It creates a slightly warmer, draft-free environment that helps the dough rise. If you have a double oven, run the top oven and proof the dough in the bottom one.
How do I know when the buns are done baking?
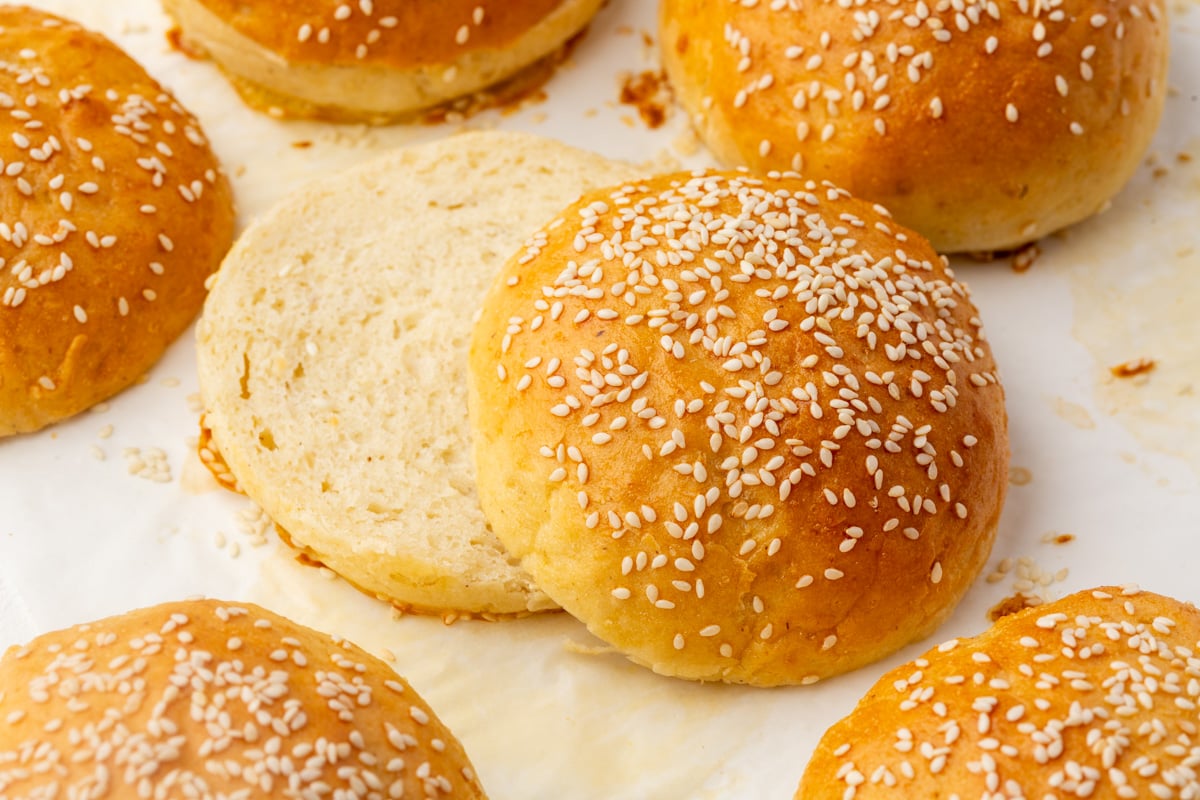
The buns should be deep golden brown on top, which takes about 16 minutes at 400°F. You can also check the internal temperature by inserting a thermometer into the center of a bun. They’re done when the internal temperature reaches 190°F to 195°F.
Expert Tips
Storage Instructions
Storing: Hamburger buns are best on the first day, but still stay soft for a few days. Keep buns in an airtight container at room temperature for up to 2-3 days. For longer storage, store them in the freezer.
Freezing: Let the buns cool completely, then slice them before freezing. Freeze in a single layer first, then transfer to a freezer bag for up to 3 months.
Reheating: Toast on the grill or in a cast iron skillet until warmed through and the cut sides are golden. For best results, thaw at room temperature or microwave for 20 seconds before toasting.
Serving Suggestions
These buns were made to be loaded up. My Turkey Spinach Garlic Burgers are what I make most often with these, and my Dill Cabbage Coleslaw takes 15 minutes and goes on top or alongside. I also love a good smash burger. Press a ball of ground beef onto a hot cast iron skillet and top it with burger sauce, American cheese, pickles, and sautéed shallot.
My Gluten-Free Fried Chicken made with boneless skinless chicken thighs works just as well between these buns for a fried chicken sandwich. And for a summer cookout where you want something hands-off, my Instant Pot BBQ Pulled Pork is ready in just over an hour and makes enough to fill a whole batch of buns.
Gluten-Free Hamburger Buns
Ingredients
Dry Ingredients:
- 160 g (1 cup) brown rice flour
- 115 g (1 cup) tapioca starch
- 75 g (½ cup) potato starch
- 50 g (¼ cup) granulated sugar - 1/4 cup
- 8 g (½ tablespoon) kosher salt - 1/2 tablespoon
- 7 g (2¼ teaspoons) instant yeast - one packet
- 6 g (2 teaspoons) xanthan gum
- 8 g (2 teaspoons) baking powder
Psyllium Mixture:
- 16 g (2 tablespoons) whole psyllium husk
- 160 g (⅔ cup) warm water - 100°F
Wet Ingredients:
- 160 g (⅔ cup) warm whole milk - 100° to 110°F
- 1 large egg - 50g
- 57 g (4 tablespoons) avocado oil - 4 tablespoons
- 5 g (1 teaspoon) apple cider vinegar - 1 teaspoon
For Finishing:
- 1 large egg - beaten (for the egg wash)
- 1 tablespoon sesame seeds
**Use the toggle button above to turn the instruction photos on and off!
Instructions
- Mix the dry ingredients: In the bowl of a stand mixer, combine 160 g (1 cup) brown rice flour, 115 g (1 cup) tapioca starch, 75 g (½ cup) potato starch, 50 g (¼ cup) granulated sugar, 8 g (½ tablespoon) kosher salt, 7 g (2¼ teaspoons) instant yeast, 6 g (2 teaspoons) xanthan gum, and 8 g (2 teaspoons) baking powder. Whisk to combine evenly.

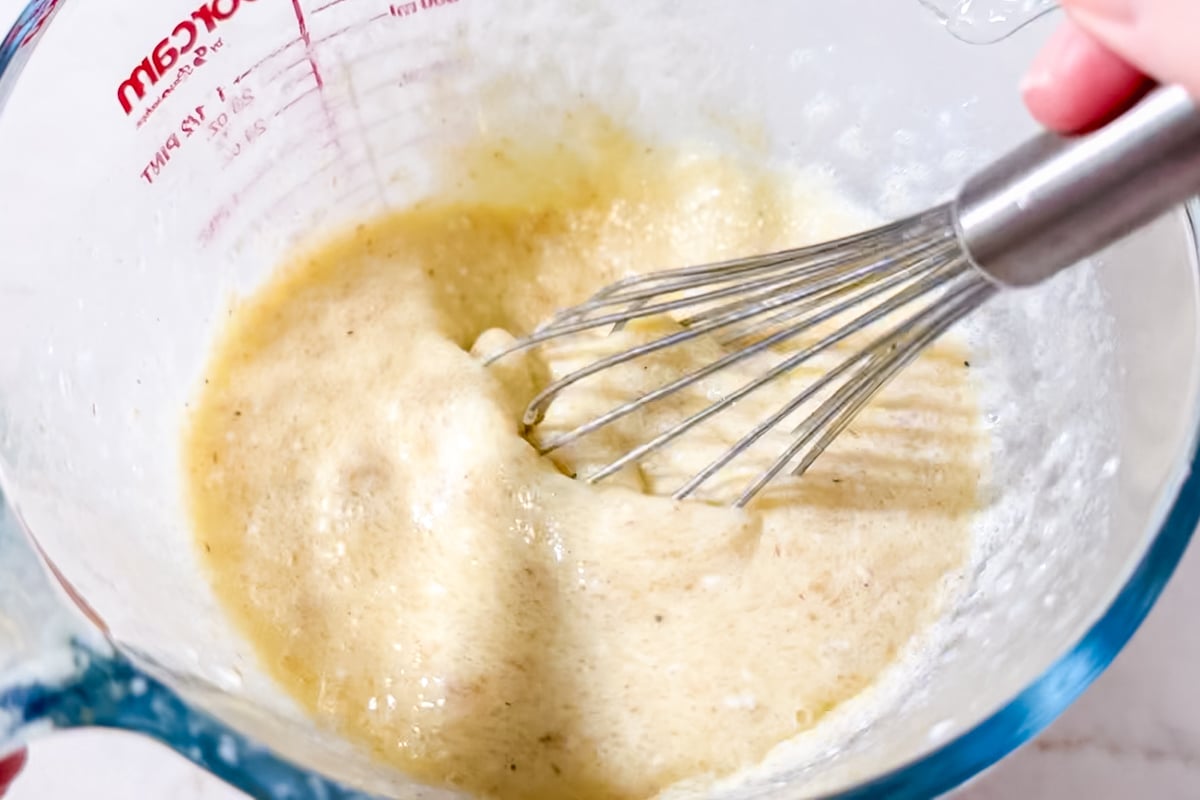
- Make the psyllium gel: In a small bowl, whisk together 16 g (2 tablespoons) whole psyllium husk and 160 g (⅔ cup) warm water until thickened into a gel. Set aside for about one minute to hydrate fully.
- Combine the wet ingredients: In a medium bowl, whisk together 160 g (⅔ cup) warm whole milk, 1 large egg, 57 g (4 tablespoons) avocado oil, and 5 g (1 teaspoon) apple cider vinegar. Add the psyllium gel and whisk until smooth and uniform.
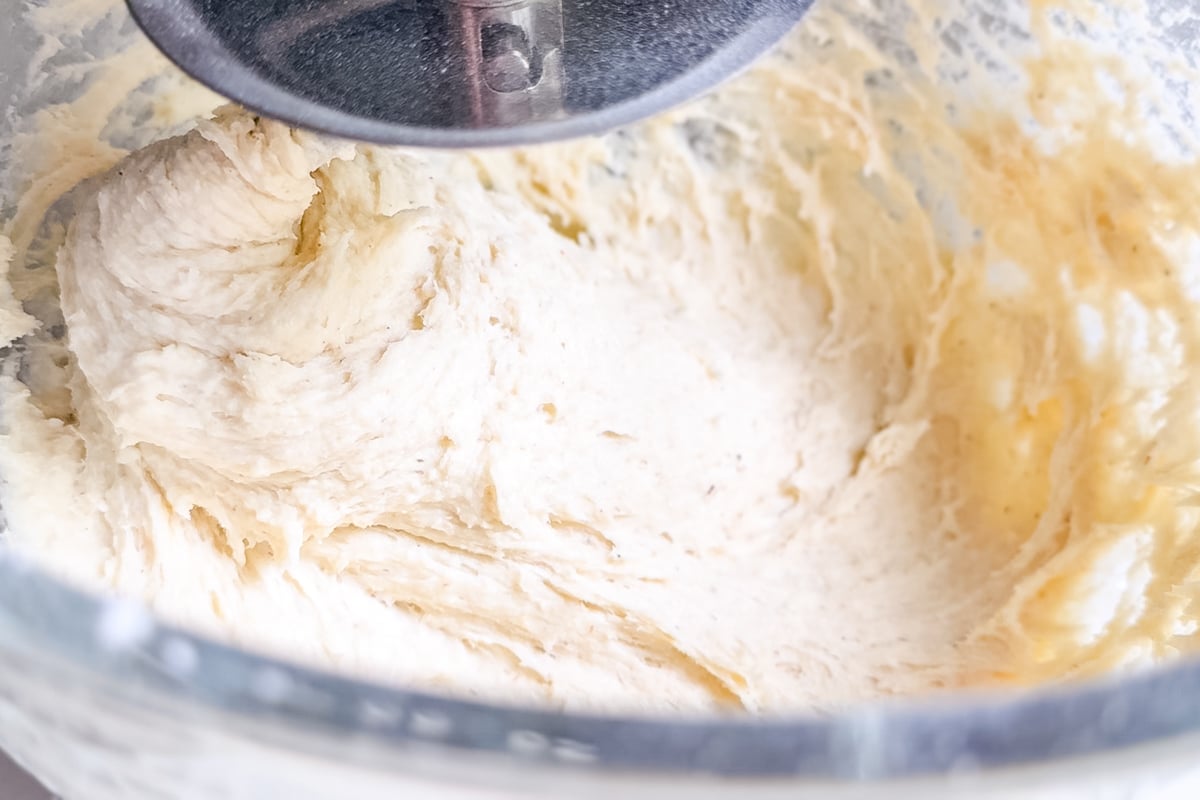
- Make the dough: Pour the wet ingredients into the dry ingredients. Using the dough hook attachment, mix on medium speed for about 5 minutes, scraping the sides and bottom of the bowl as needed. The dough should be soft, thick, and slightly sticky.
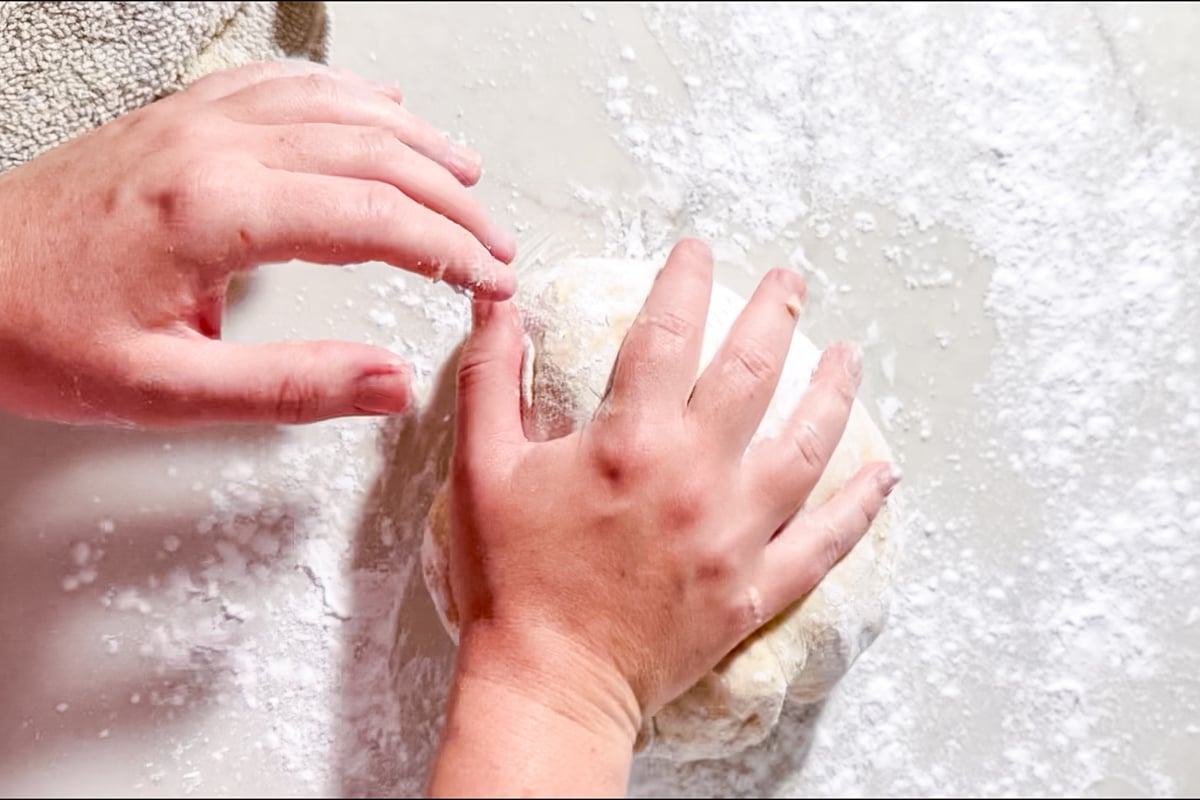
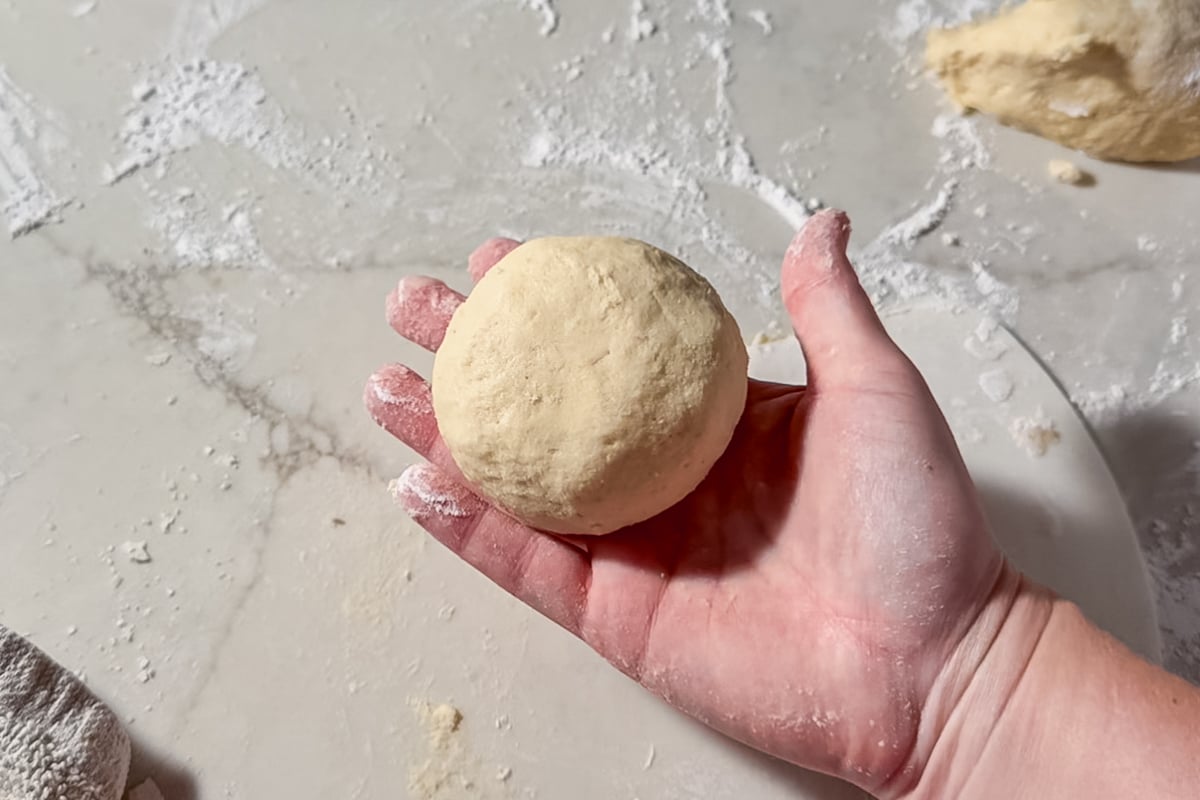
- Shape the buns: Lightly dust your work surface and hands with tapioca starch. Turn the dough out onto the surface and knead it a few times until smooth.
- Divide into 6 equal pieces, about 140g each.
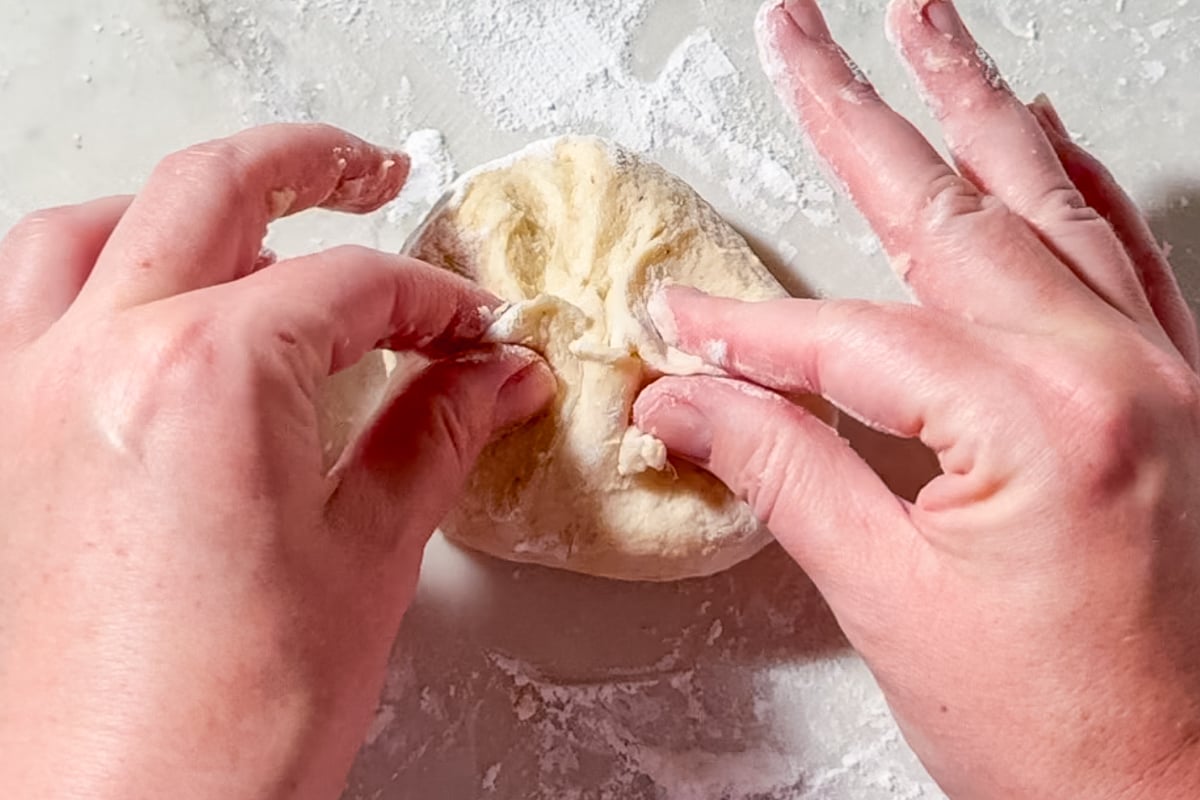
- Fold the edges of each piece toward the center, pinch the seams closed, and flip seam side down.
- Roll each piece under your hand in a loose claw shape until round and smooth. Gently press each ball down to about 1 inch in height.
- Arrange the buns on a parchment lined baking sheet, spacing about 2 inches apart. Cover loosely and proof in a warm spot at 75 to 80°F for 1.5 to 2 hours, until puffy and nearly doubled. Preheat the oven to 400°F during the last 30 minutes of the proof time.
- Brush the tops of the buns with 1 large egg and sprinkle with 1 tablespoon sesame seeds.
- Bake at 400℉ for 16-17 minutes until deep golden brown. Check the internal temperature with a thermometer. The buns are done when it reaches 190°F to 195°F.
- Let cool on the baking sheet for a few minutes before transferring to a wire rack.


Notes
- Flour Blend: Do not substitute with a pre-made gluten-free flour blend. This recipe is built around a specific ratio of brown rice flour, tapioca starch, and potato starch. A pre-made blend has different ratios and added ingredients that will change how the dough behaves. Measure by weight.
- Psyllium Husk: Use whole psyllium husk, not powder. The powder gets clumpy and won’t hydrate the same way.
- Proofing: The buns need 1.5 to 2 hours to proof fully. If your kitchen is cold, place the baking sheet in a turned-off oven with just the oven light on to create a slightly warmer, draft-free environment.
- Freezing: Let the buns cool completely, then slice before freezing. Freeze in a single layer first, then transfer to a freezer bag for up to 3 months. Toast on the grill or in a cast iron skillet to reheat.
Nutrition
I’m curious if you can use psyllium husk powder?!
Yes! You just need less, so use 13g of the powder. I just always have had trouble with it getting clumpy when I mixed it into the dry ingredients instead of hydrating it, so I would still hydrate it in the water to make a gel first.
Can you use a sweetener other than processed white sugar?
I haven’t tested this recipe with a different sweetener. Coconut sugar would be the closest swap since it behaves similarly to granulated sugar. I’d avoid liquid sweeteners like honey or maple syrup since they’ll change the hydration of the dough and affect the final texture.
Can I do it with a hand mixer?
You can use a hand mixer to mix the dough together, but then I would knead it by hand instead of using the dough hook attachment that I mention in the recipe.
Theese buns where amazing!!! Would love to make a loaf of bread also…. Can I use the same dough or do you have a better alternative with similar flour blend, not Caputo? Hard to find a good tasting, soft and airy one💗
Theese buns where amazing!
I wonder if I can use the same dough for a loaf of bread? Or do you have a good recipe for a loaf of bread without the Caputo flour?
I haven’t tried it yet, but it’s on my list to test!
Great
Holy cow! I used millet instead of brown rice, and corn starch instead of potato. Turned out perfect! I think the dough can be divided to make 8 easily.
These buns were so good! My husband is dairy free, so I substituted full fat coconut milk from a can. The buns were beautiful and taste great, but a little dense/heavy, and I’m wondering if that was because of the canned coconut milk. Any thoughts? Suggestions for the best substitution for the whole milk? Thank you for a wonderful gf recipe!
Made these again and subbed water for the milk. They were perfect.
These rolls are FANTASTIC! Can I make the dough a day ahead and put in the fridge until the next day so I can bake them fresh? I’m living your recipes! Keep ‘em coming!
Bonjour Megan,
Je ne trouve pas de l’huile d’avocat dans ma région par quoi je peux la remplacer pour avoir le moelleux stp
Hi Ray, Any neutral tasting oil will work. Even a light olive oil will also work.
Just wondering if there is a typo for the psyllium husk amount. It says 16 g (2 Tbsp) but if I measure 16 g on the scale, it comes to almost 4 Tablespoons. Please confirm asap…I’m hoping to bake these today.
At long last, I’ve found a great hamburger bun recipe! You can’t know how happy this makes me. Thank you for sharing this recipe. It’s the only one I will be making from here on out.