

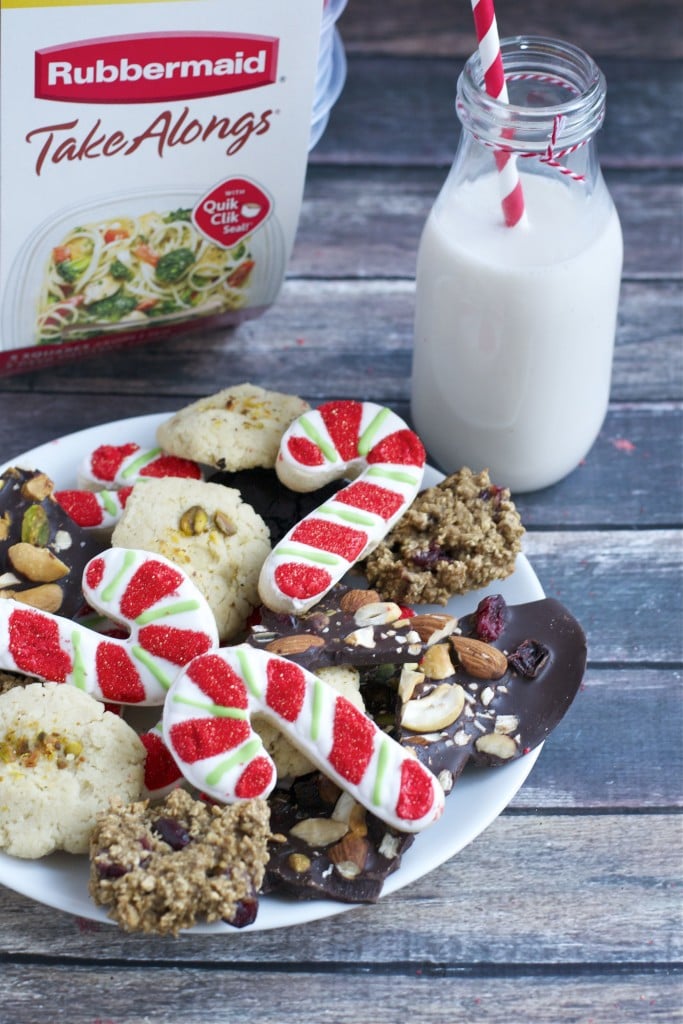
These gluten-free peppermint candy cane sugar cookies are striped in white, red and green royal icing to look like mini candy canes. They use the same base dough as my gluten-free sugar cookies, with peppermint extract added to the icing.
This is a good one to make for a cookie exchange or a holiday cookie plate. The dough freezes well, so you can make it ahead, and the recipe makes a full batch for sharing.
Ingredient notes:
- Gluten-Free Flour: Use Bob’s Red Mill 1-to-1 Gluten-Free Baking Flour in the blue bag. I haven’t tested this recipe with other blends, so results may vary with a different brand.
- Peppermint Extract: This flavors the royal icing. It’s potent, so stick to the amount in the recipe rather than adding more.
- Meringue Powder: This is what makes the royal icing food-safe and shelf-stable. These cookies don’t need refrigeration at any point, from baking through decorating to however long you store them.
- Gel Food Coloring: Use gel, not liquid food coloring. Gel gives you vibrant red and green without thinning out the icing.
- Red Sanding Sugar: Added over the red icing while it’s still wet. It covers any unevenness in the color and gives the cookies a little shimmer.
Making changes to a recipe can result in recipe failure. Any substitutions listed below are simple changes that I believe will work in this recipe, but results are not guaranteed.
Megan’s Tips
Recipe FAQs
Yes. Swap the gel food coloring for whatever colors fit your theme. The striping technique works the same no matter what colors you use.
Red is one of the hardest colors to get fully saturated in royal icing, since it takes a lot of concentrated gel coloring to get there. Adding red sanding sugar over the wet icing covers any unevenness and adds shimmer, so it doesn’t need to be perfectly red underneath.
Yes. The dough keeps well-wrapped in the fridge for a few days, or in the freezer for up to 3 months. Thaw it in the fridge before rolling.

Expert Tips
Serving Suggestions
Pack these in a holiday gift tin or add them to a cookie exchange plate once the icing is completely dry. For a gluten-free cookie tray with a mix of shapes and colors, pair them with my snowflake sugar cookies and chocolate Christmas tree sugar cookies.
Storage Instructions
- Baked cookies: Once the icing is fully dry, store in an airtight container at room temperature for about a week. For longer storage, freeze undecorated baked cookies with parchment between layers for up to 3 months, then decorate after thawing.
- Cookie dough: Shape it into a disk or cut it into shapes first, then freeze on a baking sheet for an hour before transferring to a freezer bag. Dough keeps for up to 3 months and can be baked straight from frozen with a few extra minutes in the oven.

Gluten-Free Peppermint Candy Cane Sugar Cookies
Ingredients
For the Cookies
- 1 cup unsalted butter - softened
- 1 cup powdered sugar
- 1 teaspoon pure vanilla extract
- 1 teaspoon salt
- 1 egg
- 2 ¼ cups gluten-free flour blend - 315g
For the Royal Icing
- 4 cups powdered sugar - sifted
- 2 tablespoons meringue powder
- 5 tablespoons water
- ½ teaspoon peppermint extract
- gel food coloring - green and red
- 1 tablespoon red sanding sugar
**Use the toggle button above to turn the instruction photos on and off!
Instructions
For the Cookies
- Cream 1 cup unsalted butter and 1 cup powdered sugar in a large bowl with an electric mixer. Mix in 1 egg, 1 teaspoon pure vanilla extract and 1 teaspoon salt and beat until mixed well.
- Gradually add in 2 ¼ cups gluten-free flour blend (½ cup at a time) and mix after each addition. Put dough in the refrigerator for an hour or so, or until the dough firms up.
- Sprinkle your work surface and rolling pin with powdered sugar. Roll the dough out to a ¼ inch thickness.
- Using a candy cane shaped cookie cutter, cut shapes into the dough. Place cookie dough shapes on a parchment paper lined cookie sheet and place in the freezer for 10-15 minutes.
- Then, bake cookies in the oven at 375°F for 8-10 minutes. The cookies should not brown completely, but the edges can be slightly browned (that’s a good indication it’s done). Cool on a wire rack.
For the Royal Icing
- In a bowl of an electric mixer fitted with the whisk attachment, combine the 4 cups powdered sugar, 2 tablespoons meringue powder, ½ teaspoon peppermint extract and 5 tablespoons water.
- Mix for 7-10 minutes, until the ingredients are well blended and the icing has a matte finish. This is the base consistency. To thin for outlining and flooding, add water a little at a time, mixing well after each addition. I use a 15-second rule as my guide: drizzle the icing with a spoon over the bowl and it should hold its shape for 15 seconds before melting back in. You’ll use this same consistency throughout, including the green diagonal lines, since they go on while the white icing is still wet. If you need to thin it out more then add more water. If you need to thicken it add more powdered sugar.
To Decorate
- Outline the cookie using white icing (15 second icing) in a pastry bag fitted with a number 3 tip and then make diagonal lines on the cookie to section off the candy cane stripes.
- Flood with the same white icing (15 second icing) skipping every other section.
- Then, while the white is still wet, take the green icing (15 second icing) in a pastry bag fitted with a number 2 tip and make a diagonal line in the middle of each white section. Let dry completely for at least four hours or overnight.
- Once the white is completely dry (I’m seriously talking COMPLETELY dry otherwise the sprinkles part won’t go so well), flood the remaining sections with red icing (15 second icing). Immediately after, sprinkle the 1 tablespoon red sanding sugar over the red sections. Shake off an excess. Dry completely.

These look great! What beautiful cookies. Gluten free that doesn’t taste gluten free is always amazing! Great job.
These are the cutest cookies! I love them!!
I always forget to stock up on appropriate beverages when hosting a cookie exchange- thanks for the reminder and tips! #client
Wow these are totally adorable! I’ve never worked with brown rice flour before, but these look so great that I might just have to go get some!