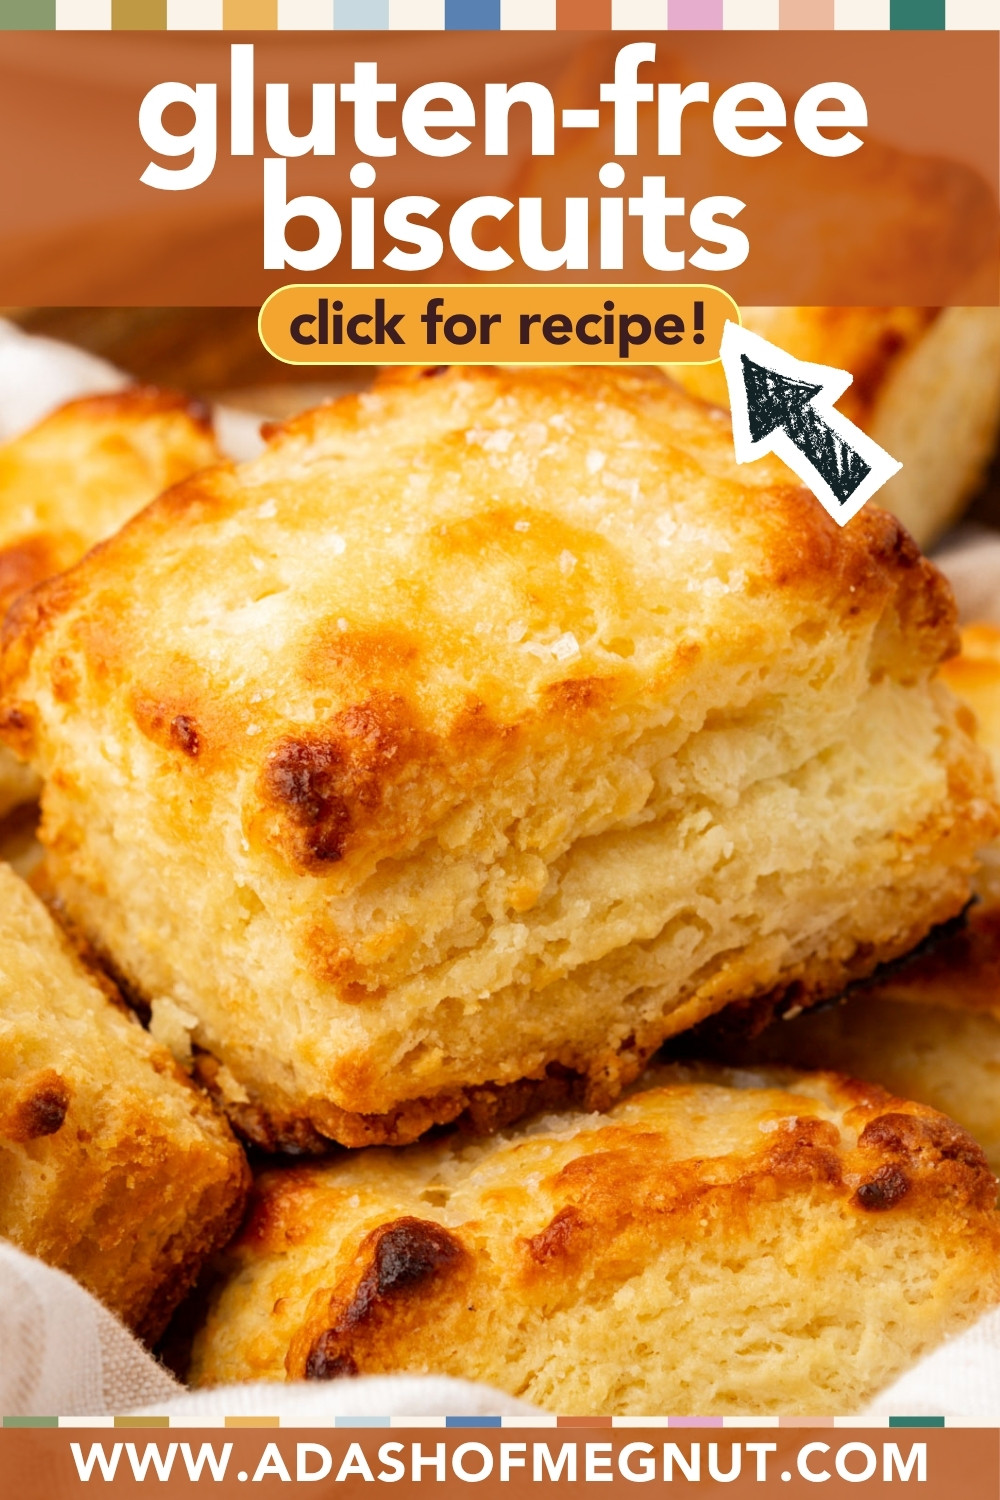
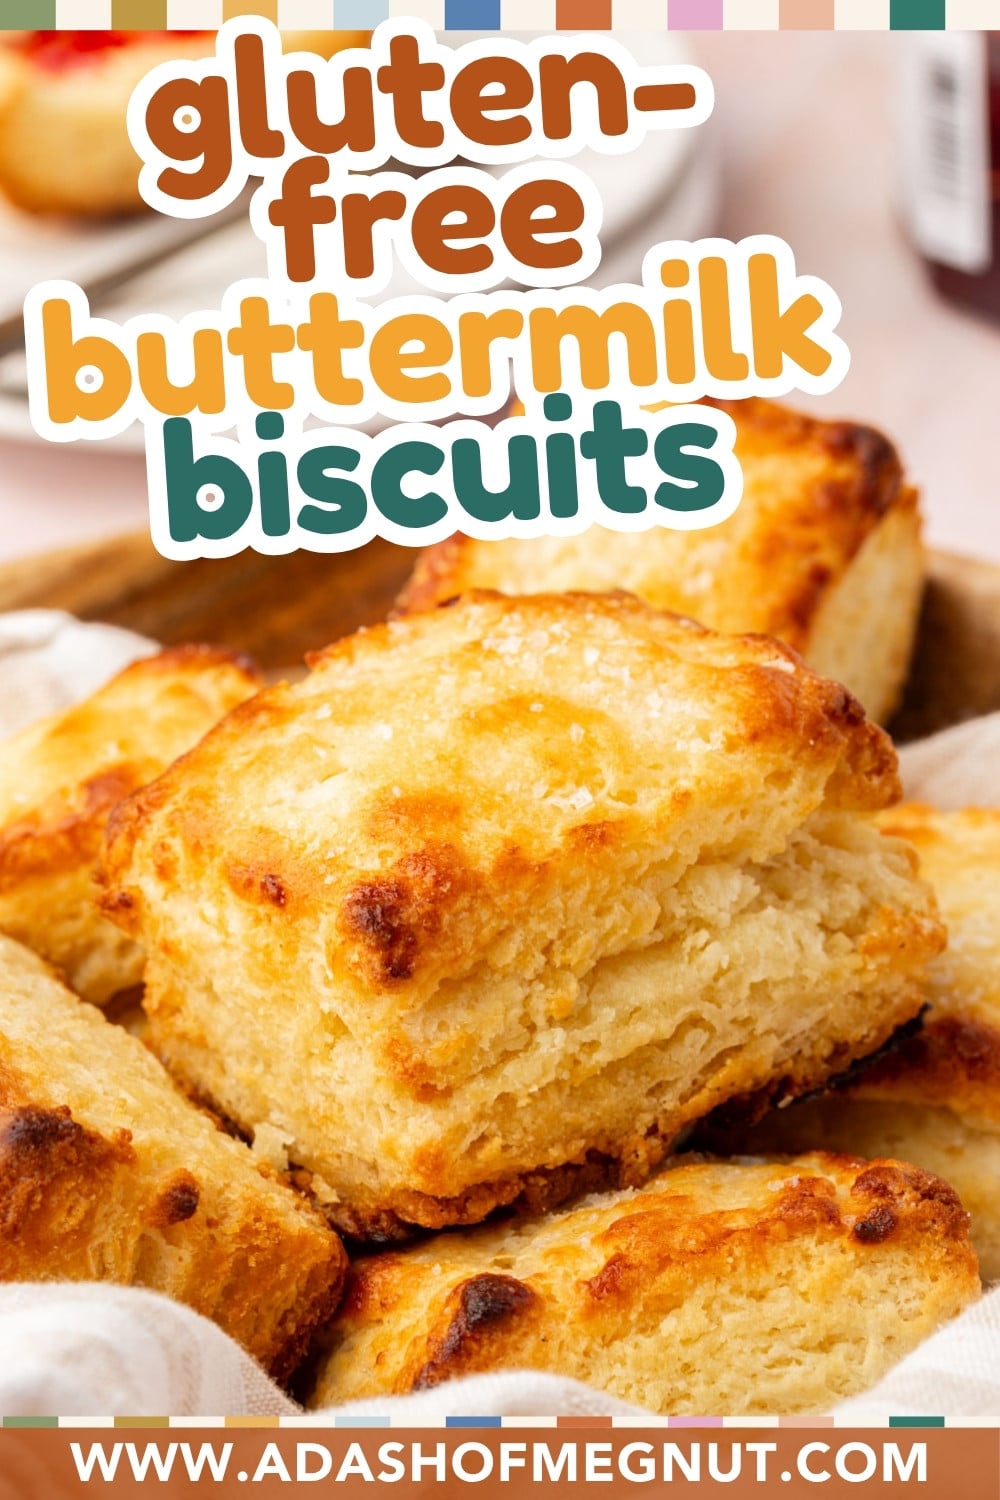
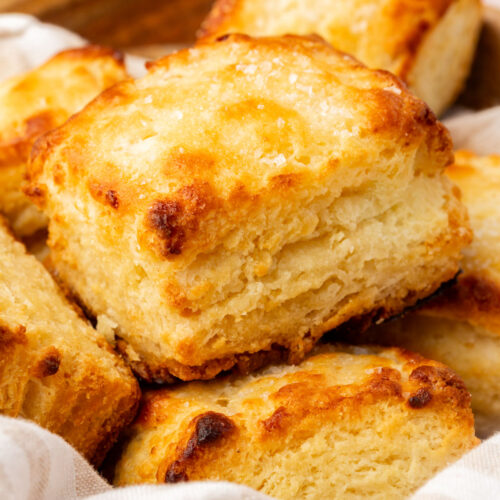
Biscuits were one of the first things I missed after my celiac diagnosis. They seem simple, but getting a gluten-free version that actually rises, layers, and tastes like a real biscuit took me four rounds of testing and four different flour blends to figure out.
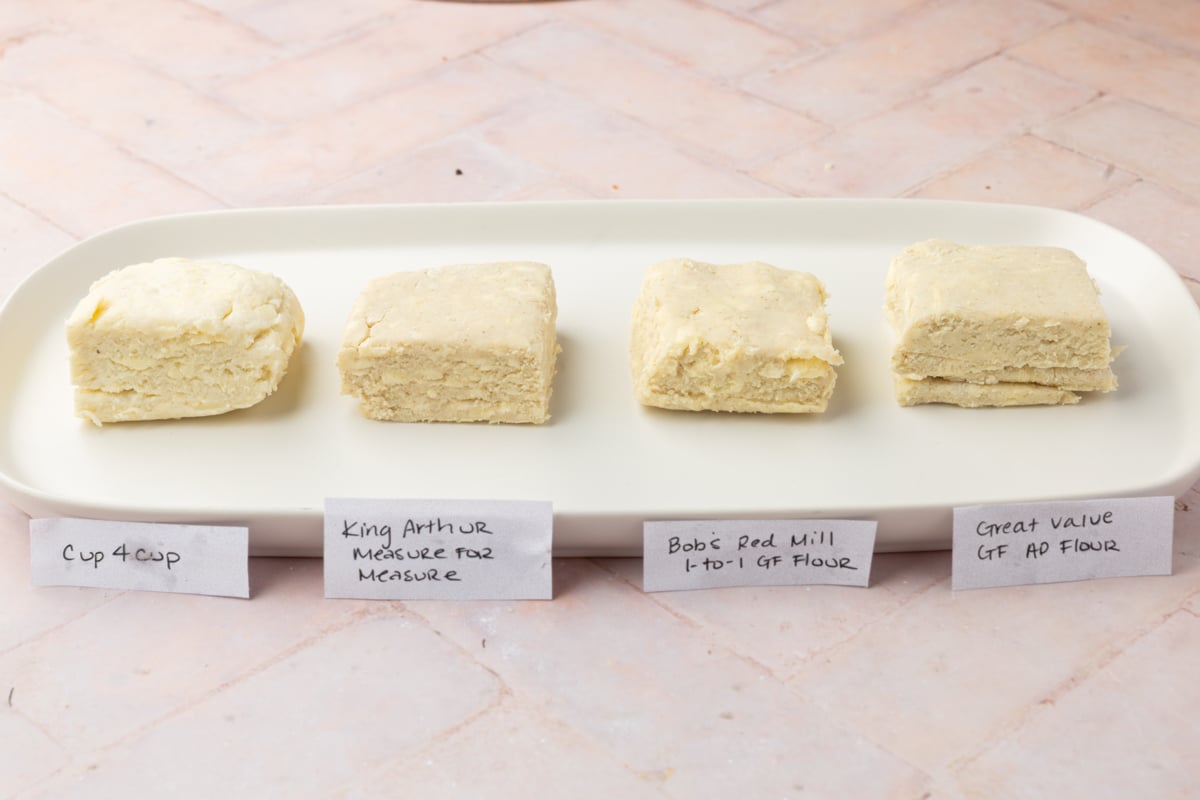
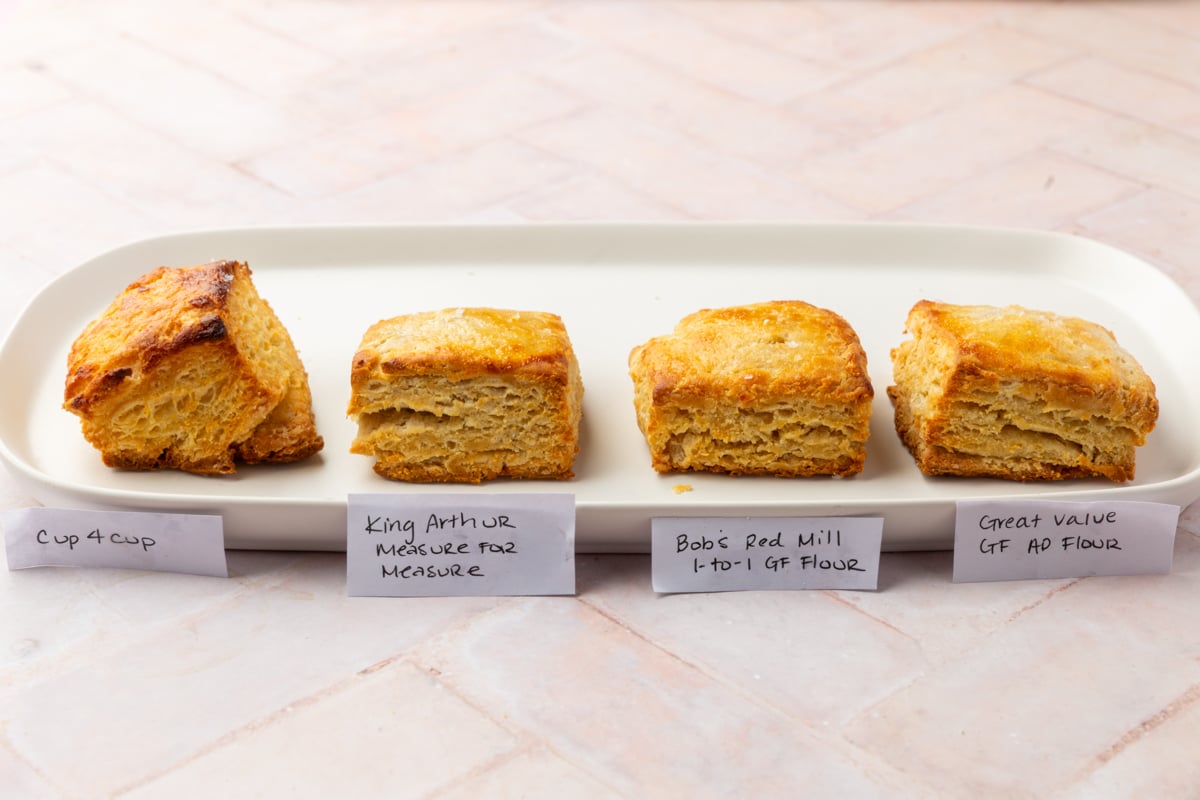
The short version is that the flour matters more than anything else in this recipe. After testing Cup4Cup, Bob’s Red Mill 1-to-1, King Arthur Measure for Measure, and Great Value, Cup4Cup was the clear winner for texture, flavor, and rise. It is the only flour I recommend for this recipe. The technique matters too. Cold butter, a quick lamination step, and freezing the cut biscuits before they go in the oven are what give you flaky layers instead of a dense puck.
Why You’ll Love This Recipe
Searching for more gluten-free bread recipes? Gluten-Free Dinner Rolls / Gluten-Free Garlic Knots / Gluten-Free Focaccia / Gluten-Free Cheddar Jalapeño Focaccia
Ingredient Notes
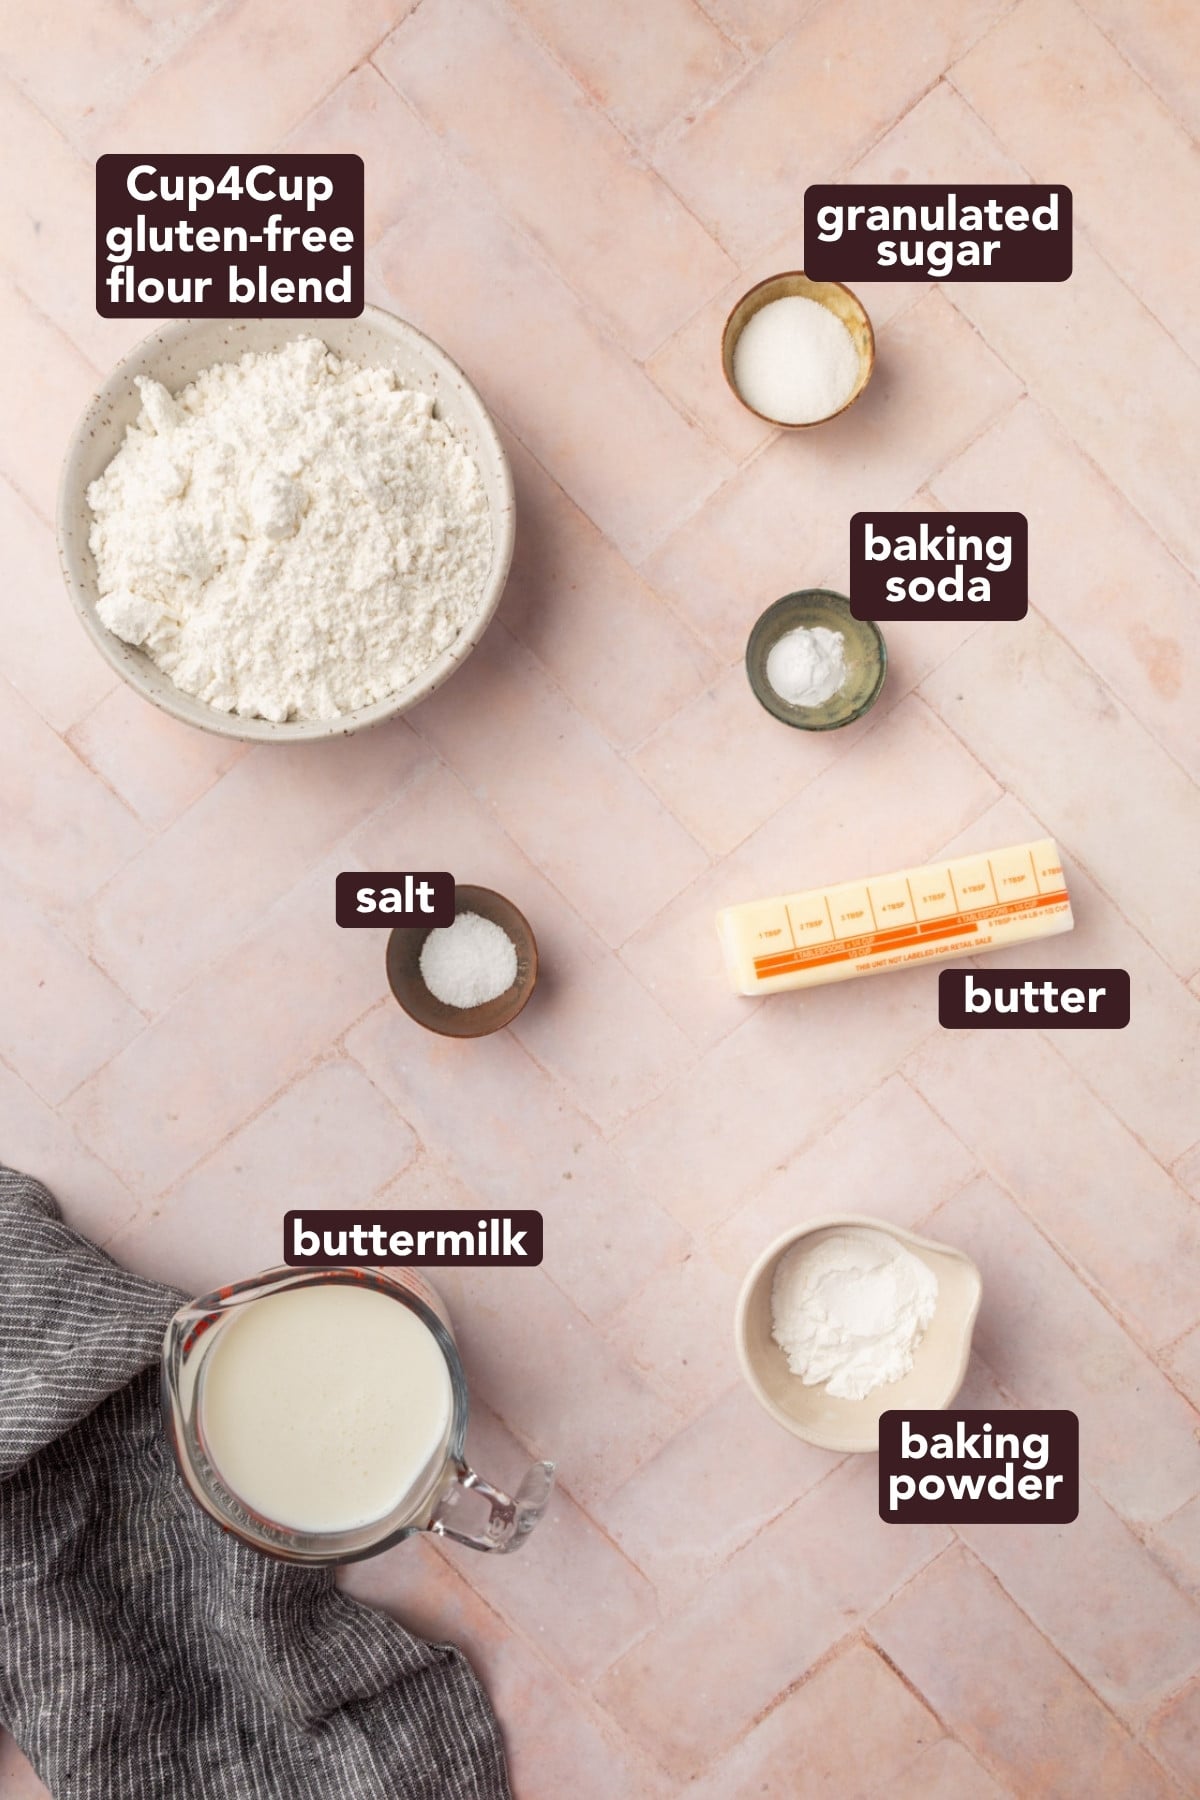
- Cup4Cup Gluten-Free Multipurpose Flour – This is the only flour I tested that gave me the texture, rise, and flavor I was looking for. Do not substitute another blend. I tested four and Cup4Cup won by a significant margin.
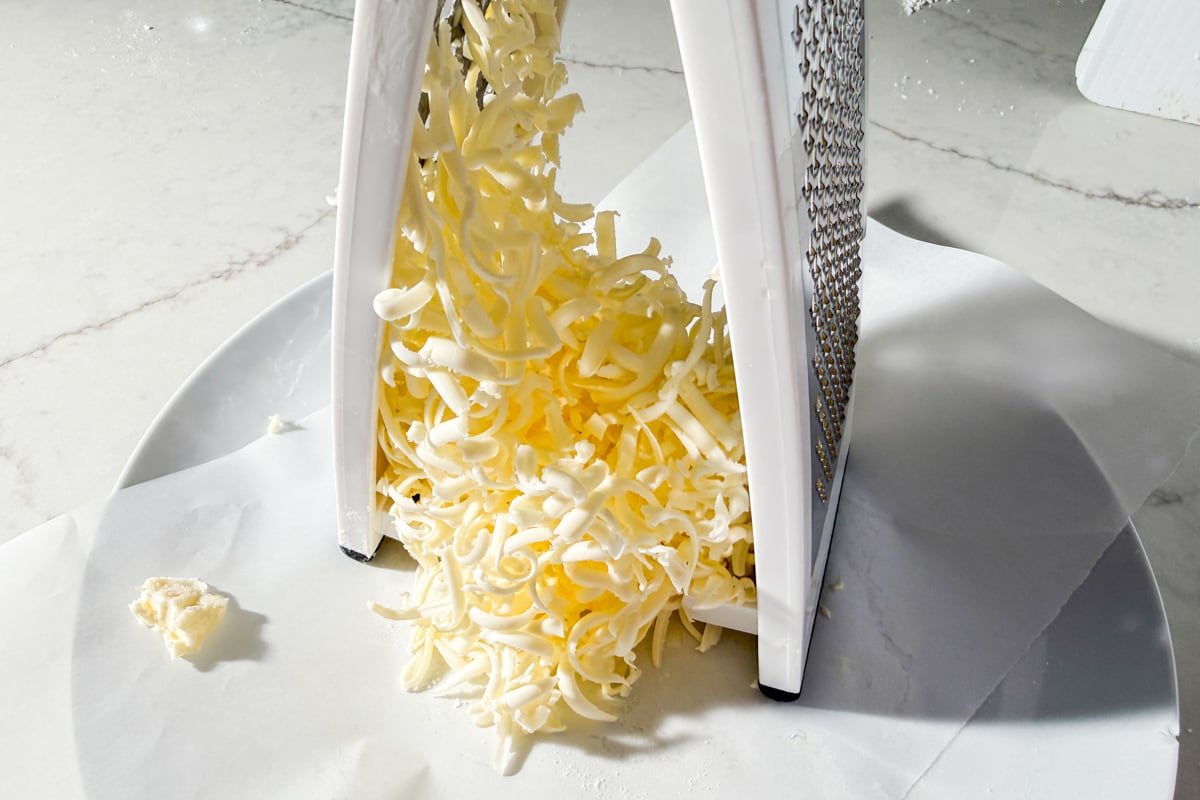
- Unsalted Butter – It needs to be very cold. Grate it on a box grater, then spread it on a plate and freeze it for about 20 minutes before using. Cold butter is what creates the steam that makes the layers.
- Buttermilk – Use full-fat buttermilk if you can find it. If you don’t have buttermilk, add 1 tablespoon of white vinegar or lemon juice to 1 cup of whole milk and let it sit for 5 to 10 minutes in the fridge. Not quite as good, but it will work in a pinch.
- Baking Powder and Baking Soda – Both are needed. The baking powder gives the initial rise and the baking soda reacts with the buttermilk for additional lift. It may seem like a lot of baking powder, but gluten-free baked goods need a little extra oomph. Make sure your baking powder is aluminum-free, otherwise your biscuits may taste metallic or extra salty.
- Flaky sea salt – For the topping. I use Maldon. It’s optional but worth it.
Keep Everything Cold
Cold butter and cold buttermilk are non-negotiable. When cold butter hits a hot oven it creates steam, and that steam is what gives you flaky layers. If the butter softens before the biscuits go in the oven, the layers collapse and you end up with a dense biscuit. If your kitchen is warm, work quickly. If the dough starts to feel soft or greasy at any point, wrap it and put it in the freezer for 10 minutes before continuing.
Testing Notes
I tested this recipe across four rounds before landing on the final version. The flour was the biggest variable. I tested Cup4Cup, Bob’s Red Mill 1-to-1, King Arthur Measure for Measure, and Great Value gluten-free all-purpose. Cup4Cup gave me the best texture, rise, and flavor by a wide margin. Bob’s Red Mill was a decent second but came out a little grittier and heavier. King Arthur was inedible. Great Value was just dense. Cup4Cup is the only flour I recommend for this recipe.
Beyond the flour, I tested baking temperatures starting at 375°F. The biscuits were fine but flat. Bumping all the way to 450°F made a real difference. That extra heat in the first few minutes is what gives the biscuits their lift. I also played with the amount of butter, buttermilk, and baking powder across batches.
My earlier versions had less butter and you could tell. The final amount is what actually makes these taste like a biscuit. The buttermilk took some calibration too since too little made the dough dry and crumbly and too much made it sticky and hard to work with. And while brushing with butter at the end is technically optional, a good quality melted butter on a hot biscuit right out of the oven is not something I’d skip.
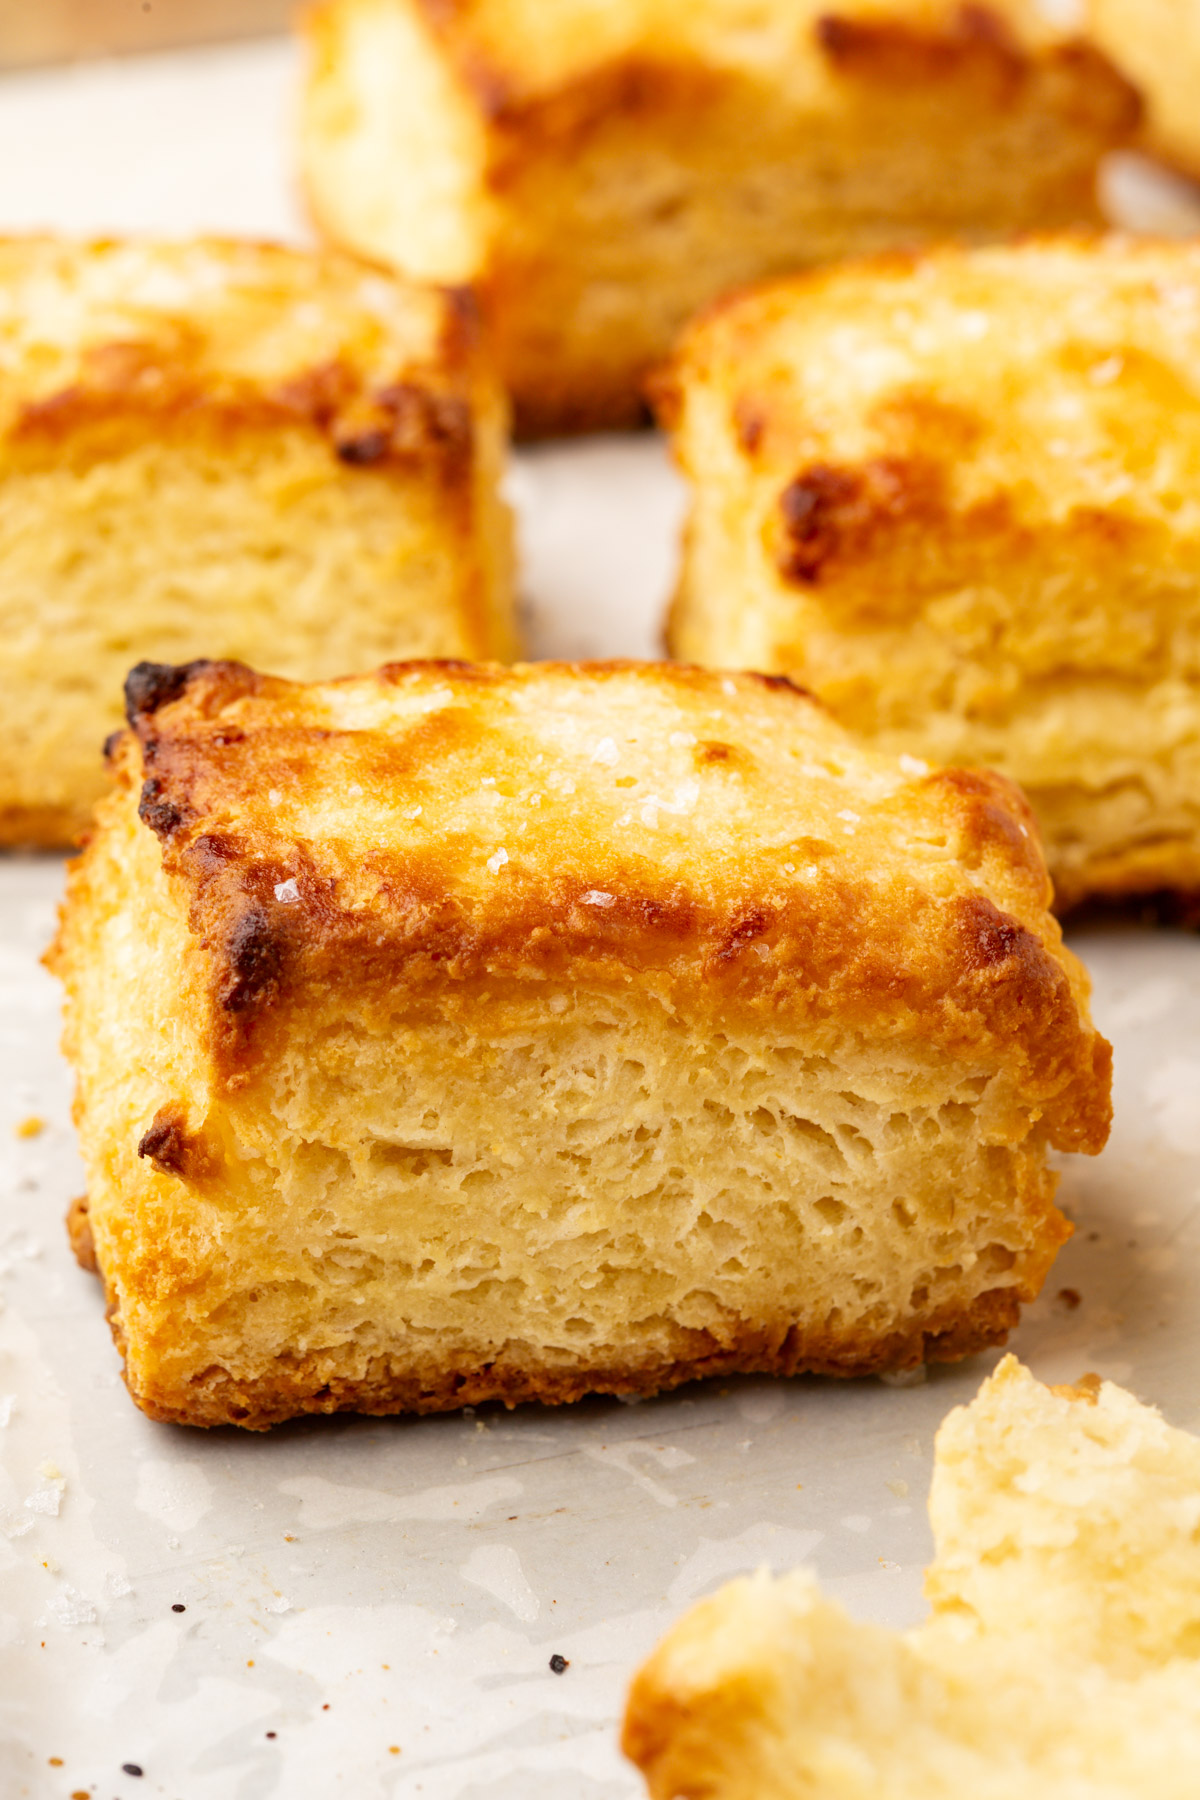
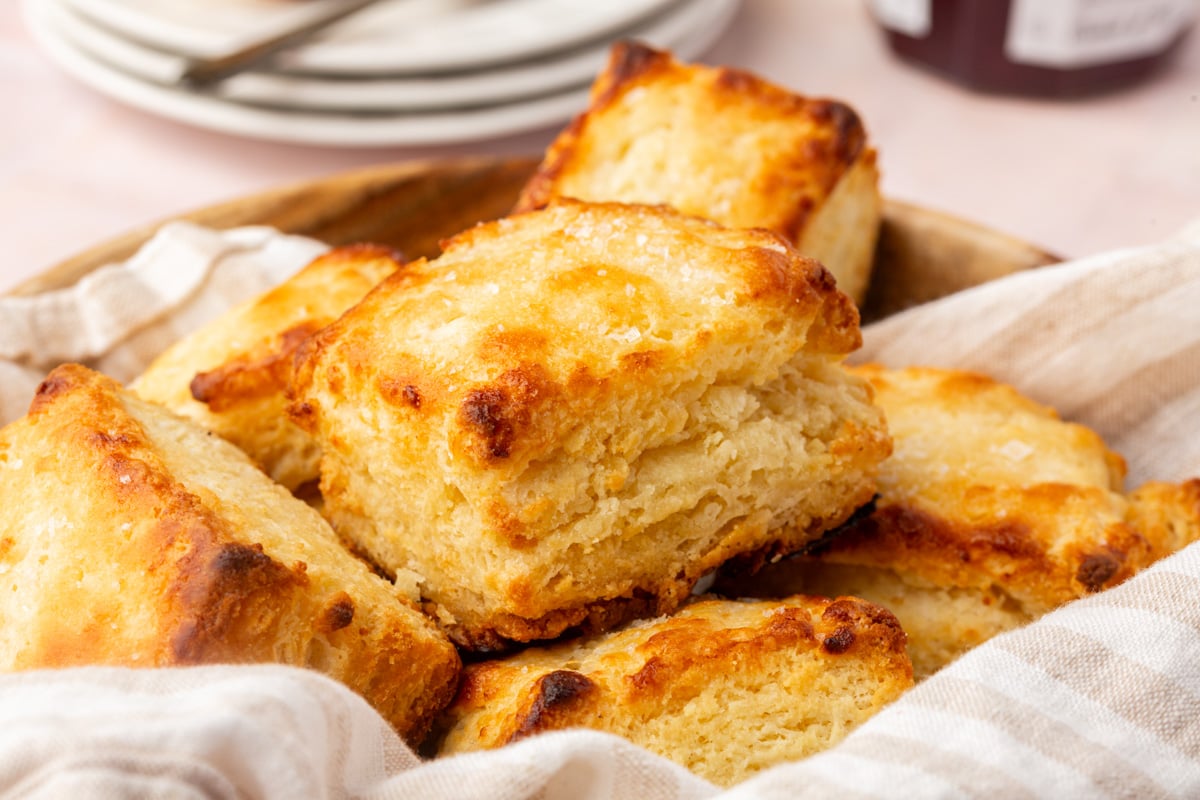
Why I Cut These Into Squares
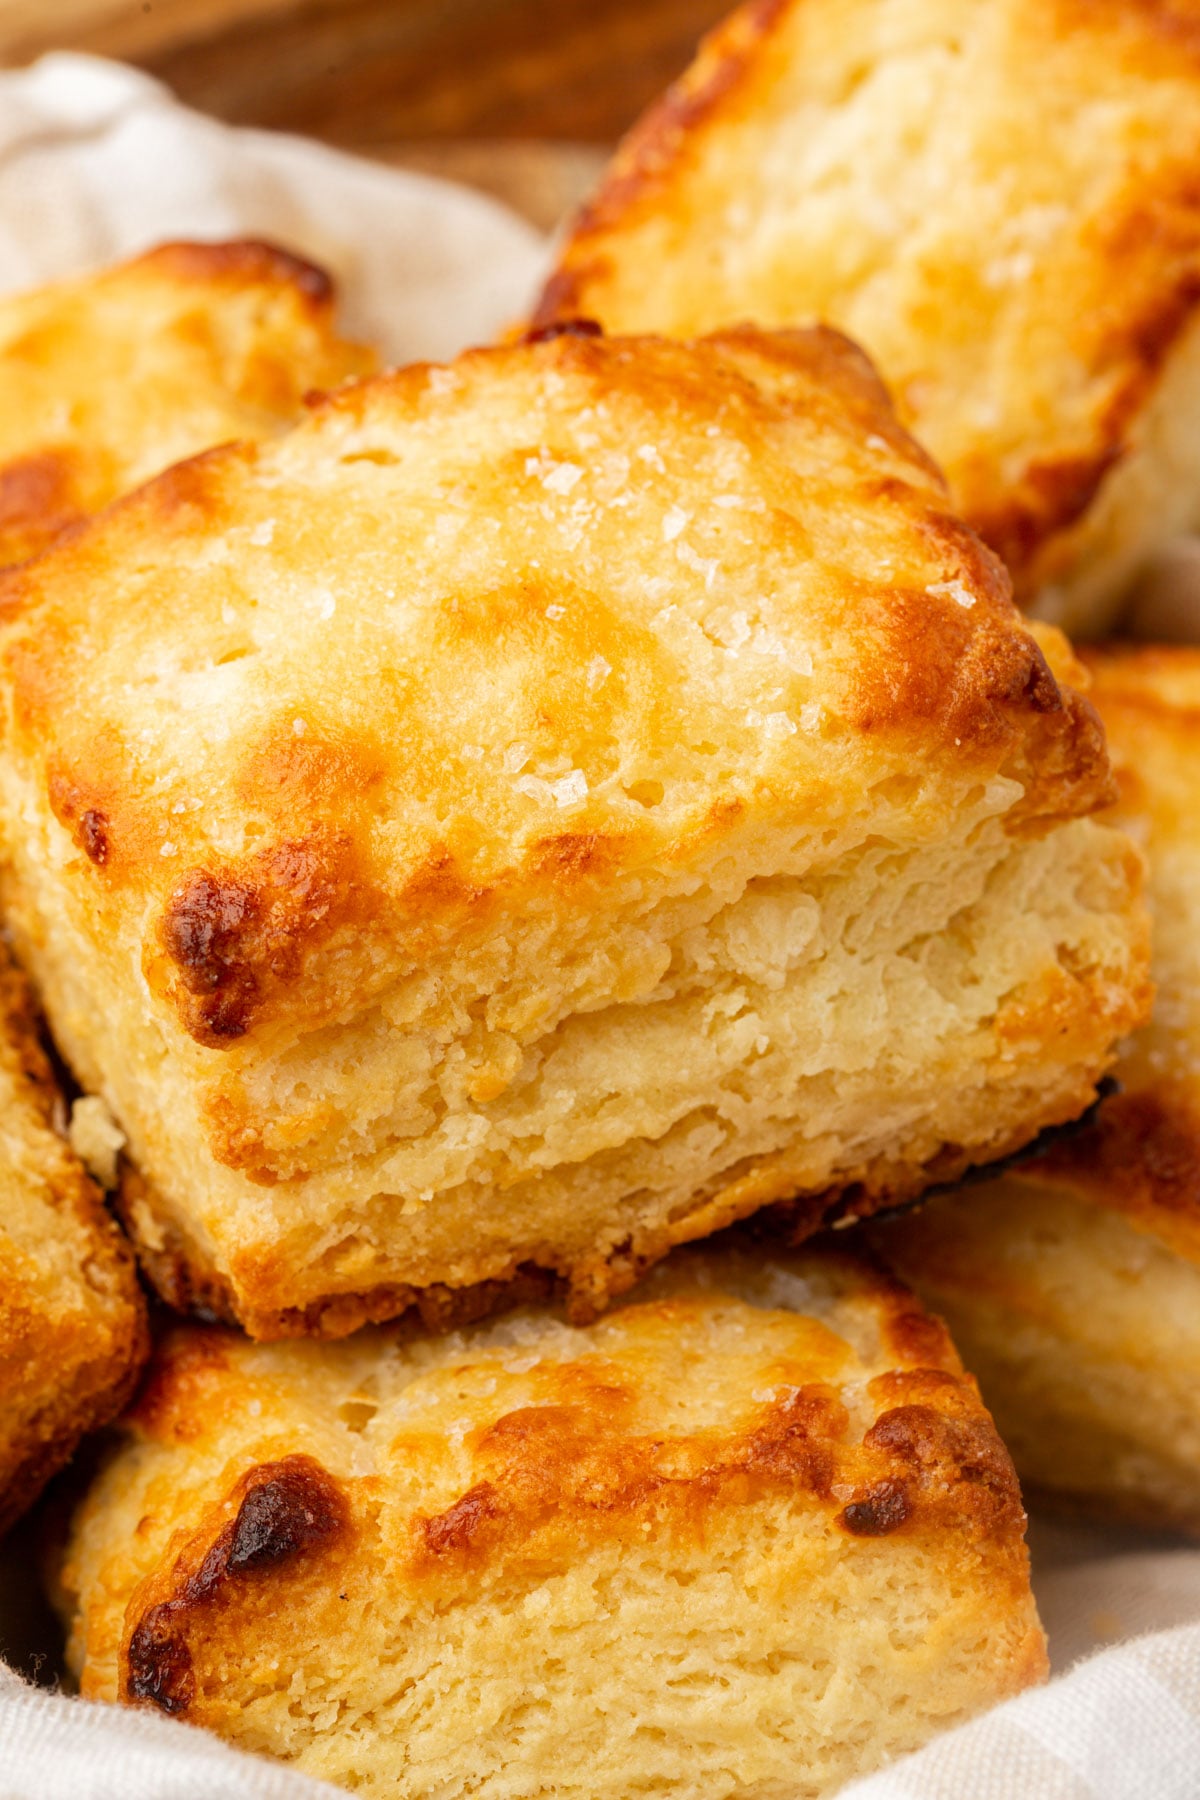
Most biscuit recipes call for a round cutter, but I cut mine into squares and I don’t think I’ll ever go back. When you use a round cutter you end up with scraps that you have to re-roll, and every time you re-roll gluten-free dough it gets tougher and the butter gets warmer. Cutting into squares means you use every bit of dough in one pass with no waste and no re-rolling. A sharp knife or bench scraper pressed straight down is all you need.
Recipe FAQs
I tested four flour blends and Cup4Cup was the only one that gave me the texture, rise, and flavor I was looking for. I don’t recommend substituting another blend for this recipe.
These are best eaten fresh and warm. You can cut and freeze the unbaked biscuits and bake them straight from frozen, adding a few extra minutes to the bake time. I wouldn’t recommend baking them ahead and reheating since they lose their texture.
Expert Tips
Storage Instructions
Storing: These are best eaten the day they’re made. If you have leftovers, store in an airtight container at room temperature for up to 2 days.
Reheating: Reheat in the oven or toaster oven at 350°F for about 5 minutes until warm. The microwave works but the texture won’t be as good.
Freezing: Freeze unbaked cut biscuits in a single layer on a parchment-lined sheet until solid, then transfer to a freezer bag for up to 2 months. Bake from frozen at 450°F, adding 3 to 5 minutes to the bake time.
Serving Suggestions
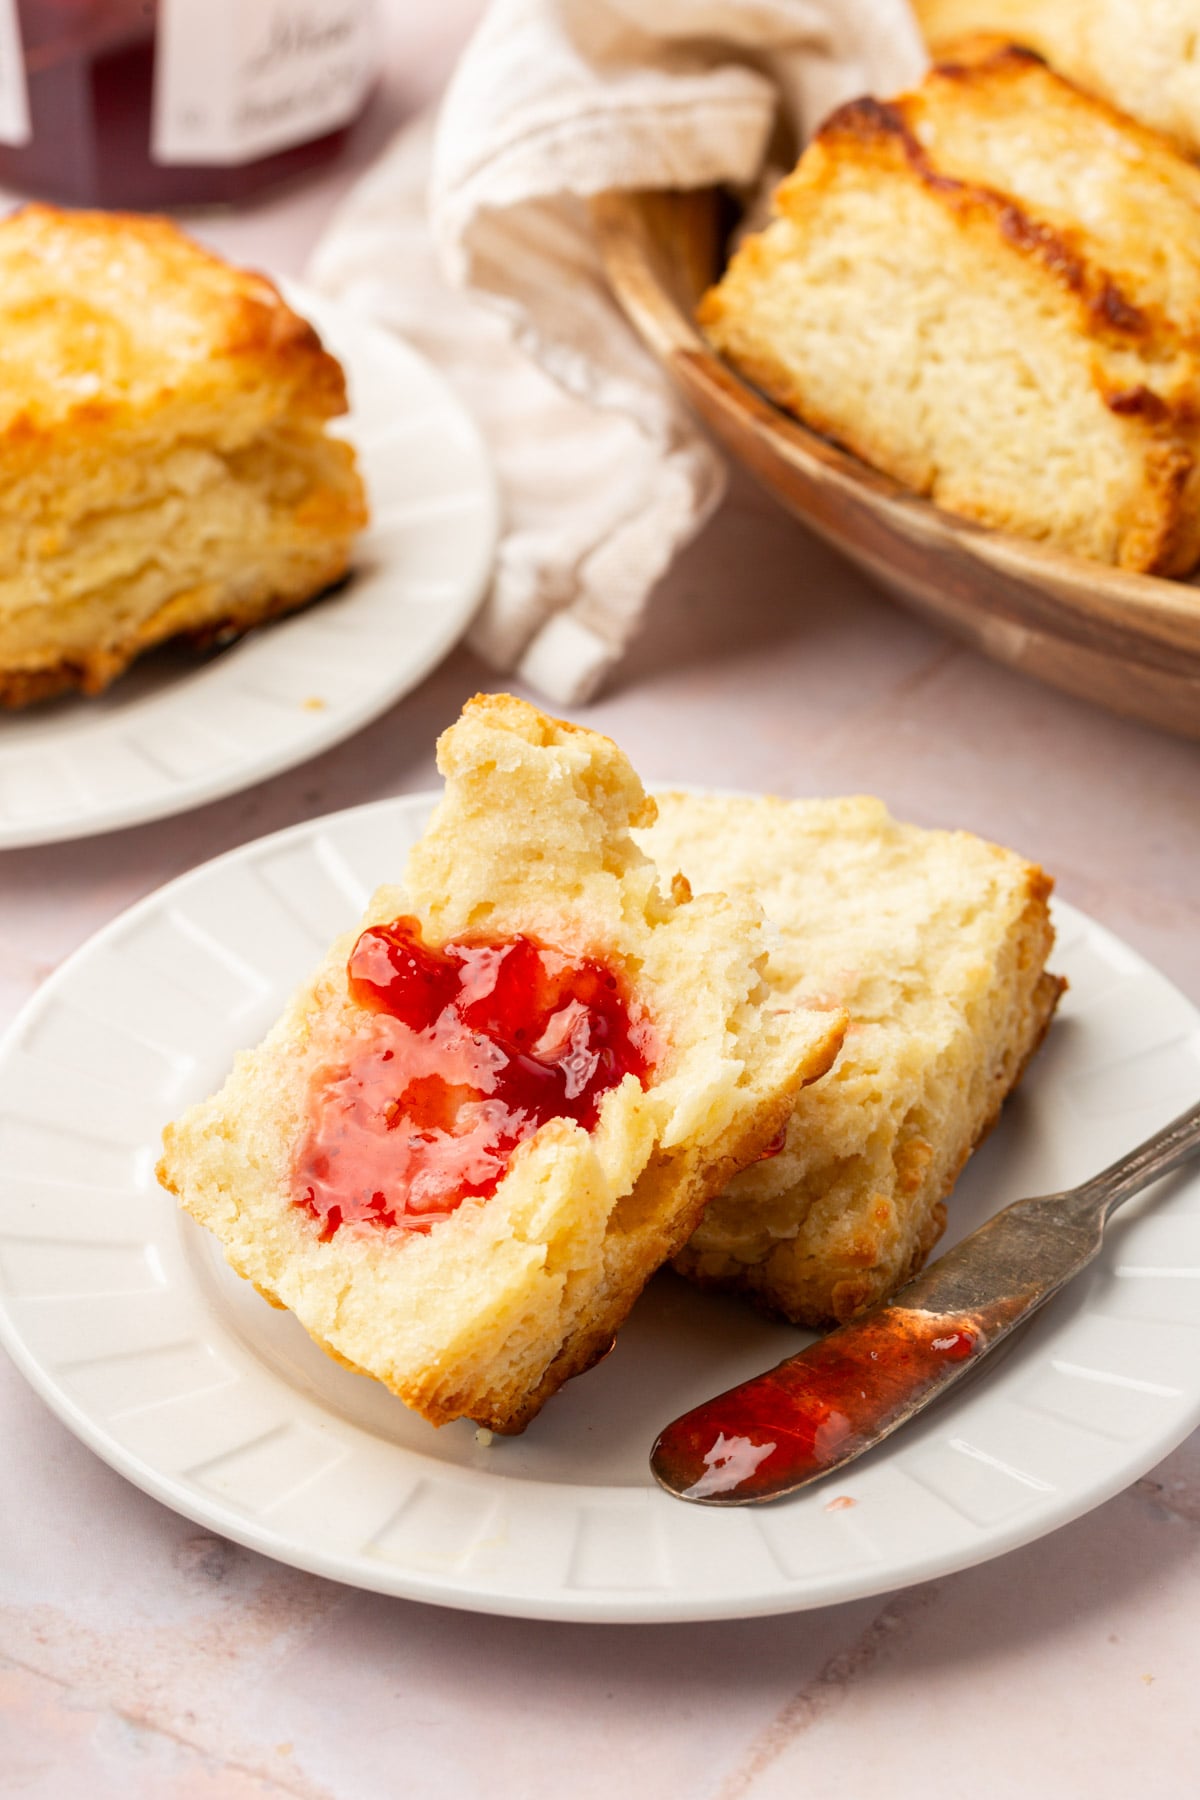
These biscuits work for any meal of the day. For dinner, my gluten-free fried chicken is what I make most often alongside them. For breakfast, they’re good next to my gluten-free breakfast casserole when you’re feeding a group and want something to round out the table. Warm out of the oven with good butter and jam is hard to beat.
Gluten-Free Buttermilk Biscuits
Ingredients
For the Biscuits:
- 2 cups (280 g) Cup4Cup Gluten-Free Multipurpose Flour - plus more for dusting
- 1 tablespoon (12 g) baking powder
- ½ teaspoon (2 g) baking soda
- 2 tablespoons (25 g) granulated sugar
- 1 teaspoon (6 g) kosher salt
- 8 tablespoons (113 g) unsalted butter - very cold
- 1 cup (240 g) buttermilk - cold
For the Topping:
- 1 tablespoon (15 g) buttermilk
- 1 tablespoon (12 g) salted butter - melted
- ¼ teaspoon flaky sea salt - such as Maldon salt
**Use the toggle button above to turn the instruction photos on and off!
Instructions
- Grate the cold 8 tablespoons (113 g) unsalted butter on the large holes of a box grater. Spread in a single layer on a plate and place in the freezer for 20 minutes.

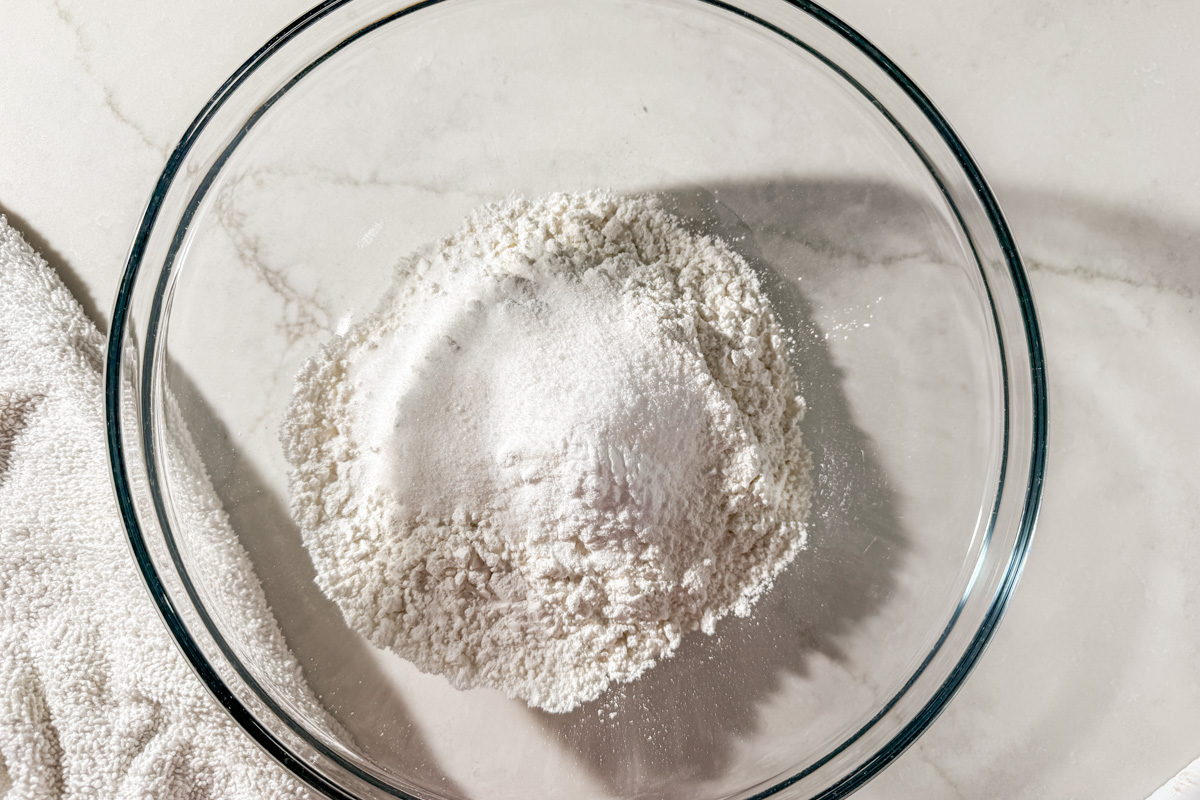
- While the butter freezes, whisk together 2 cups (280 g) Cup4Cup Gluten-Free Multipurpose Flour, 1 tablespoon (12 g) baking powder, ½ teaspoon (2 g) baking soda, 2 tablespoons (25 g) granulated sugar, and 1 teaspoon (6 g) kosher salt in a large bowl.
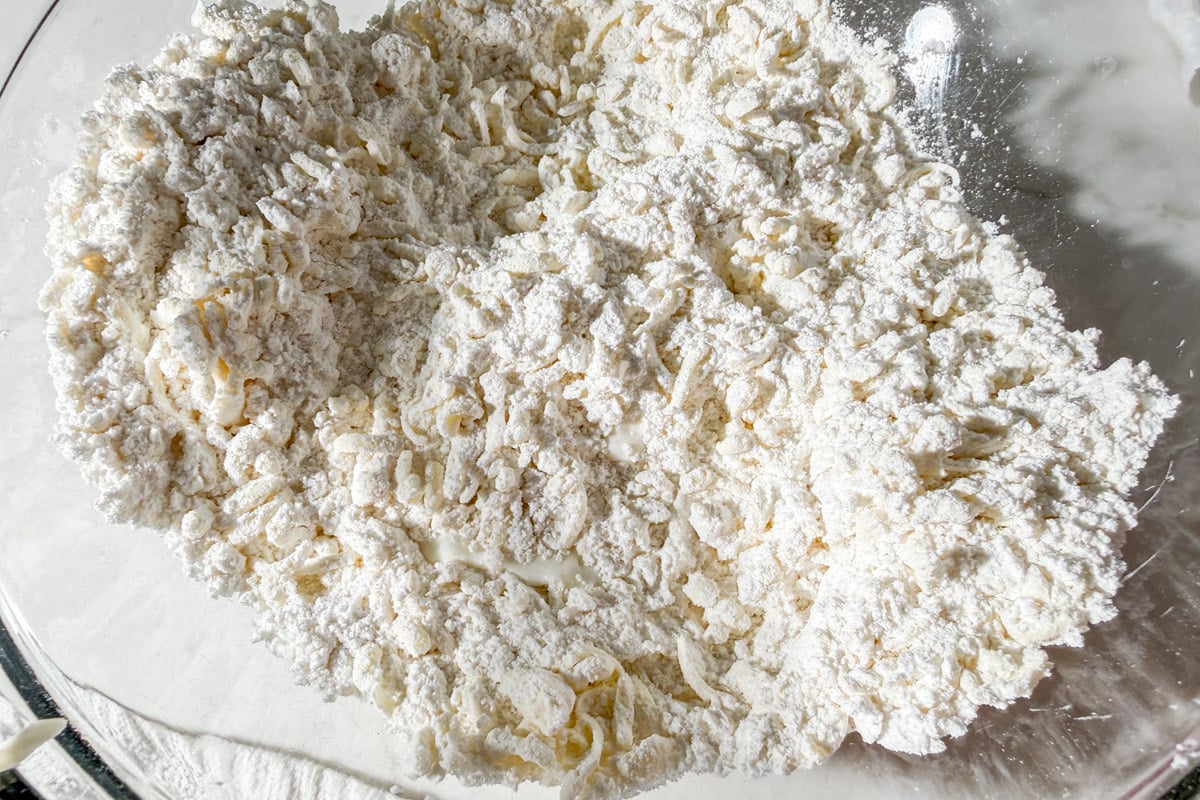
- Remove the butter from the freezer. Add it to the flour mixture and toss until the butter pieces are coated and distributed throughout.
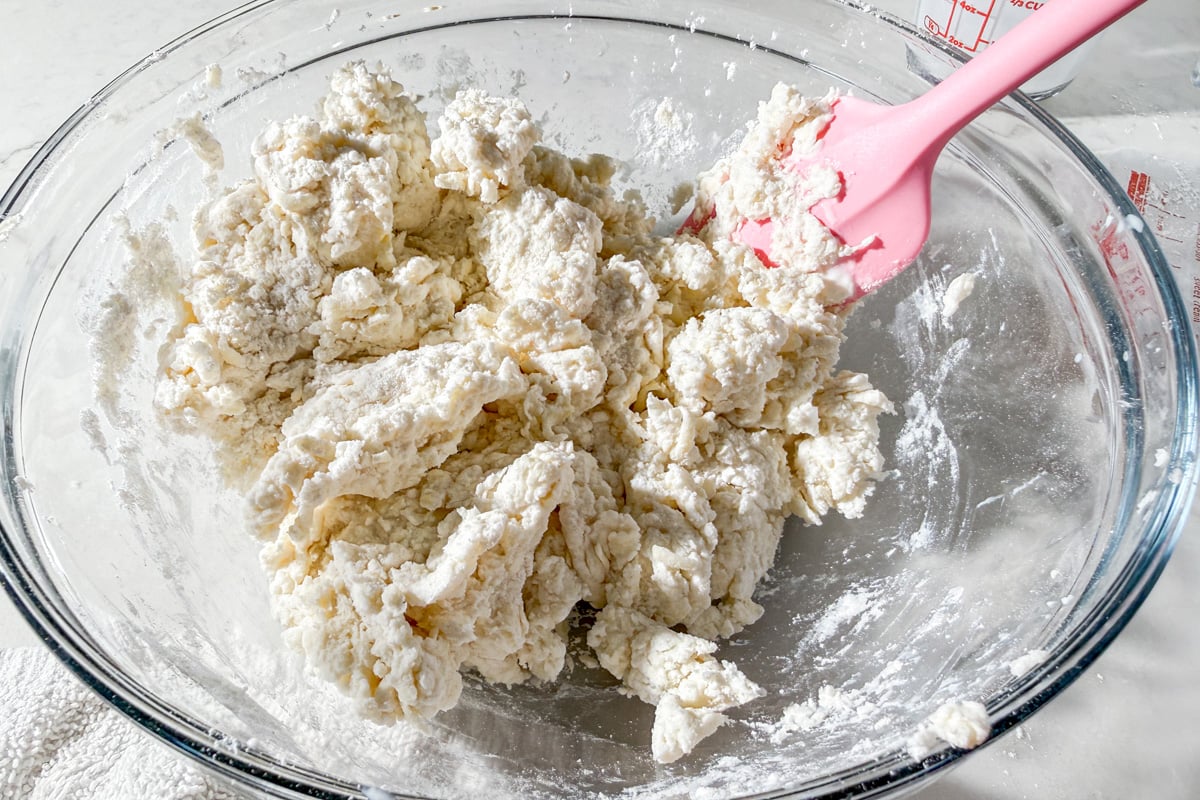
- Pour in 1 cup (240 g) buttermilk in two batches, stirring to combine. Adding the buttermilk in two batches gives you more control over the dough and helps prevent overmixing. The dough will be shaggy with some dry pieces. It should hold together if you pinch it between your fingers. Do not overmix or add more buttermilk.
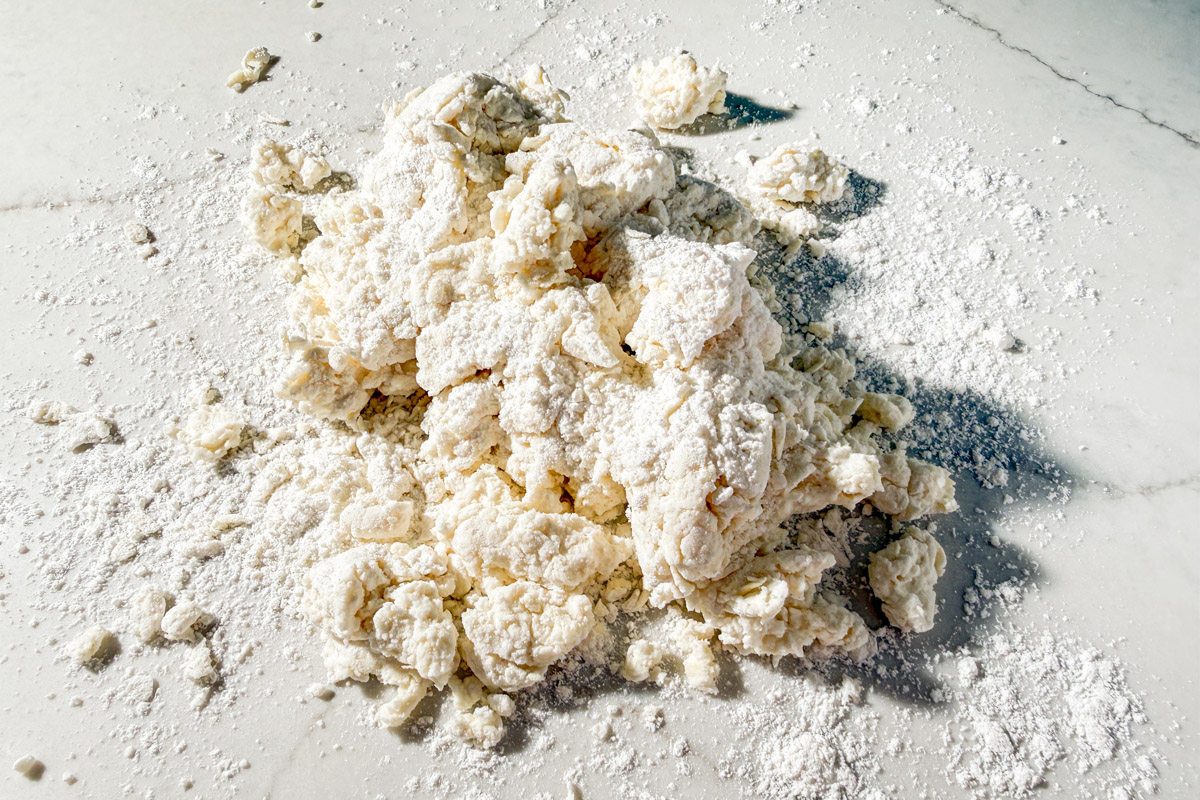
- Turn the dough out onto a lightly floured surface.
- Using your hands, pat the dough into a rough square about 1 inch thick. Do not knead the dough, just pat it together into a square. It may be crumbly.
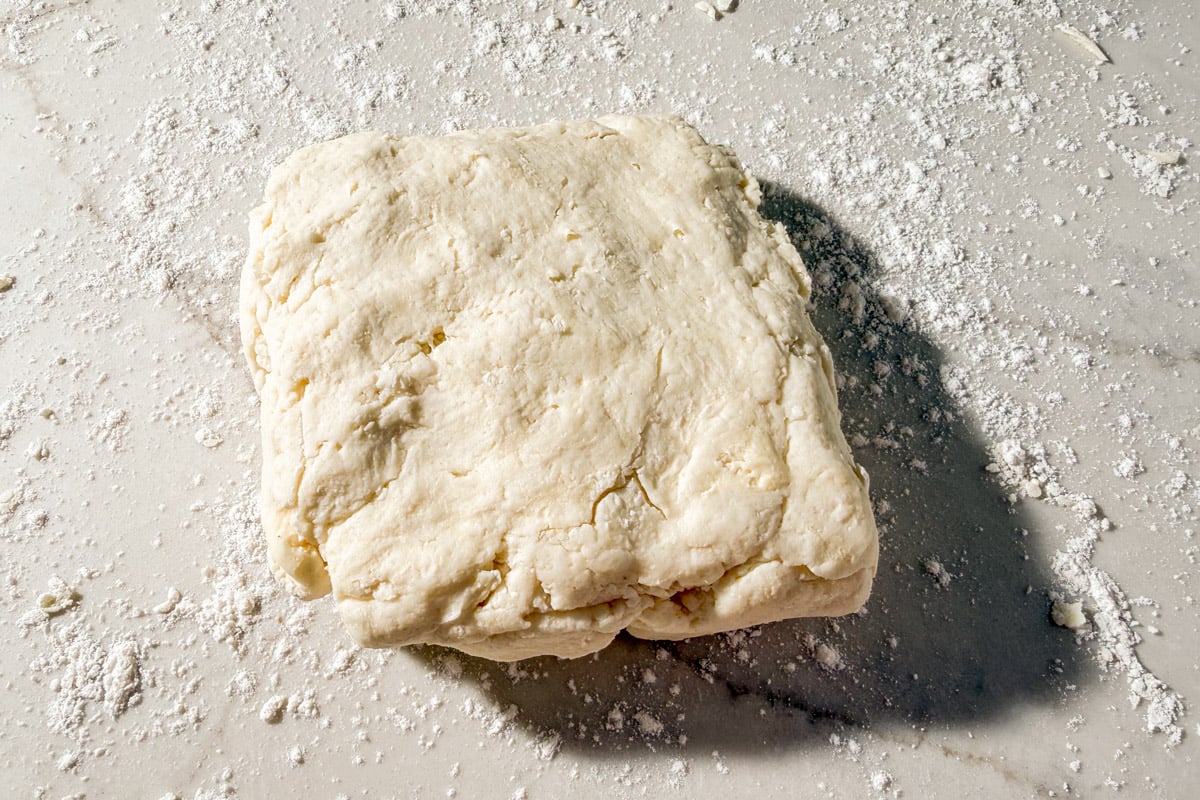
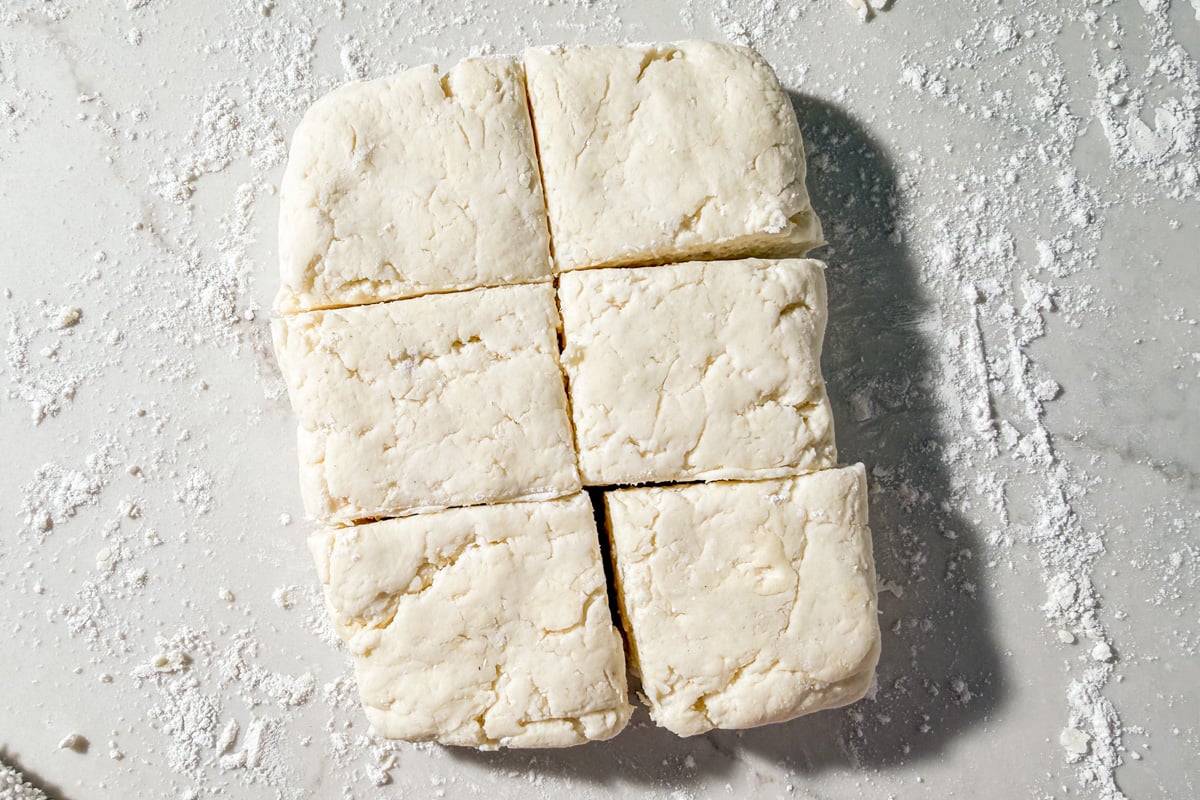
- Cut the square into 4 equal pieces.
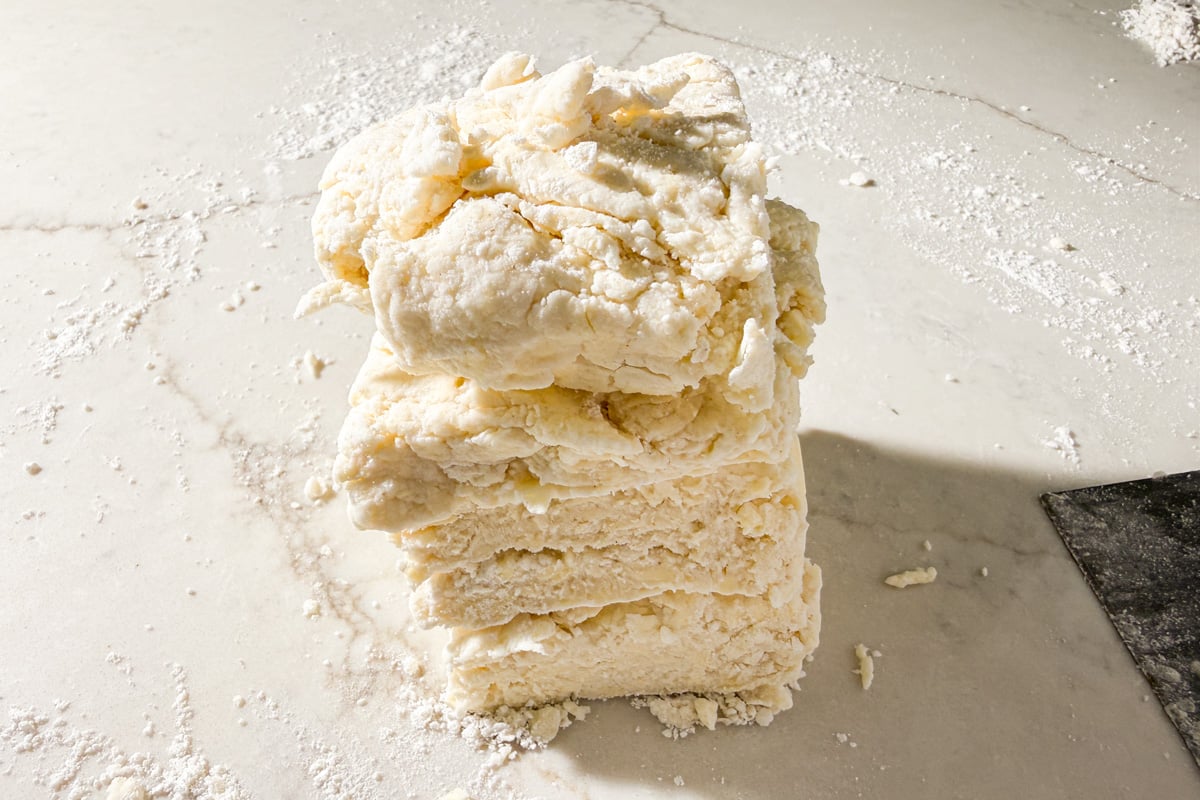
- Stack the pieces directly on top of each other, then pat the stack back down into a 1-inch thick square. Repeat the process 3 more times — cut into 4 pieces, stack, and pat back to 1 inch thick. This is the lamination step and is what creates the flaky layers. You'll notice that the dough holds together better as you go.
- Pat the dough into a rectangle about 4×6 inches and about 1 inch thick. Don't roll it thinner. Using a sharp knife or bench scraper, cut into 6 equal squares (2 columns x 3 rows). Do not twist or drag the knife. Press straight down with one clean cut. Pulling or dragging will seal the edges and prevent the biscuits from rising.
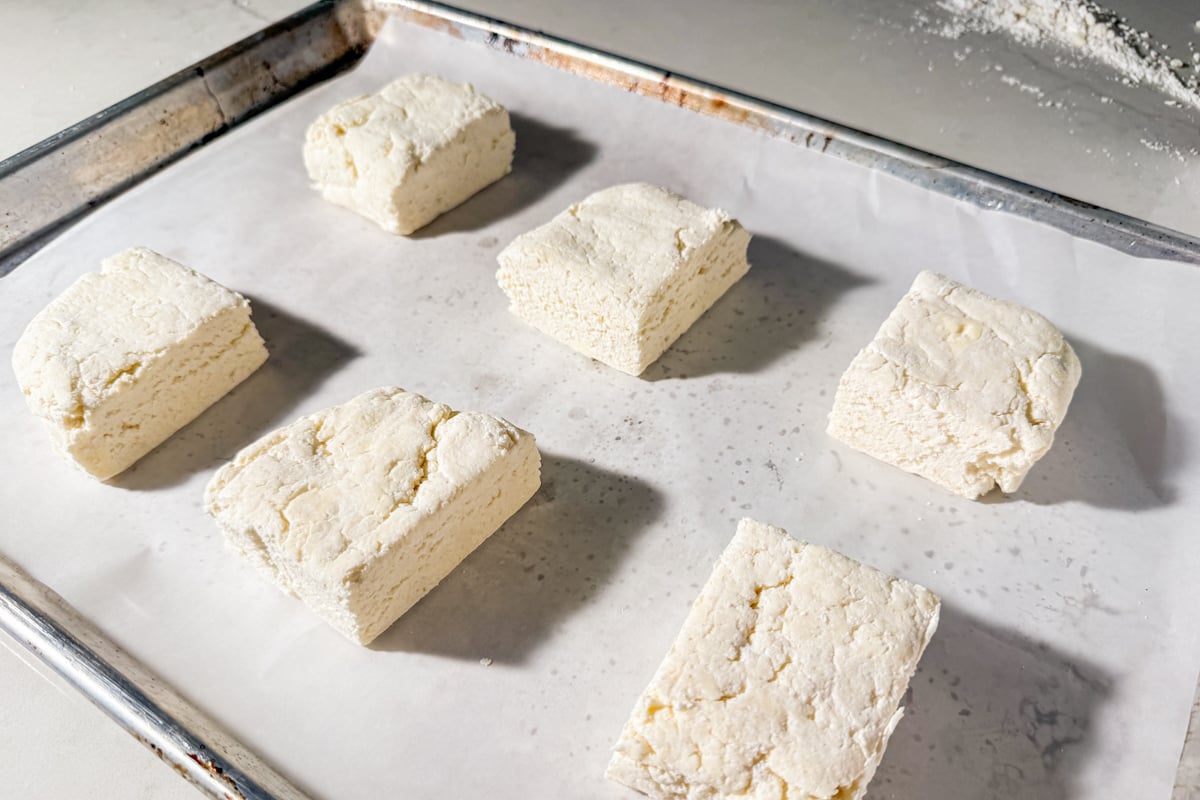
- Place the biscuits on a parchment-lined baking sheet and freeze for 20 minutes. This firms up the butter.
- Preheat the oven to 450°F while the dough is freezing.
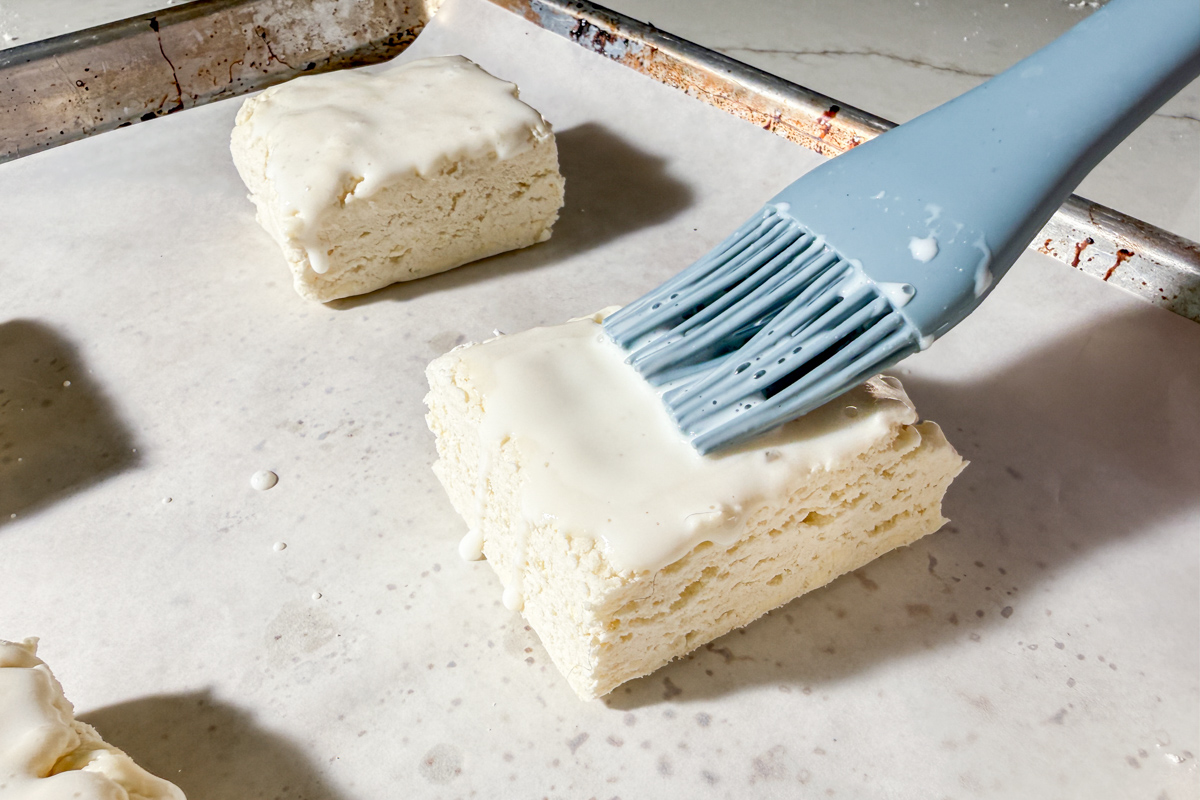
- Brush the tops of the frozen biscuits with 1 tablespoon (15 g) buttermilk.
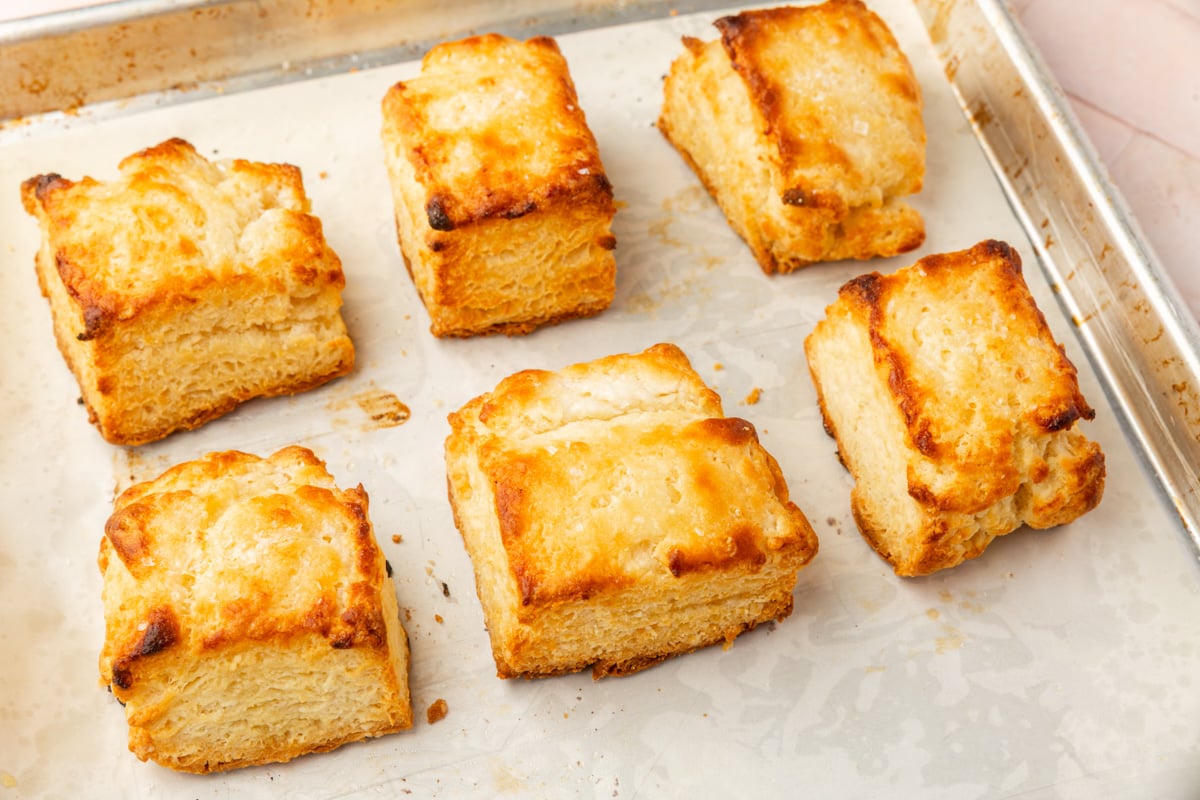
- Bake at 450℉ for 18 to 20 minutes, until golden brown on top and cooked through.
- Immediately brush with 1 tablespoon (12 g) salted butter and sprinkle with ¼ teaspoon flaky sea salt. Serve warm.

Notes
- Flour: Cup4Cup Gluten-Free Multipurpose Flour is the only flour I recommend for this recipe. I tested four blends and this was the clear winner for texture, rise, and flavor.
- Butter: Grate it while very cold from the fridge, then freeze the grated butter for about 20 minutes before using. Do not skip this step.
- Storage: Best eaten the day they’re made. Store leftovers at room temperature in an airtight container for up to 2 days. Reheat in an oven at 350°F. Freeze unbaked cut biscuits for up to 2 months and bake from frozen at 450°F, adding 3 to 5 minutes to the bake time.
I just made these and, they are outstanding! I am not much of a baker, and these were super easy. Big hit!