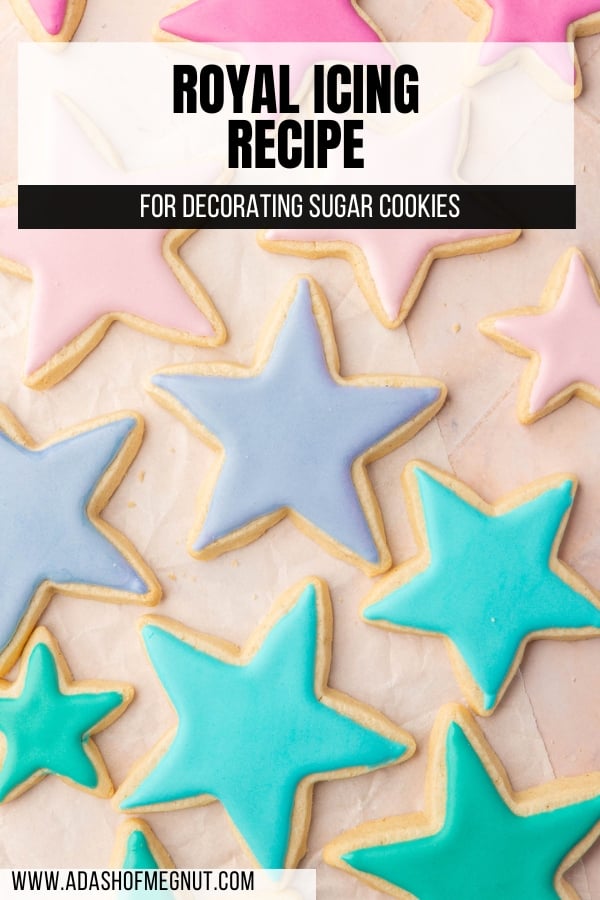
I went to pastry school and have been decorating sugar cookies professionally for years. Weddings, baby showers, birthday parties, a monthly gluten-free cookie subscription box. I have decorated thousands of cookies and this is the royal icing recipe I always come back to.
It uses meringue powder instead of raw egg whites, which means no salmonella risk and no separating eggs. Four ingredients, about 8 minutes in a stand mixer, and you have a base consistency that you can thin down for outlining, flooding, or detail work depending on what you need.
Why You’ll Love This Recipe
Ingredient Notes
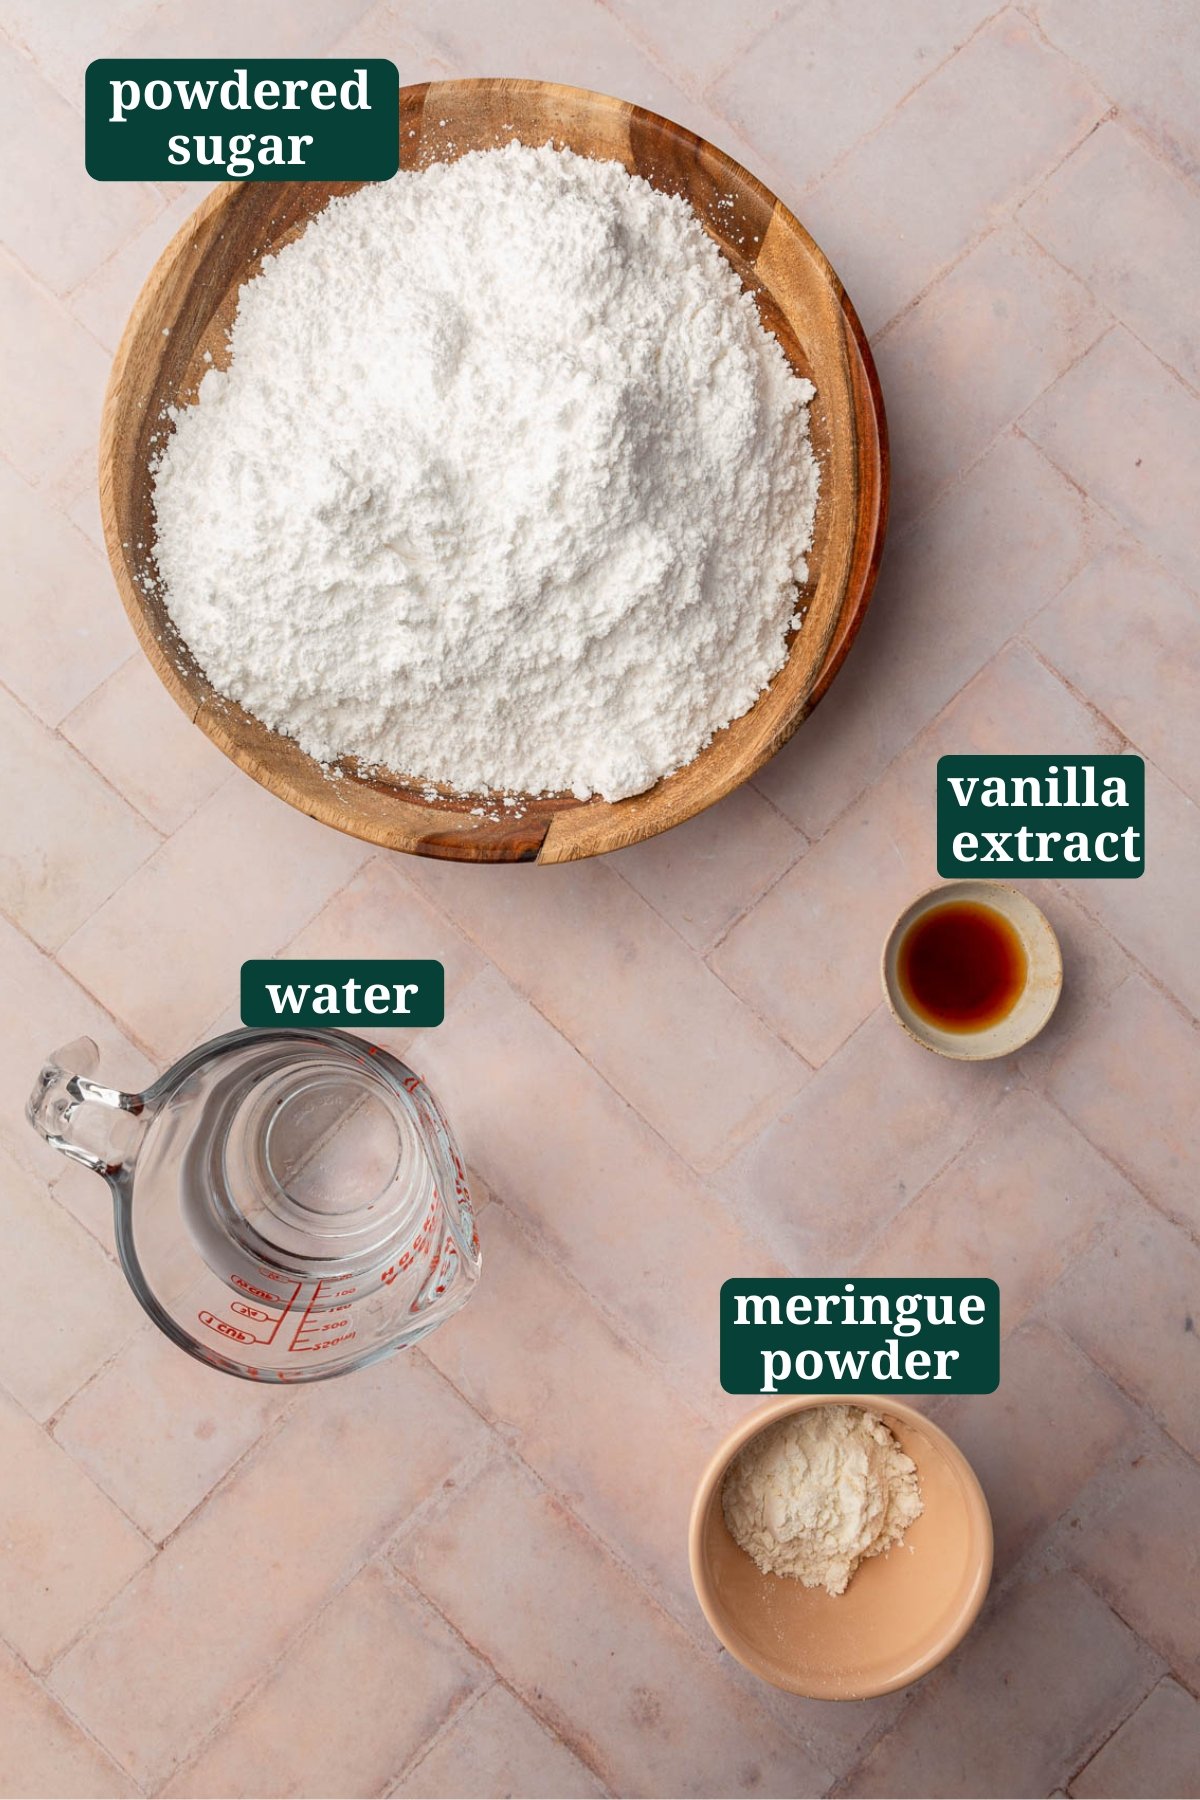
- Powdered Sugar – Also sold as confectioners’ sugar or icing sugar. Do not substitute granulated sugar or any other type. It won’t dissolve properly and will leave the icing grainy.
- Meringue Powder – A dried egg white product that replaces raw egg whites in royal icing. I use AmeriColor brand, which is gluten-free and easy to find on Amazon or at cake decorating stores. Wilton is another common option available at most craft stores.
- Water – Use room temperature water. The amount you use controls the consistency, so start with less and add more gradually.
- Vanilla or Almond Extract – Use pure extract, not imitation. Artificial flavoring can leave a chemical aftertaste in an uncooked icing. Either flavor works well here.
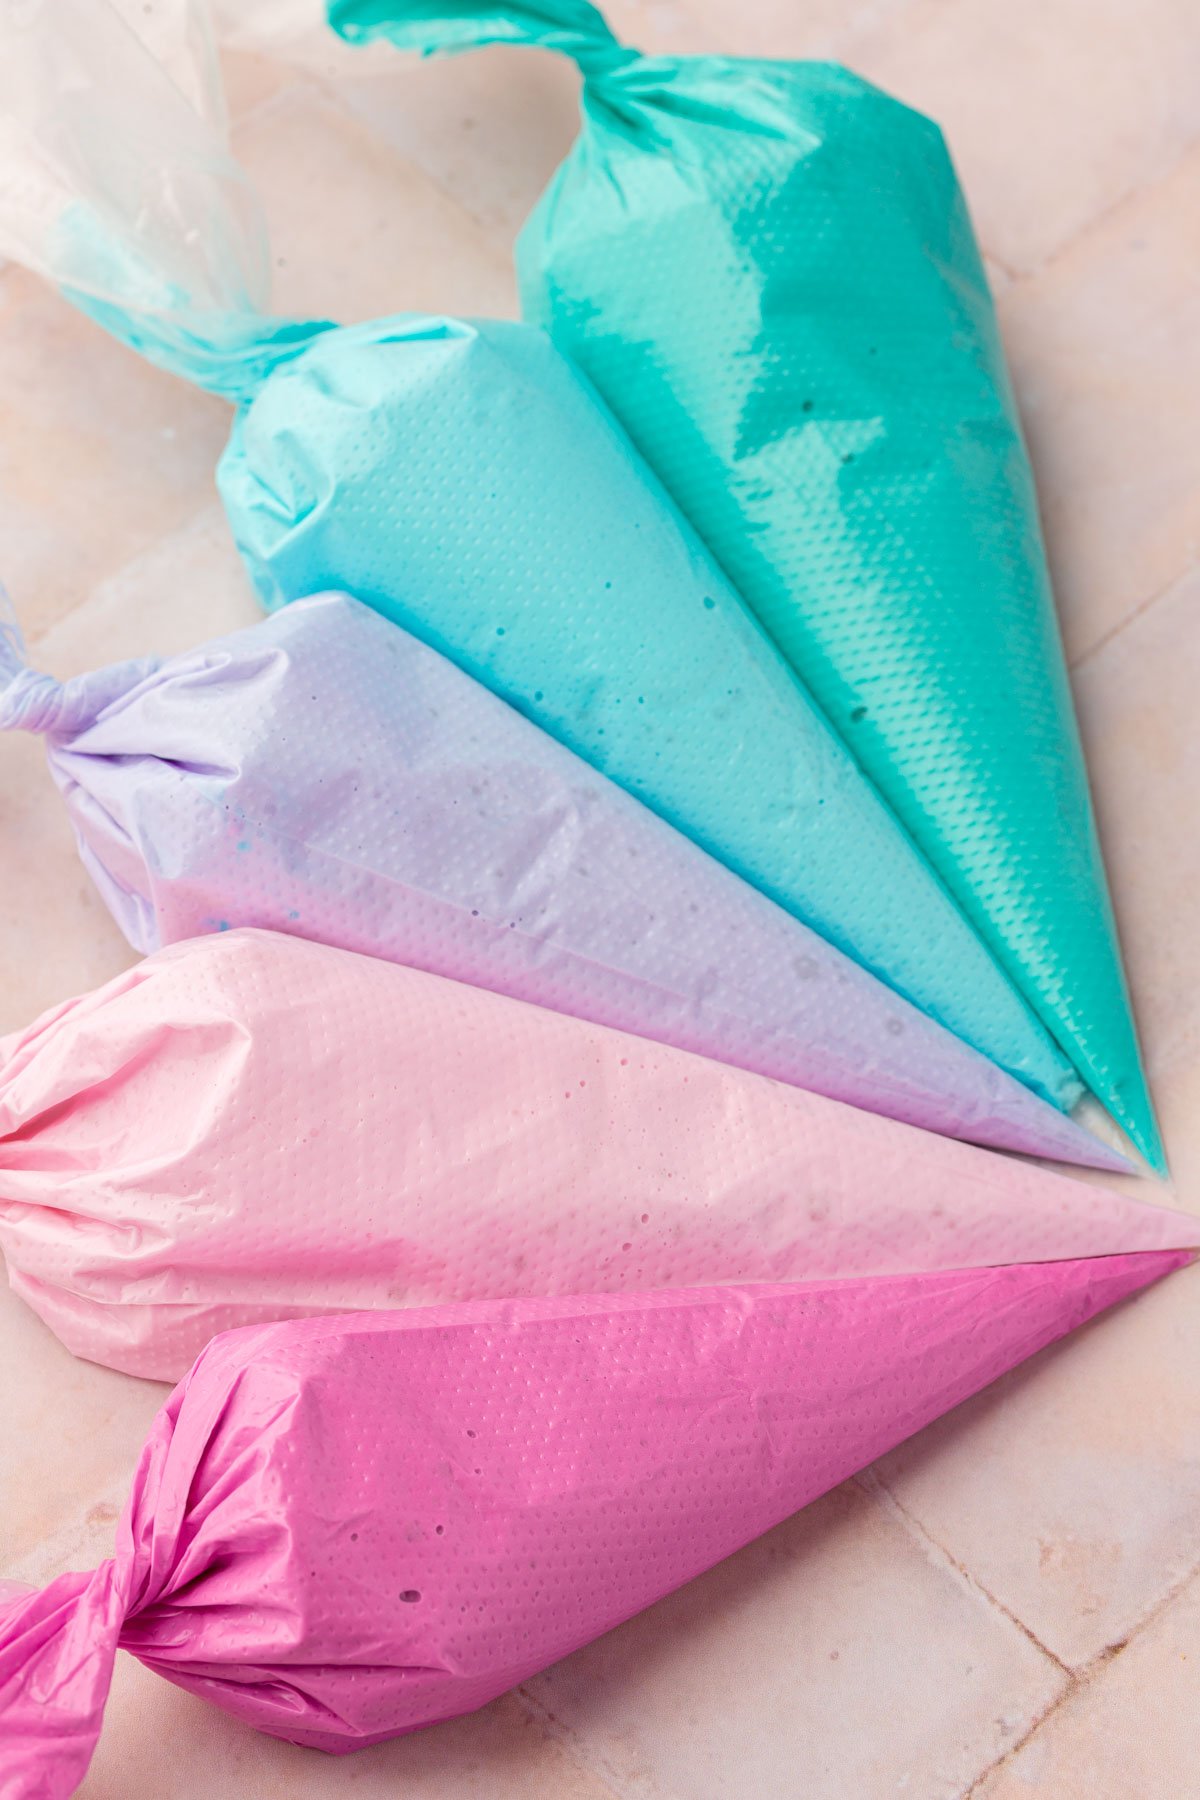
- AmeriColor Gel Food Coloring – Gel is preferred over liquid because it gives you vibrant color without thinning the icing. I use AmeriColor, which is gluten-free and comes in a squeeze bottle for easy control.
The 15-Second Rule
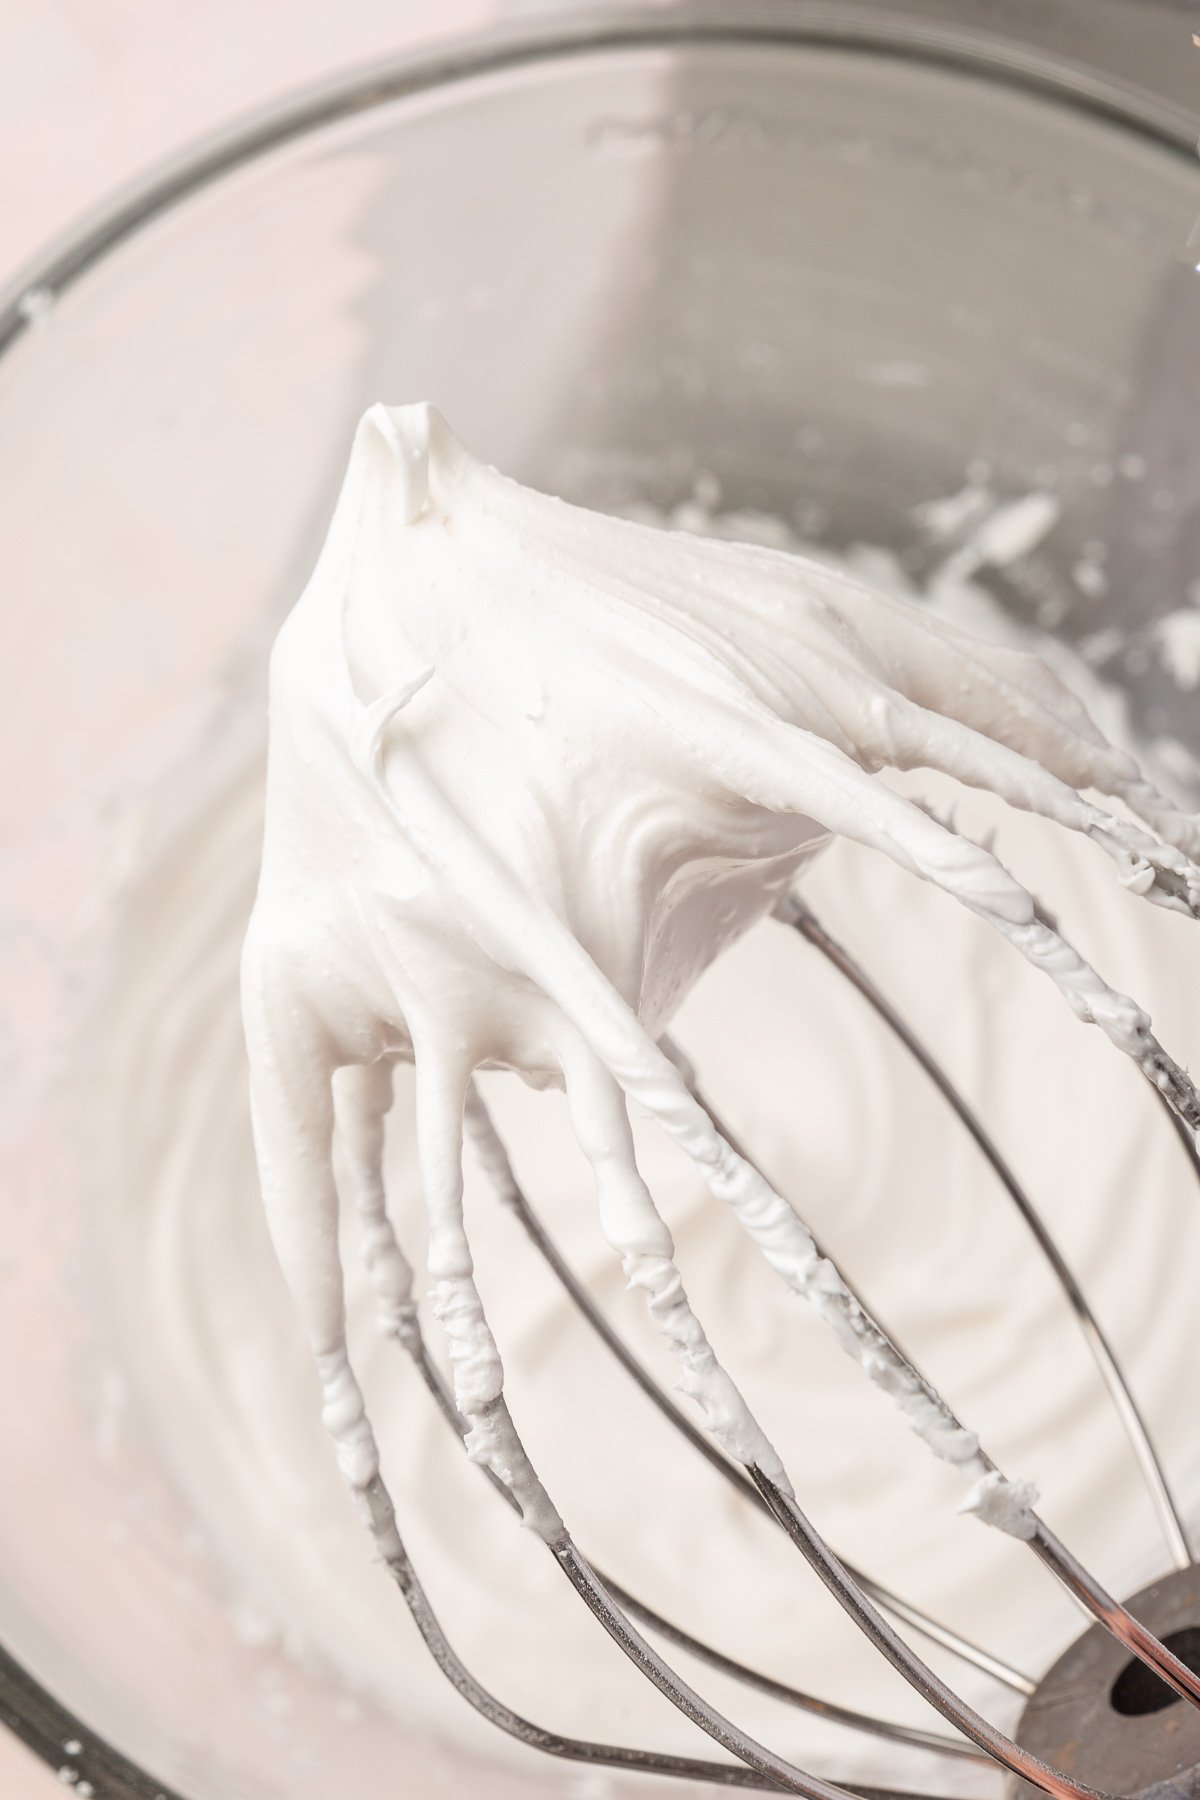
Royal icing consistency is everything. For outlining and flooding, I use what’s called 15-second icing. Lift a spoonful of icing and drizzle it back into the bowl. It should hold its shape for 15 seconds before melting back in.
For more detailed work, I use 20 to 25-second icing, which is slightly thicker. Start with the base consistency out of the mixer and add water half a teaspoon at a time until you get there. It’s much easier to thin icing than to thicken it back up.
Step-by-Step Instructions
It’s very simple to make royal icing with meringue powder at home! The follow photos with matching steps are not meant to be the full recipe, but are there to help you see the royal icing at various stages so you know what to look for while you make it.
For the ingredient list with measurements, full instructions, printable recipe, and additional notes, please scroll down to the recipe card.


Recipe FAQs
Usually one of three things: too much water in the mix, high humidity in your kitchen, or it wasn’t beaten long enough. Make sure you mix it to the right consistency and let it dry uncovered in a low-humidity environment. Putting cookies in front of a fan can help speed up drying time.
Flood icing takes about 4 to 5 hours to dry completely. Thicker detail work takes about an hour. I let decorated cookies dry overnight at room temperature before stacking or packaging them.
Bubbles usually mean the icing is too thin or has too much air beaten in. After thinning, tap the bowl on the counter a few times to pop them. If you see bubbles while decorating, use a scribe tool or toothpick to pop them before the icing sets.
Add water half a teaspoon at a time to thin it out. To thicken it, add small amounts of powdered sugar. Always go slowly in either direction since small additions make a bigger difference than you’d expect.
Expert Tips
Storage Instructions
- Storing: Keep in an airtight container at room temperature for up to 2 weeks. Press a piece of plastic wrap directly onto the surface of the icing before sealing to prevent it from crusting over.
- Freezing: Store in an airtight container or freezer bag with plastic wrap pressed directly on the surface for up to 2 months. Thaw in the refrigerator overnight, then re-whip on low speed until it comes back together.
Cookies to Decorate with Royal Icing
This royal icing is made for decorating. My gluten-free sugar cookies are the recipe I use it with most often and they hold their shape well when cut out, which makes them ideal for decorating. My gluten-free gingerbread cookies are another good pairing since the icing works really well against the spiced dough. And if you’re putting together a holiday cookie plate, my gluten-free Christmas cookies post has a full collection of recipes to decorate and give away.
Royal Icing Recipe
Ingredients
- 4 cups (480 g) powdered sugar
- 3 tablespoons (20 g) meringue powder
- 5 tablespoons (75 g) water - plus more as needed
- 1 teaspoon (4 g) vanilla extract - or almond extract
- AmeriColor gel food coloring - for decorating
**Use the toggle button above to turn the instruction photos on and off!
Instructions
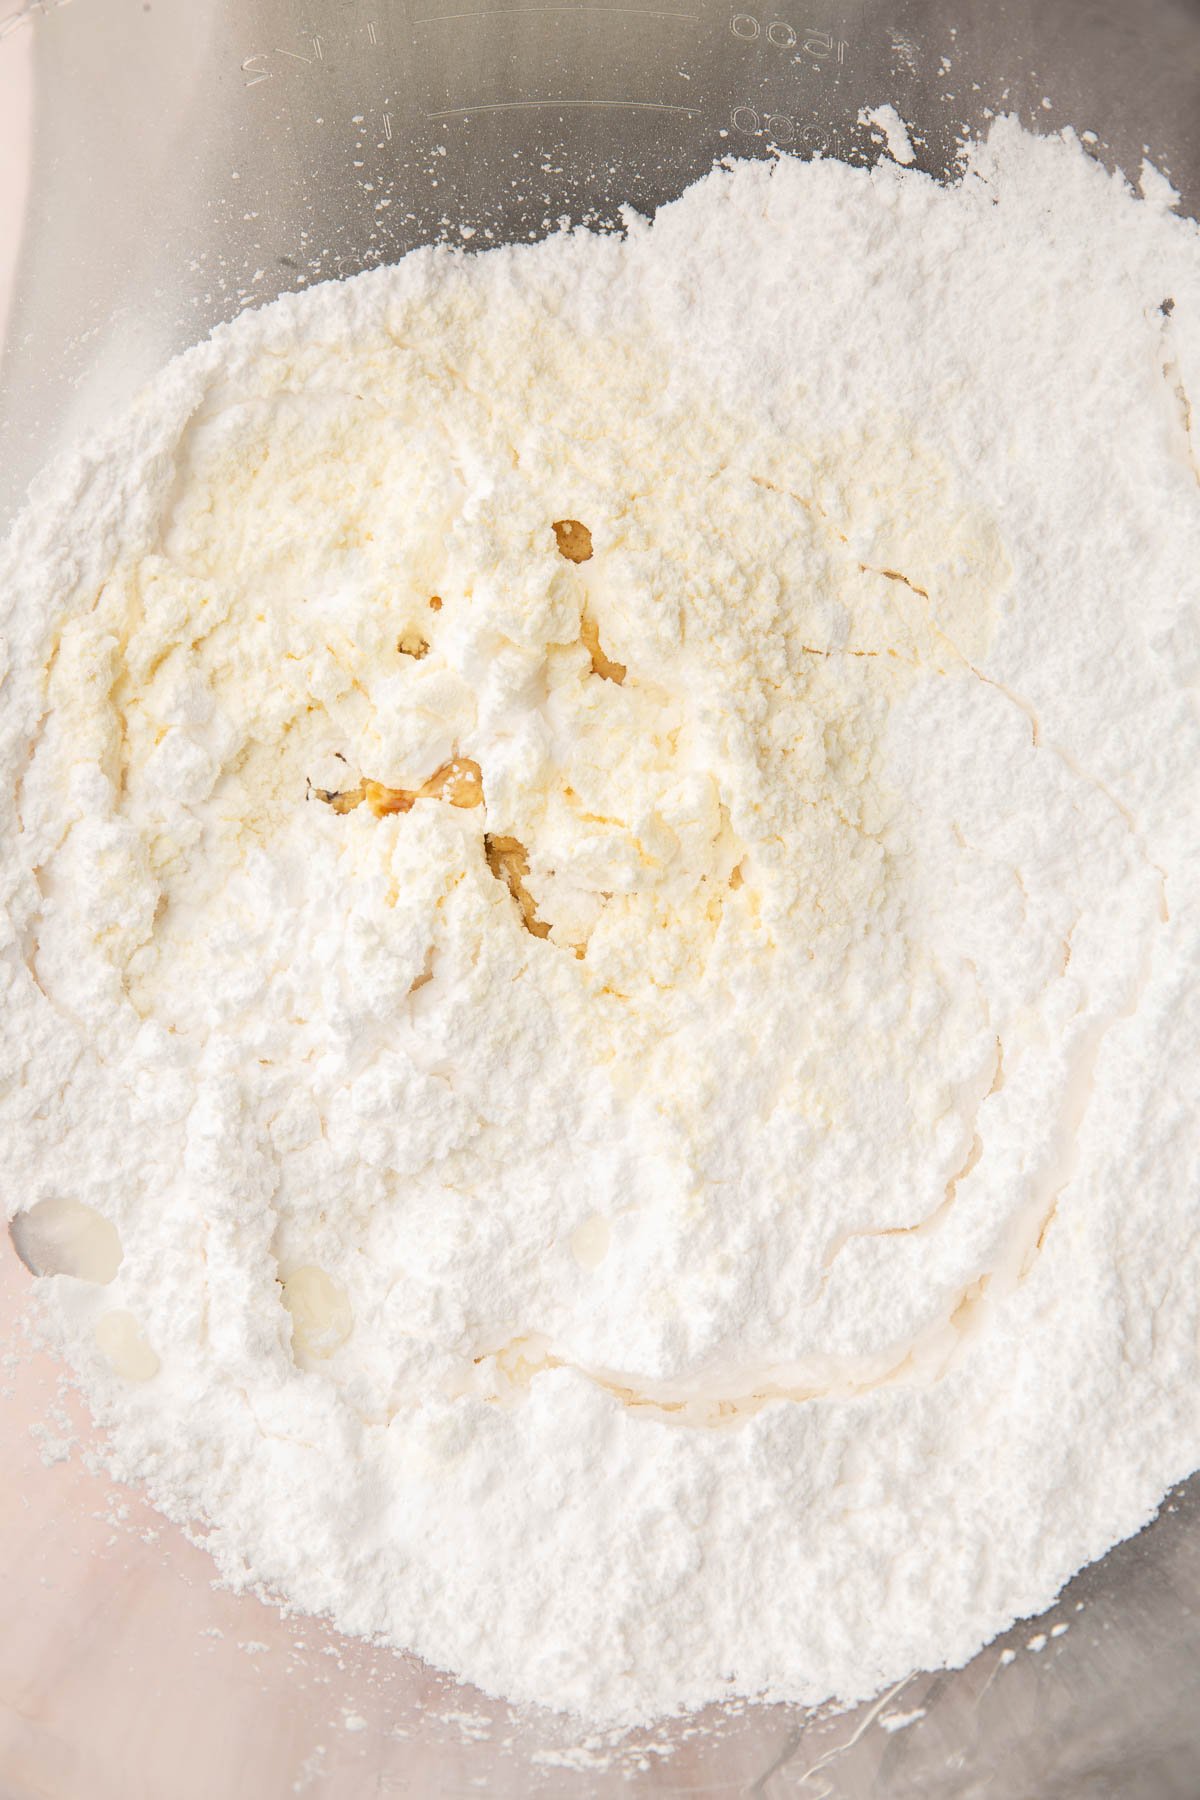
- In the bowl of a stand mixer fitted with the whisk attachment, combine 4 cups (480 g) powdered sugar, 3 tablespoons (20 g) meringue powder, 5 tablespoons (75 g) water, and 1 teaspoon (4 g) vanilla extract.
- Mix on low speed for 1 to 2 minutes, scraping down the sides to make sure everything is incorporated. This will help ensure you also don’t get a big cloud of powdered sugar all over your kitchen.
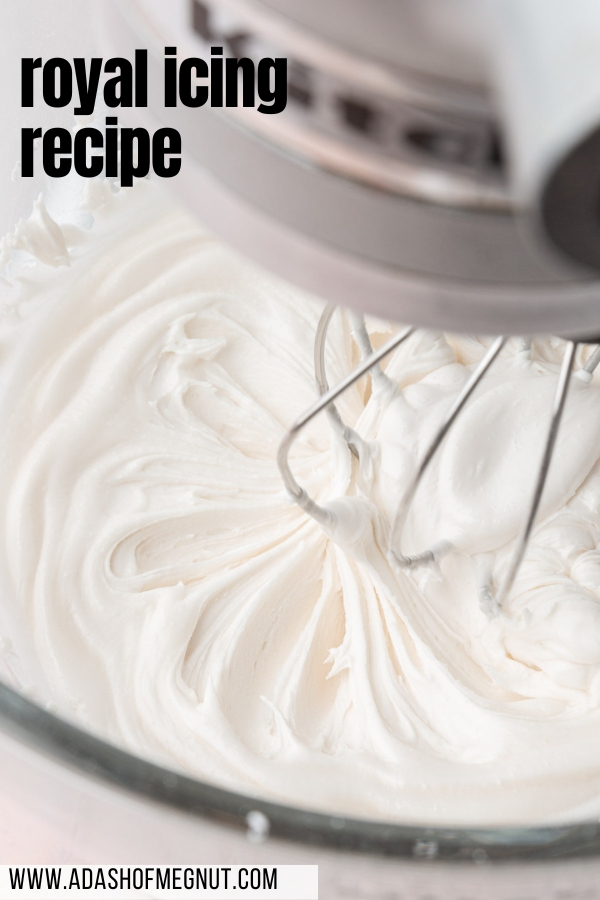
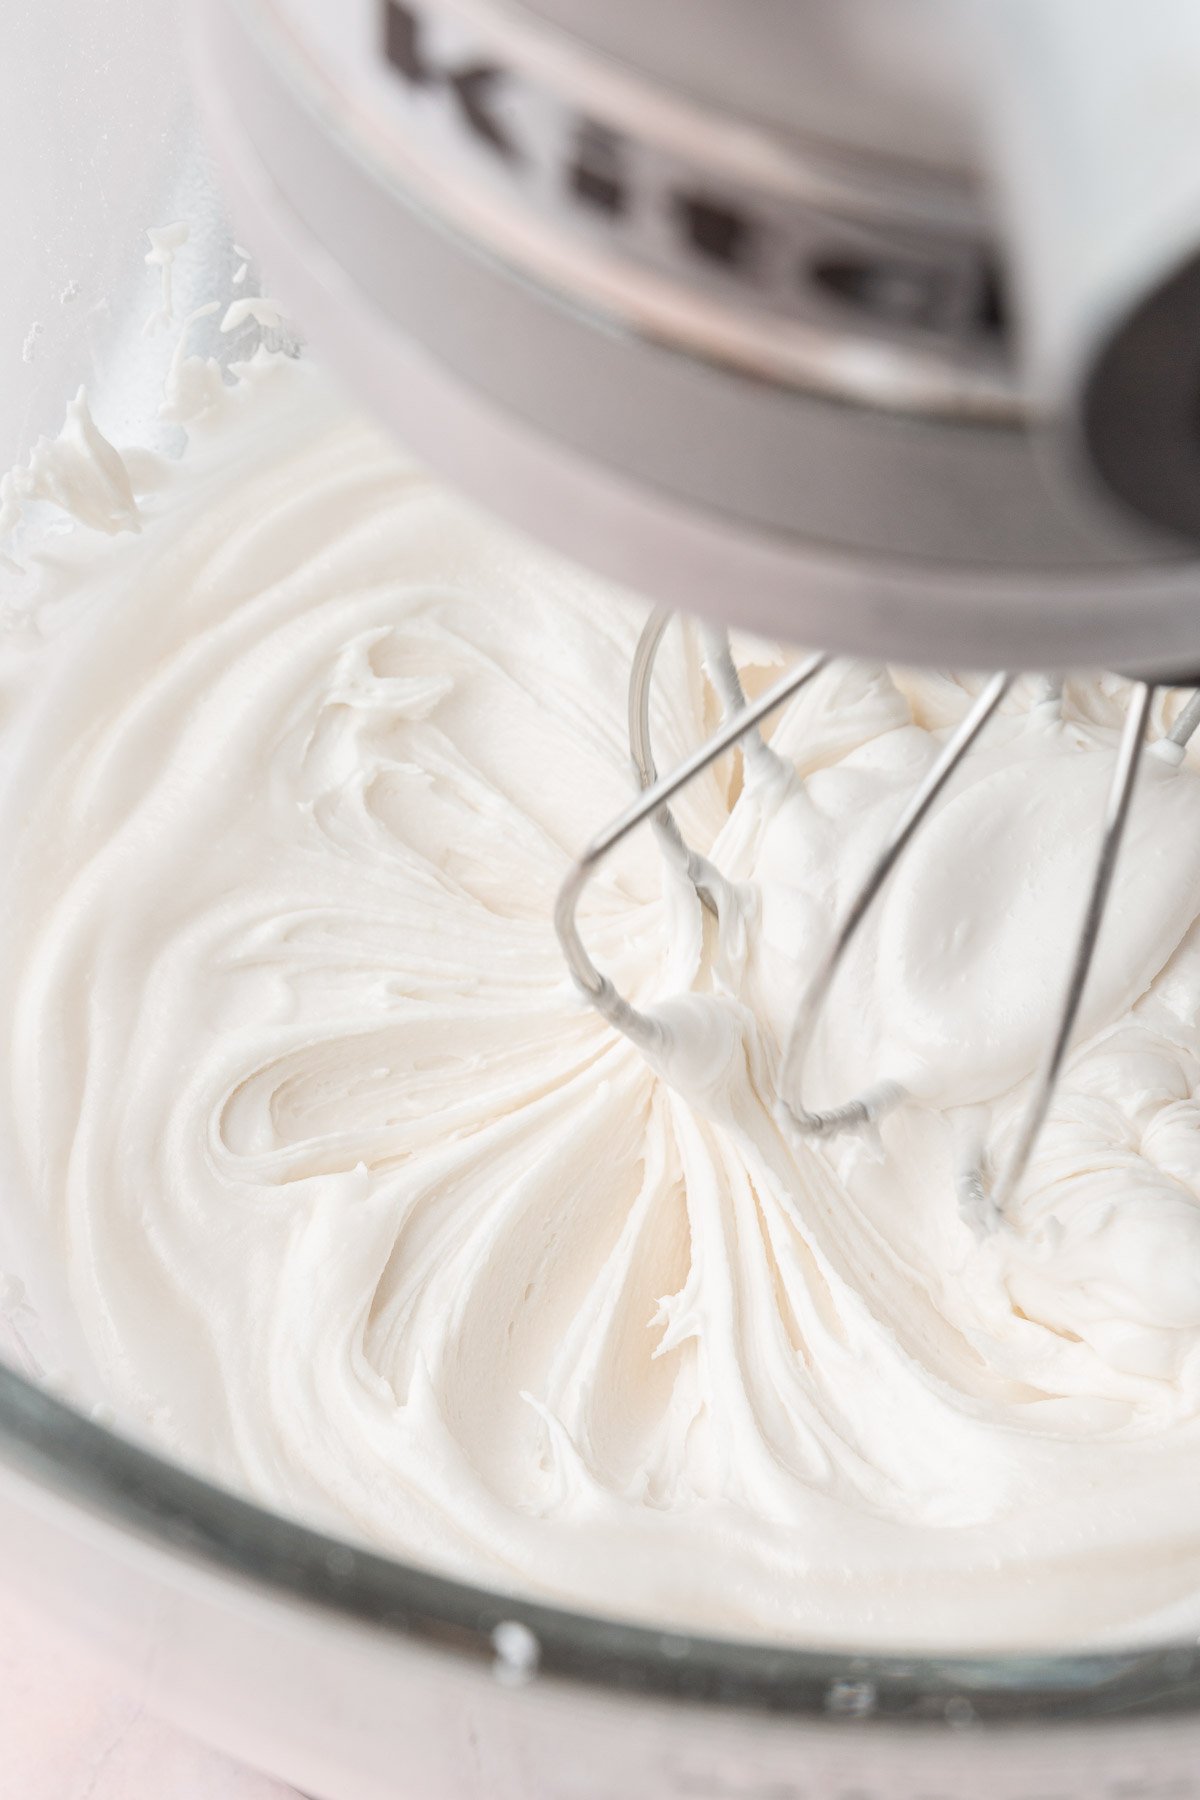
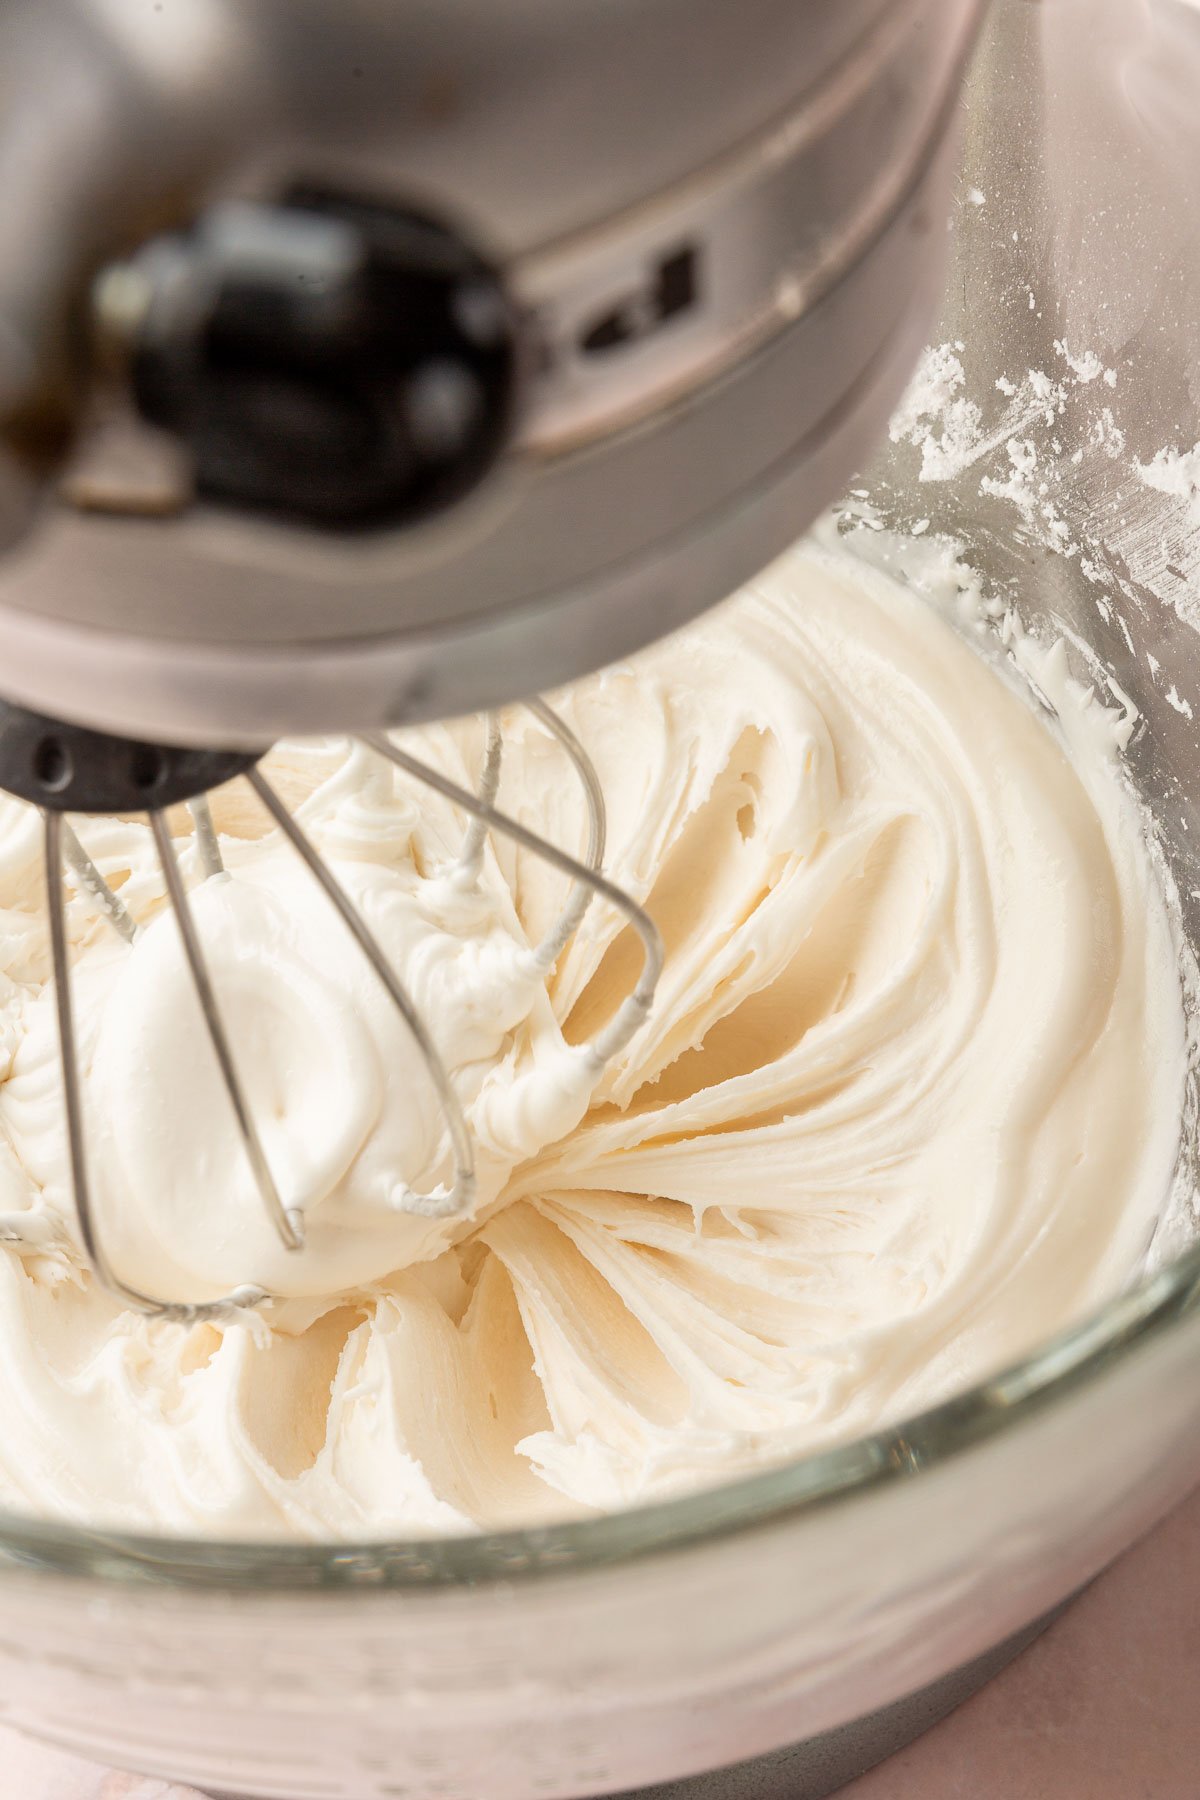
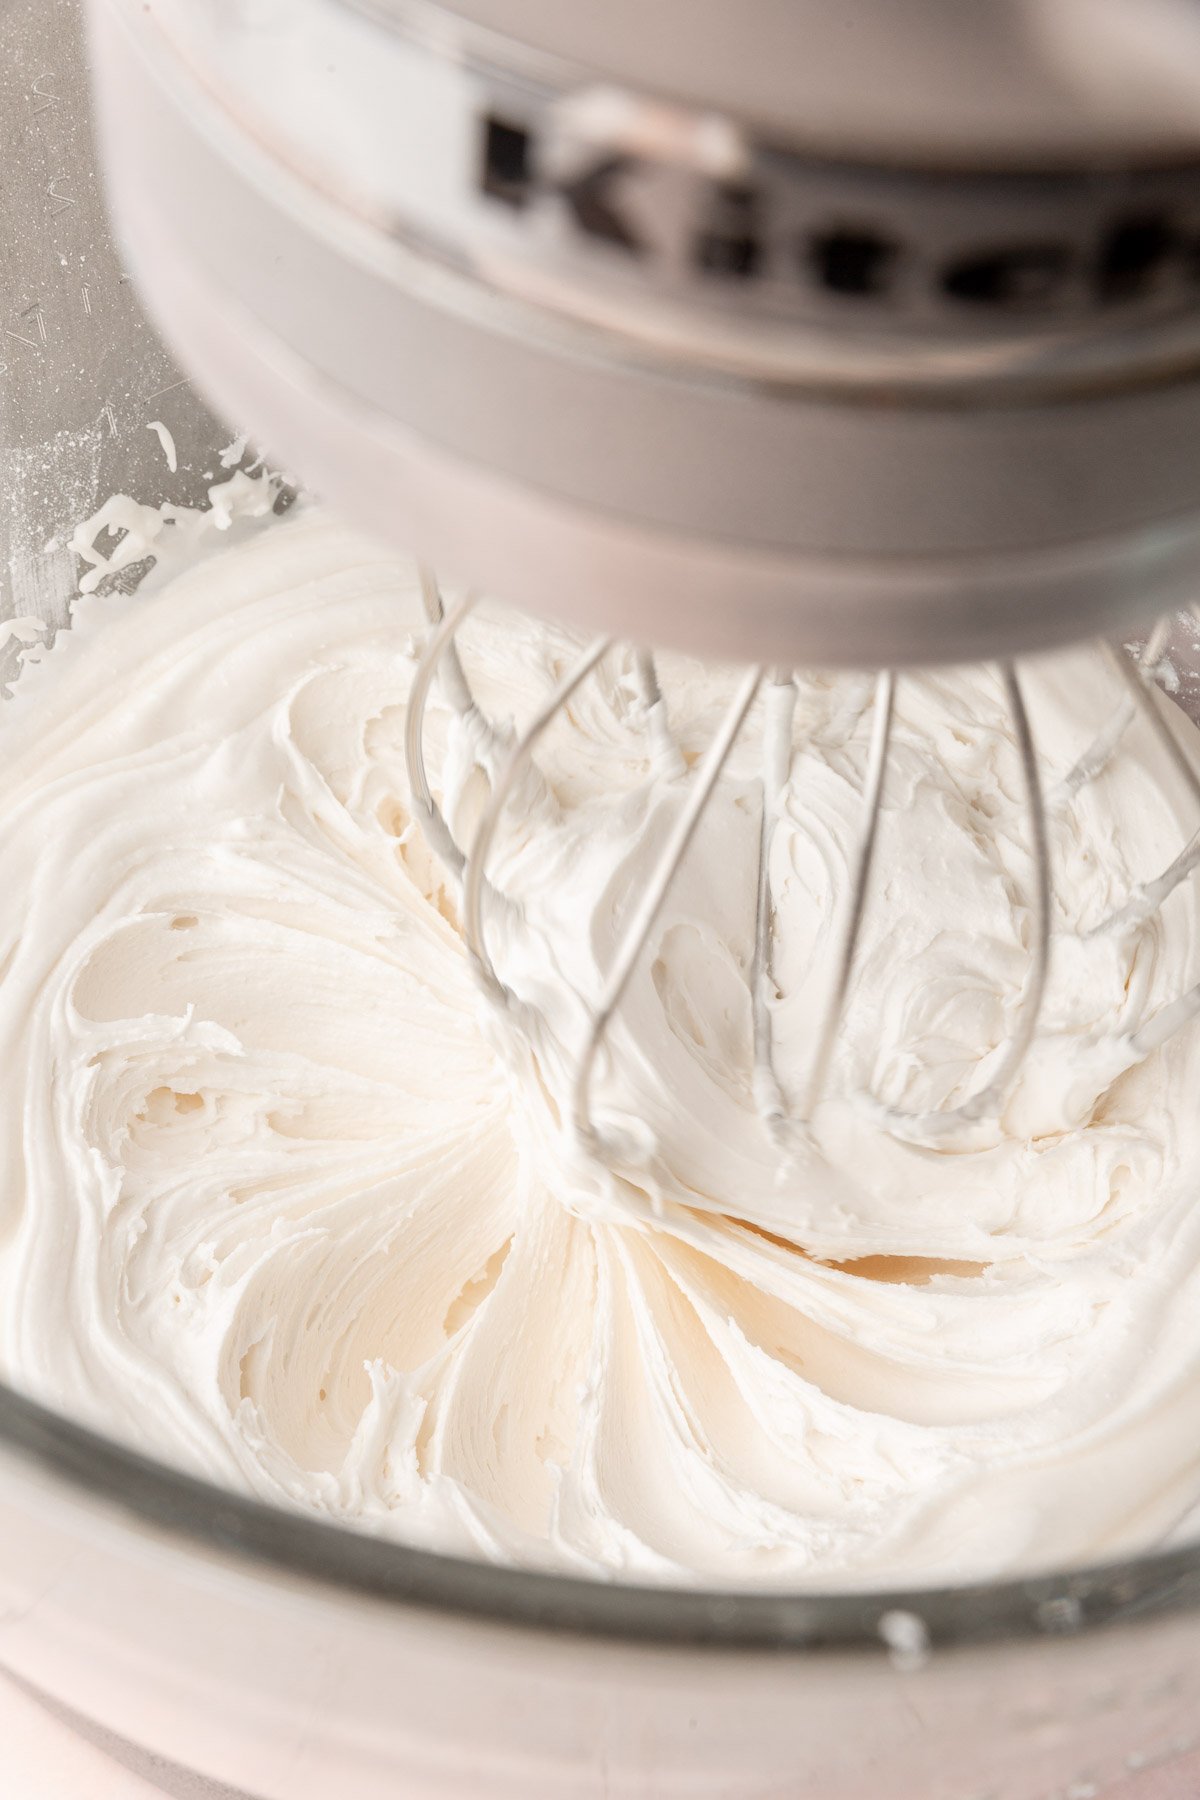
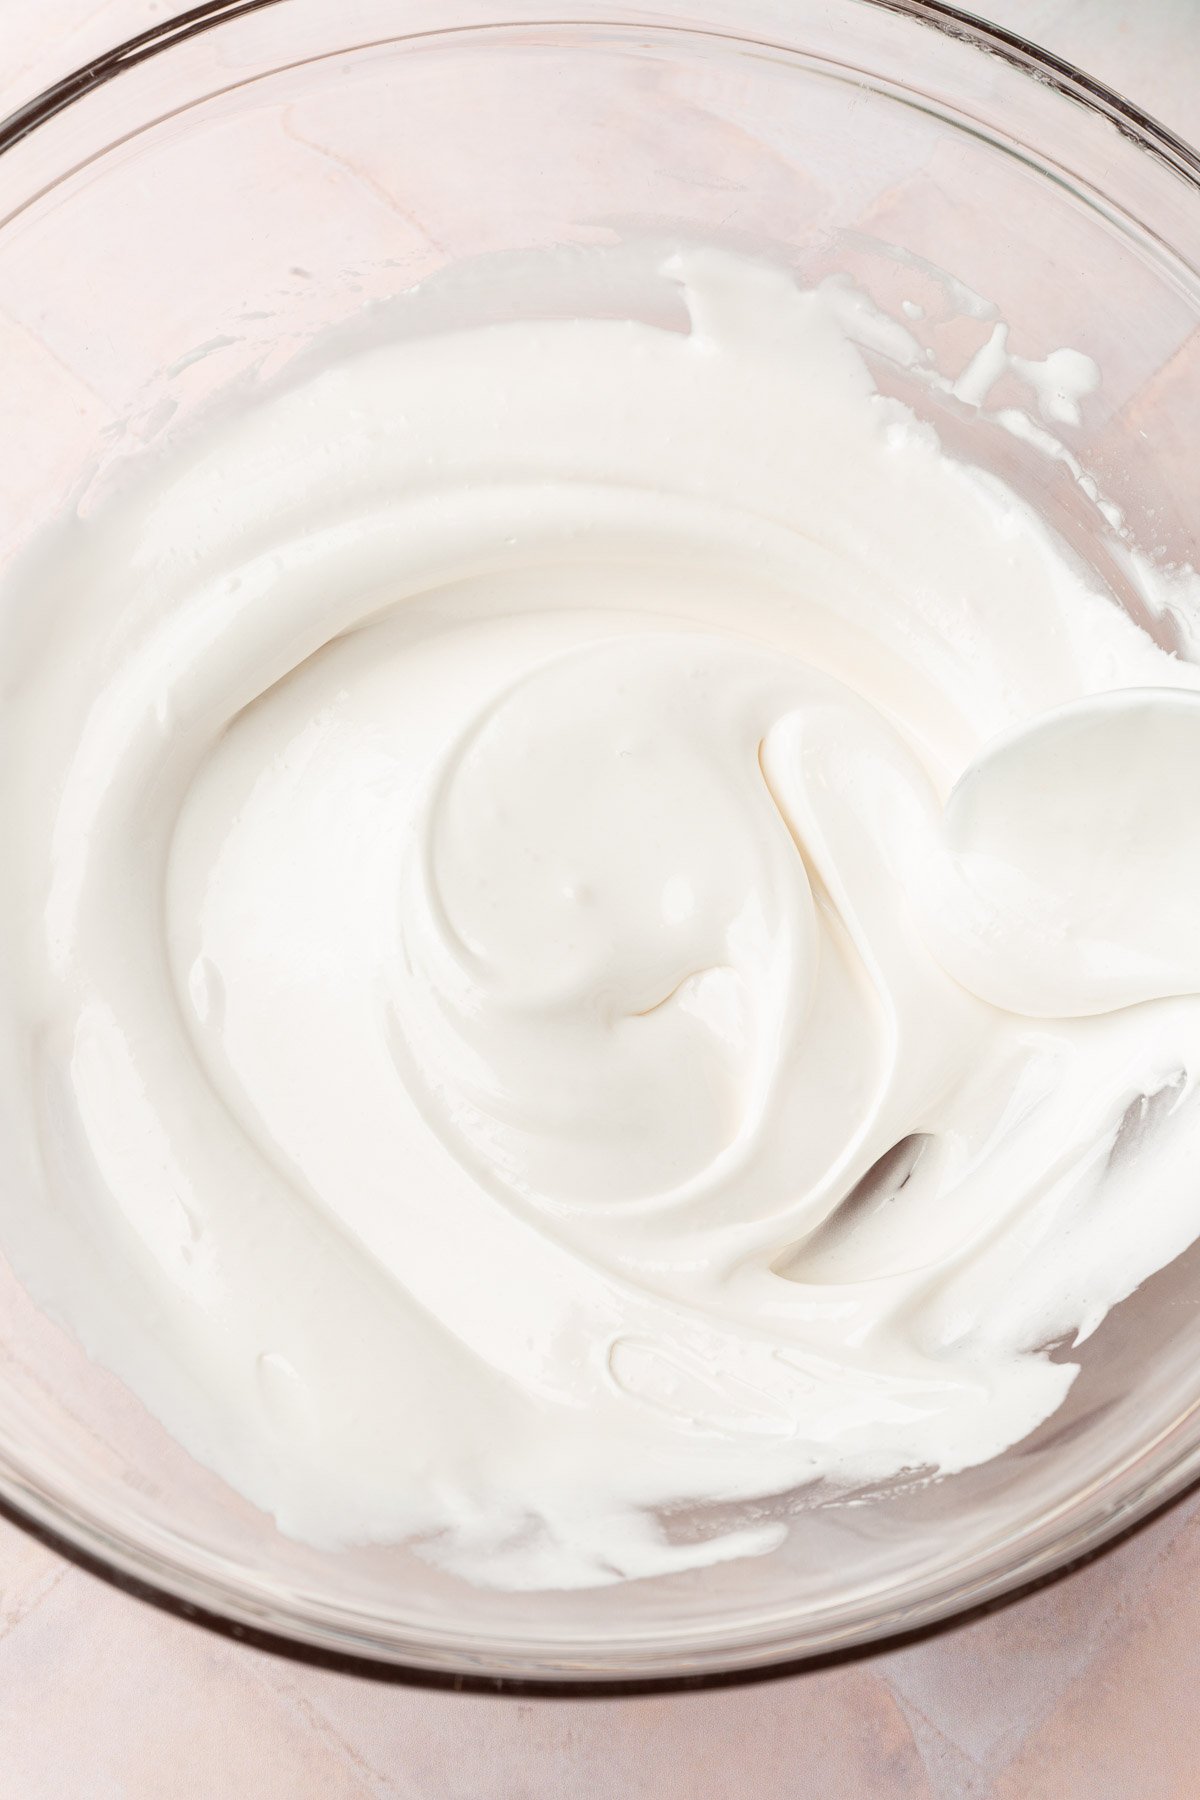
- Increase the speed to medium-high and mix for an additional 3 to 4 minutes until the icing is thick, white, and has increased in volume with a relatively matte finish. If using a hand mixer, this will take closer to 8 to 10 minutes.
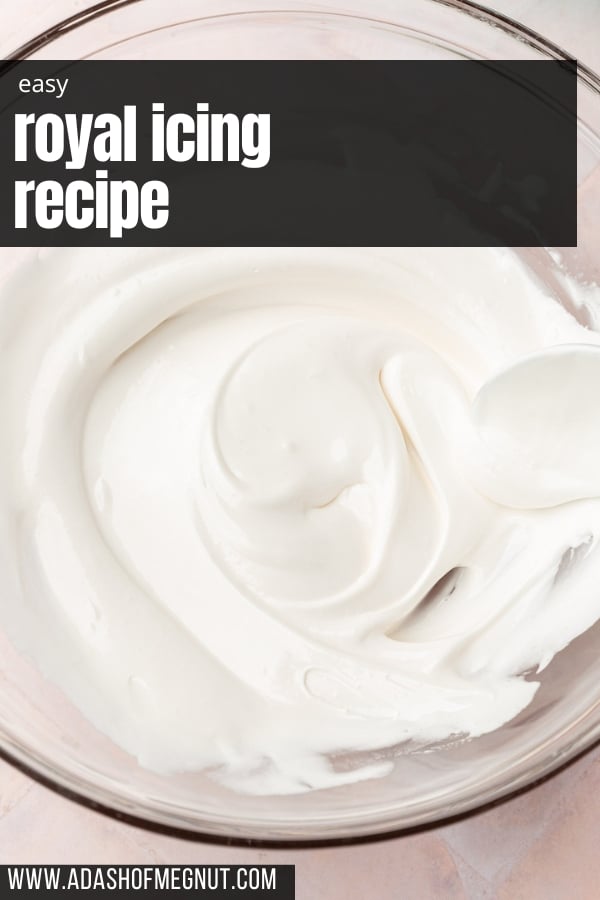
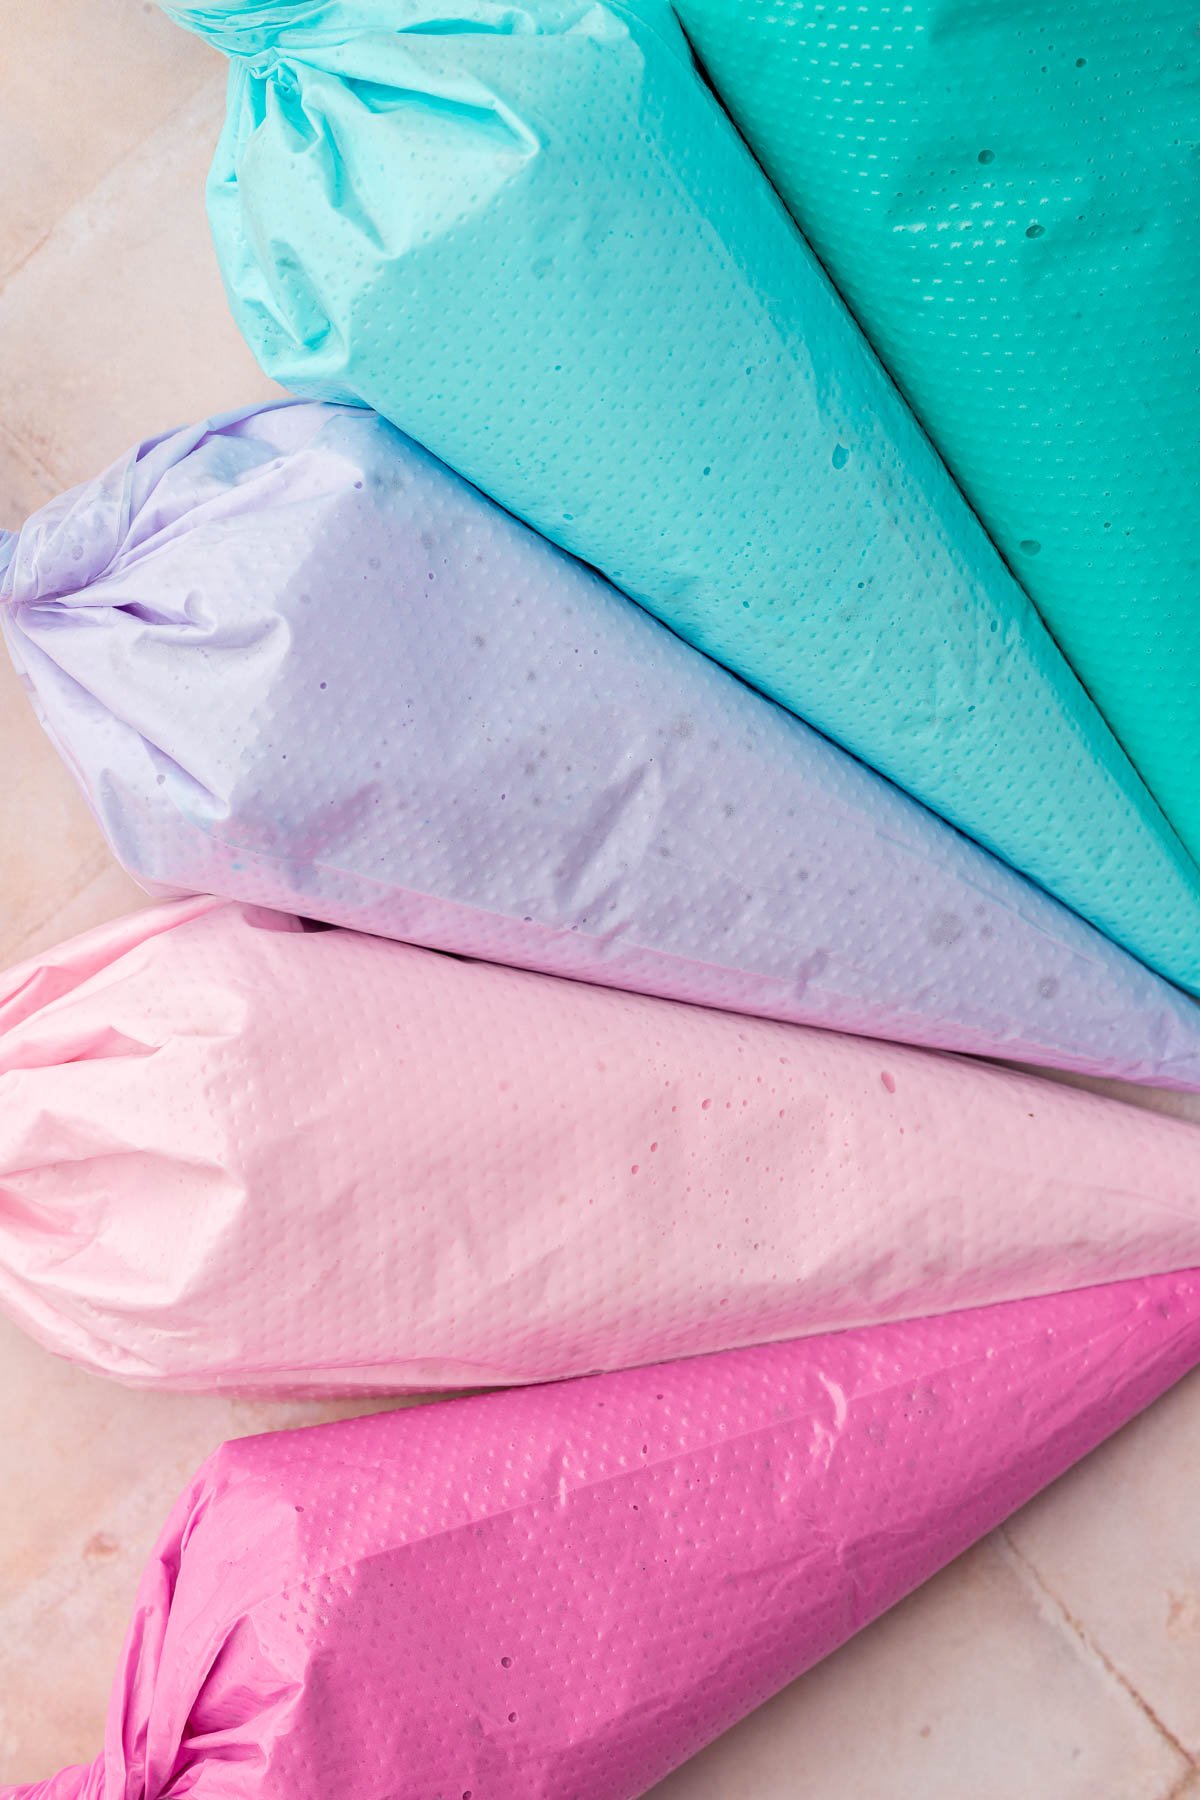
- This is your base consistency. It will be thick with stiff peaks. Keep it covered with a wet paper towel at all times to prevent it from drying out, unless it's in a pastry bag.
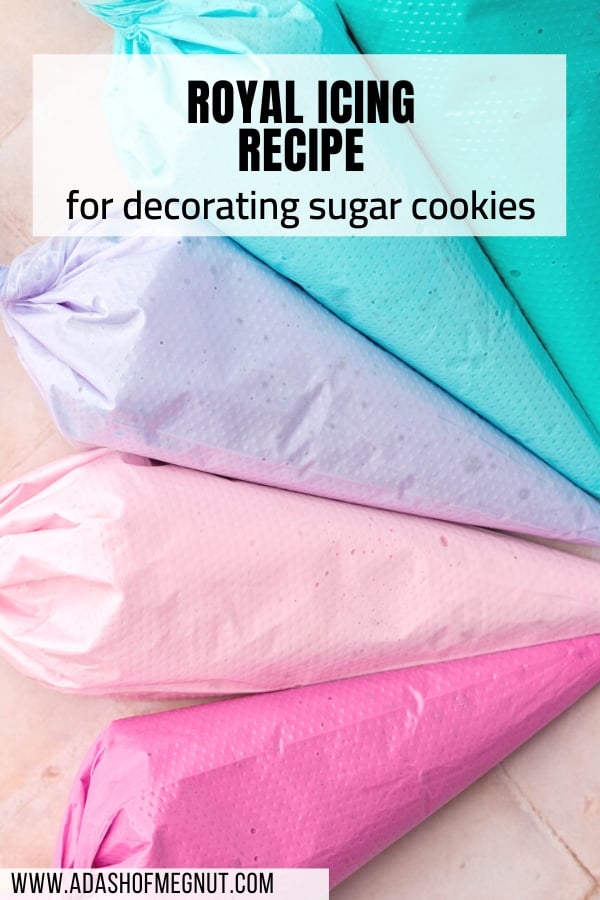
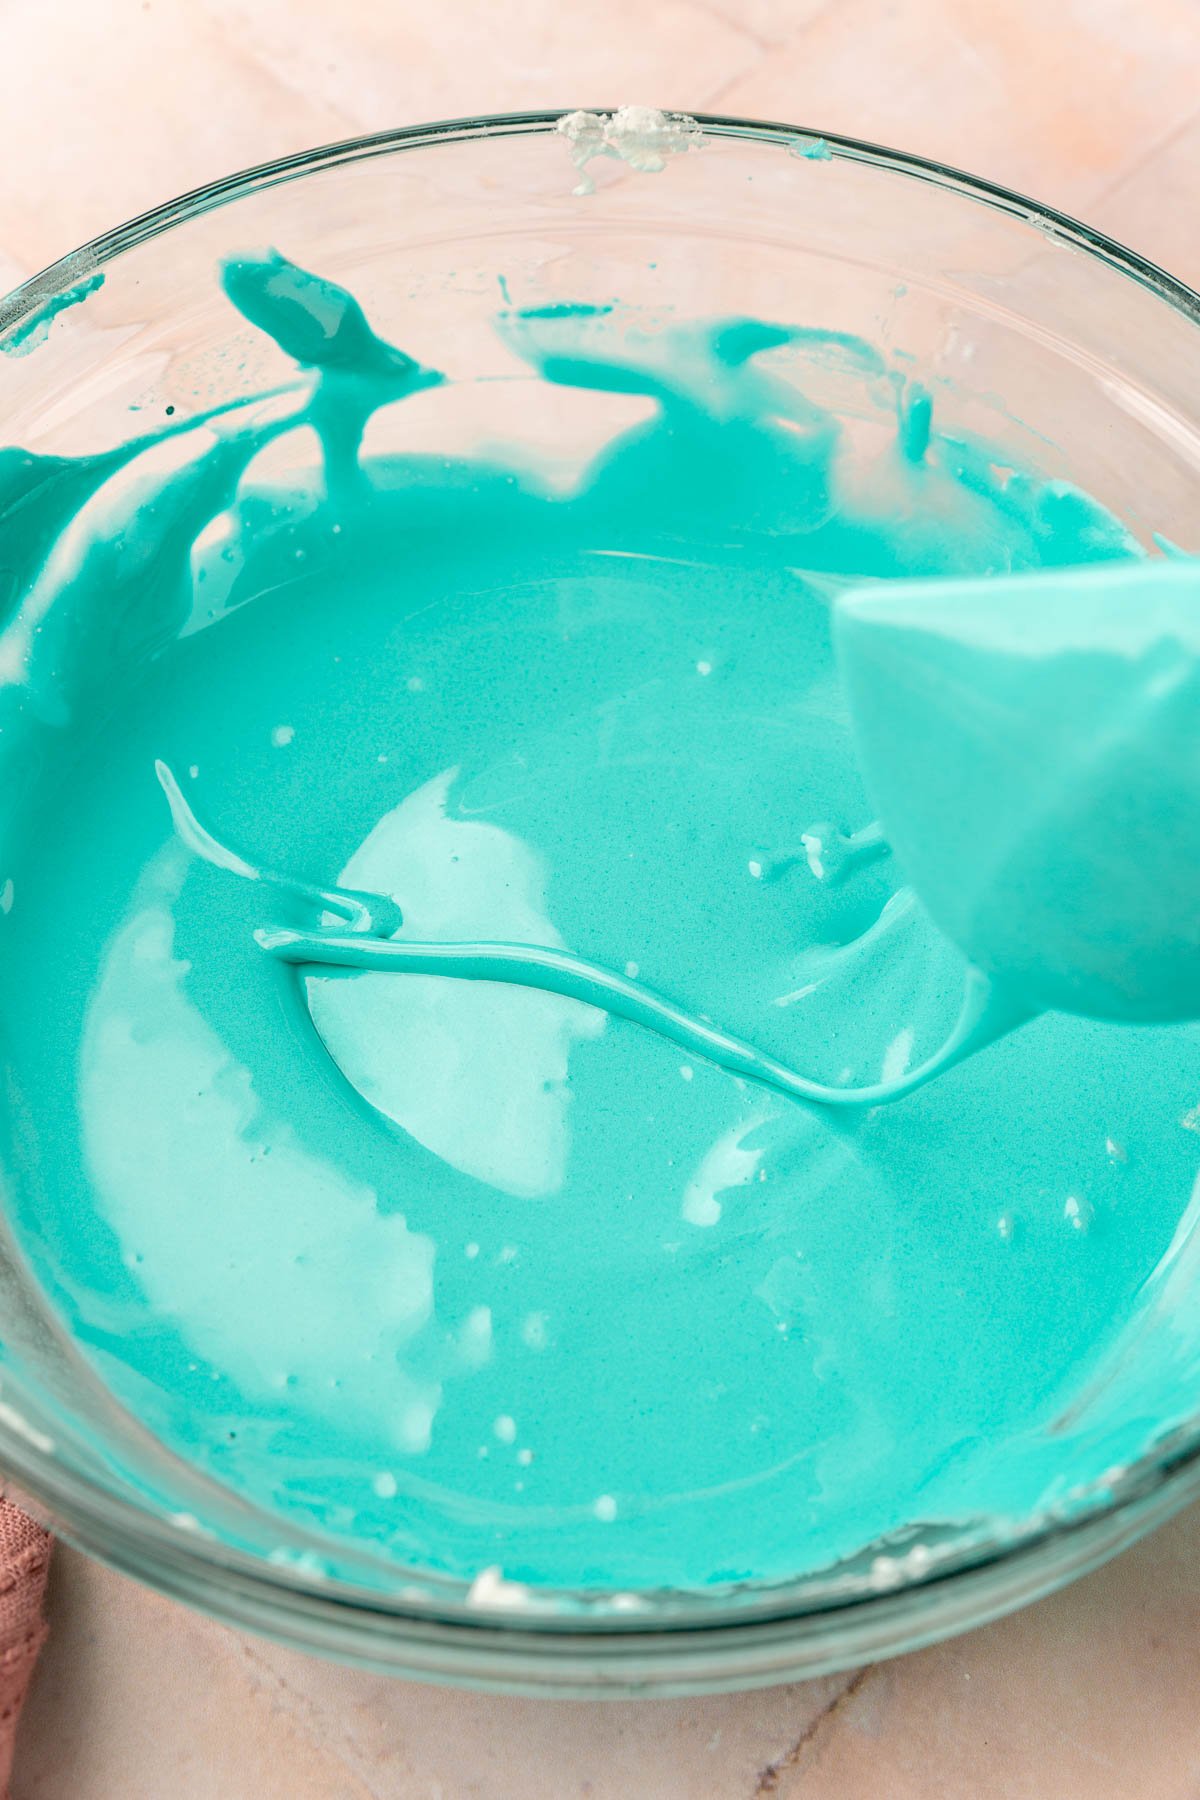
- To thin for outlining or flooding, add water half a teaspoon at a time, mixing well after each addition. I use a 15-second rule as my guide for outline and flood icing: drizzle the icing with a spoon or spatula over the bowl and it should hold its shape for 15 seconds before melting back in. For intricate detail work, use 20 to 25-second icing, which is slightly thicker. For gingerbread house assembly, stay closer to the base consistency so the walls hold. Depending on how thin you need it, you may add anywhere from 1 to 4 more tablespoons of water total. Go slowly, adding half a teaspoon at a time, as it's much easier to thin out icing than to thicken it back up.
- Add AmeriColor gel food coloring a little at a time if using. The color will deepen as the icing dries, so start with less than you think you need.
Notes
- Meringue powder: I use AmeriColor brand, which is gluten-free. Wilton is another common option available at most craft stores.
- Extract: Use pure vanilla or almond extract, not imitation. Artificial flavoring can leave a chemical aftertaste in an uncooked icing.
- Food coloring: Use gel food coloring, not liquid. Liquid food coloring will thin out your icing and give you less vibrant color. I use AmeriColor, which is gluten-free and comes in a squeeze bottle instead of a screw-top lid, which is so much less messy when you’re in the middle of decorating.
- Piping bags: I use tipless piping bags 90% of the time. Just cut a small hole at the tip and pipe from there. I only use a piping tip when I want a specific shape for detail work, like a leaf tip or small star tip.
- Consistency: It is much easier to thin out royal icing than to thicken it. Always add water gradually, half a teaspoon at a time.
- Storage: Store in an airtight container at room temperature for up to 2 weeks with plastic wrap pressed directly on the surface. Freeze for up to 2 months. Thaw in the refrigerator overnight and re-whip before using.