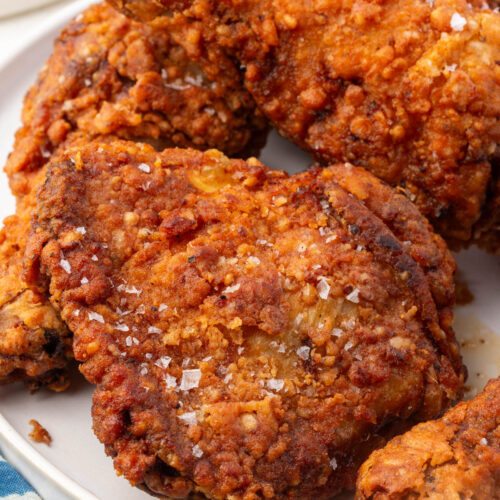
Gluten-Free Fried Chicken
Crispy, juicy gluten-free fried chicken with the perfect coating. It's light and crunchy without being thick or heavy, and yields when you take a bite. This three-flour blend delivers the crunch you've been missing.
Print Recipe
Pin Recipe
Rate this Recipe
Ingredients
Marinade
- 2 cups buttermilk
- ½ cup pickle juice
- 1 tablespoon kosher salt
- 1 teaspoon ground black pepper
- 2 teaspoons garlic powder
- 2 teaspoons paprika
- 2 lbs chicken thighs - about 4 chicken thighs - bone-in and skin-on
- 2 lbs chicken legs - about 5 chicken legs - bone-in and skin-on
Flour Dredge
- 1 cup white rice flour - 1 cup is 115g for Three Ladies brand which is finely milled, you'll get less than 1 cup for other brands like Bob's Red Mill
- ½ cup potato starch - 80g
- ½ cup cornstarch - 64g
- 2 teaspoons kosher salt
- 2 teaspoons garlic powder
- 1 teaspoon onion powder
- 1 teaspoon black pepper
- 2 teaspoons paprika
For Frying
- 4-6 cups vegetable oil - canola oil, or peanut oil
For Finishing
- Flaky sea salt - such as Maldon
**Use the toggle button above to turn the instruction photos on and off!
Instructions
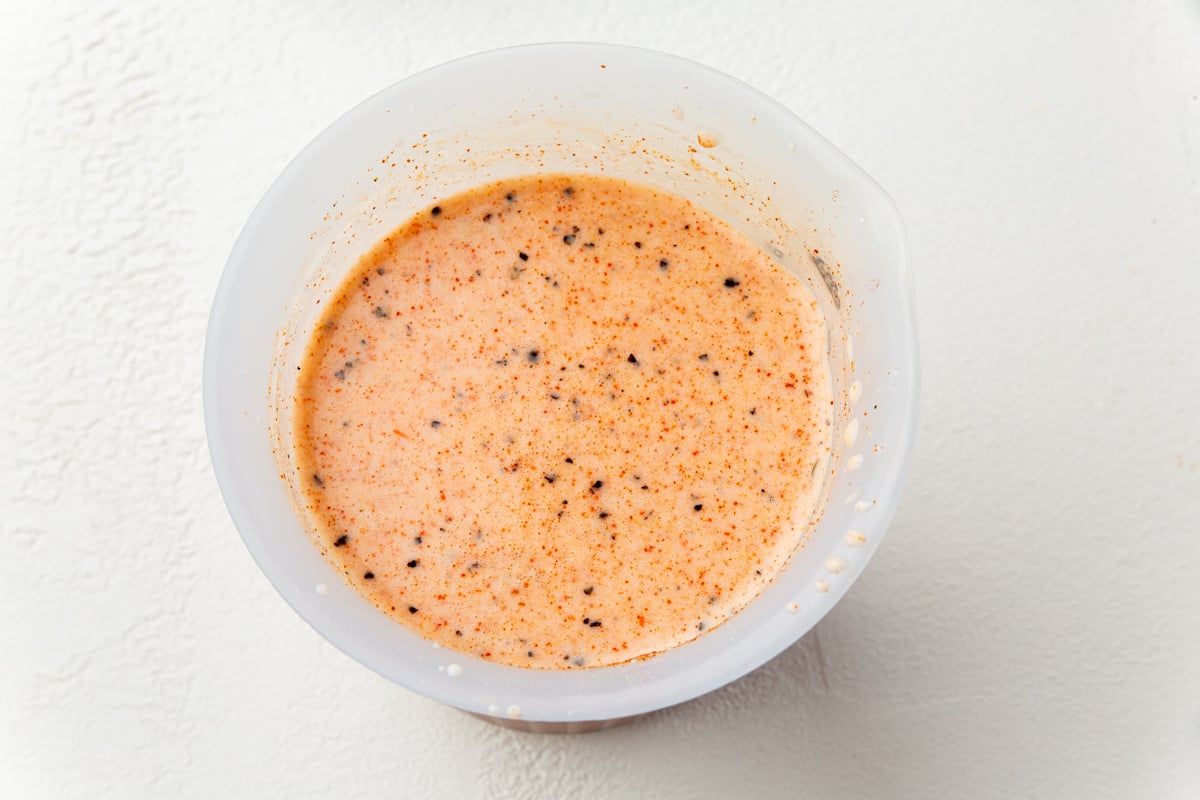
- Make the marinade: In a large bowl or zip-top bag, whisk together 2 cups buttermilk, ½ cup pickle juice, 1 tablespoon salt, 1 teaspoon black pepper, 2 teaspoons garlic powder, and 2 teaspoons paprika.
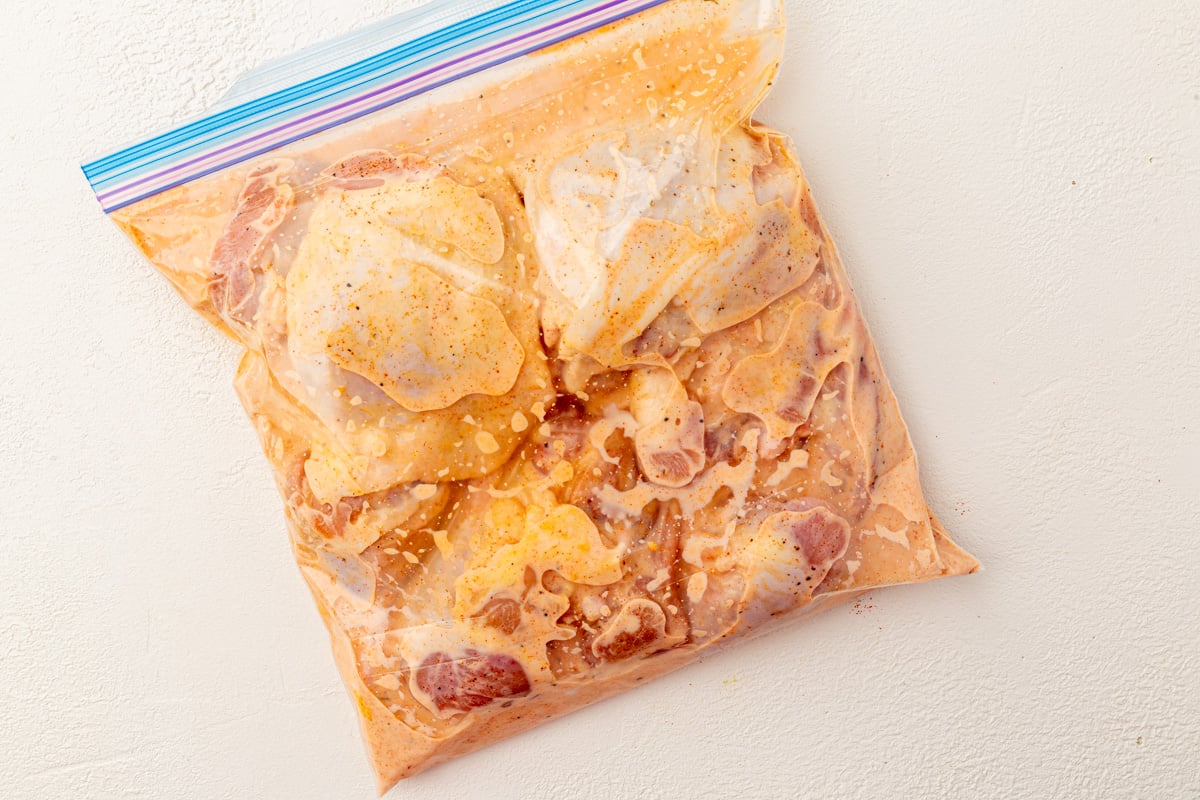
- Marinate the chicken: Add chicken thighs and legs to the marinade. Make sure everything is coated. Cover and refrigerate for at least 2 hours, but overnight is even better.
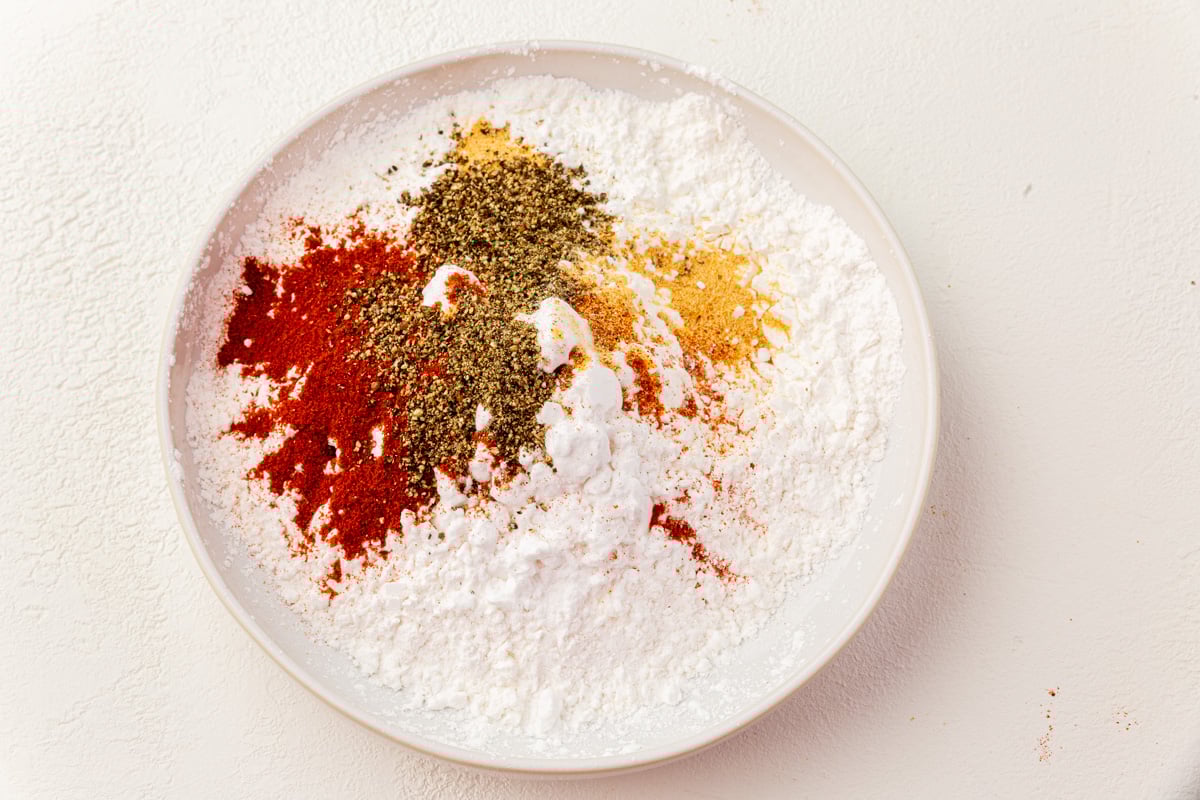
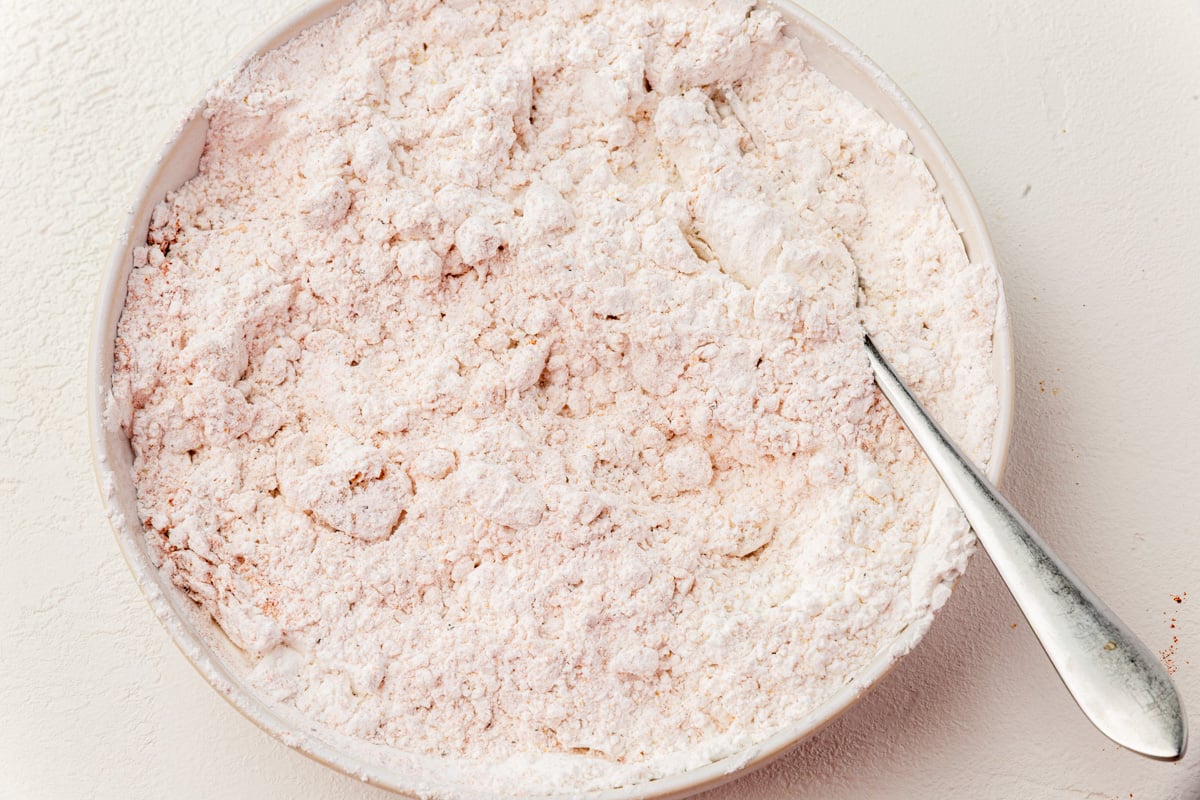
- Make the flour dredge: In a shallow dish, whisk together 115g (1 cup) rice flour, 80g (½ cup) potato starch, 64g (½ cup) cornstarch, 2 teaspoons salt, 2 teaspoons garlic powder, 1 teaspoon onion powder, 1 teaspoon black pepper, and 2 teaspoons paprika.
- Add brine to the flour: Take about ½ cup of the marinade and whisk it into the flour mixture.
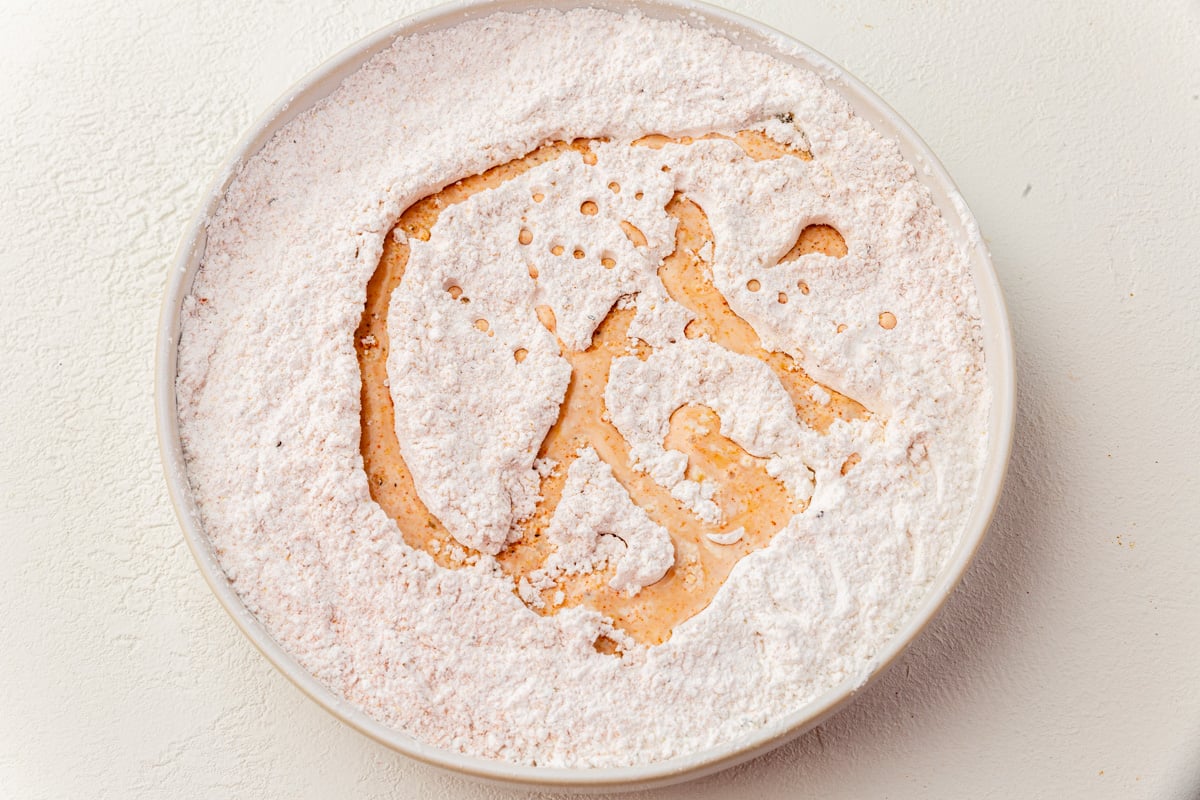
- This creates those craggy bits that fry up extra crispy.
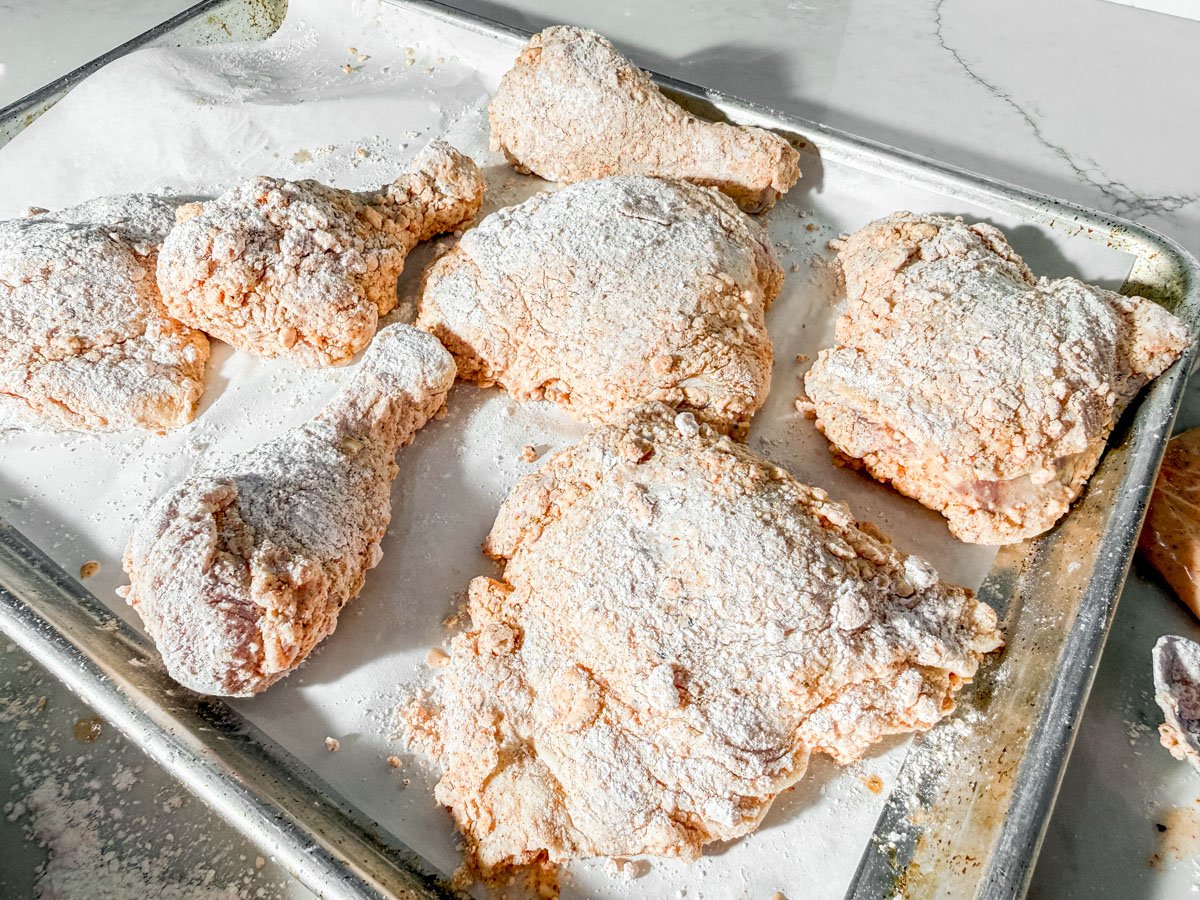
- Dredge the chicken: Remove chicken from the marinade and press each piece firmly into the flour mixture, making sure to coat all the nooks and crannies.
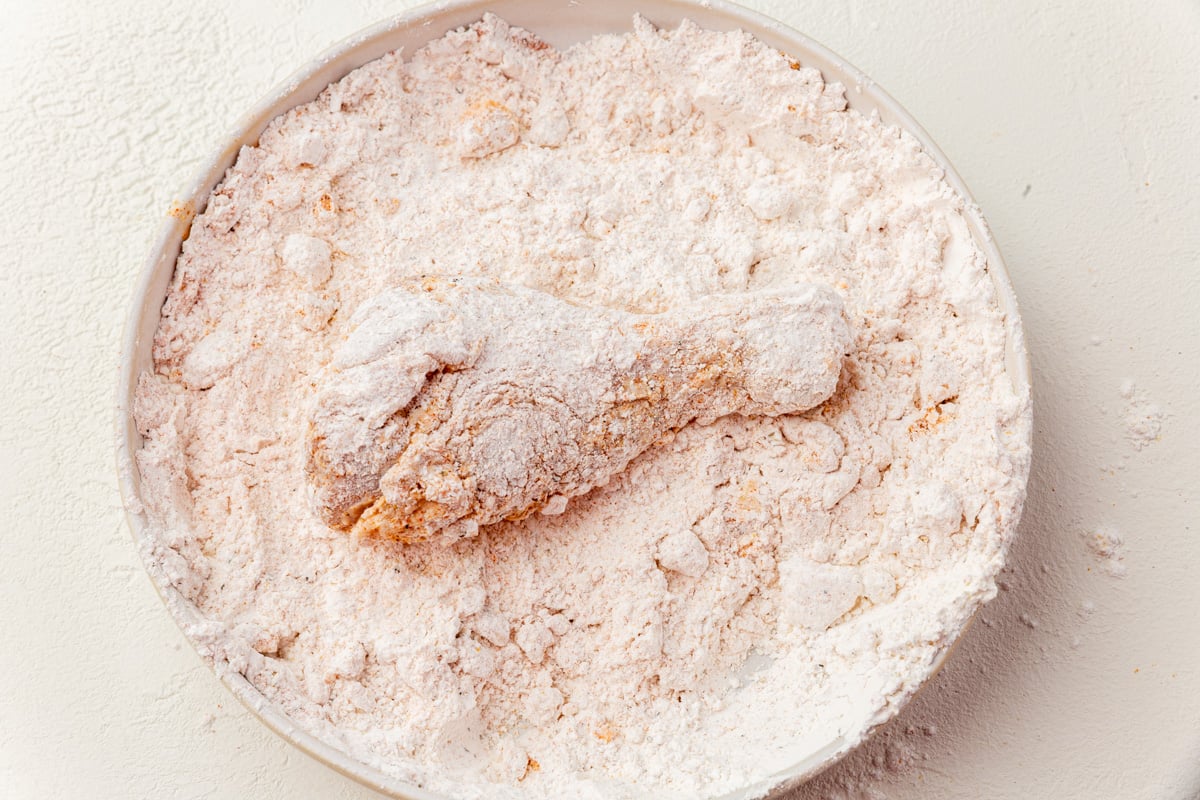
- Let it rest: Place the coated chicken on a wire rack and let it sit for 10-15 minutes. This helps the coating set and stick better.
- Heat the oil: In a large, heavy pot or Dutch oven, heat 3 inches of oil to 325°F.
- Fry the chicken: Working in batches to avoid crowding, carefully add the chicken to the hot oil. Maintain oil temperature at 310-325°F.
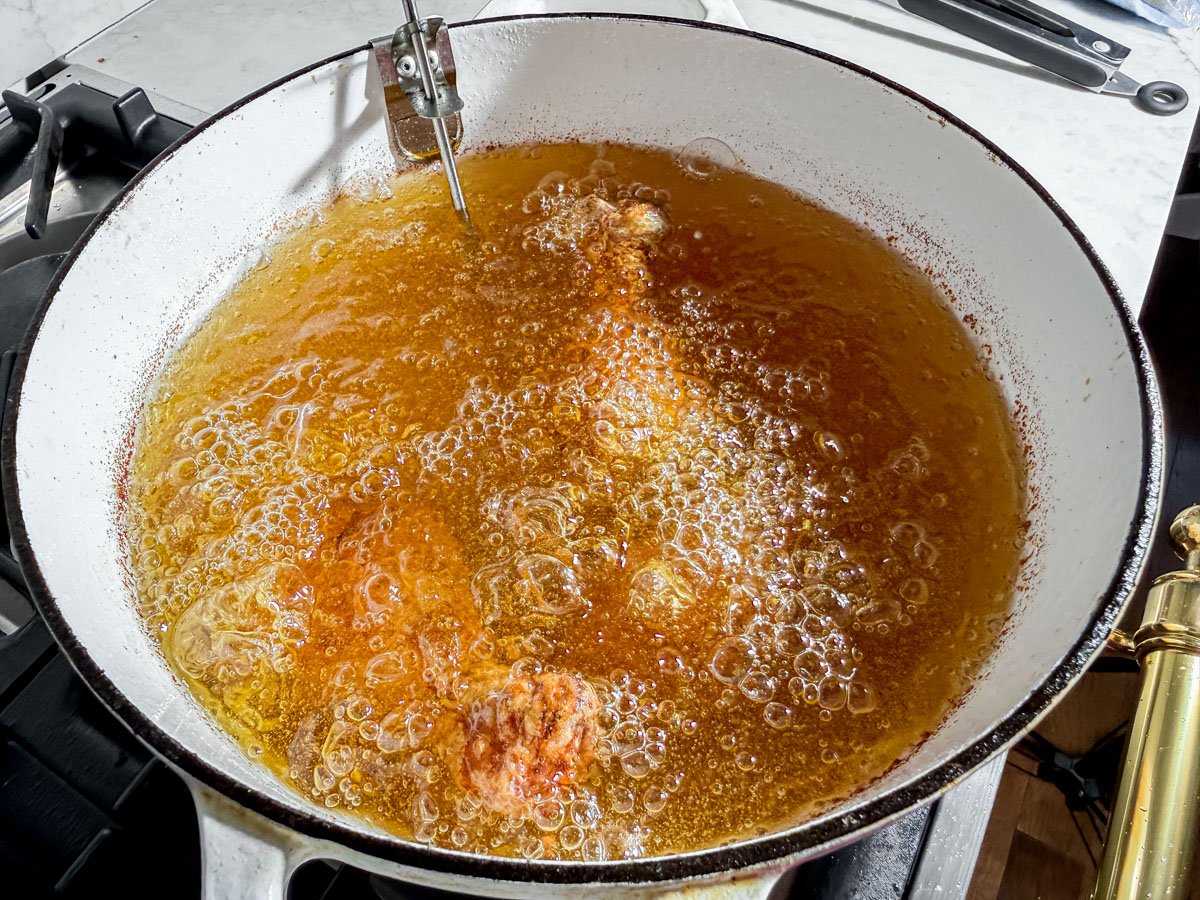
- Fry chicken legs for about 10-14 minutes and thighs for 12-16 minutes, flipping halfway through, until golden brown and internal temperature reaches 165°F. Use a thermometer to confirm the internal temperature of the chicken.
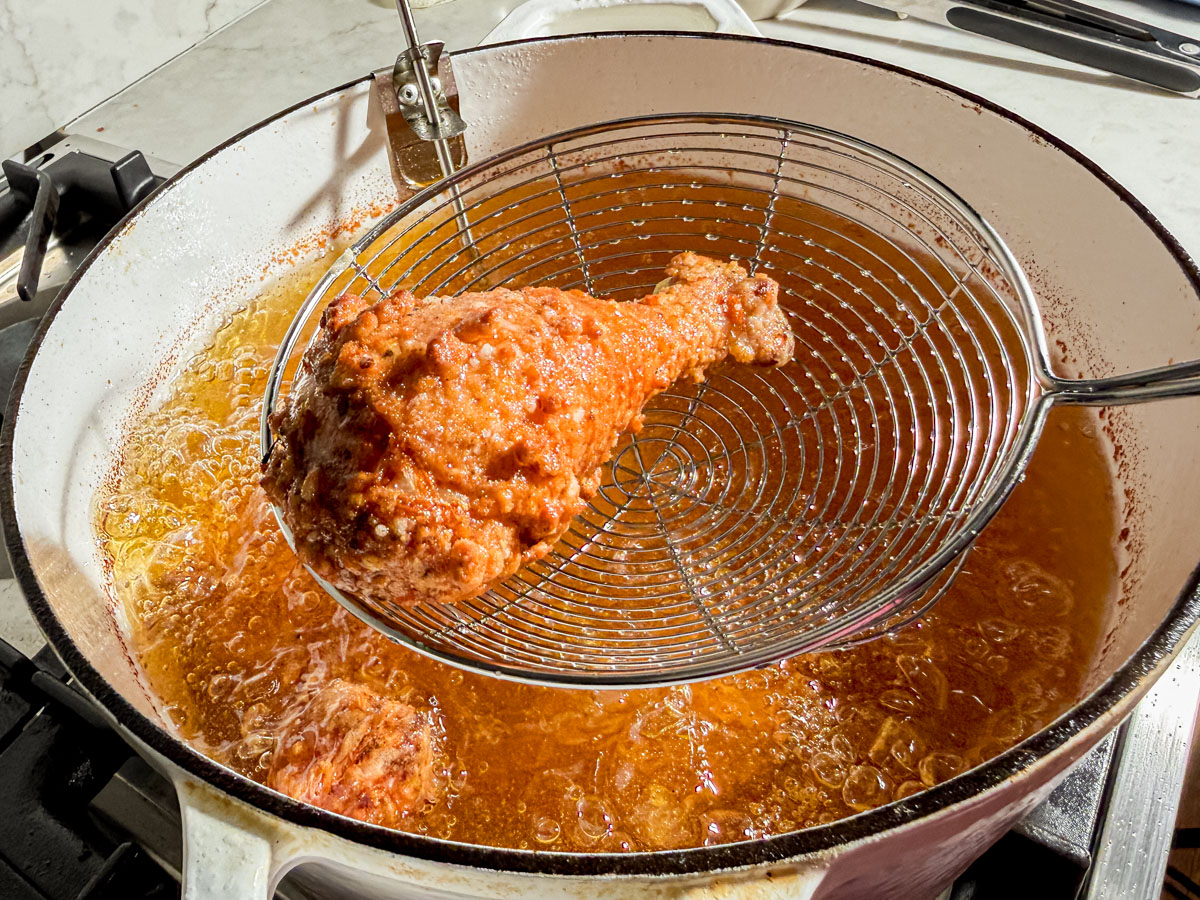
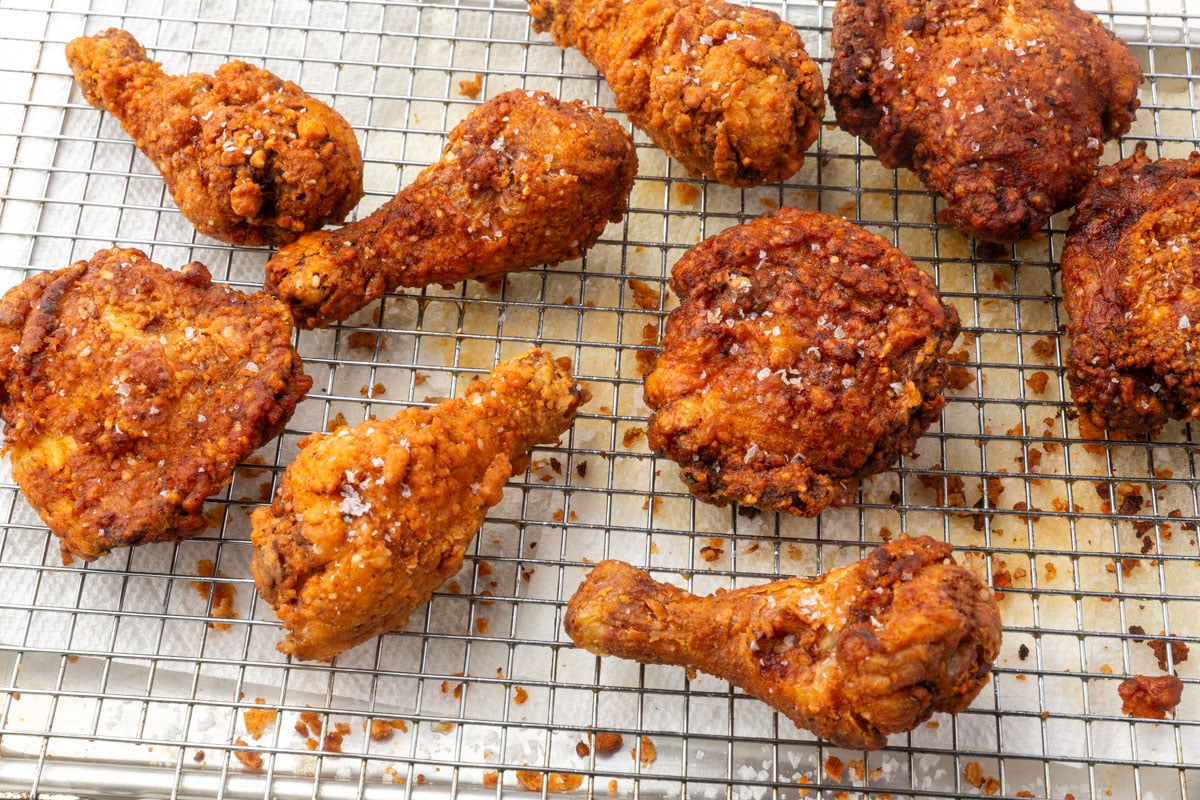
- Drain and season: Transfer fried chicken to a wire rack set over a baking sheet. Immediately sprinkle with flaky sea salt while still hot.
Notes
- Flour Blend: Don't substitute with store-bought gluten-free blends. Most contain xanthan gum and binders that make the coating heavy and gummy. This custom blend was tested specifically for this recipe to get that light, crispy texture.
- Note on rice flour weight: Rice flour weight varies significantly by brand depending on how finely it's milled. I use Three Ladies brand (115g per cup), which is also way cheaper than brands like Bob's Red Mill. If using a different brand, 1 cup may weigh closer to 140-158g. For best results, measure by weight if possible, but the cup measurement should work across brands.
- Oil Temperature: Maintaining 310-325°F is crucial. Use a thermometer to keep it consistent. If the oil gets too hot, the coating will burn. If it's not hot enough, the chicken gets greasy instead of crispy.
- Frying Time: Total frying time will be 45-50 minutes when cooking all pieces in batches. I usually do about 3 pieces per batch with my dutch oven but that may vary depending on the size of your pot.
- Resting Time: Don't skip letting the coated chicken rest for 10-15 minutes. This helps the coating hydrate and stick better during frying.
Nutrition
Calories: 469kcal | Carbohydrates: 10g | Protein: 24g | Fat: 36g | Saturated Fat: 8g | Polyunsaturated Fat: 8g | Monounsaturated Fat: 18g | Trans Fat: 0.2g | Cholesterol: 139mg | Sodium: 726mg | Potassium: 357mg | Fiber: 0.5g | Sugar: 1g | Vitamin A: 279IU | Vitamin C: 0.3mg | Calcium: 32mg | Iron: 1mg
