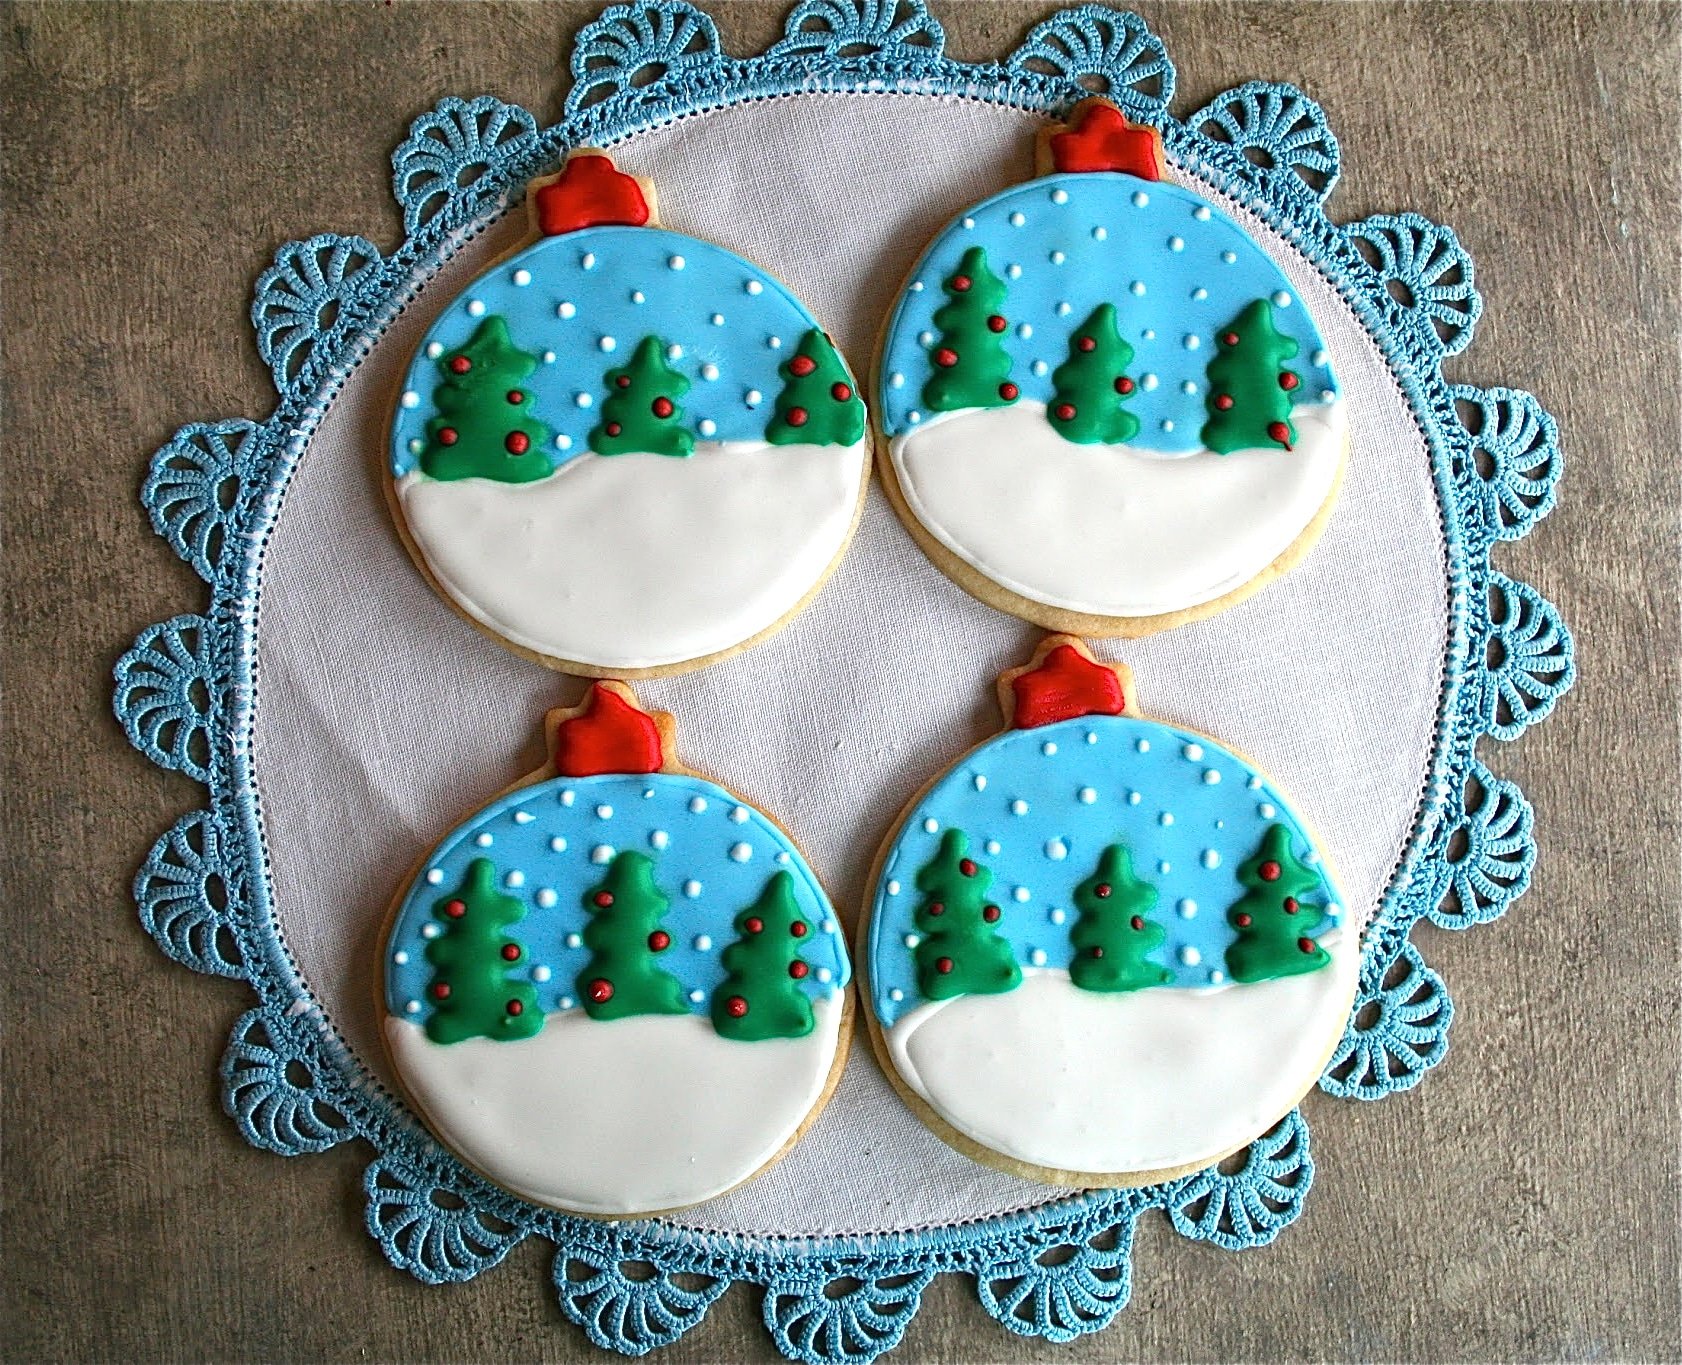
Gluten Free Snow Globe Sugar Cookies
These gluten free snow globe sugar cookies are so adorable for winter celebrations. Follow these easy steps to make these sugar cookies with royal icing.
Print
Pin
Servings: 18 cookies
Calories: 282kcal
Ingredients
For the Sugar Cookies:
- 2 1/2 cups gluten free flour blend
- 1 1/2 tsp xanthan gum (if your blend doesn't already contain it)
- 1 cup butter (softened)
- 1 cup powdered sugar
- 2 tsp almond extract
- 1 tsp vanilla
- 1 tsp salt
- 1 egg
For the Royal Icing:
- 4 cups powdered sugar (sifted)
- 2 tbsp meringue powder
- 5 tbsp water
- 1 tsp vanilla (or almond extract)
Instructions
For the Cookies:
- In a medium bowl, whisk together gluten free flour blend and xanthan gum (if using). Set aside.
- Cream butter and powdered sugar in a large bowl with an electric mixer.
- Mix in egg, vanilla, almond extract and salt and beat until mixed well.
- Gradually add in flour blend (1/2 cup at a time) and mix after each addition. Be sure not to over mix. I use the electric mixer for the first 2 cups of flour and then hand mix the last 1/2 cup.
- Put dough in the refrigerator for an hour or so, or until the dough firms up. You can also put it in the freezer but I would only do that for 20-30 minutes otherwise it’s very difficult to roll out.
- Sprinkle your work surface and rolling pin with powdered sugar.
- Roll the dough out to a 1/4 inch thickness.
- Cut with cookie cutters.
- Place on a greased cookie sheet and put back in the freezer for 10-15 minutes.
- Then, bake in the oven at 375 degrees Fahrenheit for 8-10 minutes or until cookie all the way through. The cookie should not brown, but the edges can be slightly browned (that’s a good indication it’s done). Cool on a wire rack.
For the Royal Icing:
- In a bowl of an electric mixer fitted with the whisk attachment, combine the powdered sugar, meringue powder and water.
- Mix for 7-10 minutes, until the ingredients are well blended and the icing has a matte finish. This is the base consistency. I usually add about 1 tsp more of water for a good outline icing (I use a 10 second rule) and add more water until I reach a 4-second icing for flood icing. This means that when you drizzle icing over the bowl of royal icing then the icing will flow back in with the rest of the icing in 4 seconds (10 second icing is the same but it will sink back in with the rest of the icing in 10 seconds). If you need to thin it out more then add more water. If you need to thicken it add more powdered sugar.
To Decorate:
- Outline half of the circle with the white icing and then run a squiggly line through the middle of the cookie to finish the outline.
- This will make the slopes of the hill. Continue until you have finished all of your cookies. Then, with the blue icing, just complete the rest of the circle with the outline.
- You don't have to outline the center of the cookie with blue since the white will act as a barrier for the blue flood icing. Continue with all of your cookies.
- Then, put the white flood icing in a squeeze bottle. Squeeze a dollop of white icing in the middle of the white outline.
- With a toothpick, drag the icing to the edge of the outline. Continue with all of the cookies.
- Now repeat, with the blue icing. Let all of the cookies dry before you continue.
- Using a pastry bag with a number 3 tip (or use the squeeze bottle if the hole is small enough and you think you can be precise) and make three trees. To do this, I concentrated on just making horizontal lines back and forth, making sure that the bottom one was large than the top ones. Let dry completely.
- With a pastry bag filled with the number 1 (or 2) tip, make ornaments with the red frosting.
- Then, make the snow with the white frosting. To do this, just squeeze a little bit on the pastry bag and then pick up real fast so that there is no tail on the ornament or snow flake. If I see that I'm about to make a tail, I circle the pastry bag so that the tail wraps around the snowflake or ornament as I release pressure and then the tail becomes part of the circle instead of a nasty line that ruins your picture.
- Let dry for a few hours or overnight and then store in an airtight container at room temperature. Enjoy!
Nutrition
Calories: 282kcal | Carbohydrates: 45g | Protein: 2g | Fat: 11g | Saturated Fat: 6g | Cholesterol: 36mg | Sodium: 230mg | Potassium: 6mg | Fiber: 1g | Sugar: 33g | Vitamin A: 330IU | Calcium: 15mg | Iron: 0.7mg
Tried this Recipe? Tag me Today!Mention @ADashofMegnut or tag #adashofmegnut!