
Gluten-Free Peppermint Candy Cane Sugar Cookies


Happy December everyone! This month is a time full of joy, family, friends, food, and many, MANY parties. Office parties, Christmas parties, Hannukah parties, white elephant parties, New Years’ parties.. all the parties!
I bet you can guess what my favorite type of party of all is.. Yep! It’s cookie exchange parties! If you’ve never participated in a cookie exchange, here are the basics: You bring some cookies to share and end up bringing home a mix of everyone else’s cookies. It’s a great way to try a bunch of different variety of cookies while having a good time. It also makes it socially acceptable to eat about a dozen cookies in one sitting which is definitely cool with me.

When I’m going to a cookie exchange party, I tend to bring sugar cookies. As you know, sugar cookies are kind of my jam and I take every opportunity to make some, especially around the holidays! What can I say? They’re what I’m known for and what I love to make! My gluten-free variety is great for cookie exchange parties because then the gluten-free folk are happy and the others honestly can’t even tell that they’re gluten-free! Seriously, there’s no need to make a gluten-free batch and a regular batch – they’re that good!
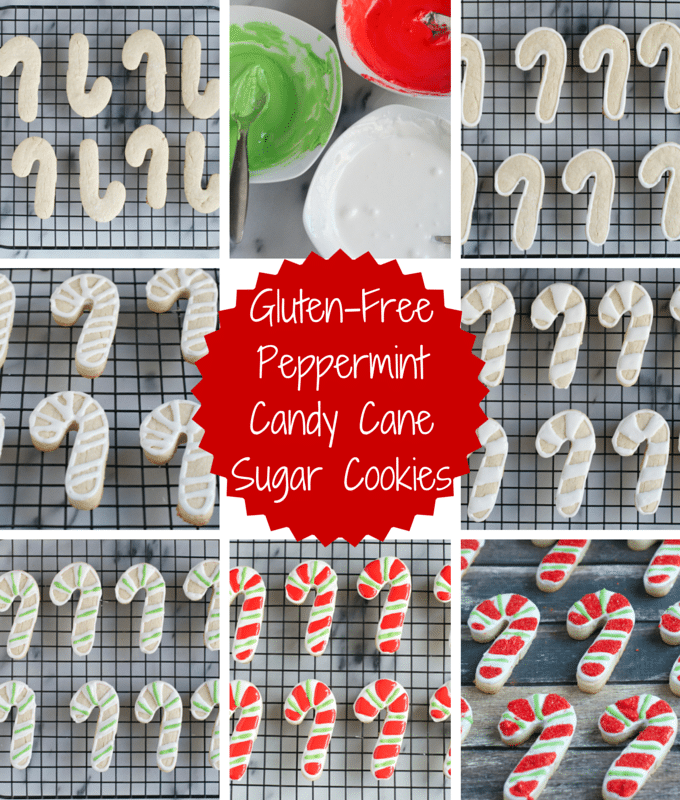
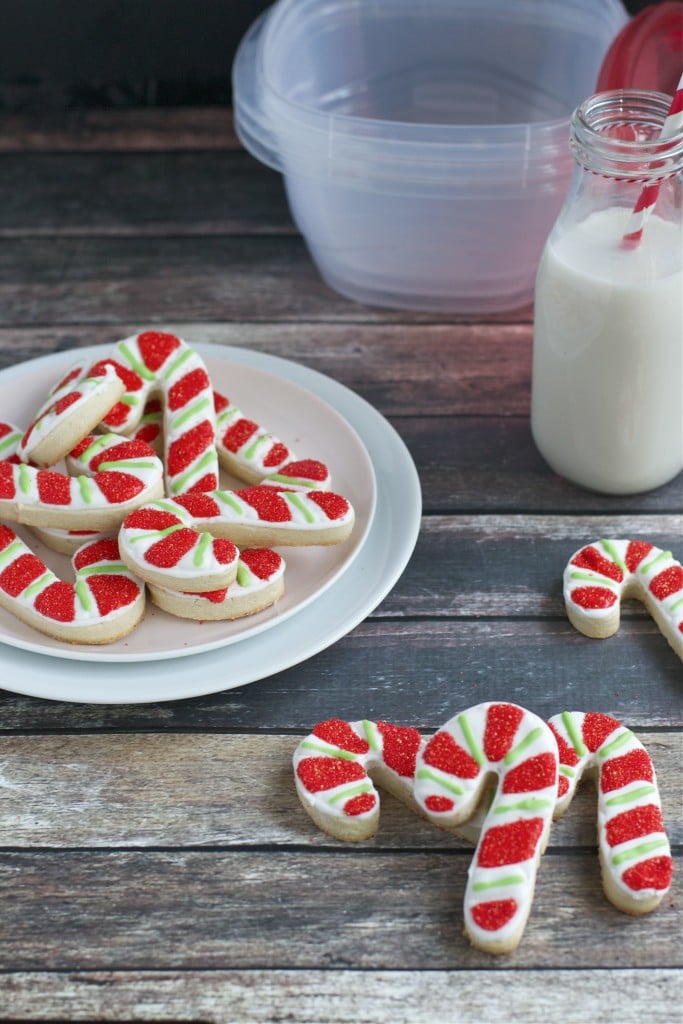
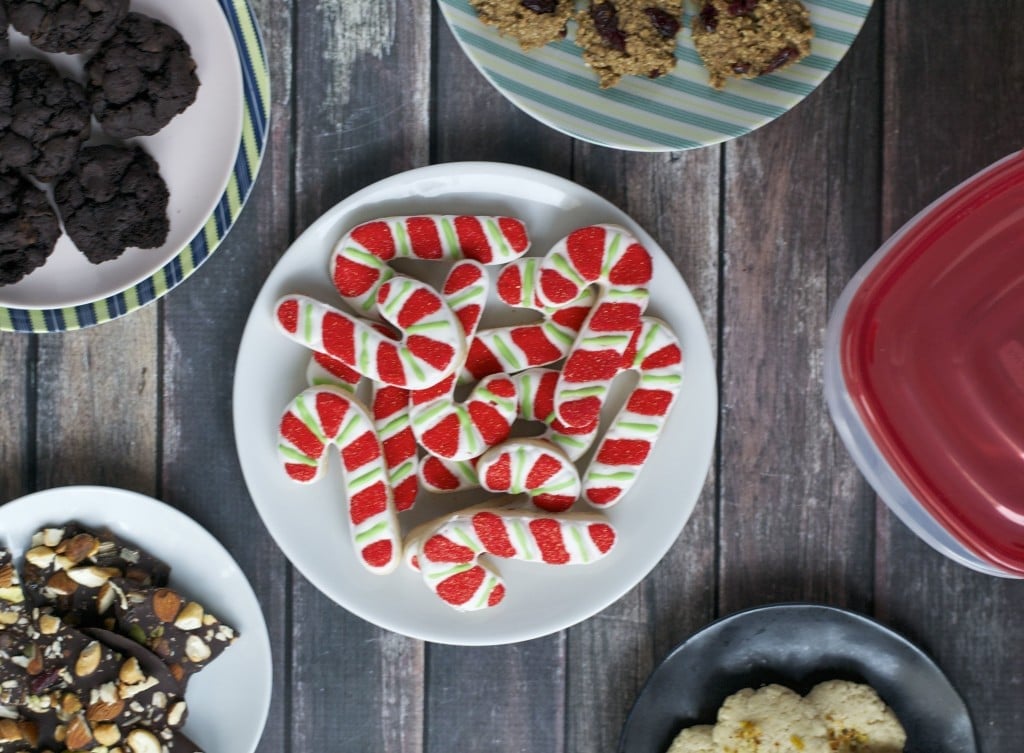
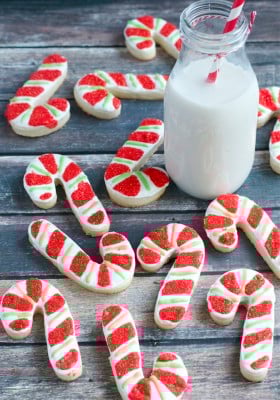
Today, I’m sharing with you my gluten-free peppermint candy cane sugar cookies! I love these sugar cookies because of how festive they are. Peppermint just screams the holidays to me and it adds a little oomph to this basic sugar cookie recipe. The red sprinkles just add some pizzazz to them don’t you think? I’ll also let you in on a little secret.
Making red icing is super hard. Seriously, it’s not easy. It requires a ton of red coloring and still 9 times out of 10 ends up more pink than red. But my holiday fix is to add some red sanding sugar on top of the red icing and no one will know the difference. You’ll have perfectly red cookies with a little shimmer! If that’s not a win-win situation, I don’t know what is! Trust me, these cookies will definitely impress at your next cookie exchange.
It probably goes without saying that with all the cookies I bake I’ve also hosted a few cookie exchanges in my day. I’ve got all the tips and tricks to hosting a successful cookie exchange for your friends, family or office! Hosting a cookie exchange is an easy way to bring friends and family together with minimal effort.
Here’s my step-by-step tutorial for hosting the perfect cookie exchange!
- Invite your guests! Think about how many guests you will have and think about how many cookies each guest should make. For example, for six guests (including yourself) either 1 or 2 dozen work well – four cookies for each person! Remember some cookies will be eaten at the party and guests will want to take a few home as well so take that into consideration when planning how many cookies to make.
- Create a space for the cookies and make that table the focus point of the room. You don’t need a lot, if any, decorations since the cookies are the center of all the fun!
- Lay out extra serving platters for guests to arrange their cookies on if they did not bring any. Using a few cake stands also is great for adding height and dimension to the table.
- Add small tasting plates and napkins that are a fun holiday theme.
- Serve some beverages, like milk and hot chocolate, that pair well with cookies.
- Place Rubbermaid TakeAlongs at the end of the table so that guests can pack up their cookies when the party is over. Holiday Rubbermaid TakeAlongs come in a variety of colors including red, green and holiday prints. It’s also a cute idea to have a few colored ribbons that guests can use to make their packages festive!
- Have fun tasting with your guests!
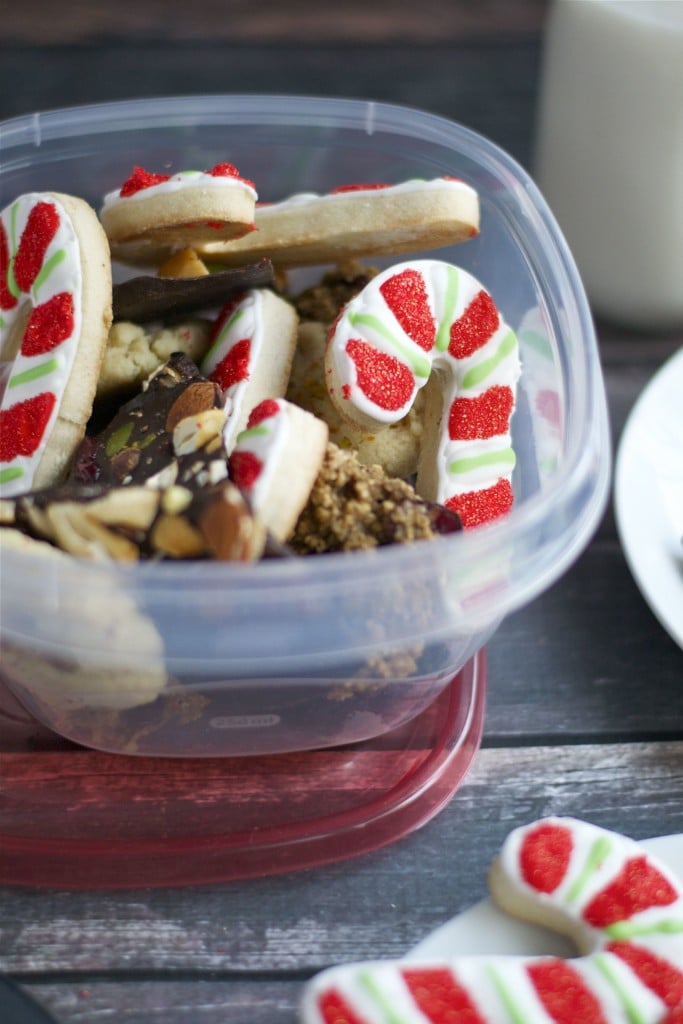
Tip #6 is probably the best tip I can give you! By having take-away boxes or tupperware for your guests, your cookie exchange will surely be a success!
More Holiday Gluten Free Cookies
- Snowflake Sugar Cookies are perfect for any winter holiday celebration!
- Snow Globe Ornament Sugar Cookies are so festive for Christmas! Get out those decorating bags and royal icing!
- Dipped Oreo Snowmen are almost too cute to eat and so easy to make with your kids!
- Chocolate Christmas Tree Sugar Cookies prove that everything is better with a little chocolate!
- Gluten-Free White Chocolate Peppermint Icebox Cookies are the perfect freezer cookie to make for the holidays.
I don’t know about you, but I’m ready to eat some more cookies! Tell me in the comments, what’s your favorite type of cookie to bring to holiday parties?
Gluten-Free Peppermint Candy Cane Sugar Cookies
Ingredients
For the Cookies
- 1 cup butter (softened)
- 1 cup powdered sugar
- 2 tsp almond extract
- 1 tsp pure vanilla extract
- 1 tsp salt
- 1 egg
- 2.5 cups gluten-free flour blend
For the Royal Icing
- 4 cups powdered sugar (sifted)
- 2 tbsp meringue powder
- 5 tbsp water
- 1/2 tsp peppermint extract
- gel food coloring (green and red)
- 1 tbsp red sanding sugar
Instructions
For the Cookies
- In a medium bowl, whisk together brown rice flour, white rice flour, potato starch, tapioca flour, cornstarch and xanthan gum. Set aside.
- Cream butter and powdered sugar in a large bowl with an electric mixer. Mix in egg, vanilla, almond extract and salt and beat until mixed well.
- Gradually add in flour (1/2 cup at a time) and mix after each addition. Put dough in the refrigerator for an hour or so, or until the dough firms up.
- Sprinkle your work surface and rolling pin with powdered sugar. Roll the dough out to a ¼ inch thickness.
- Using a candy cane shaped cookie cutter, cut shapes into the dough. Place cookie dough shapes on a parchment paper lined cookie sheet and place in the freezer for 10-15 minutes.
- Then, bake cookies in the oven at 375 degrees Fahrenheit for 8-10 minutes. The cookies should not brown completely, but the edges can be slightly browned (that’s a good indication it’s done). Cool on a wire rack.
For the Royal Icing
- In a bowl of an electric mixer fitted with the whisk attachment, combine the powdered sugar, meringue powder, peppermint extractand water.
- Mix for 7-10 minutes, until the ingredients are well blended and the icing has a matte finish. This is the base consistency. I usually add about 1 tsp more of water for a good outline icing (I use a 10 second rule) and add more water until I reach a 4-second icing for flood icing. This means that when you drizzle icing over the bowl of royal icing then the icing will flow back in with the rest of the icing in 4 seconds (10 second icing is the same but it will sink back in with the rest of the icing in 10 seconds). If you need to thin it out more then add more water. If you need to thicken it add more powdered sugar.
To Decorate
- Outline the cookie using white icing (10 second icing) in a pastry bag fitted with a number 3 tip and then make diagonal lines on the cookie to section off the candy cane stripes.
- Flood with thinned out white icing skipping every other section (4 second icing).
- Then, take the green icing (4 second icing) in a pastry bag fitted with a number 2 tip and make a diagonal line in the middle of each white section. Let dry completely for at least four hours or overnight.
- Once the white is completely dry (I'm seriously talking COMPLETELY dry otherwise the sprinkles part won't go so well), flood the remaining sections with red icing (4 second icing). Immediately after, sprinkle the red sanding sugar over the red sections. Shake off an excess. Dry completely.
Notes
Nutrition

I’m Megan
A gluten-free food blogger from Chicago and lover of all things food, showing you gluten-free can be easy and delicious, too. Let’s make gluten-free stress free together! Read more…


These look great! What beautiful cookies. Gluten free that doesn’t taste gluten free is always amazing! Great job.
These are the cutest cookies! I love them!!
I always forget to stock up on appropriate beverages when hosting a cookie exchange- thanks for the reminder and tips! #client
Wow these are totally adorable! I’ve never worked with brown rice flour before, but these look so great that I might just have to go get some!